Love this? Save it for later!
Share the inspiration with your friends
My accountant, Mr. Henderson, is the last person on earth I expected to teach me anything about dessert. The man wears beige suits, drives a sensible sedan, and once told me his favorite food was “a balanced spreadsheet.” But there I was, stuck in his office waiting for my tax return to be reviewed, when he suddenly leaned back in his chair and started describing the most incredible pumpkin cheesecake bars I’d ever heard of.
“The secret is the crust,” he said, tapping his pencil on the desk. “Gingersnaps. Not graham crackers. Trust me on this.”
Honestly, I thought he was pulling my leg. But he was so serious about it, so specific about the ratios and the baking time, that I jotted it down on the back of an envelope. I mean, when your accountant gets passionate about pastry, you pay attention, right?
That weekend, I gave his recipe a try. And let me tell you, those bars were a total showstopper. The spicy, crunchy gingersnap crust paired with the creamy, smooth pumpkin cheesecake filling was a combination I’d never even considered. It was like fall had exploded in my mouth. I made them for a small dinner party that same week, and everyone—and I mean everyone—asked for the recipe.
Maybe you’ve been there, looking for that one dessert that feels special but isn’t a huge pain to make. Something that looks like you spent hours on it, but really comes together with a little bit of strategy. These bars are that recipe. They’ve become my go-to for every fall gathering, and they started with a tax accountant who clearly has a hidden talent for baking.
So, let me show you how to make the best pumpkin cheesecake bars with gingersnap crust. Trust me, this is one recipe you’ll want to keep close.
Why You’ll Love These Pumpkin Cheesecake Bars
These aren’t just another pumpkin dessert. After testing this recipe at least a dozen times for different gatherings, I can tell you exactly why it works so well. It’s the kind of recipe that makes you look like a pro without the stress.
- Perfect for Hosting: These bars are a dream for dinner parties or potlucks. You can make them a day ahead, cut them into neat squares, and they look gorgeous on a platter. No last-minute fuss, just pure presentation win.
- Simple Ingredients: You probably have most of these in your pantry already. No weird extracts or hard-to-find spices. Just honest, good-quality ingredients that work together beautifully.
- Crowd-Pleaser Guaranteed: I’ve served these to everyone from my spice-averse mother-in-law to my friend who “doesn’t do pumpkin,” and they all went back for seconds. The creamy cheesecake balances the pumpkin perfectly, so it’s not too heavy or too sweet.
- Unbelievably Delicious: That gingersnap crust is the game-changer. It adds a warm, spicy crunch that a regular graham cracker crust just can’t match. The texture contrast between the crunchy base and the silky filling is what makes these bars next-level.
- Make-Ahead Magic: This is the real secret for hosts. You can prep these bars entirely the night before your party. The flavors actually get better as they chill, so you’re not just saving time—you’re improving the final dish.
What makes these bars different from every other pumpkin cheesecake recipe out there? It’s that crust, hands down. I’ve tested versions with shortbread, with plain graham crackers, even with crushed Oreos. Nothing beats the spicy kick of a good gingersnap. It doesn’t just support the filling; it elevates the whole experience. This isn’t just another version of a fall dessert—it’s the version you’ll come back to year after year.
What Ingredients You Will Need
This recipe uses simple, wholesome ingredients to deliver that big, bold fall flavor. Most of these are pantry staples, especially if you do a bit of fall baking. Let’s break down what you’ll need and why each ingredient matters.
For the Gingersnap Crust
- 2 cups (about 8 ounces) gingersnap cookies, finely crushed: This is the star of the show. I recommend using store-bought gingersnaps for consistency. Look for a brand that’s snappy, not too soft. You want that strong ginger and molasses flavor. (Pro tip: Pulse them in a food processor for the finest, most even crumbs.)
- 5 tablespoons unsalted butter, melted: The butter binds the crumbs together. Use unsalted so you control the salt level. If you only have salted butter, just skip adding any extra salt to the crust mixture.
- 2 tablespoons granulated sugar: This adds a touch of sweetness and helps the crust set firmly. It balances the slight bitterness of the ginger.
- 1/8 teaspoon salt: Just a pinch to enhance all the flavors. Don’t skip it—it makes a difference.
For the Pumpkin Cheesecake Filling
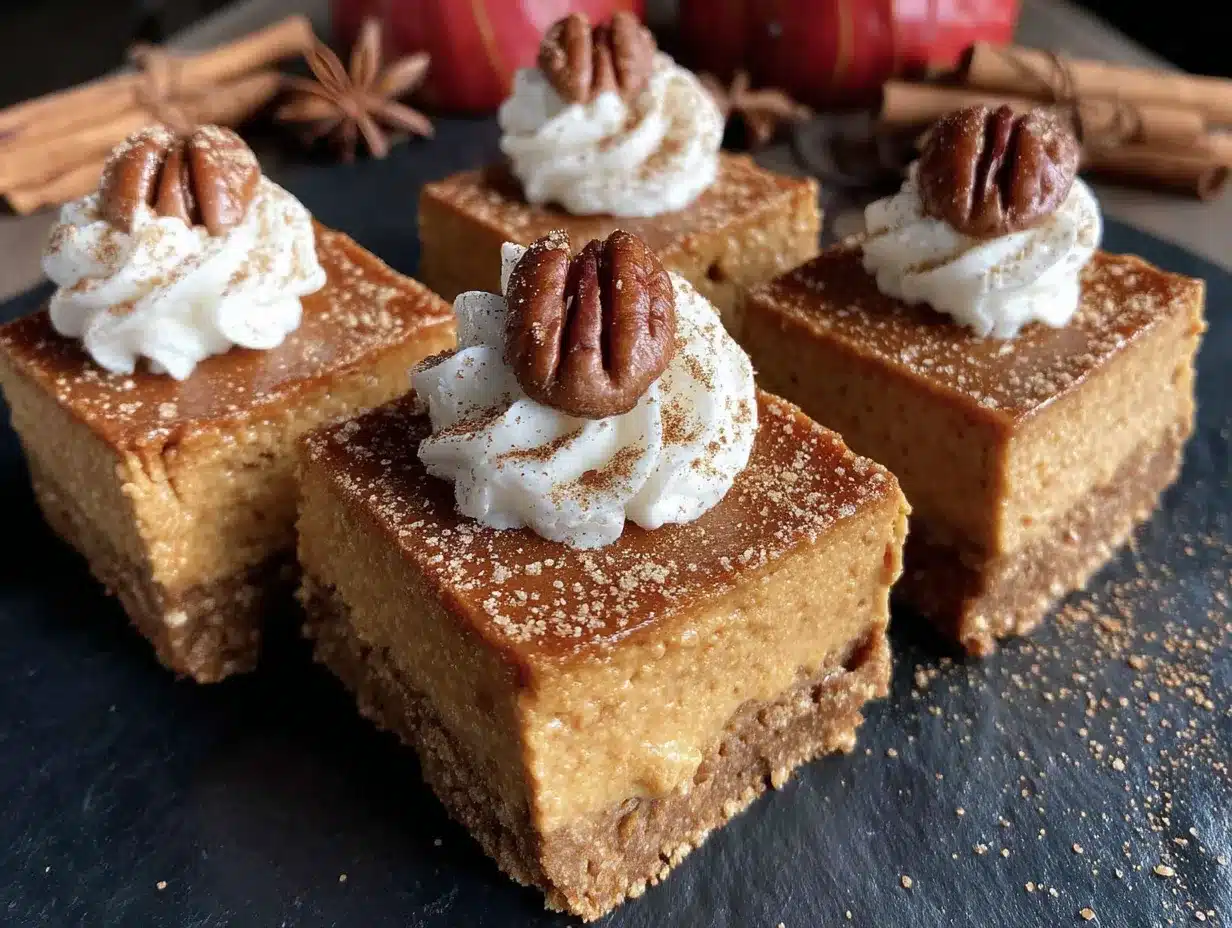
- 16 ounces (two 8-ounce blocks) cream cheese, softened: This is non-negotiable for that creamy, tangy cheesecake texture. Let it sit out on the counter for at least an hour before you start. Cold cream cheese leads to a lumpy filling, and nobody wants that.
- 3/4 cup granulated sugar: Sweetens the filling just enough. It balances the tang of the cream cheese and the earthiness of the pumpkin.
- 1 cup canned pumpkin puree: Not pumpkin pie filling! Make sure you grab 100% pure pumpkin puree. The pie filling has added sugar and spices that will throw off the balance. Libby’s is my go-to brand for consistent results.
- 2 large eggs, room temperature: Room temperature eggs incorporate more evenly into the batter, giving you a smoother, creamier cheesecake. If you forget to take them out, place them in a bowl of warm water for 5 minutes.
- 1 teaspoon vanilla extract: Pure vanilla extract adds depth. Imitation works in a pinch, but pure is better.
- 1 teaspoon pumpkin pie spice: This is your shortcut to that classic fall flavor. If you don’t have it, mix 1/2 teaspoon cinnamon, 1/4 teaspoon ginger, 1/4 teaspoon nutmeg, and a pinch of cloves.
- 1/2 teaspoon ground cinnamon: Extra cinnamon because, honestly, can you ever have too much? It pairs beautifully with the gingersnap crust.
- 1/4 teaspoon salt: Balances the sweetness and brings out the pumpkin’s natural flavor.
For the Optional Topping (Highly Recommended)
- 1 cup heavy cream, cold: For a dollop of freshly whipped cream. It adds a light, airy contrast to the dense cheesecake.
- 2 tablespoons powdered sugar: Sweetens the cream without making it grainy.
- 1/2 teaspoon vanilla extract: For flavor.
- Extra crushed gingersnaps or a sprinkle of cinnamon, for garnish: Makes the bars look extra special on a serving platter.
Equipment Needed
You don’t need a professional kitchen to pull these off, but having the right tools makes the process smoother. Here’s what you’ll need.
- 9×9-inch square baking pan: This is the perfect size for these bars. It gives you a nice thickness without being too tall. If you only have an 8×8 pan, the bars will be slightly thicker and may need a few extra minutes of baking time.
- Parchment paper: A total lifesaver. Line your pan with two overlapping strips of parchment, leaving some overhang on the sides. This creates “handles” that let you lift the entire block of cheesecake out cleanly once it’s chilled. I learned this trick after struggling to get the first perfect square out of the pan.
- Food processor or zip-top bag and rolling pin: A food processor makes quick work of crushing the gingersnaps into fine crumbs. If you don’t have one, put the cookies in a sturdy zip-top bag and go to town with a rolling pin. It’s a great way to release some baking frustration!
- Electric hand mixer or stand mixer: You need this to get the cream cheese and sugar perfectly smooth and fluffy. A whisk and some serious elbow grease could work, but it’s a lot of effort. A mixer ensures a lump-free filling.
- Large mixing bowls: One for the crust ingredients and one for the filling.
- Measuring cups and spoons: For accuracy. Baking is a science, especially with cheesecake.
- Spatula: A rubber spatula is perfect for scraping down the sides of the bowl and spreading the filling evenly.
Preparation Method
Alright, let’s get to the fun part. Follow these steps, and you’ll have a pan of the best pumpkin cheesecake bars your friends have ever tasted. I’ve broken it down so you can prep ahead and stay relaxed.
Step 1: Prep Your Pan and Preheat
Preheat your oven to 350°F (175°C). While it’s heating up, line your 9×9-inch baking pan with parchment paper. Leave about 2 inches of overhang on two opposite sides. This is your secret weapon for getting the bars out cleanly later. Lightly spray the parchment with non-stick cooking spray for extra insurance.
Step 2: Make the Gingersnap Crust
Place the gingersnap cookies in your food processor. Pulse them until you have fine, even crumbs. You should have about 2 cups. Pour the crumbs into a medium bowl. Add the melted butter, sugar, and salt. Stir with a fork until all the crumbs are evenly moistened. The mixture should look like wet sand and hold together when you squeeze it.
Pour the crumb mixture into your prepared pan. Press it down firmly and evenly into the bottom. I use the flat bottom of a measuring cup to really pack it in tight. A well-packed crust is the key to bars that don’t crumble apart when you cut them. Bake the crust for 10 minutes. It will smell amazing. Set it aside to cool slightly while you make the filling.
Step 3: Make the Pumpkin Cheesecake Filling
In a large mixing bowl, beat the softened cream cheese with an electric mixer on medium speed until it’s completely smooth and fluffy. This takes about 2 minutes. Scrape down the sides and the bottom of the bowl with your spatula. You want no lumps at all.
Add the sugar and beat for another minute until it’s well combined and creamy. Now, add the pumpkin puree, vanilla extract, pumpkin pie spice, cinnamon, and salt. Beat on low speed until everything is just combined. Don’t overmix at this stage.
Add the eggs, one at a time, beating on low speed after each addition just until the yolk disappears into the batter. Overmixing the eggs adds too much air, which can cause the cheesecake to crack as it bakes. You want a smooth, thick, beautifully orange batter.
Step 4: Assemble and Bake
Pour the pumpkin cheesecake filling over the pre-baked crust. Use your spatula to spread it into an even layer, reaching all the corners. Give the pan a gentle tap on the counter to release any air bubbles.
Place the pan in the preheated oven and bake for 35-40 minutes. The edges should look set and slightly puffed, but the center will still have a slight jiggle when you gently shake the pan. That’s exactly what you want. A fully firm center means an overbaked, dry cheesecake.
Turn off the oven and crack the oven door open. Let the bars sit in the cooling oven for 15 minutes. This gentle cooling helps prevent a dramatic temperature change that can cause cracking. After 15 minutes, remove the pan from the oven and place it on a wire rack to cool completely to room temperature.
Step 5: Chill and Serve
Once the bars are completely cool, cover the pan with plastic wrap and transfer it to the refrigerator. This is the hardest part—you need to chill them for at least 4 hours, but overnight is best. The chilling time allows the cheesecake to set completely, making it firm enough to cut into clean, beautiful squares.
When you’re ready to serve, use the parchment paper handles to lift the entire block of cheesecake out of the pan. Place it on a cutting board. Use a sharp, clean knife to slice it into 9 even squares (3 rows by 3 rows). For the cleanest cuts, wipe the knife clean between each slice. Top with a dollop of whipped cream and a sprinkle of extra crushed gingersnaps. Watch them disappear!
Cooking Tips & Techniques
After making these bars more times than I can count, I’ve picked up a few tricks that make a real difference. Here are my best tips for perfect results every time.
- Don’t skip the room temperature ingredients. I know it’s tempting to use cold cream cheese and eggs straight from the fridge, but it’s the number one reason for a lumpy cheesecake filling. Cold ingredients don’t emulsify properly. Give them at least an hour on the counter. Your future self will thank you.
- Press that crust down with authority. A loose crust is a crumbly crust. Use the bottom of a glass or a measuring cup to really compact those gingersnap crumbs. A tight, even base means your bars will hold their shape when you cut them. I once rushed this step and ended up with a delicious but messy pile of crumbs and filling. Learn from my mistake.
- Watch for the jiggle. Overbaking is the enemy of good cheesecake. The center should still wobble slightly when you shake the pan. It will continue to set as it cools and chills. If you wait until the center is completely firm, you’ll end up with a dry, cracked texture.
- Use a water bath? Not necessary here. Because these are bars in a shallow pan, and the baking time is shorter, you don’t need a water bath. The gentle cooling method (turning off the oven and leaving the door cracked) is enough to prevent major cracking. It’s one less hassle for the host.
- Chill time is non-negotiable. I know you’ll be tempted to dig in after a couple of hours. But trust me, these bars need a full 4 hours minimum to set. Overnight is ideal. The texture goes from soft and almost mousse-like to a firm, sliceable cheesecake. The flavors also meld together beautifully overnight.
- For clean cuts, use a hot knife. Run your knife under hot water, dry it off, and then make your cut. The heat glides through the cold cheesecake without dragging or sticking. Wipe the blade clean and reheat between each cut for perfect squares.
Variations & Adaptations
One of the best things about this recipe is how flexible it is. You can tweak it to fit different diets, seasons, or just your personal cravings. Here are a few variations I’ve tried and loved.
- Gluten-Free Version: This is an easy swap. Just use gluten-free gingersnap cookies for the crust. Most major brands offer a gluten-free option now. The rest of the ingredients are naturally gluten-free, so you’re good to go. I’ve made this for a gluten-sensitive friend, and she said it was the best dessert she’d had in years.
- Dairy-Free Adaptation: This one takes a bit more work, but it’s doable. Use a dairy-free cream cheese alternative, like Miyoko’s or Kite Hill. Make sure it’s softened. Substitute the butter in the crust with a good-quality vegan butter or coconut oil. For the topping, use a chilled can of full-fat coconut cream instead of heavy cream. The texture will be slightly different, but the flavor is still fantastic.
- Bourbon Pumpkin Cheesecake Bars: For an adult twist, add 1 tablespoon of good bourbon to the cheesecake filling. The warmth of the bourbon pairs beautifully with the pumpkin and the spicy gingersnap crust. I tried this for a friendsgiving dinner, and it was a huge hit. Just make sure you tell your guests there’s alcohol in it!
- Chocolate Drizzle: If you’re a chocolate lover, melt 1/2 cup of semi-sweet chocolate chips with a teaspoon of coconut oil. Drizzle it over the chilled, cut bars. The bitter chocolate is a wonderful contrast to the sweet, spiced cheesecake.
- Make it a Swirl: Before baking, drop small spoonfuls of plain cheesecake batter (or even a thick caramel sauce) on top of the pumpkin filling. Use a knife to gently swirl it through. It creates a beautiful marbled effect that looks super impressive on a dessert table.
Serving & Storage Suggestions
These bars are incredibly versatile when it comes to serving. Here’s how to make them the star of your next gathering.
Serving Suggestions: Serve the bars chilled, straight from the fridge. They are firm and slice beautifully at this temperature. If you prefer a slightly softer texture, let them sit at room temperature for about 15 minutes before serving. A generous dollop of freshly whipped cream is almost mandatory. It cuts through the richness of the cheesecake perfectly. For an extra special touch, add a light dusting of cinnamon or a few extra crushed gingersnaps on top.
These bars pair wonderfully with a hot cup of coffee, a spiced chai latte, or even a glass of dessert wine like a late-harvest Riesling. If you’re hosting a fall brunch, serve them alongside a savory dish like a frittata. The sweet and savory balance is always a crowd-pleaser.
Storage Instructions: Store any leftover bars in an airtight container in the refrigerator. They will stay fresh for up to 5 days. In fact, the flavors continue to develop, so they might taste even better on day two or three.
Freezing Instructions: These bars freeze like a dream. Once they are fully chilled and set, cut them into individual squares. Place the squares on a baking sheet lined with parchment paper and freeze for about an hour, or until they are solid. Then, transfer the frozen squares to a freezer-safe zip-top bag or container. They will keep for up to 3 months. To serve, thaw them in the refrigerator overnight. Do not thaw at room temperature, as they can become too soft.
Reheating: Honestly, these are best served cold. I don’t recommend reheating them. The texture of the cheesecake changes and can become grainy. If you absolutely must have a warm dessert, try a different recipe. These bars are all about that cool, creamy, firm texture.
Nutritional Information & Benefits
While these are definitely a treat, they do offer a few surprising benefits. Here’s a rough breakdown per bar (based on 9 servings, without the whipped cream topping).
| Nutrient | Amount Per Bar |
|---|---|
| Calories | ~380 |
| Fat | 24g |
| Saturated Fat | 14g |
| Carbohydrates | 38g |
| Sugar | 26g |
| Protein | 6g |
| Vitamin A | 80% DV |
Pin This Recipe!
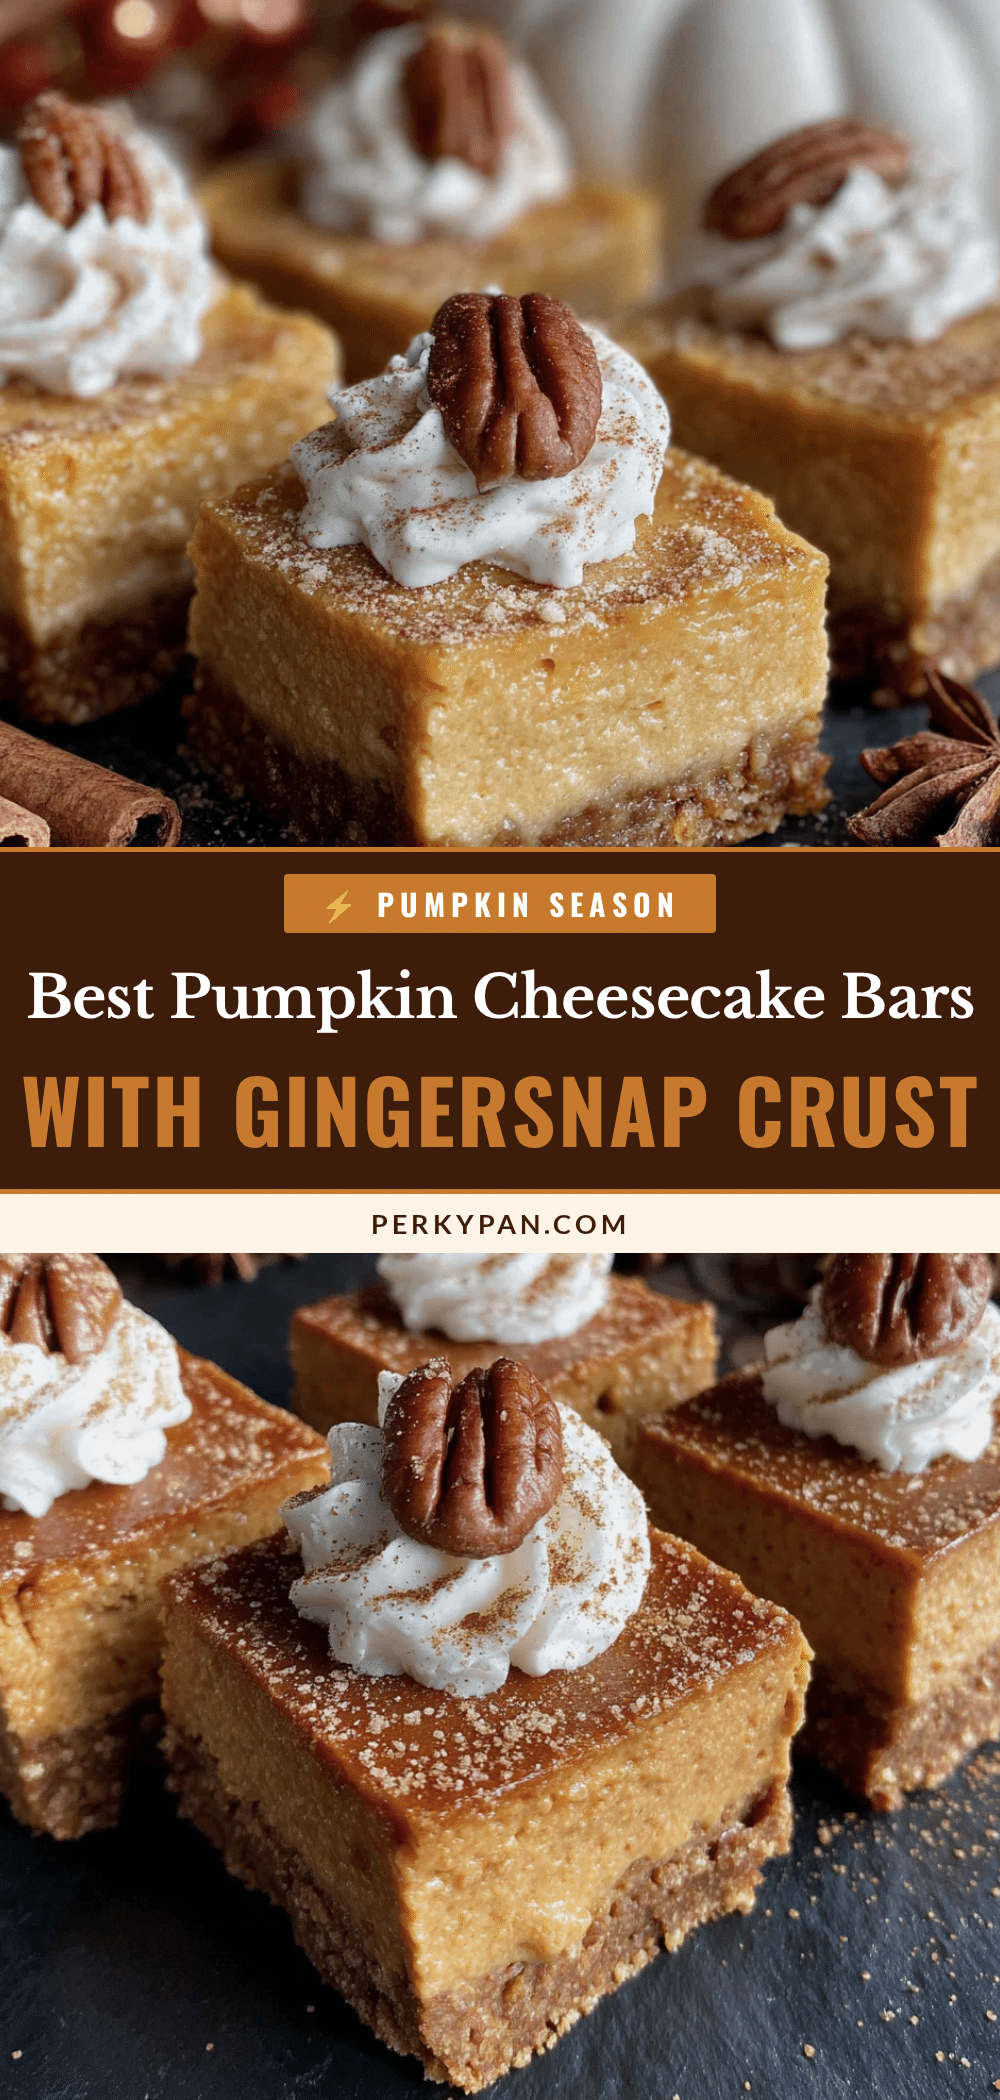
Best Pumpkin Cheesecake Bars with Gingersnap Crust
These pumpkin cheesecake bars feature a spicy gingersnap crust and a creamy pumpkin cheesecake filling. They are perfect for fall gatherings, easy to make ahead, and always a crowd-pleaser.
- Prep Time: 20 minutes
- Cook Time: 40 minutes
- Total Time: 5 hours (includes chilling time)
- Yield: 9 servings 1x
- Category: Dessert
- Cuisine: American
Ingredients
- 2 cups (about 8 ounces) gingersnap cookies, finely crushed
- 5 tablespoons unsalted butter, melted
- 2 tablespoons granulated sugar
- 1/8 teaspoon salt
- 16 ounces (two 8-ounce blocks) cream cheese, softened
- 3/4 cup granulated sugar
- 1 cup canned pumpkin puree
- 2 large eggs, room temperature
- 1 teaspoon vanilla extract
- 1 teaspoon pumpkin pie spice
- 1/2 teaspoon ground cinnamon
- 1/4 teaspoon salt
- 1 cup heavy cream, cold (for optional topping)
- 2 tablespoons powdered sugar (for optional topping)
- 1/2 teaspoon vanilla extract (for optional topping)
- Extra crushed gingersnaps or a sprinkle of cinnamon, for garnish (optional)
Instructions
- Preheat your oven to 350°F (175°C). Line a 9×9-inch baking pan with parchment paper, leaving about 2 inches of overhang on two opposite sides. Lightly spray the parchment with non-stick cooking spray.
- Place the gingersnap cookies in a food processor and pulse until you have fine, even crumbs. Pour the crumbs into a medium bowl. Add the melted butter, 2 tablespoons sugar, and 1/8 teaspoon salt. Stir with a fork until all the crumbs are evenly moistened.
- Pour the crumb mixture into the prepared pan. Press it down firmly and evenly into the bottom using the flat bottom of a measuring cup. Bake the crust for 10 minutes. Set aside to cool slightly.
- In a large mixing bowl, beat the softened cream cheese with an electric mixer on medium speed until completely smooth and fluffy, about 2 minutes. Scrape down the sides and bottom of the bowl.
- Add 3/4 cup sugar and beat for another minute until well combined and creamy. Add the pumpkin puree, 1 teaspoon vanilla extract, pumpkin pie spice, cinnamon, and 1/4 teaspoon salt. Beat on low speed until just combined.
- Add the eggs, one at a time, beating on low speed after each addition just until the yolk disappears. Do not overmix.
- Pour the pumpkin cheesecake filling over the pre-baked crust. Spread it into an even layer. Give the pan a gentle tap on the counter to release any air bubbles.
- Bake for 35-40 minutes. The edges should look set and slightly puffed, but the center will still have a slight jiggle when you gently shake the pan.
- Turn off the oven and crack the oven door open. Let the bars sit in the cooling oven for 15 minutes. Then remove the pan from the oven and place it on a wire rack to cool completely to room temperature.
- Once completely cool, cover the pan with plastic wrap and refrigerate for at least 4 hours, preferably overnight.
- When ready to serve, use the parchment paper handles to lift the entire block of cheesecake out of the pan. Place it on a cutting board. Use a sharp, clean knife to slice it into 9 even squares (3 rows by 3 rows). Wipe the knife clean between each slice.
- Top with a dollop of whipped cream and a sprinkle of extra crushed gingersnaps or cinnamon, if desired.
Notes
For best results, use room temperature cream cheese and eggs. Press the crust firmly to prevent crumbling. The center should still jiggle slightly when done. Chill for at least 4 hours, preferably overnight, for clean slices. For clean cuts, use a hot knife.
Nutrition
- Serving Size: 1 bar
- Calories: 380
- Sugar: 26
- Sodium: 320
- Fat: 24
- Saturated Fat: 14
- Carbohydrates: 38
- Fiber: 2
- Protein: 6
Keywords: pumpkin cheesecake bars, gingersnap crust, fall dessert, pumpkin dessert, cheesecake bars


