Love this? Save it for later!
Share the inspiration with your friends
I was digging through my pantry last Tuesday, looking for a bag of chocolate chips I knew I had stashed somewhere, when the smell hit me. Not chocolate—cinnamon. The jar had tipped over at some point, spilling a small pile of fragrant brown powder onto the shelf. And just like that, I was seven years old, sitting on a cracked vinyl stool in my neighbor Mrs. Gable’s kitchen, watching her dump what looked like half a jar of cinnamon into a bowl of pumpkin puree. She always said, “If you’re gonna make something taste like fall, you gotta make it mean it.” I didn’t really get it back then. I mean, I was seven. I just wanted the bread to be done so I could swipe a piece off the cooling rack when she turned her back. But that smell—that sharp, sweet, earthy cinnamon smell—it stuck with me in a way I didn’t understand until years later.
Mrs. Gable moved to Florida about ten years ago. I haven’t seen her since her going-away party, where she made her famous pumpkin bread one last time and told everyone she was trading her oven for a pool. I remember laughing, but honestly, I felt a little sad. That bread was a staple of my childhood—the thing she’d bring over when someone was sick, the thing she’d make for no reason at all on a rainy October afternoon. And I never thought to ask for the recipe. So for the last decade, I’ve been chasing it. Trying to recreate that exact texture, that perfect balance of pumpkin and spice, that cozy feeling of biting into something that tastes like a hug.
This Cozy One-Bowl Pumpkin Banana Bread is the closest I’ve gotten. And honestly, it might even be better. The banana adds a natural sweetness and moisture that the original didn’t have, and the one-bowl method means less cleanup—which, let’s face it, is a win no matter how you slice it. Maybe you’ve been there too, trying to recreate a taste from your past. Or maybe you just want a really good, really easy fall bread to make your kitchen smell like heaven. Either way, this one’s for you.
Why You’ll Love This Recipe
I’ve made a lot of pumpkin bread in my time. Some were dry. Some were too dense. Some tasted more like banana than pumpkin, or vice versa, like they couldn’t decide what they wanted to be. This recipe is different. It’s the result of about a dozen test loaves, a few frustrated kitchen meltdowns, and one very patient husband who ate every single one of them without complaint. Here’s why I think you’ll love it too:
- Quick & Easy: From mixing bowl to oven in under 15 minutes. No stand mixer needed, no complicated techniques. Just a bowl, a whisk, and a spatula. Perfect for those mornings when you want fresh bread but don’t want to spend an hour prepping.
- Simple Ingredients: You probably already have most of these in your pantry. Pumpkin puree, ripe bananas, flour, sugar, eggs, oil, and spices. No weird specialty items that you’ll use once and forget about.
- Perfect for Cozy Mornings: This bread was made for cold weather, rainy afternoons, and those slow Sunday mornings when you just want to sit with a cup of coffee and a thick slice of something warm. It’s comfort in edible form.
- Crowd-Pleaser: Every time I’ve brought this to a gathering, it disappears. Kids love it. Adults love it. Even my friend who swears she doesn’t like pumpkin bread asked for the recipe after trying a slice.
- Unbelievably Delicious: The texture is what gets me every time. It’s moist without being gummy, tender without being crumbly. The pumpkin and banana work together to create a flavor that’s somehow both familiar and surprising. It’s the kind of bread that makes you close your eyes after the first bite.
What makes this recipe different from the rest? It’s the technique of mashing the banana with the pumpkin before adding the wet ingredients. Most recipes have you mix everything at once, but taking that extra minute to really blend the banana into the pumpkin creates a smoother, more consistent batter. No random chunks of banana that didn’t incorporate properly. No pockets of dry spice mix. Just even, perfect flavor in every bite.
This isn’t just another pumpkin bread recipe. It’s the one that’ll make you forget about all the others.
What Ingredients You Will Need
This recipe uses simple, wholesome ingredients that come together to create something truly special. Most of these are pantry staples, so you might not even need a trip to the store.
- All-purpose flour (1 ¾ cups / 220g) — The backbone of the bread. I use Gold Medal, but any standard brand works. Spoon and level your flour for the best results; scooping directly from the bag can pack it down and make the bread dry.
- Baking soda (1 teaspoon) — Helps the bread rise and gives it that tender crumb. Make sure yours isn’t expired; old baking soda won’t do much.
- Ground cinnamon (1 ½ teaspoons) — The star of the spice show. I prefer McCormick for its consistent quality, but any brand will do. This is where most of that cozy flavor comes from.
- Ground nutmeg (½ teaspoon) — Adds warmth and depth. Freshly grated is amazing if you have it, but pre-ground works perfectly fine.
- Ground ginger (¼ teaspoon) — A little goes a long way. It adds a subtle warmth without being overpowering.
- Salt (½ teaspoon) — Balances the sweetness and enhances all the other flavors. Don’t skip it.
- Granulated sugar (½ cup / 100g) — Provides sweetness and helps with browning. You can reduce this slightly if you prefer less sweet bread.
- Brown sugar (½ cup / 100g, packed) — Adds moisture and a deeper, caramel-like sweetness. Light or dark brown sugar both work; dark will give a richer flavor.
- Pumpkin puree (1 cup / 245g) — Not pumpkin pie filling! Make sure you’re getting 100% pure pumpkin puree. Libby’s is my go-to, but store brands work just as well.
- Ripe bananas (2 medium, about 1 cup mashed) — The riper, the better. You want them spotty and soft, almost too mushy to eat. That’s when they’re at their sweetest and most flavorful.
- Large eggs (2, room temperature) — Help bind everything together. If you forget to take them out of the fridge ahead of time, place them in a bowl of warm water for 5 minutes.
- Vegetable oil (⅓ cup / 80ml) — Keeps the bread incredibly moist. Canola or any neutral oil works. You can substitute melted coconut oil if you prefer.
- Vanilla extract (1 teaspoon) — Enhances the other flavors. Pure vanilla is best, but imitation works in a pinch.
- Optional mix-ins: ½ cup chocolate chips, chopped walnuts, or dried cranberries. I usually add chocolate chips because, well, chocolate makes everything better.
Equipment Needed
The beauty of this recipe is that it doesn’t require fancy equipment. Here’s what you’ll need:
- Large mixing bowl — Any bowl will do, but a wide one makes mixing easier. I use a ceramic one I picked up at a thrift store for three dollars.
- Whisk — For mixing the dry ingredients and combining the wet ones. A fork works in a pinch, but a whisk is easier.
- Spatula — For folding everything together and scraping the bowl clean. A rubber or silicone one is best.
- 9×5-inch loaf pan — Standard size. If you use an 8×4-inch pan, you’ll need to increase the baking time by about 10 minutes. If you use a smaller pan, the bread might overflow.
- Parchment paper — Not strictly necessary, but it makes removing the bread from the pan so much easier. I never skip it.
- Cooling rack — Allows air to circulate around the bread so it cools evenly. If you don’t have one, you can use the inverted loaf pan or just let it cool in the pan for 10 minutes before turning it out.
- Measuring cups and spoons — For accurate measurements. I’ve learned the hard way that eyeballing ingredients leads to inconsistent results.
- Fork or potato masher — For mashing the bananas. A fork works fine; a masher is faster.
Preparation Method
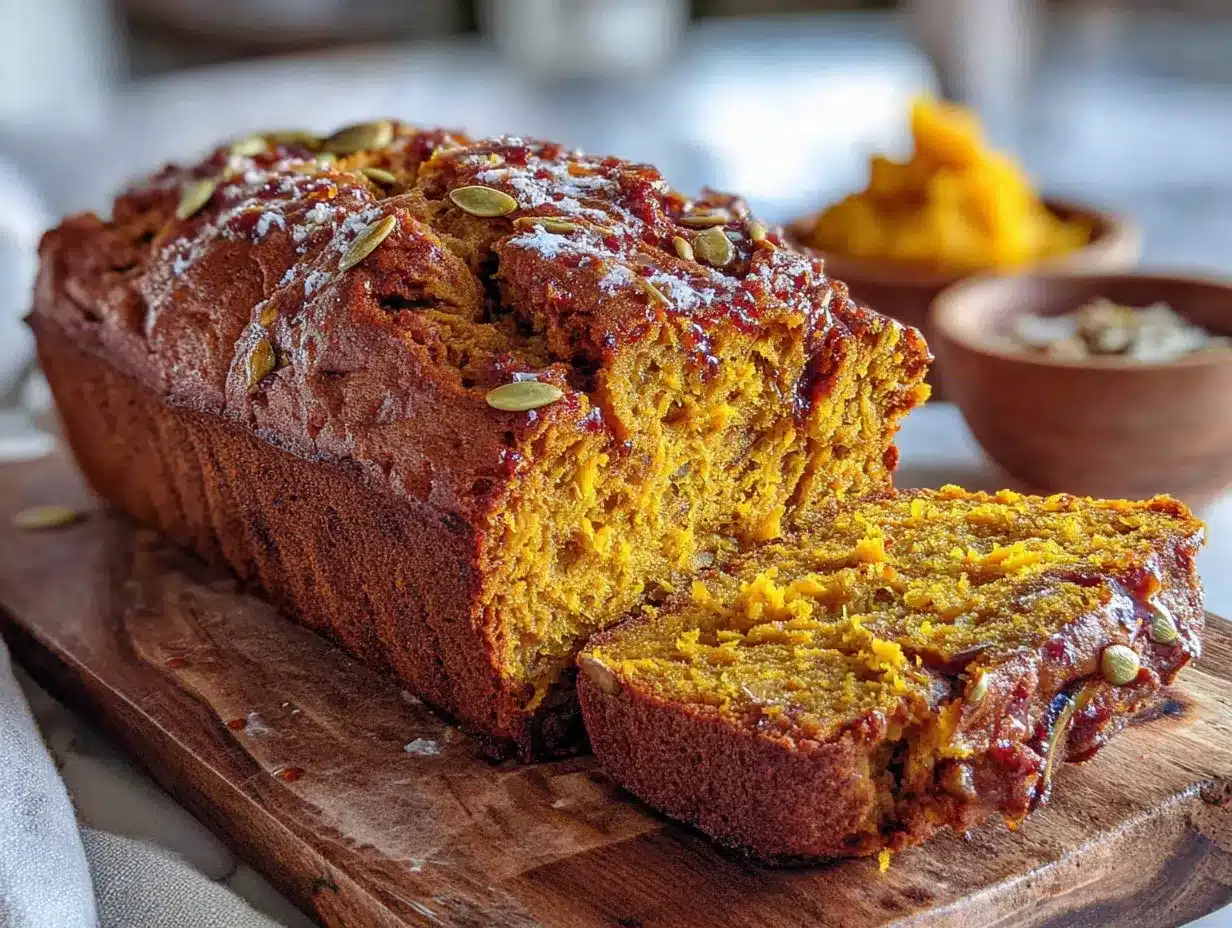
This recipe comes together in one bowl, which means less dishes and more time to enjoy the smell of baking bread filling your kitchen. Here’s how to do it:
- Preheat your oven to 350°F (175°C). Position the rack in the center of the oven. While it’s heating, line your loaf pan with parchment paper, leaving some overhang on the long sides. This will make it easy to lift the bread out later. Lightly grease the exposed sides of the pan with a little oil or butter.
- Mash the bananas in your mixing bowl. Peel the two ripe bananas and place them in the bowl. Use a fork or potato masher to mash them until they’re mostly smooth with just a few small lumps. You want some texture, but no large chunks. This should take about 30 seconds.
- Add the pumpkin puree to the mashed bananas. Stir them together until they’re well combined. The mixture should look smooth and uniform. This step is key—blending the two together before adding other ingredients ensures even distribution of flavor and moisture throughout the bread.
- Add the sugars and oil. Pour in the granulated sugar, brown sugar, and vegetable oil. Whisk vigorously for about a minute until the mixture is smooth and the sugars have started to dissolve. It should look glossy and slightly thickened.
- Add the eggs and vanilla. Crack the eggs into the bowl one at a time, whisking well after each addition. Add the vanilla extract and whisk again. The batter should be smooth and slightly runny at this point.
- Add the dry ingredients directly on top of the wet mixture. Sprinkle the flour, baking soda, cinnamon, nutmeg, ginger, and salt over the wet ingredients. Don’t stir yet—you want to mix the dry ingredients together on top of the batter first. Use your whisk to gently stir the dry ingredients together on the surface before folding them into the wet mixture. This ensures even distribution without overmixing.
- Fold the dry ingredients into the wet. Use your spatula to gently fold the flour mixture into the pumpkin-banana mixture. Stir just until you no longer see streaks of flour. A few small lumps are fine; overmixing will make the bread tough. If you’re adding chocolate chips or nuts, fold them in at this point with a few gentle stirs.
- Pour the batter into the prepared loaf pan. Use your spatula to scrape every last bit from the bowl. Spread the batter evenly in the pan, smoothing the top. Give the pan a gentle tap on the counter to release any air bubbles.
- Bake for 55-65 minutes. The bread is done when a toothpick inserted into the center comes out clean or with just a few moist crumbs. If the top is browning too quickly (around the 40-minute mark), tent the pan loosely with aluminum foil. My oven runs hot, so I usually start checking at 50 minutes.
- Cool in the pan for 10 minutes. Place the pan on a cooling rack. After 10 minutes, use the parchment paper overhang to lift the bread out of the pan and transfer it to the rack to cool completely. Resist the urge to slice it while it’s warm—it needs time to set, or it will crumble. I know it’s hard. I’ve burned my fingers more than once trying to sneak an early slice.
Cooking Tips & Techniques
I’ve made this bread enough times to learn a few things the hard way. Here are my best tips for getting it right every time:
- Don’t overmix the batter. This is the most common mistake I see. Once you add the flour, stir just until it disappears. Overmixing develops the gluten and makes the bread dense and tough. A few lumps are your friend.
- Use room temperature ingredients. Cold eggs can seize the batter and create an uneven texture. If you forgot to take them out of the fridge, place them in a bowl of warm water for 5 minutes. Same goes for the pumpkin puree—let it sit on the counter while you preheat the oven.
- Check your baking soda. If your bread doesn’t rise properly, your baking soda might be old. To test it, drop a small amount into a bowl of vinegar. If it fizzes vigorously, it’s still good. If not, it’s time for a new box.
- Adjust for altitude. If you live above 3,000 feet, you might need to make some adjustments. Reduce the sugar by 1-2 tablespoons, increase the flour by 1-2 tablespoons, and decrease the baking soda to ¾ teaspoon. Watch the baking time carefully—high altitude often requires a shorter bake.
- Let it cool completely. I know it’s tempting to slice into warm bread, but it really does need to cool fully. The structure is still setting as it cools, and cutting too early can result in a gummy, crumbly mess. Trust me, I’ve ruined more than one loaf this way.
- Toast leftover slices. If you have bread that’s a day or two old, toast it lightly and spread a little butter on top. It brings back that fresh-from-the-oven texture and adds a lovely crunch to the edges.
Variations & Adaptations
This recipe is incredibly versatile. Here are some of my favorite variations:
- Gluten-Free Version: Substitute the all-purpose flour with a 1:1 gluten-free baking flour blend. I’ve had good results with Bob’s Red Mill and King Arthur. Add an extra tablespoon of oil to compensate for the dryness that gluten-free flours can sometimes cause.
- Vegan Version: Replace the eggs with flax eggs (2 tablespoons ground flaxseed mixed with 6 tablespoons water, let sit for 5 minutes). Use coconut oil or a neutral vegetable oil instead of butter if you’re adding any. The texture will be slightly denser but still delicious.
- Chocolate Chip Pumpkin Banana Bread: Fold in ½ cup of semi-sweet or dark chocolate chips. The chocolate adds a rich contrast to the warm spices. I’ve also tried white chocolate chips, which are amazing but make it significantly sweeter.
- Spice It Up: Add ¼ teaspoon of ground cloves or allspice for a more complex spice profile. You can also add a pinch of cardamom for a slightly floral note that pairs beautifully with the pumpkin.
- Nutty Crunch: Fold in ½ cup of toasted walnuts or pecans. Toasting them first brings out their flavor and keeps them crunchy. Spread them on a baking sheet and toast at 350°F for 5-7 minutes before adding to the batter.
- Streusel Topping: Mix ¼ cup flour, ¼ cup brown sugar, 2 tablespoons cold butter, and ½ teaspoon cinnamon until crumbly. Sprinkle over the batter before baking. It adds a lovely crunchy top that makes the bread feel extra special.
Serving & Storage Suggestions
This bread is wonderful on its own, but here are some ways to make it even better:
Serving Temperature: I prefer this bread at room temperature or slightly warm. If you’re serving it fresh, let it cool for at least 30 minutes after baking. For a warm slice the next day, pop it in the microwave for 10-15 seconds or toast it lightly.
Presentation Ideas: Slice the bread and arrange it on a wooden board or a pretty plate. Dust with a little powdered sugar for a bakery-style look. Serve with a pat of butter, a drizzle of honey, or a dollop of whipped cream. For a breakfast treat, spread a slice with cream cheese or Greek yogurt.
Complementary Dishes: This bread pairs beautifully with a hot cup of coffee, chai tea, or spiced apple cider. For a full fall breakfast, serve it alongside scrambled eggs and fresh fruit. It also makes a great dessert with a scoop of vanilla ice cream.
Storage Instructions: Store the bread in an airtight container at room temperature for up to 4 days. To keep it extra moist, wrap it in plastic wrap before placing it in the container. Do not refrigerate—the cold air will dry it out.
Freezing Instructions: This bread freezes beautifully. Let it cool completely, then wrap it tightly in plastic wrap, followed by a layer of aluminum foil. Freeze for up to 3 months. To thaw, leave it on the counter for a few hours or overnight in the refrigerator. You can also freeze individual slices for quick grab-and-go breakfasts.
Flavor Development: Here’s a little secret—this bread actually tastes better the next day. The flavors have time to meld and deepen, and the texture becomes even more moist. So don’t be afraid to make it a day ahead.
Nutritional Information & Benefits
While I wouldn’t call this a health food, it does have some redeeming qualities. Here’s the estimated nutritional breakdown per slice (assuming 10 slices):
- Calories: 280
- Total Fat: 10g
- Saturated Fat: 2g
- Cholesterol: 35mg
- Sodium: 220mg
- Total Carbohydrates: 45g
- Dietary Fiber: 2g
- Sugars: 25g
- Protein: 4g
- Vitamin A: 60% of the Daily Value (from the pumpkin)
- Potassium: 200mg (from the banana)
Health Benefits: Pumpkin is packed with vitamin A, which supports eye health and immune function. Bananas provide potassium, which is important for heart health and muscle function. The cinnamon in this recipe has anti-inflammatory properties and may help regulate blood sugar. So while this is definitely a treat, it’s not entirely without nutritional value.
Dietary Considerations: This recipe is vegetarian. For a vegan version, see the variations section above. For a gluten-free version, use a 1:1 gluten-free flour blend. It contains eggs, wheat, and dairy (if you add butter to the pan or serve it with butter).
Conclusion
This Cozy One-Bowl Pumpkin Banana Bread has become a staple in my kitchen, and I have a feeling it will become one in yours too. It’s the kind of recipe that feels like coming home—simple, comforting, and exactly what you need on a chilly day. The combination of pumpkin and banana creates a moist, flavorful bread that’s perfect for breakfast, snacking, or dessert. And the one-bowl method means you spend less time cleaning and more time enjoying that amazing smell filling your house.
I’d love to hear how yours turns out. Did you add chocolate chips? Try a spice variation? Share your results in the comments below, or tag me on social media. There’s something special about knowing that this bread is being baked in kitchens all over the world, bringing a little warmth and comfort to whoever makes it. Happy baking, friends.
Frequently Asked Questions
Can I use frozen bananas for this recipe?
Absolutely! Frozen bananas work great. Just thaw them completely and drain off any excess liquid before mashing. They’ll be extra soft and sweet, which actually makes the bread even more flavorful.
Can I substitute the oil with applesauce?
Yes, you can replace the oil with an equal amount of unsweetened applesauce. The bread will be slightly less tender and a bit more cake-like in texture, but it’s a great lower-fat option. I’ve done it many times and it still turns out delicious.
Why did my bread sink in the middle?
This usually happens for one of three reasons: the bread was underbaked, the oven door was opened too early, or the batter was overmixed. Make sure your oven is fully preheated, don’t open the door for the first 40 minutes, and stop mixing as soon as the flour disappears.
Can I make this into muffins instead of a loaf?
Definitely! Grease a 12-cup muffin tin or line it with paper liners. Fill each cup about ⅔ full and bake at 350°F for 18-22 minutes, or until a toothpick inserted into the center comes out clean. You’ll get about 12-14 muffins.
How do I know when the bread is done without a toothpick?
If you don’t have a toothpick, you can use a thin skewer or a strand of uncooked spaghetti. Alternatively, gently press the center of the bread with your finger—if it springs back, it’s done. The edges should also be pulling away from the sides of the pan slightly.
Pin This Recipe!
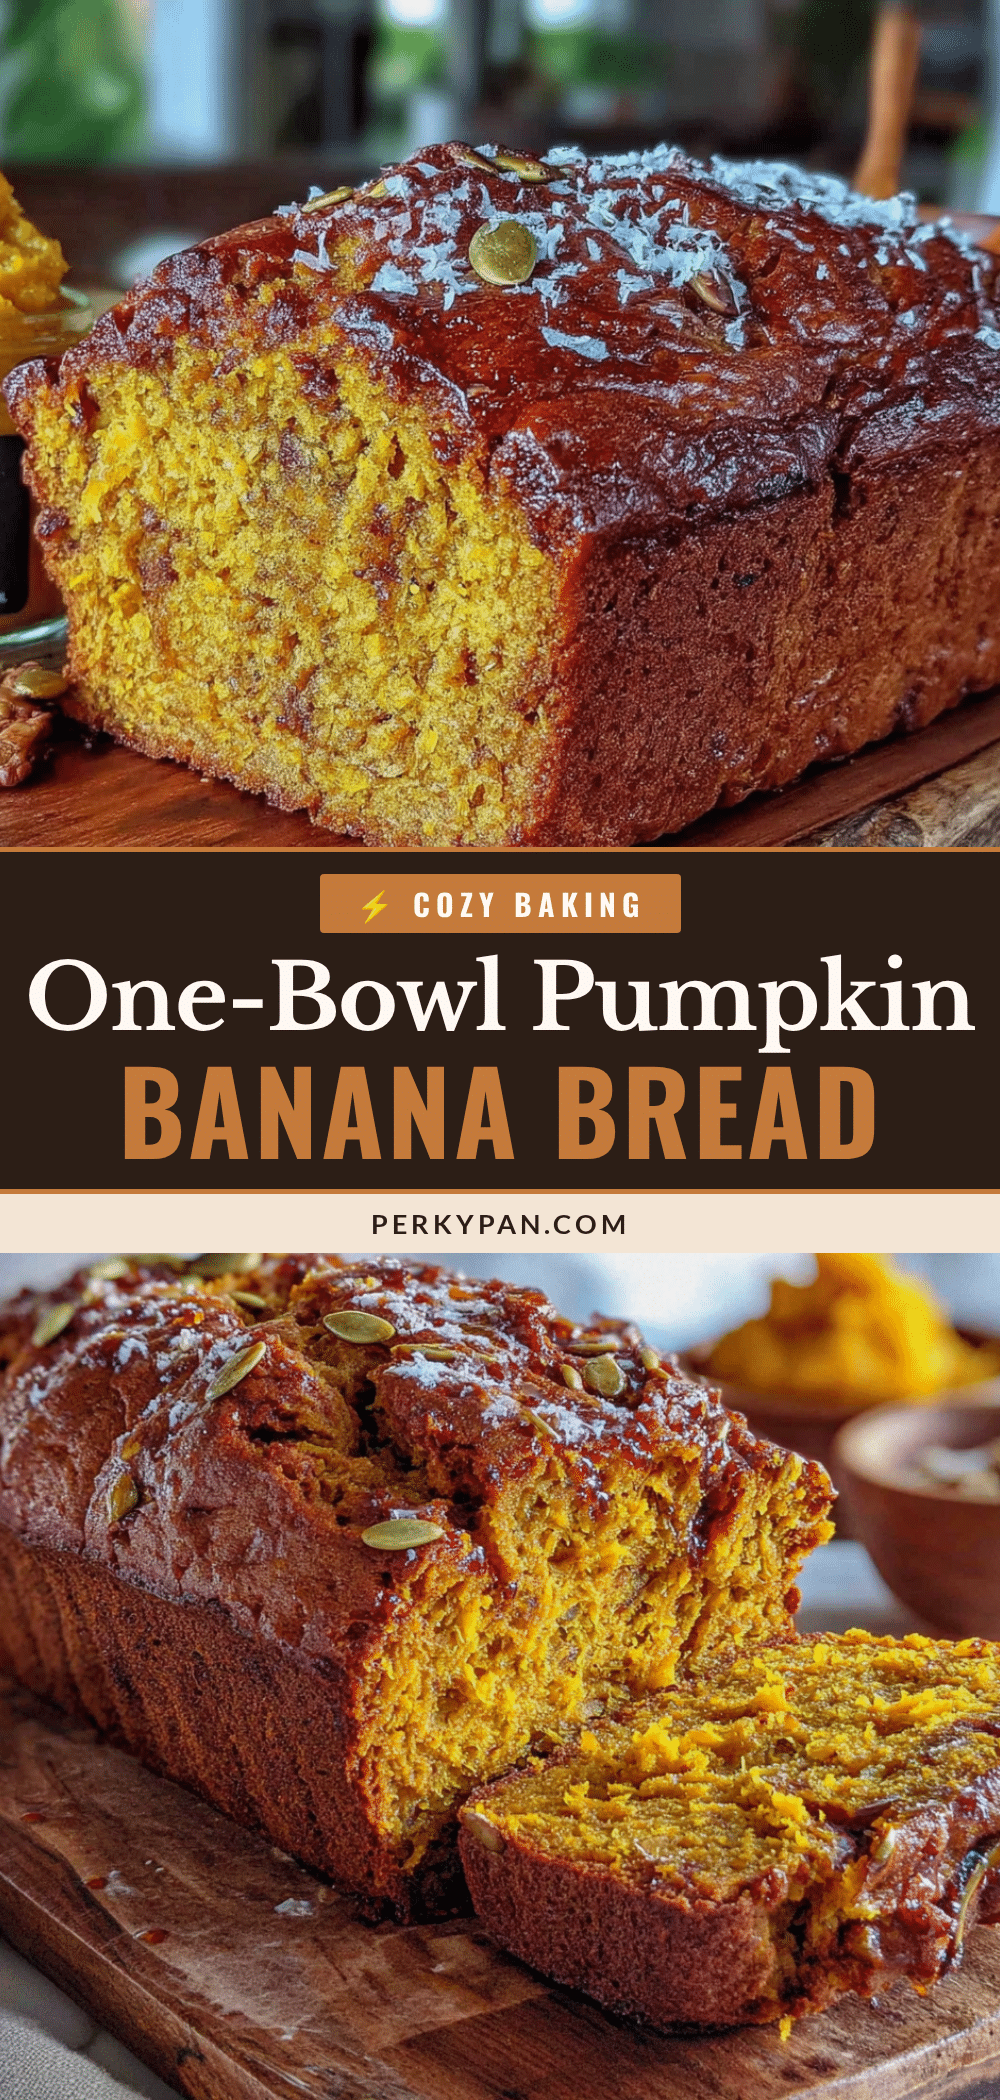
Cozy One-Bowl Pumpkin Banana Bread (Easy Fall Recipe)
This moist and flavorful pumpkin banana bread combines the natural sweetness of ripe bananas with warm fall spices for a cozy, easy-to-make treat. Made in one bowl with simple ingredients, it’s perfect for breakfast, snacking, or dessert.
- Prep Time: 15 minutes
- Cook Time: 55-65 minutes
- Total Time: 1 hour 10 minutes to 1 hour 20 minutes
- Yield: 10 servings 1x
- Category: Bread
- Cuisine: American
Ingredients
- 1 ¾ cups (220g) all-purpose flour
- 1 teaspoon baking soda
- 1 ½ teaspoons ground cinnamon
- ½ teaspoon ground nutmeg
- ¼ teaspoon ground ginger
- ½ teaspoon salt
- ½ cup (100g) granulated sugar
- ½ cup (100g) packed brown sugar
- 1 cup (245g) pumpkin puree (not pumpkin pie filling)
- 2 medium ripe bananas (about 1 cup mashed)
- 2 large eggs, room temperature
- ⅓ cup (80ml) vegetable oil (or other neutral oil)
- 1 teaspoon vanilla extract
- ½ cup chocolate chips, chopped walnuts, or dried cranberries (optional)
Instructions
- Preheat your oven to 350°F (175°C). Position the rack in the center of the oven. Line a 9×5-inch loaf pan with parchment paper, leaving some overhang on the long sides. Lightly grease the exposed sides of the pan with a little oil or butter.
- Mash the bananas in your mixing bowl. Peel the two ripe bananas and place them in the bowl. Use a fork or potato masher to mash them until they’re mostly smooth with just a few small lumps.
- Add the pumpkin puree to the mashed bananas. Stir them together until they’re well combined and smooth.
- Add the granulated sugar, brown sugar, and vegetable oil. Whisk vigorously for about a minute until the mixture is smooth, glossy, and slightly thickened.
- Add the eggs one at a time, whisking well after each addition. Add the vanilla extract and whisk again. The batter should be smooth and slightly runny.
- Add the dry ingredients directly on top of the wet mixture: flour, baking soda, cinnamon, nutmeg, ginger, and salt. Gently stir the dry ingredients together on the surface before folding them into the wet mixture.
- Use a spatula to gently fold the dry ingredients into the wet mixture. Stir just until no streaks of flour remain. If adding chocolate chips or nuts, fold them in at this point.
- Pour the batter into the prepared loaf pan. Spread evenly and smooth the top. Give the pan a gentle tap on the counter to release air bubbles.
- Bake for 55-65 minutes, until a toothpick inserted into the center comes out clean or with a few moist crumbs. If the top browns too quickly, tent loosely with aluminum foil after about 40 minutes.
- Cool in the pan for 10 minutes on a cooling rack. Then use the parchment paper overhang to lift the bread out and transfer to the rack to cool completely before slicing.
Notes
For best results, use very ripe bananas (spotty and soft). Do not overmix the batter; a few lumps are fine. Let the bread cool completely before slicing to avoid a gummy texture. The bread tastes even better the next day as flavors meld. Store in an airtight container at room temperature for up to 4 days, or freeze for up to 3 months.
Nutrition
- Serving Size: 1 slice (1/10 of loa
- Calories: 280
- Sugar: 25
- Sodium: 220
- Fat: 10
- Saturated Fat: 2
- Carbohydrates: 45
- Fiber: 2
- Protein: 4
Keywords: pumpkin banana bread, one bowl pumpkin bread, easy fall recipe, moist pumpkin bread, banana pumpkin bread, fall baking, quick bread


