Love this? Save it for later!
Share the inspiration with your friends
I wasn’t expecting lunchbox advice from a retired plumber named Frank, but there I was, stuck in a five-hour car ride home from a family reunion, listening to him describe exactly how to make turkey ranch pinwheels. We were somewhere past the third rest stop, the air conditioning fighting a losing battle against the August heat, and Frank—who I’d only ever seen grumbling about his lawn—was suddenly the most interesting person in the car. He was explaining, with surprising passion, how these little roll-ups had saved his daughter from the dreaded cafeteria trade. “She came home with a half-eaten sandwich every single day,” he said, shaking his head. “But these? She ate every last one, and the other kids started asking for her lunch.” Honestly, I was half-listening at first, distracted by the highway and the faint smell of gas station coffee. But something about the way he described them—cool, creamy, wrapped tight, and totally satisfying—made me grab a napkin and scribble down the ingredients. I mean, when a guy who fixes pipes for a living gets that animated about a recipe, you pay attention. I’ve been making these easy turkey ranch pinwheel lunchbox roll-ups ever since, and let me tell you, Frank was right. They’re the kind of thing you make once, then suddenly you’re making them every Sunday night for the week ahead. Maybe you’ve been there—desperate for something quick that actually gets eaten, not traded. That’s where these come in.
Why You’ll Love This Recipe
Let’s be real for a second. Finding a lunch option that’s fast, kid-friendly, and doesn’t make you feel like you’re serving cardboard is a genuine win. These turkey ranch pinwheel roll-ups check every box, and I’ve tested them enough times to know they work.
- Ready in 10 Minutes: No joke. From grabbing the ingredients to slicing the final pinwheel, you’re done in under ten minutes. Perfect for those Sunday meal prep sessions or frantic weekday mornings.
- Simple, Pantry-Friendly Ingredients: You likely already have cream cheese, tortillas, and ranch seasoning in your kitchen. The turkey and cheese are standard grocery staples. No fancy trips to a specialty store.
- Perfect for Lunchboxes: These hold up beautifully in a lunchbox. They don’t get soggy, they’re easy for little hands to hold, and they look way more exciting than a regular sandwich.
- Crowd-Pleaser for All Ages: I’ve served these at playdates, picnics, and even a casual brunch. Kids devour them, and adults quietly grab seconds. They’re universally loved.
- Unbelievably Satisfying: The creamy ranch filling, the salty turkey, the soft tortilla—it’s a simple combo that just works. It’s comfort food you can eat with one hand.
What makes these different from other pinwheel recipes is the technique. Instead of just spreading cream cheese, I whip it with a little milk and ranch seasoning until it’s fluffy and smooth. This small step makes the filling lighter and prevents the tortillas from getting soggy, even after a few hours in the fridge. I’ve tried shortcuts, and honestly, this method is the one that delivers every single time. It’s not just another version—it’s the best version.
This recipe isn’t just good; it’s the kind that makes you close your eyes after the first bite. It’s that perfect mix of creamy, savory, and cool that hits the spot without any stress. Perfect for busy parents, or anyone who just wants a reliable, delicious meal in minutes.
What Ingredients You Will Need
This recipe uses simple, wholesome ingredients to deliver bold flavor without the fuss. Most of these are pantry staples, which makes these roll-ups a great last-minute option.
- Flour Tortillas (10-inch): Use large, soft flour tortillas. They roll up easily without cracking. I personally prefer Mission or Ole Xtreme Wellness for a slightly healthier option. Look for tortillas that are pliable and fresh.
- Turkey Breast, Deli-Sliced: About 8-10 thin slices per roll-up. I like oven-roasted or honey-smoked turkey for extra flavor. Avoid thick-cut slices, as they make rolling difficult.
- Cream Cheese (8 oz), Softened: Full-fat cream cheese gives the best creamy texture. Let it sit on the counter for 15 minutes to soften. For a lighter version, use reduced-fat cream cheese, but don’t use fat-free—it can be grainy.
- Ranch Seasoning Mix (1 packet): This is the flavor powerhouse. Use a standard 1-ounce packet. I recommend Hidden Valley for consistent results. You can also use homemade ranch seasoning if you prefer.
- Milk (1-2 tablespoons): A splash of milk helps whip the cream cheese into a fluffy, spreadable consistency. Any milk works—whole, 2%, or even unsweetened almond milk.
- Shredded Cheddar Cheese (½ cup): Adds a sharp, melty flavor. I use sharp cheddar, but Colby Jack or Monterey Jack are great substitutes. For a milder taste, try mozzarella.
- Lettuce Leaves (Optional): Adds a nice crunch. Use crisp romaine or iceberg lettuce. Pat the leaves completely dry with a paper towel to prevent sogginess.
Ingredient Selection Tips: For the best texture, look for tortillas that are soft and not dried out at the edges. If your tortillas are a bit stiff, microwave them for 10 seconds to make them more pliable. When choosing turkey, ask for fresh-sliced at the deli counter—it’s usually more flavorful than pre-packaged options.
Substitution Guidance: Need a gluten-free option? Use gluten-free tortillas made from corn or cassava flour. For a dairy-free version, swap the cream cheese for a dairy-free cream cheese alternative, use dairy-free shredded cheese, and ensure your ranch seasoning is dairy-free (some brands contain buttermilk). You can also swap the turkey for ham, roast beef, or even grilled chicken strips.
Equipment Needed
You don’t need any fancy gadgets for this recipe, which is part of its beauty. Here’s what you’ll need:
- Cutting Board: A large, sturdy cutting board gives you plenty of space to assemble and slice the roll-ups.
- Sharp Knife: A serrated knife works best for slicing through the tortillas without squishing them. A chef’s knife works too, just use a gentle sawing motion.
- Electric Mixer or Whisk: An electric hand mixer makes whipping the cream cheese fluffy in under a minute. A strong whisk and some elbow grease work too, but the mixer is easier.
- Small Mixing Bowl: For combining the cream cheese, ranch seasoning, and milk.
- Spatula: A rubber spatula helps you scrape every bit of the creamy filling onto the tortillas.
- Plastic Wrap: Wrapping the rolled tortillas tightly in plastic wrap helps them hold their shape while chilling. You can also use beeswax wraps for a reusable option.
- Toothpicks (Optional): If you’re serving these as appetizers, toothpicks help hold the pinwheels together on a platter.
I’ve made these with just a butter knife and a bowl before, and they still turned out great. The plastic wrap is the one thing I wouldn’t skip—it really helps keep everything tight and neat.
Preparation Method
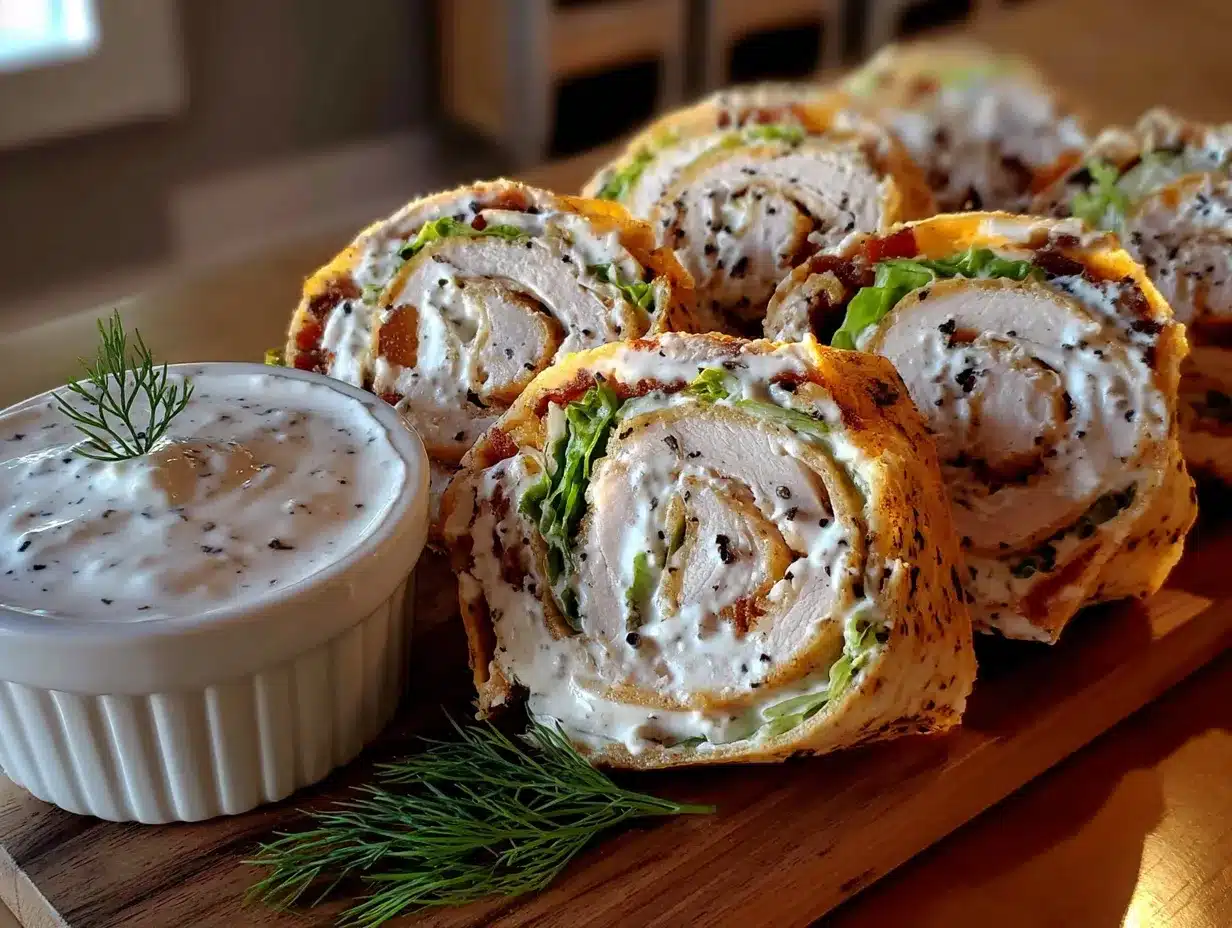
Follow these steps carefully, and you’ll have perfect pinwheels every time. I’ve included all the little tricks I’ve learned from making these dozens of times.
- Prepare the Cream Cheese Filling: In a small mixing bowl, combine the softened cream cheese (8 oz), the entire packet of ranch seasoning mix (1 oz), and 1 tablespoon of milk. Using an electric mixer on medium speed, beat the mixture for about 1-2 minutes until it’s light, fluffy, and completely smooth. Scrape down the sides of the bowl with a spatula. If the mixture seems too thick to spread, add another tablespoon of milk. You want a consistency similar to thick frosting. Pro tip: If your cream cheese is still cold, microwave it for 10 seconds to soften it faster, but don’t overheat it.
- Lay Out the Tortillas: Place one large flour tortilla (10-inch) flat on your cutting board. Make sure the tortilla is at room temperature. If it’s cold from the fridge, it might crack when you roll it. Sensory cue: The tortilla should feel soft and flexible, not stiff or brittle.
- Spread the Filling: Using a spatula or the back of a spoon, spread an even layer of the creamy ranch mixture over the entire surface of the tortilla. Go all the way to the edges—this helps everything stick together. You want a layer about ¼-inch thick. Don’t skimp on the edges, or your pinwheels might unravel. Personal tip: I use an offset spatula for this; it makes spreading perfectly even so much easier.
- Layer the Turkey and Cheese: Place 8-10 thin slices of deli turkey evenly over the cream cheese mixture. Overlap them slightly to ensure every bite has turkey. Sprinkle about 2 tablespoons of shredded cheddar cheese evenly over the turkey. If you’re using lettuce, place 1-2 crisp, dry lettuce leaves on top of the cheese. Troubleshooting: If you add too much filling, the roll-up will be difficult to roll and might burst. Keep the layers thin and even.
- Roll It Tightly: Starting from one edge, tightly roll the tortilla into a log. Use your fingers to keep the filling tucked in as you go. Roll it as snugly as you can without tearing the tortilla. Once rolled, place it seam-side down on the cutting board. Visual cue: The roll should look uniform and compact, like a cigar.
- Wrap and Chill: Tightly wrap the rolled tortilla in plastic wrap. Twist the ends of the plastic wrap to secure it. Place the wrapped roll in the refrigerator for at least 30 minutes. This step is crucial—it allows the cream cheese to firm up, which makes slicing much cleaner. For the best results, chill for 1-2 hours. Time estimate: Chilling is 30 minutes to 2 hours, but the active prep time is only 10 minutes.
- Slice the Pinwheels: After chilling, unwrap the roll and place it on your cutting board. Using a sharp serrated knife, slice the roll into 1-inch thick pinwheels. Use a gentle sawing motion—don’t press straight down, or you’ll squish them. You should get about 8-10 pinwheels per tortilla. Warning: A dull knife will crush the roll. A serrated knife is your best friend here.
- Serve or Store: Arrange the pinwheels on a plate or pack them directly into lunchboxes. They’re ready to eat immediately after slicing.
Cooking Tips & Techniques
After making these more times than I can count, I’ve picked up a few tricks that make a real difference. Let me share them so you can skip the trial and error.
Don’t Skip the Chilling Step. I know it’s tempting to slice them right away, especially when you’re in a hurry. But trust me on this one. Chilling the rolled tortilla for at least 30 minutes firms up the cream cheese, which means your slices come out clean and round instead of squished and messy. I once forgot to chill them, and the pinwheels looked like sad, flattened blobs. Never again.
Pat Your Lettuce Bone Dry. If you’re adding lettuce, moisture is your enemy. Wet lettuce makes the tortilla soggy and the filling slide around. After washing your lettuce leaves, lay them on a paper towel, roll them up, and gently squeeze. It sounds fussy, but it takes ten seconds and saves your roll-ups from turning into a mushy mess.
Use a Serrated Knife for Slicing. This is non-negotiable. A serrated knife cuts through the tortilla without compressing it. A straight-edged chef’s knife tends to push the filling out the sides. I learned this the hard way after ruining a whole batch with a dull knife. A gentle sawing motion is all you need.
Make a Batch, Not Just One. Since the prep time is only 10 minutes, I always make 4-5 roll-ups at once. It takes the same amount of effort as making one, and then I have lunch sorted for the whole week. Just wrap each one individually in plastic wrap before chilling.
Watch Your Filling Amounts. It’s easy to get carried away with the turkey and cheese. Too much filling makes the roll impossible to close and causes the filling to squirt out the ends. Keep the layers thin and even. You want every bite to have a balanced ratio of tortilla, cream cheese, turkey, and cheese.
Variations & Adaptations
One of the best things about this recipe is how easy it is to change up. I’ve experimented with different combinations, and here are some of my favorites.
Spicy Southwest Pinwheels: Swap the ranch seasoning for a packet of taco seasoning. Use pepper jack cheese instead of cheddar, and add a thin layer of canned black beans (rinsed and drained) before the turkey. A few slices of jalapeño take it to the next level. This version is fantastic for game day snacks.
Everything Bagel Pinwheels: Mix 1 tablespoon of everything bagel seasoning into the cream cheese mixture. Use smoked salmon or lox instead of turkey, and add a thin layer of cream cheese with capers. It’s a fun twist that feels fancy but is just as easy to make.
Veggie-Packed Version: For a meatless option, skip the turkey and pile on the veggies. Thinly sliced cucumber, shredded carrots, bell pepper strips, and fresh spinach work beautifully. The ranch cream cheese holds everything together, and the crunch is incredible. My kids actually love this version, which surprised me.
Gluten-Free and Low-Carb Adaptations: Use large gluten-free tortillas or low-carb tortillas made from almond flour or coconut flour. The recipe works exactly the same way. Just be careful when rolling, as some gluten-free tortillas are more fragile. Warm them slightly to prevent cracking.
Breakfast Pinwheels: This is a fun weekend brunch idea. Replace the turkey with crispy bacon or breakfast sausage crumbles. Add a thin layer of scrambled eggs and use a milder cheese like mozzarella. The ranch cream cheese still works, or you can use plain cream cheese for a more traditional breakfast flavor.
Serving & Storage Suggestions
These pinwheels are incredibly versatile when it comes to serving. Here’s how to get the most out of them.
Serving Temperature: They’re best served cold or at room temperature. Straight from the fridge, they’re firm and refreshing. If you’re packing them for lunch, they’ll come to room temperature by the time lunch rolls around, which is perfect.
Presentation Ideas: For parties, arrange the pinwheels on a platter in concentric circles. Stick a toothpick in each one for easy grabbing. Garnish with a small bowl of extra ranch dressing for dipping. For lunchboxes, place them in a small container with a few baby carrots and some grapes for a balanced meal.
Complementary Dishes: These pair beautifully with a simple side salad, some crunchy veggie sticks, or a cup of tomato soup for dipping. They’re also great alongside fresh fruit or a handful of chips for a quick lunch.
Storage Instructions: Store leftover pinwheels in an airtight container in the refrigerator for up to 3 days. Place a paper towel at the bottom of the container to absorb any excess moisture. If you’re storing them for more than a day, keep them unsliced as a whole roll. Slice only what you plan to eat.
Reheating Tips: Honestly, I don’t recommend reheating these. They’re designed to be enjoyed cold. If you absolutely must warm them, a few seconds in the microwave will soften the tortilla, but the texture won’t be as good. Stick to serving them cold or at room temperature for the best experience.
Flavor Development: These actually taste better after a few hours in the fridge. The flavors meld together, and the ranch seasoning really permeates the cream cheese. If you can, make them the night before you plan to serve them.
Nutritional Information & Benefits
While these are definitely a treat, they also offer some nutritional benefits worth noting. Here’s a rough estimate per pinwheel (based on 8 pinwheels per roll-up).
- Calories: Approximately 120-150 per pinwheel
- Protein: 8-10 grams (from turkey and cheese)
- Fat: 7-9 grams (mostly from cream cheese and cheese)
- Carbohydrates: 8-10 grams (from the tortilla)
- Fiber: 1-2 grams
Health Benefits of Key Ingredients: Turkey breast is a lean source of high-quality protein, which helps keep you full and satisfied. Cream cheese provides calcium and a small amount of vitamin A. The ranch seasoning, while primarily for flavor, often contains herbs like dill and parsley, which have antioxidant properties. If you use whole-wheat tortillas, you’ll get a nice boost of fiber.
Dietary Considerations: This recipe can be adapted for gluten-free and low-carb diets as mentioned in the variations. It’s not suitable for a vegan diet, but you can experiment with plant-based cream cheese and turkey alternatives. For a lower-fat version, use reduced-fat cream cheese and low-fat turkey.
Potential Allergens: This recipe contains dairy (cream cheese, cheddar cheese) and gluten (tortillas). If you have allergies, please check your specific ingredients. Some ranch seasoning mixes may contain dairy or MSG.
I personally love that these pinwheels give my family a protein-packed lunch that doesn’t feel like a chore to eat. It’s a win-win in my book.
Conclusion
So there you have it—the easy turkey ranch pinwheel lunchbox roll-ups that started with a story from a plumber in a hot car. Honestly, I still think about that conversation every time I make them. It’s funny where good recipes come from, isn’t it? This one has become a staple in my home, and I truly believe it can become one in yours too. They’re quick, they’re forgiving, and they’re just plain delicious.
I encourage you to make these your own. Play around with the fillings, try different seasonings, or pack them for a picnic. The base recipe is so solid that you really can’t go wrong. And when you do make them, I’d love to hear about it. Drop a comment below and tell me how they turned out, or share your own twist on the recipe. Did your kids love them? Did you try the Southwest version? Let me know!
Thanks for stopping by, and happy rolling. You’ve got this.
Frequently Asked Questions
Can I make these turkey ranch pinwheels ahead of time?
Absolutely! In fact, they’re better when made ahead. You can assemble and roll the tortillas up to 24 hours in advance. Keep them tightly wrapped in plastic wrap in the refrigerator, and slice them just before serving or packing. The flavors meld together beautifully overnight.
How do I keep the pinwheels from getting soggy in a lunchbox?
The key is to pat all wet ingredients dry. Make sure your lettuce is completely dry before adding it. Also, don’t overdo the ranch seasoning liquid—use just enough milk to make the cream cheese fluffy. Chilling the rolled tortillas before slicing also helps them hold their structure and prevents sogginess.
Can I use a different type of meat instead of turkey?
Yes, definitely. Ham, roast beef, pastrami, or even grilled chicken strips work wonderfully. The ranch cream cheese pairs well with most deli meats. For a vegetarian option, you can skip the meat entirely and load up on crunchy vegetables like bell peppers, cucumbers, and shredded carrots.
What’s the best way to slice pinwheels without squishing them?
Use a sharp serrated knife and a gentle sawing motion. Don’t press straight down on the roll. Chilling the roll for at least 30 minutes before slicing makes a huge difference because the filling is firm. A dull knife is the number one cause of squished pinwheels, so keep it sharp.
How long do these pinwheels last in the fridge?
Stored in an airtight container, they’ll stay fresh for up to 3 days. I recommend placing a paper towel in the container to absorb any extra moisture. If you’re storing them for more than a day, keep the roll whole and slice only what you need. This prevents the edges from drying out.
Pin This Recipe!

Easy Turkey Ranch Pinwheel Lunchbox Roll-Ups: Best 10-Minute Recipe

These easy turkey ranch pinwheel lunchbox roll-ups are ready in 10 minutes and perfect for busy parents. Creamy ranch filling, turkey, and cheese rolled in a soft tortilla make a satisfying, kid-friendly lunch that won’t get traded away.
- Prep Time: 10 minutes
- Cook Time: 0 minutes
- Total Time: 40 minutes (includes 30 minutes chilling)
- Yield: 4 servings (32-40 pinwheels) 1x
- Category: Lunch
- Cuisine: American
Ingredients
- 4 large flour tortillas (10-inch)
- 8–10 thin slices deli turkey breast per roll-up (about 32–40 slices total)
- 8 oz cream cheese, softened
- 1 packet (1 oz) ranch seasoning mix
- 1–2 tablespoons milk
- ½ cup shredded cheddar cheese
- Optional: crisp lettuce leaves (romaine or iceberg), patted dry
Instructions
- Prepare the Cream Cheese Filling: In a small mixing bowl, combine the softened cream cheese (8 oz), the entire packet of ranch seasoning mix (1 oz), and 1 tablespoon of milk. Using an electric mixer on medium speed, beat the mixture for about 1-2 minutes until it’s light, fluffy, and completely smooth. Scrape down the sides of the bowl with a spatula. If the mixture seems too thick to spread, add another tablespoon of milk. You want a consistency similar to thick frosting.
- Lay Out the Tortillas: Place one large flour tortilla (10-inch) flat on your cutting board. Make sure the tortilla is at room temperature. If it’s cold from the fridge, it might crack when you roll it.
- Spread the Filling: Using a spatula or the back of a spoon, spread an even layer of the creamy ranch mixture over the entire surface of the tortilla. Go all the way to the edges—this helps everything stick together. You want a layer about ¼-inch thick.
- Layer the Turkey and Cheese: Place 8-10 thin slices of deli turkey evenly over the cream cheese mixture. Overlap them slightly to ensure every bite has turkey. Sprinkle about 2 tablespoons of shredded cheddar cheese evenly over the turkey. If you’re using lettuce, place 1-2 crisp, dry lettuce leaves on top of the cheese.
- Roll It Tightly: Starting from one edge, tightly roll the tortilla into a log. Use your fingers to keep the filling tucked in as you go. Roll it as snugly as you can without tearing the tortilla. Once rolled, place it seam-side down on the cutting board.
- Wrap and Chill: Tightly wrap the rolled tortilla in plastic wrap. Twist the ends of the plastic wrap to secure it. Place the wrapped roll in the refrigerator for at least 30 minutes. This step is crucial—it allows the cream cheese to firm up, which makes slicing much cleaner. For the best results, chill for 1-2 hours.
- Slice the Pinwheels: After chilling, unwrap the roll and place it on your cutting board. Using a sharp serrated knife, slice the roll into 1-inch thick pinwheels. Use a gentle sawing motion—don’t press straight down, or you’ll squish them. You should get about 8-10 pinwheels per tortilla.
- Serve or Store: Arrange the pinwheels on a plate or pack them directly into lunchboxes. They’re ready to eat immediately after slicing.
Notes
Don’t skip the chilling step—it firms up the cream cheese for clean slices. Pat lettuce completely dry to prevent sogginess. Use a serrated knife with a gentle sawing motion for best results. Make a batch of 4-5 roll-ups at once for weekly meal prep. These taste even better after a few hours in the fridge as flavors meld.
Nutrition
- Serving Size: 1 pinwheel
- Calories: 120150
- Sugar: 12
- Sodium: 350450
- Fat: 79
- Saturated Fat: 34
- Carbohydrates: 810
- Fiber: 12
- Protein: 810
Keywords: turkey ranch pinwheels, lunchbox roll-ups, easy lunch recipe, kid-friendly lunch, 10-minute recipe, pinwheel sandwiches, turkey cream cheese roll-ups


