Love this? Save it for later!
Share the inspiration with your friends
I was standing in my kitchen last Tuesday, staring at a bunch of bananas that had gone from “perfectly ripe” to “aggressively spotted” in what felt like hours. You know that feeling when you buy bananas with the best intentions of eating them all week, and then life happens? Well, that was me. I had a Zoom meeting in twenty minutes, a toddler tugging at my pant leg, and a serious craving for something warm and comforting. I grabbed the sour cream from the fridge without thinking — it was just sitting there, leftover from taco night — and something clicked.
I’ve made banana bread more times than I can count. Honestly, I’ve had some real disasters. Dry loaves that crumbled when I tried to slice them. Dense bricks that could honestly double as doorstops. But this time, with the sour cream staring back at me, I decided to try something different. I threw everything into one bowl — no fuss, no separate mixing, no nonsense — and hoped for the best.
The smell that filled my kitchen was something else. It was familiar but different, richer somehow. When I finally pulled that loaf out of the oven, it was golden, perfectly domed, and absolutely gorgeous. The first slice was still warm when I cut into it, and let me tell you — it was everything I wanted. Moist, tender, with that perfect crumb that just melts on your tongue. I’ve been making this one-bowl version ever since, and I honestly don’t think I’ll go back to the old way.
Why You’ll Love This Recipe
I’m not going to tell you this is just another banana bread recipe. Because it’s not. This moist one-bowl sour cream banana bread is the result of trial and error, a few happy accidents, and one very memorable baking session where I forgot to grease my pan properly (don’t ask). Here’s why this recipe stands out from the crowd:
- One Bowl, No Fuss: You read that right. Everything goes into one bowl. No creaming butter and sugar separately. No alternating dry and wet ingredients. Just dump, stir, and bake. Perfect for those days when you want homemade banana bread without the mountain of dishes.
- Incredibly Moist: The sour cream is the secret weapon here. It adds richness and tenderness that regular banana bread just can’t match. Every bite is soft, moist, and downright indulgent.
- Simple Pantry Ingredients: You probably have everything you need already. Bananas, flour, sugar, eggs, butter, and that tub of sour cream hiding in the back of your fridge.
- Foolproof for Beginners: If you’ve ever been intimidated by baking, this is the recipe to start with. The one-bowl method is forgiving, and the sour cream helps prevent overmixing disasters.
- Perfect for Overripe Bananas: Let’s face it — we all have those bananas sitting on the counter, getting spotty and sad. This recipe turns them into gold.
This isn’t just banana bread — it’s the kind of loaf that makes you close your eyes after the first bite. It’s comfort food that feels special but requires almost no effort. And honestly? That’s my favorite kind of recipe.
What Ingredients You Will Need
This recipe uses simple, wholesome ingredients that work together to create something truly special. The sour cream is the star here, but every component plays its part. Here’s what you’ll need:
For the Banana Bread:
- 3 ripe bananas, mashed (about 1½ cups) — The riper the better. Those spotty, almost-black bananas are perfect. They’re sweeter and easier to mash.
- ½ cup unsalted butter, melted (1 stick) — I use salted butter in a pinch and just reduce the added salt slightly. Melted butter gives the bread a tender crumb.
- 1 cup granulated sugar — Regular white sugar works beautifully. You can substitute with brown sugar for a deeper flavor.
- 2 large eggs, room temperature — Cold eggs can seize the melted butter. Let them sit out for 15 minutes or warm them in a bowl of warm water.
- 1 teaspoon vanilla extract — Pure vanilla extract makes a difference. I’ve tried imitation in a pinch, and honestly, the real stuff is worth it.
- ½ cup sour cream — Full-fat sour cream gives the best texture. Greek yogurt works as a substitute if that’s what you have.
- 1½ cups all-purpose flour — Spoon and level your flour for the most accurate measurement. Scooping directly can pack in too much flour.
- 1 teaspoon baking soda — Make sure your baking soda is fresh. It’s the main leavening agent here.
- ½ teaspoon salt — Balances the sweetness and enhances the banana flavor.
- Optional: ½ cup chopped walnuts or chocolate chips — I’m partial to chocolate chips myself, but walnuts add a lovely crunch.
Ingredient Notes:
- I prefer using full-fat sour cream for this recipe. The reduced-fat versions have more water content and can make the bread slightly less tender. If you only have low-fat, drain off any excess liquid before using.
- For the best banana flavor, let your bananas get really ripe. I’m talking brown spots covering at least 50% of the peel. If your bananas aren’t ripe enough, you can roast them in a 300°F oven for 15-20 minutes to concentrate their sweetness.
- If you’re out of sour cream, plain Greek yogurt is your best substitute. It won’t be quite as rich, but it’ll still give you a moist loaf.
Equipment Needed
The beauty of this recipe is that you don’t need fancy equipment. Here’s what you’ll need:
- A large mixing bowl — Any bowl will do. I use my grandmother’s old ceramic mixing bowl, but a stainless steel or glass bowl works perfectly.
- A 9×5-inch loaf pan — This is the standard size. If you use an 8×4-inch pan, you’ll need to increase the baking time by about 10 minutes. A 9×5 gives you a nice tall loaf.
- Parchment paper — Not strictly necessary, but it makes removing the bread from the pan so much easier. I always line my pan with a sling of parchment paper.
- A fork or potato masher — For mashing those bananas. A fork works fine, but a potato masher makes quick work of it.
- A whisk or wooden spoon — Since this is a one-bowl recipe, you don’t need an electric mixer. A good whisk or wooden spoon is all you need.
- Measuring cups and spoons — Accurate measurements matter in baking. I recommend using dry measuring cups for flour and sugar, and a liquid measuring cup for the melted butter.
- A cooling rack — Letting the bread cool in the pan for 10 minutes, then transferring it to a rack, prevents a soggy bottom.
If you don’t have a loaf pan, you can bake this in a 9×9-inch square pan for about 30-35 minutes. The bread will be thinner, but it’ll still taste amazing. I’ve done this when my loaf pan was in use, and honestly, it worked out great.
Preparation Method
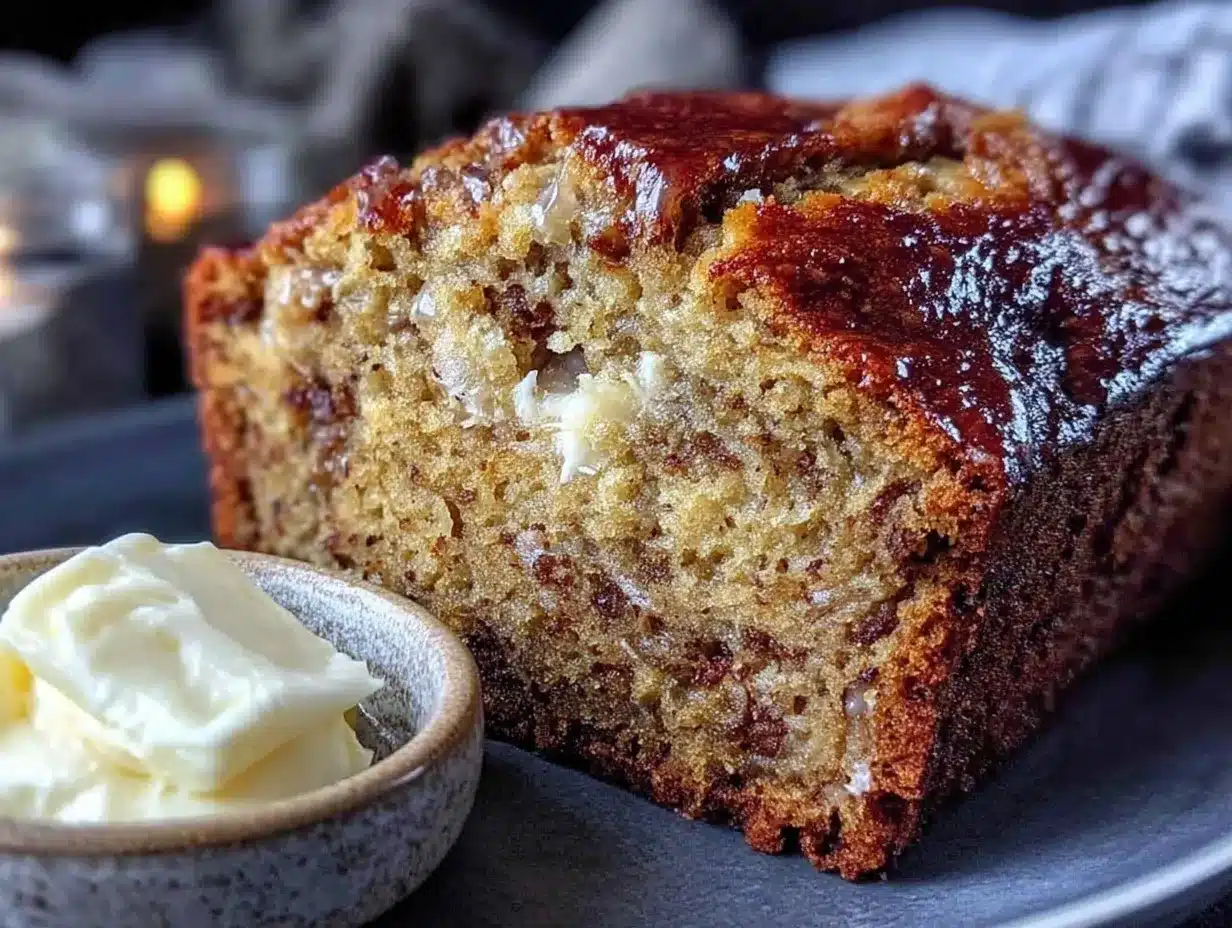
This is where the magic happens. Follow these steps, and you’ll have the most incredible banana bread coming out of your oven.
- Preheat your oven to 350°F (175°C). Grease a 9×5-inch loaf pan or line it with parchment paper. I like to leave a little overhang on the sides — it makes lifting the bread out so much easier.
- Mash the bananas in your large mixing bowl. Use a fork or potato masher until they’re mostly smooth with a few small lumps remaining. You want some texture, not baby food consistency. Three medium bananas should give you about 1½ cups of mashed banana.
- Add the melted butter to the bananas. Stir until combined. The butter should be cool enough that it doesn’t cook the bananas — just warm, not hot.
- Add the sugar, eggs, vanilla extract, and sour cream. Whisk everything together until smooth. The mixture will be thick and glossy. Make sure your eggs are at room temperature so they incorporate smoothly.
- Add the flour, baking soda, and salt directly to the wet ingredients. This is the one-bowl magic. Gently fold the dry ingredients into the wet using a spatula or wooden spoon. Mix just until you no longer see streaks of flour. A few lumps are okay — overmixing will make your bread tough.
- Fold in any add-ins if using. I usually add about ½ cup of chocolate chips at this point. Fold gently, just a few strokes.
- Pour the batter into your prepared loaf pan. Spread it evenly with your spatula. The batter will be thick — that’s normal.
- Bake for 55-65 minutes. Start checking at 50 minutes. The bread is done when a toothpick inserted into the center comes out clean or with just a few moist crumbs. The top should be golden brown and cracked beautifully.
- Cool in the pan for 10 minutes. This allows the bread to set and makes it easier to remove. After 10 minutes, lift the bread out using the parchment paper and transfer to a cooling rack.
- Cool completely before slicing. I know this is the hardest part. The smell is intoxicating. But if you slice too early, the bread will be gummy. Give it at least 30 minutes on the cooling rack.
Pro tip: If the top of your bread is browning too quickly but the center isn’t done yet, tent it loosely with aluminum foil for the last 15 minutes of baking. I learned this the hard way after several burnt tops.
Cooking Tips & Techniques
After making this recipe more times than I can count, I’ve picked up a few tricks that make a real difference. Here’s what I’ve learned:
Don’t overmix the batter. This is the number one mistake people make with quick breads. Mix until the flour just disappears. Overmixing develops gluten, which makes your bread tough and dense. The sour cream helps keep things tender, but it can’t work miracles against aggressive mixing.
Use room temperature ingredients. Cold eggs and sour cream can cause the melted butter to seize up, creating lumps in your batter. Leave everything on the counter for about 20 minutes before you start. Your batter will come together smoothly and bake more evenly.
Check your baking soda freshness. Baking soda loses its potency over time. To test if yours is still active, drop a teaspoon into a small bowl of vinegar. If it fizzes vigorously, you’re good. If it barely bubbles, it’s time for a new box.
Let the bread cool properly. I’ve ruined more loaves than I want to admit by slicing too early. The bread needs time to set up. If you slice when it’s still warm, the texture will be gummy and it’ll fall apart. Patience pays off here.
Use a kitchen scale for accuracy. If you have one, weighing your flour gives the most consistent results. One cup of all-purpose flour should weigh about 120-125 grams. I don’t always use mine, but when I do, I notice the difference.
Trust the toothpick test. Ovens vary, so baking times are always approximate. Start checking at 50 minutes. If the toothpick comes out wet, give it 5 more minutes. If it comes out clean, it’s done.
Variations & Adaptations
This recipe is wonderfully adaptable. Here are some variations I’ve tried and loved:
Chocolate Chip Banana Bread: This is my go-to variation. Fold in ½ cup of semi-sweet chocolate chips along with the flour. The chocolate melts into little pockets of goodness throughout the bread. Dark chocolate chips work beautifully too.
Nutty Banana Bread: Add ½ cup of toasted walnuts or pecans. Toast them in a dry pan for 3-4 minutes before adding — it really brings out their flavor. I’ve also used chopped almonds, which add a nice crunch.
Gluten-Free Version: Substitute the all-purpose flour with a 1:1 gluten-free baking flour blend. I’ve used Bob’s Red Mill with great results. The texture will be slightly more crumbly, but it’s still delicious. Add an extra tablespoon of sour cream to help with moisture.
Vegan Adaptation: Use flax eggs (2 tablespoons ground flaxseed mixed with 6 tablespoons water) and replace the sour cream with coconut yogurt. Use coconut oil instead of butter. The texture won’t be quite as rich, but it’s still a solid banana bread.
Spiced Banana Bread: Add 1 teaspoon of cinnamon and ½ teaspoon of nutmeg to the flour mixture. Sometimes I add a pinch of cardamom too. It gives the bread a warm, cozy flavor that’s perfect for fall.
Banana Muffins: Pour the batter into a greased muffin tin instead of a loaf pan. Bake at 350°F for 18-22 minutes. You’ll get about 12 muffins. Perfect for breakfast on the go.
Serving & Storage Suggestions
This banana bread is wonderful at room temperature, but I have a few favorite ways to serve it:
- Warm with butter: Slice a piece, toast it lightly, and spread with salted butter. The combination of warm, buttery bread and melted butter is unbeatable.
- With cream cheese: Spread a thin layer of cream cheese on a slice. The tanginess complements the sweetness of the banana bread perfectly.
- As French toast: This is a game-changer. Slice the bread thick, dip in an egg mixture, and pan-fry. It’s incredible for a weekend brunch.
- With a cup of coffee: Honestly, this is my favorite way. The banana bread is perfect for dipping.
Storage: Store the bread wrapped tightly in plastic wrap or in an airtight container at room temperature for up to 3 days. The sour cream helps keep it moist longer than regular banana bread.
Freezing: This bread freezes beautifully. Wrap the cooled loaf (or individual slices) tightly in plastic wrap, then in aluminum foil. Freeze for up to 3 months. Thaw at room temperature or pop a slice in the toaster straight from the freezer.
Reheating: For that just-baked experience, warm slices in a 300°F oven for 5-7 minutes. The microwave works in a pinch, but it can make the bread slightly rubbery. The oven is worth the extra few minutes.
The flavors actually develop over time. I find the bread tastes even better on the second day. Something about the banana flavor deepening and the sour cream working its magic overnight. If you can resist eating it all on day one, you’re a stronger person than I am.
Nutritional Information & Benefits
Here’s the approximate nutritional breakdown for one slice (assuming 12 slices per loaf):
| Nutrient | Amount Per Slice |
|---|---|
| Calories | 245 |
| Total Fat | 11g |
| Saturated Fat | 6g |
| Cholesterol | 55mg |
| Sodium | 210mg |
| Total Carbohydrates | 34g |
| Dietary Fiber | 1.5g |
| Sugars | 18g |
| Protein | 4g |
Bananas are a great source of potassium and vitamin B6. They also provide natural sweetness, which means you can use slightly less sugar than other banana bread recipes. The sour cream adds calcium and a touch of protein, plus it helps create a more satisfying texture with less butter than traditional recipes.
This bread isn’t health food, but it’s made with real ingredients and no preservatives. That counts for something. If you want to lighten it up, you can reduce the sugar to ¾ cup and use Greek yogurt instead of sour cream. The texture will be slightly different, but it’ll still be delicious.
For those watching their intake, one slice makes a satisfying snack or breakfast. Pair it with some Greek yogurt or a hard-boiled egg for a more balanced meal.
Conclusion
This moist one-bowl sour cream banana bread has become my go-to recipe for so many reasons. It’s easy enough for a Tuesday morning, impressive enough for a brunch with friends, and comforting enough to chase away a bad day. The one-bowl method means less cleanup, and the sour cream ensures every bite is tender and delicious.
I love that this recipe is flexible. You can add chocolate chips, nuts, or spices depending on your mood. You can make it gluten-free or vegan with simple substitutions. It’s a recipe that works with you, not against you.
If you try this recipe, I’d love to hear how it turns out. Leave a comment below and let me know what variations you tried. Did you add chocolate chips? Walnuts? Did you turn it into muffins? Share your experience — your feedback helps others who are thinking about making it.
And if you’re looking for more easy baking recipes, check out my easy classic banana muffins or my simple chocolate chip cookies. Both use the same one-bowl approach and are just as forgiving.
Happy baking, friends. May your bananas always be spotty and your bread always be moist.
Frequently Asked Questions
Can I use frozen bananas for this recipe?
Absolutely! Thaw them completely and drain off any excess liquid before mashing. Frozen bananas can be even sweeter than fresh ones, which is a bonus. Just make sure to squeeze out the extra moisture — too much liquid can make your bread dense.
Why did my banana bread sink in the middle?
This usually happens when the bread is underbaked or when the oven temperature is too low. Make sure your oven is properly preheated to 350°F. Also, don’t open the oven door during the first 40 minutes of baking — the temperature drop can cause the bread to collapse.
Can I make this recipe without sour cream?
Yes, you can substitute an equal amount of plain Greek yogurt or buttermilk. The texture won’t be quite as rich, but it’ll still be moist and delicious. If using buttermilk, reduce the baking soda to ¾ teaspoon since buttermilk is less acidic than sour cream.
How do I know when my bananas are ripe enough?
Look for bananas with brown spots covering at least half the peel. They should be soft to the touch and smell sweet. If your bananas are still yellow, you can speed up the ripening process by placing them in a paper bag with an apple overnight.
Can I double this recipe?
Yes, this recipe doubles beautifully. Use a larger bowl and bake in two loaf pans. The baking time will be about the same. If you only have one loaf pan, you can refrigerate the second batch of batter for up to 24 hours before baking.
Pin This Recipe!
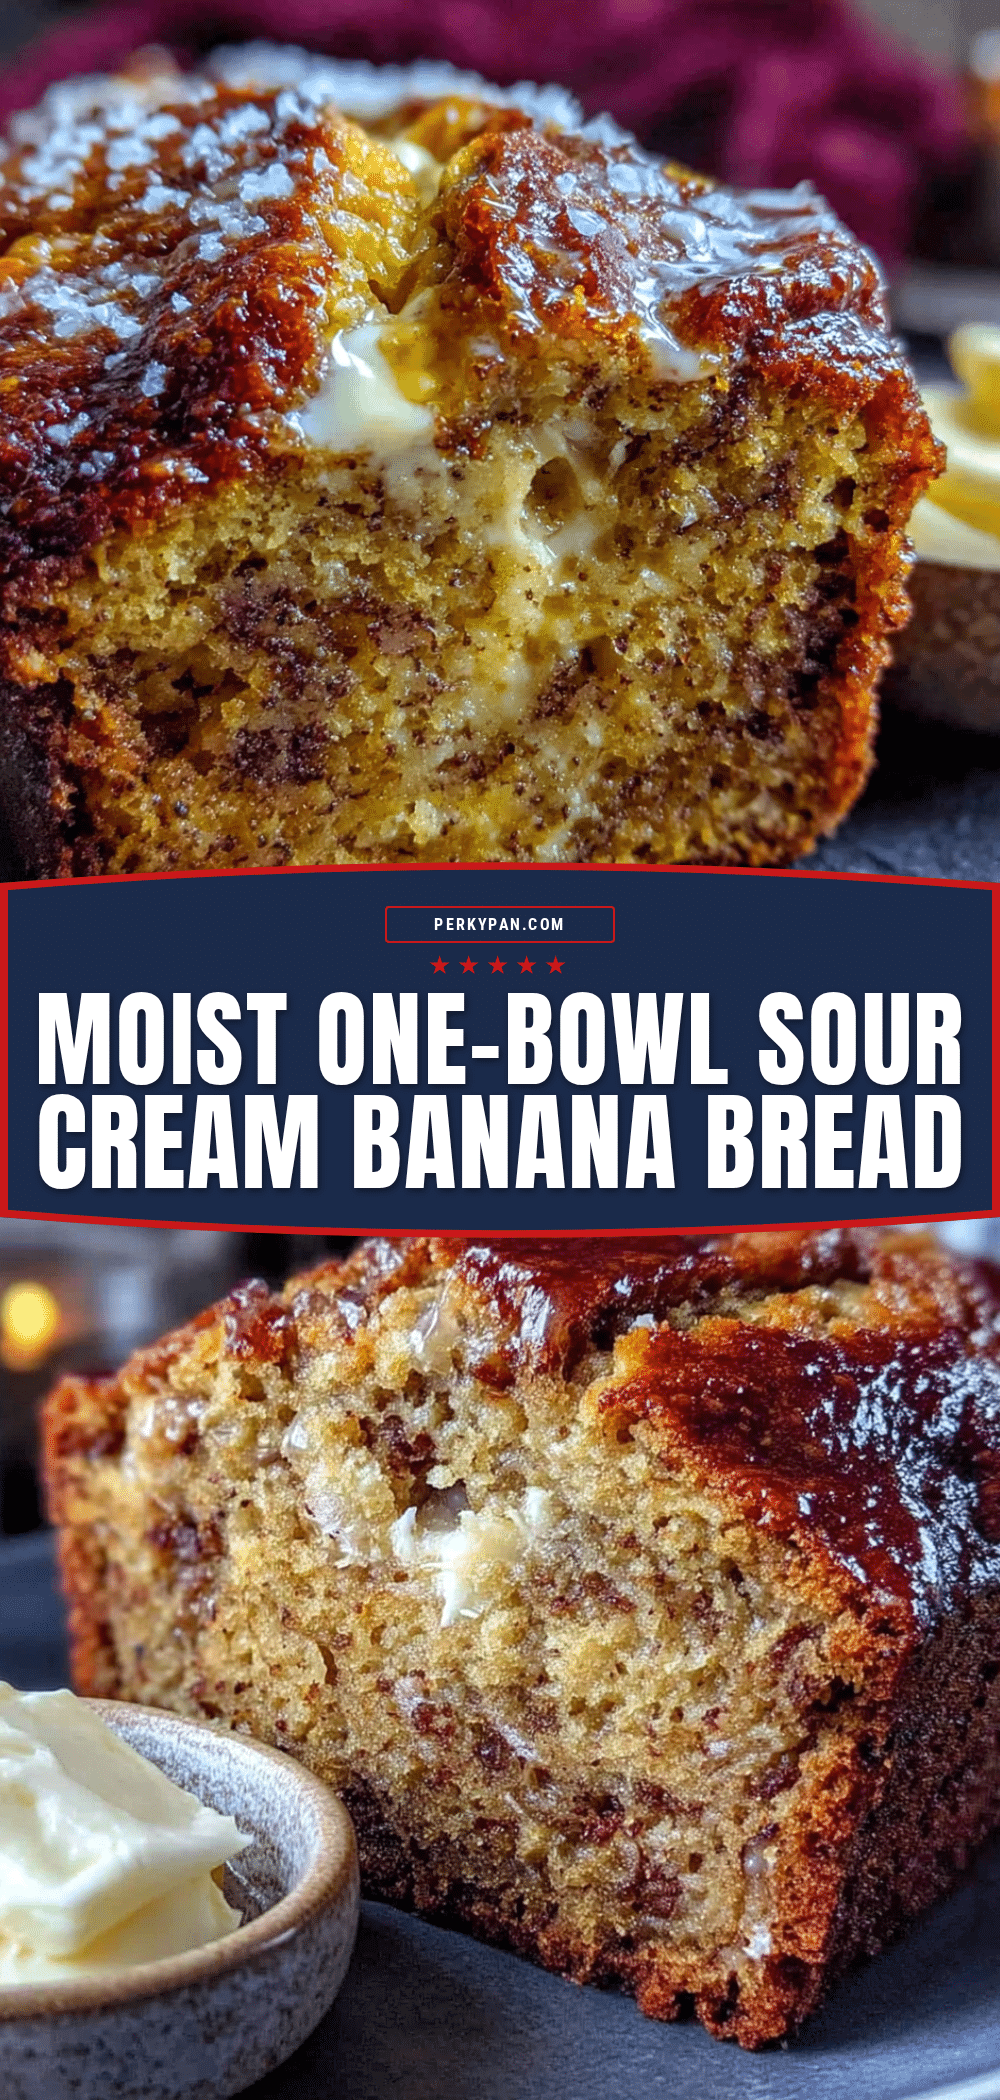
Moist One-Bowl Sour Cream Banana Bread Recipe
This incredibly moist and tender banana bread uses sour cream for richness and comes together in one bowl with no fuss. Perfect for using up overripe bananas, it’s a foolproof recipe that delivers a golden, perfectly domed loaf every time.
- Prep Time: 15 minutes
- Cook Time: 55-65 minutes
- Total Time: 1 hour 10 minutes - 1 hour 20 minutes
- Yield: 12 servings 1x
- Category: Dessert
- Cuisine: American
Ingredients
- 3 ripe bananas, mashed (about 1½ cups)
- ½ cup unsalted butter, melted (1 stick)
- 1 cup granulated sugar
- 2 large eggs, room temperature
- 1 teaspoon vanilla extract
- ½ cup sour cream (full-fat recommended)
- 1½ cups all-purpose flour
- 1 teaspoon baking soda
- ½ teaspoon salt
- Optional: ½ cup chopped walnuts or chocolate chips
Instructions
- Preheat your oven to 350°F (175°C). Grease a 9×5-inch loaf pan or line it with parchment paper, leaving overhang on the sides for easy removal.
- Mash the bananas in your large mixing bowl with a fork or potato masher until mostly smooth with a few small lumps.
- Add the melted butter to the bananas and stir until combined. The butter should be warm, not hot.
- Add the sugar, eggs, vanilla extract, and sour cream. Whisk everything together until smooth and glossy.
- Add the flour, baking soda, and salt directly to the wet ingredients. Gently fold with a spatula or wooden spoon until just combined—do not overmix. A few lumps are okay.
- Fold in any add-ins (e.g., chocolate chips or walnuts) if using, with just a few strokes.
- Pour the batter into the prepared loaf pan and spread evenly. The batter will be thick.
- Bake for 55-65 minutes, starting to check at 50 minutes. The bread is done when a toothpick inserted into the center comes out clean or with a few moist crumbs. The top should be golden brown and cracked.
- Cool in the pan for 10 minutes, then lift the bread out using the parchment paper and transfer to a cooling rack.
- Cool completely before slicing (at least 30 minutes) to avoid a gummy texture.
Notes
For best results, use very ripe bananas (brown spots on at least 50% of peel). If the top browns too quickly, tent loosely with aluminum foil for the last 15 minutes. The bread tastes even better on the second day. Store wrapped tightly at room temperature for up to 3 days, or freeze for up to 3 months.
Nutrition
- Serving Size: 1 slice
- Calories: 245
- Sugar: 18
- Sodium: 210
- Fat: 11
- Saturated Fat: 6
- Carbohydrates: 34
- Fiber: 1.5
- Protein: 4
Keywords: banana bread, sour cream banana bread, one-bowl banana bread, moist banana bread, easy banana bread, quick bread, overripe bananas


