Love this? Save it for later!
Share the inspiration with your friends
I was standing in line at the DMV—the absolute last place you’d expect to find a life-changing dessert recipe. The woman ahead of me, clutching a folder of paperwork and wearing a faded t-shirt that said “I <3 My Cat,” turned around and asked if I baked. I admitted I did, mostly, and she launched into a description of this spider web chocolate cookie cake she’d been making for her daughter’s Halloween parties. She didn’t have it written down; she just recited it from memory while we inched toward the counter. I scribbled it on the back of an old receipt. Honestly, I thought I’d lose that scrap of paper, but here we are, years later, and I still make this cake every October.
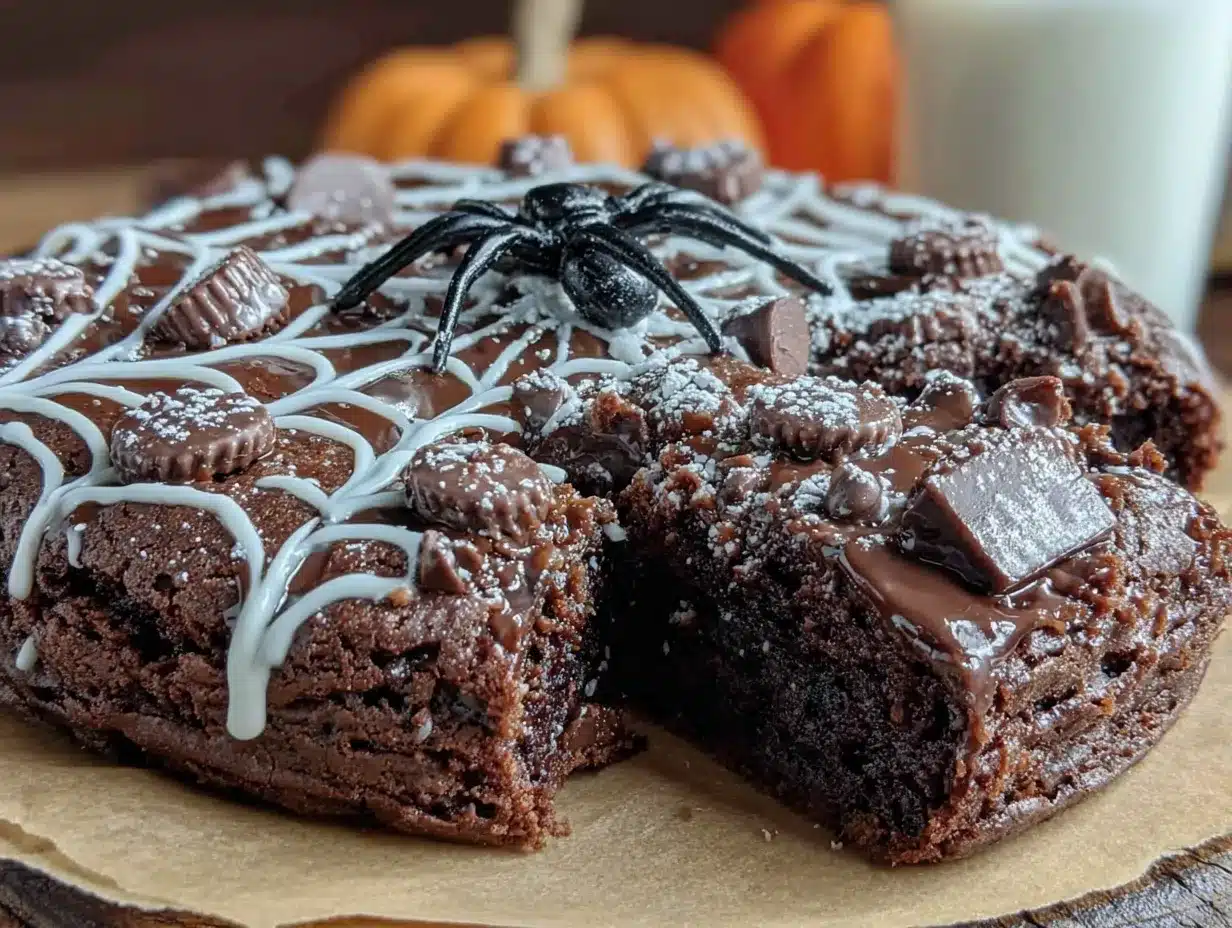
This isn’t your average chocolate cake. It’s dense and fudgy, almost like a giant cookie, with a creamy frosting that gets swirled into a spider web pattern on top. The first time I made it, I forgot to soften the butter—classic move—so the frosting came out lumpy. I had to start over, muttering to myself while the cat watched from the counter. But that second batch? Perfect. The web design was crisp, the cake was moist, and I finally understood why that woman at the DMV was so passionate about it.
Maybe you’ve been there—looking for a Halloween dessert that’s impressive but not complicated. Something that looks like you spent hours on it but actually comes together in under an hour. That’s this spider web chocolate cookie cake. It’s the kind of recipe that makes people say, “Wait, you made that?” and then they take a bite and go quiet. I’ve been making it every October since that day at the DMV, and it never gets old. Let me show you how to make it.
Why You’ll Love This Recipe
Let me tell you why this spider web chocolate cookie cake has earned a permanent spot in my fall baking rotation. I’ve tested this recipe at least a dozen times—sometimes with different cocoa powders, once with a gluten-free flour blend (which actually worked!), and even with a dairy-free frosting. Each time, it delivered that same rich, fudgy texture and that stunning web design that makes everyone at the party stop and stare.
- Quick & Easy: From start to finish, this cake takes about 45 minutes. The dough comes together in one bowl, and the frosting is a simple buttercream. Perfect for a last-minute Halloween treat or a weekend baking project with kids.
- Simple Ingredients: You probably have most of these in your pantry right now. Butter, sugar, eggs, flour, cocoa powder—nothing fancy. The only special item is black gel food coloring for the web, but you can skip it and still get a gorgeous effect.
- Perfect for Halloween: This cake is the star of any spooky gathering. It looks like a giant spider web, which is both beautiful and a little creepy. Kids love it, adults love it, and it photographs beautifully for social media.
- Crowd-Pleaser: I’ve brought this to three different Halloween parties, and it’s always the first dessert to disappear. The combination of fudgy chocolate cake and creamy vanilla frosting is irresistible.
- Unbelievably Delicious: The texture is what sets this apart. It’s denser than a regular cake—more like a giant chocolate cookie. The edges get slightly crisp, while the center stays soft and gooey. That contrast, paired with the smooth frosting, is next-level comfort food.
What makes this recipe different from the rest? It’s the technique. Instead of a traditional cake batter, you’re making a cookie dough that bakes into a thick, fudgy disc. The frosting is piped on in concentric circles, then dragged outward with a toothpick to create the web. It’s simple, but the effect is stunning. You’ll feel like a professional baker without any of the stress.
This isn’t just a cake—it’s the kind that makes you close your eyes after the first bite. It’s comfort food reimagined for Halloween: indulgent, festive, and surprisingly easy. Perfect for impressing guests without breaking a sweat, or turning a simple October evening into something memorable.
What Ingredients You Will Need
This spider web chocolate cookie cake uses simple, everyday ingredients to create something truly special. The magic is in how they come together—the butter and sugar create that perfect cookie texture, while the cocoa powder delivers deep chocolate flavor without being too sweet. Here’s everything you need:
For the Cookie Cake Base
- 1 cup (226g) unsalted butter, softened – I always use Kerrygold for its rich flavor, but any good-quality butter works. Make sure it’s at room temperature for easy creaming.
- 1 cup (200g) granulated sugar – Adds sweetness and helps create that slightly crisp edge.
- 1 large egg, room temperature – Brings the dough together. Cold eggs can seize the butter, so let it sit out for 30 minutes first.
- 1 teaspoon vanilla extract – Pure vanilla, not imitation. It makes a difference in the overall flavor.
- 1 ½ cups (190g) all-purpose flour – Spoon and level it; don’t scoop directly from the bag or you’ll get too much.
- ½ cup (45g) unsweetened cocoa powder – I prefer Dutch-process for a deeper, more mellow chocolate flavor, but natural cocoa works too.
- ½ teaspoon baking soda – Helps the cookie cake spread just enough without puffing up too much.
- ¼ teaspoon salt – Balances the sweetness and enhances the chocolate.
For the Vanilla Buttercream Frosting
- ½ cup (113g) unsalted butter, softened – Again, room temperature is key for a smooth, lump-free frosting.
- 2 cups (240g) powdered sugar – Sift it if you have time; it prevents tiny lumps.
- 2 tablespoons heavy cream – Or milk, but cream gives a richer texture.
- 1 teaspoon vanilla extract – For that classic buttercream flavor.
- Black gel food coloring – I use Americolor Super Black. Liquid food coloring won’t give you the same deep color and can thin the frosting.
Ingredient Tips & Substitutions
For the cocoa powder, I recommend Ghirardelli or Hershey’s Special Dark for a richer taste. If you’re gluten-free, swap the all-purpose flour with a 1:1 gluten-free baking blend—I’ve used Bob’s Red Mill with great results. For a dairy-free version, use plant-based butter and coconut cream in the frosting. The texture will be slightly different, but still delicious. If you don’t have black gel food coloring, you can leave the frosting white and pipe the web with melted dark chocolate instead—it looks just as striking.
Equipment Needed
You don’t need a fancy kitchen to make this spider web chocolate cookie cake. Here’s what you’ll need:
- 9-inch round cake pan or springform pan – A springform pan makes it easier to remove the cake, but a regular cake pan works too. Just line the bottom with parchment paper for easy release.
- Electric hand mixer or stand mixer – For creaming the butter and sugar, and for making the frosting. A whisk and some elbow grease will work, but your arm will thank you for using a mixer.
- Mixing bowls – One large for the dough, one medium for the frosting.
- Piping bag or zip-top bag – For piping the frosting. I’ve used both; a piping bag with a round tip gives more control, but a zip-top bag with the corner snipped off works fine.
- Toothpick or skewer – This is the secret tool for creating the spider web design. A toothpick is perfect for dragging the frosting outward.
- Cooling rack – Essential for letting the cake cool completely before frosting. Patience is key here.
- Measuring cups and spoons – For accurate measurements. Baking is a science, after all.
If you don’t have a springform pan, don’t worry. I’ve made this in a regular cake pan lined with parchment paper, and it came out perfectly. Just let it cool in the pan for 10 minutes, then run a knife around the edge and flip it out onto the cooling rack. Budget-friendly tip: a basic 9-inch cake pan from a thrift store works just as well as an expensive one.
Preparation Method
Let’s get baking! Follow these steps carefully, and you’ll have a stunning spider web chocolate cookie cake that’ll be the talk of your Halloween party.
- Preheat and prep. Preheat your oven to 350°F (175°C). Grease your 9-inch round cake pan with butter or non-stick spray, then line the bottom with a circle of parchment paper. This ensures the cake releases cleanly.
- Cream the butter and sugar. In a large mixing bowl, beat the softened butter and granulated sugar together until light and fluffy, about 2-3 minutes. Scrape down the sides of the bowl once. The mixture should look pale and slightly increased in volume.
- Add the egg and vanilla. Beat in the egg and vanilla extract until fully incorporated. Don’t overmix here—just until the egg disappears into the butter mixture. If it looks a little curdled, that’s okay; it’ll come together when you add the dry ingredients.
- Mix the dry ingredients. In a separate bowl, whisk together the flour, cocoa powder, baking soda, and salt. This ensures the baking soda is evenly distributed so the cookie cake bakes evenly.
- Combine wet and dry. Gradually add the dry ingredients to the wet mixture, mixing on low speed or folding with a spatula. Stop as soon as the flour disappears. Overmixing will make the cookie cake tough. The dough should be thick and slightly sticky—like a soft cookie dough.
- Press into the pan. Transfer the dough to your prepared pan. Use your hands or a spatula to press it into an even layer. It will be thick, but that’s what we want. Don’t worry about smoothing the top perfectly; it’ll even out as it bakes.
- Bake. Bake for 18-22 minutes. The edges should look set and slightly cracked, but the center will still be soft and slightly underdone. That’s the secret to a fudgy texture. A toothpick inserted in the center should come out with a few moist crumbs, not wet batter.
- Cool completely. Let the cookie cake cool in the pan for 10 minutes, then transfer it to a cooling rack. And I mean completely cool—at least 30 minutes. If you frost it while it’s warm, the frosting will melt into a puddle. I learned this the hard way.
- Make the frosting. While the cake cools, beat the softened butter for the frosting until smooth and creamy. Gradually add the powdered sugar, one cup at a time, beating on low speed. Add the heavy cream and vanilla extract, then beat on medium-high for 2 minutes until light and fluffy. Scoop about ⅓ cup of the frosting into a small bowl and stir in the black gel food coloring until you reach your desired shade. Leave the rest white.
- Frost the cake. Spread the white frosting evenly over the cooled cookie cake. It doesn’t need to be perfect—just a smooth, even layer.
- Pipe the web. Fill your piping bag or zip-top bag with the black frosting. Pipe a small circle in the center of the cake. Then pipe concentric circles around it, spacing them about 1 inch apart, working your way to the edge.
- Create the web effect. Here’s the fun part. Take a toothpick or skewer and gently drag it from the center outward through the black circles, pulling the black frosting into the white. Do this every 1-2 inches around the cake, like drawing spokes on a wheel. The frosting will stretch and create a beautiful web pattern. Wipe the toothpick clean between each drag for the cleanest lines.
- Chill and serve. Refrigerate the cake for at least 15 minutes to set the frosting before slicing. This makes the web design hold its shape better when you cut into it.
Cooking Tips & Techniques
I’ve made this spider web chocolate cookie cake more times than I can count, and I’ve picked up a few tricks along the way. Here’s what I’ve learned:
Don’t overbake. This is the most important tip. The cookie cake should look slightly underdone in the center when you pull it out of the oven. It continues to cook as it cools, so if you wait until it’s fully set, it’ll be dry and crumbly. Trust me, I’ve made that mistake. It’s still edible, but not nearly as fudgy.
Room temperature ingredients matter. I know, it’s annoying to wait for butter and eggs to warm up. But cold butter doesn’t cream properly, and cold eggs can make the dough seize. Set everything out 30 minutes before you start. If you’re in a rush, you can soften butter in the microwave in 5-second bursts, but be careful not to melt it.
Chill the frosting if it gets too soft. If your kitchen is warm, the buttercream might become too soft to pipe clean lines. Pop it in the fridge for 10 minutes, then stir it before piping. The black frosting should be slightly stiffer than the white for the best web effect.
Practice the web drag on a plate first. Before you commit to the cake, try dragging a toothpick through a small dollop of black frosting on a plate. You’ll get a feel for the pressure and speed needed to create clean lines. It’s not hard, but it’s nice to know what to expect.
Use a ruler for even circles. If you’re a perfectionist, lightly mark the cake with a toothpick before piping to space your circles evenly. I usually eyeball it, but a little planning goes a long way.
Clean your toothpick frequently. Each time you drag through the black frosting, some of it sticks to the toothpick. Wipe it clean with a paper towel between each drag. This prevents smudging and keeps the web pattern crisp.
Variations & Adaptations
One of the best things about this spider web chocolate cookie cake is how easy it is to customize. Here are some variations I’ve tried and loved:
- Gluten-Free Version: Swap the all-purpose flour with a 1:1 gluten-free baking blend. I’ve used Bob’s Red Mill and King Arthur Measure for Measure with great results. The texture is slightly more tender, but the fudgy quality remains. Add an extra tablespoon of flour if the dough seems too sticky.
- Peppermint Chocolate: Add ½ teaspoon of peppermint extract to the cookie dough along with the vanilla. For the frosting, crush some candy canes and sprinkle them on top of the web before the frosting sets. It’s a festive twist for Christmas, and the peppermint pairs beautifully with the dark chocolate.
- Orange Creamsicle: Replace the vanilla extract in the frosting with 1 teaspoon of orange extract and a pinch of orange zest. The citrus flavor cuts through the richness and gives it a Halloween-appropriate orange scent. It’s surprisingly refreshing.
- Spider Web Cheesecake Style: Make a no-bake cheesecake filling (cream cheese, sugar, vanilla) and spread it over the cooled cookie cake instead of buttercream. Chill for 2 hours, then pipe the web with melted dark chocolate. It’s richer and creamier, like a hybrid dessert.
- Mini Cookie Cakes: Press the dough into a muffin tin (lined with paper cups) instead of a 9-inch pan. Bake for 12-14 minutes. Frost each mini cake individually. They’re perfect for parties or lunchbox treats.
Serving & Storage Suggestions
This spider web chocolate cookie cake is best served at room temperature or slightly chilled. The frosting firms up nicely in the fridge, which makes slicing cleaner. I like to let it sit out for 10 minutes after refrigerating so the cake softens just a bit.
For presentation, place the cake on a black or orange platter to make the web pattern pop. Add a few plastic spiders on top for a playful touch—kids love it. You can also dust the edges with a little powdered sugar for a “spider web in the morning dew” effect.
This cake pairs beautifully with a glass of cold milk, a scoop of vanilla ice cream, or a hot cup of coffee. For a Halloween party, serve it alongside other spooky treats like ghost-shaped sugar cookies or a bowl of candy corn.
Storage: Keep the cake in an airtight container in the refrigerator for up to 5 days. The cookie cake base stays moist and fudgy, and the frosting holds its shape well. If you’re making it ahead, you can bake the cookie cake up to 2 days in advance and frost it on the day you serve it. Just wrap the cooled cake tightly in plastic wrap and store it at room temperature.
Freezing: You can freeze the unfrosted cookie cake for up to 3 months. Wrap it in plastic wrap, then foil, and thaw it in the fridge overnight before frosting. The frosting itself doesn’t freeze well, so always add it fresh.
Reheating: If you prefer a warm, gooey texture, microwave individual slices for 10-15 seconds. The frosting will soften, but the web pattern will still be visible. It’s like eating a warm cookie straight from the oven.
Nutritional Information & Benefits
Let’s be real—this is a dessert, not a health food. But that doesn’t mean it can’t be enjoyed mindfully. Here’s the estimated nutritional breakdown per slice (based on 8 servings):
- Calories: 420
- Total Fat: 24g
- Saturated Fat: 15g
- Carbohydrates: 50g
- Sugar: 35g
- Protein: 4g
- Fiber: 2g
The cocoa powder in this recipe is a surprising source of antioxidants—flavonoids that can support heart health and reduce inflammation. Dark chocolate in its pure form has benefits, and while this cake has plenty of sugar, the cocoa still contributes a little something good. The butter provides vitamin A and healthy fats, which help your body absorb fat-soluble vitamins.
For dietary considerations: this recipe contains gluten, dairy, and eggs. It can be made gluten-free with a flour blend, and dairy-free with plant-based alternatives. It’s not suitable for vegans as written, but a vegan butter and egg replacer (like flax eggs) could work in a future experiment.
My personal take? This is a treat. It’s for celebrations and cozy nights, not everyday eating. But when you do indulge, savor every bite. Life is too short for bad dessert.
Conclusion
This spider web chocolate cookie cake is proof that the best recipes come from the most unexpected places—like a DMV line on a Tuesday afternoon. It’s simple enough for a beginner baker but impressive enough to steal the show at any Halloween gathering. The fudgy cookie base, the creamy frosting, that stunning web pattern—it all comes together in under an hour with ingredients you probably already have.
I love this recipe because it’s forgiving. Forget to soften the butter? I’ve been there. Overbake it slightly? Still delicious. The first time I made it, the web looked more like a tangled mess than a spider web, but you know what? It still tasted amazing. That’s the beauty of this cake—it’s hard to mess up, and even the imperfect versions are worth eating.
Now I want to hear from you. Have you tried making a spider web dessert before? What’s your favorite Halloween treat? Drop a comment below and share your version of this cake. Did you add a twist? Use a different frosting color? I’d love to see your photos and hear your stories. And if you make this for a party, let me know how it went over. Happy baking, and may your webs be ever crisp!
Frequently Asked Questions
Can I use a different pan size?
Yes, you can use an 8-inch pan for a thicker cookie cake, but increase the baking time by 3-5 minutes. A 10-inch pan will give you a thinner cake—reduce the baking time by 2-3 minutes. Just keep an eye on it and test with a toothpick.
Why did my frosting turn out lumpy?
Lumpy frosting usually means the butter wasn’t soft enough, or the powdered sugar wasn’t sifted. Make sure your butter is at room temperature (soft to the touch, but not melted). Sifting the powdered sugar before adding it also helps. If it’s already lumpy, beat it on high speed for an extra minute—it might smooth out.
Can I make this ahead of time?
Absolutely. Bake the cookie cake up to 2 days in advance and store it wrapped in plastic at room temperature. Frost it on the day you plan to serve it for the freshest look. The web pattern is best when the frosting is freshly piped and chilled.
How do I get the web pattern to look perfect?
Practice makes perfect, but here’s a tip: pipe your black circles evenly and use a clean toothpick for each drag. Wipe the toothpick on a paper towel between each line to prevent smudging. If you make a mistake, smooth the frosting with a spatula and start over—the white frosting is very forgiving.
Can I use melted chocolate instead of black food coloring?
Yes! Melt ¼ cup of dark chocolate chips with 1 teaspoon of coconut oil and let it cool slightly. Use it in place of the black frosting for the web. It gives a glossy, professional look and tastes amazing. Just work quickly because the chocolate will harden as it cools.
Pin This Recipe!
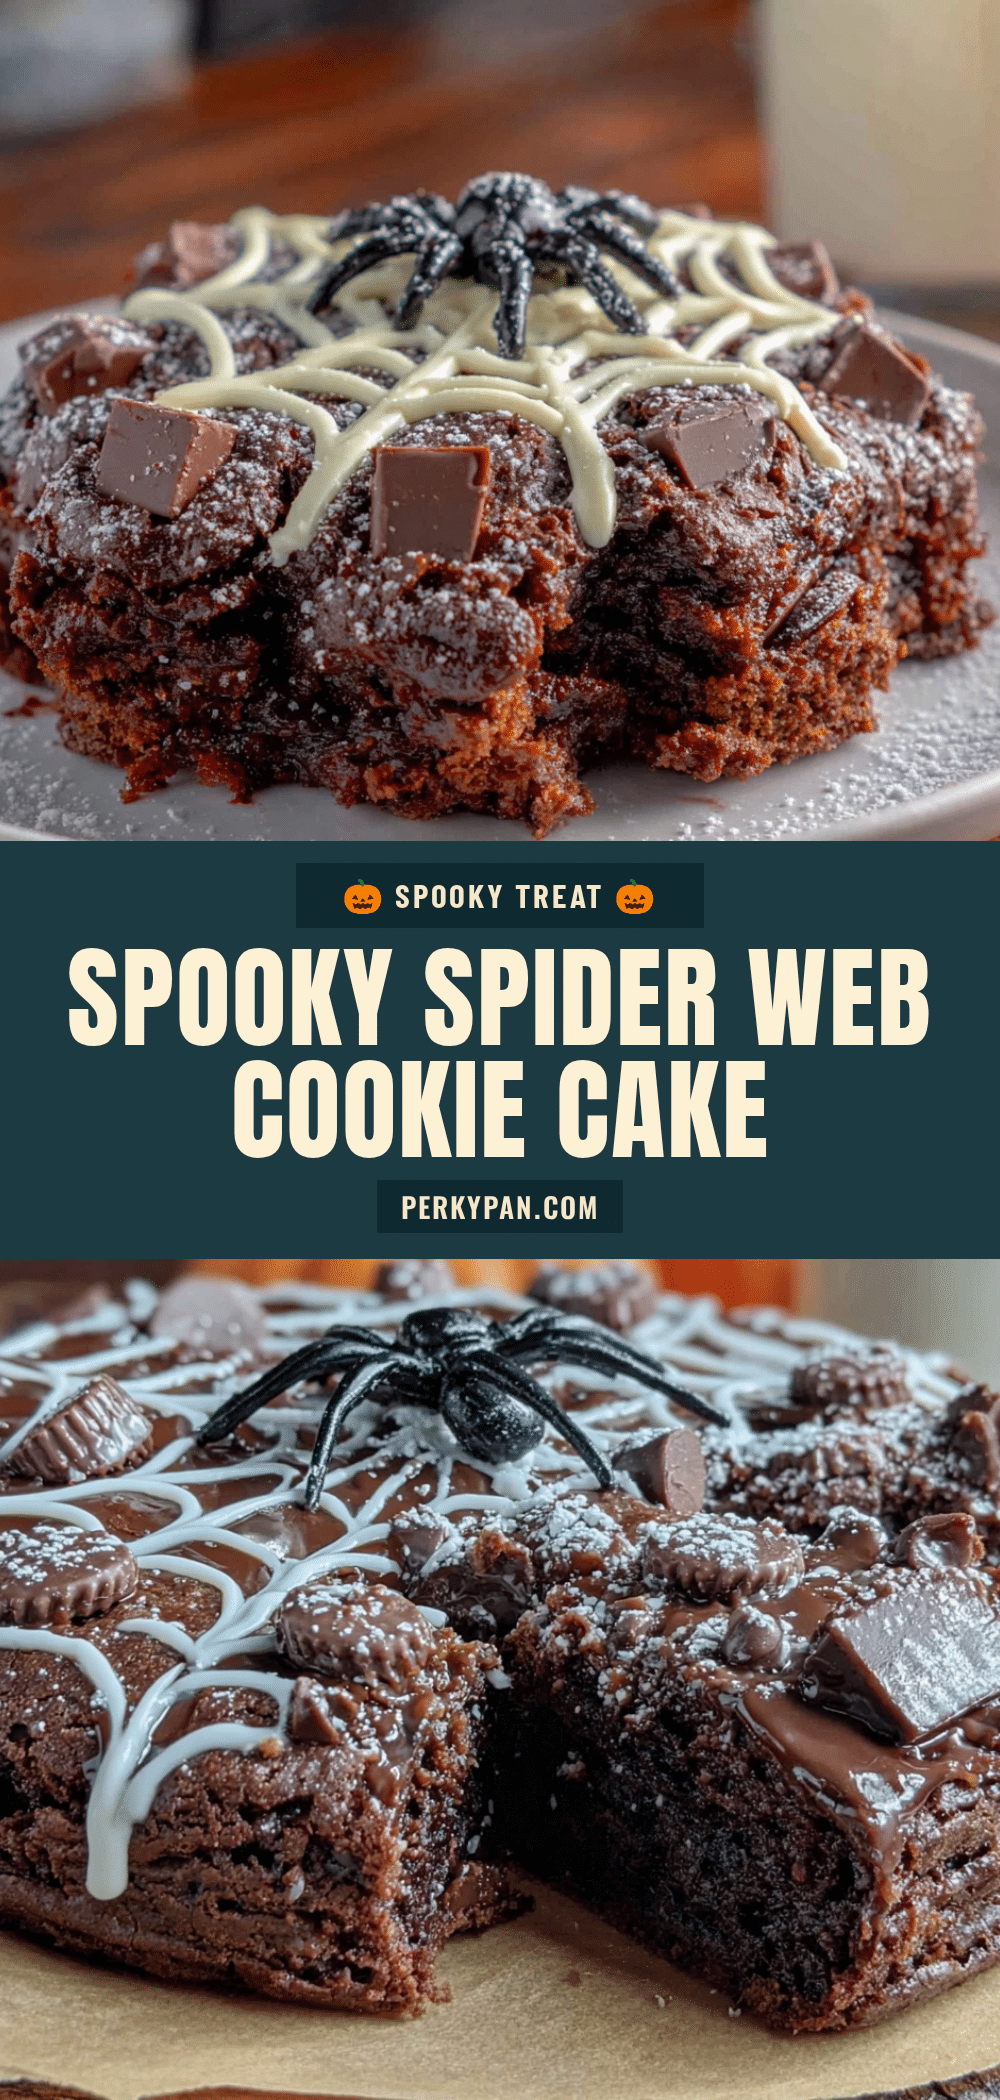
Spider Web Chocolate Cookie Cake – Easy Halloween Dessert
This dense and fudgy chocolate cookie cake is topped with a creamy vanilla buttercream swirled into a spider web pattern. It’s an impressive yet easy Halloween dessert that comes together in under an hour with simple ingredients.
- Prep Time: 15 minutes
- Cook Time: 20 minutes
- Total Time: 45 minutes
- Yield: 8 servings 1x
- Category: Dessert
- Cuisine: American
Ingredients
- 1 cup (226g) unsalted butter, softened
- 1 cup (200g) granulated sugar
- 1 large egg, room temperature
- 1 teaspoon vanilla extract
- 1 ½ cups (190g) all-purpose flour
- ½ cup (45g) unsweetened cocoa powder
- ½ teaspoon baking soda
- ¼ teaspoon salt
- ½ cup (113g) unsalted butter, softened (for frosting)
- 2 cups (240g) powdered sugar
- 2 tablespoons heavy cream
- 1 teaspoon vanilla extract (for frosting)
- Black gel food coloring
Instructions
- Preheat oven to 350°F (175°C). Grease a 9-inch round cake pan and line the bottom with parchment paper.
- In a large bowl, beat softened butter and granulated sugar until light and fluffy, about 2-3 minutes.
- Beat in egg and vanilla extract until fully incorporated.
- In a separate bowl, whisk together flour, cocoa powder, baking soda, and salt.
- Gradually add dry ingredients to wet mixture, mixing on low speed until just combined. Dough should be thick and slightly sticky.
- Press dough evenly into prepared pan.
- Bake for 18-22 minutes until edges are set but center is still soft. Cool in pan for 10 minutes, then transfer to a cooling rack to cool completely (at least 30 minutes).
- For frosting: Beat softened butter until smooth. Gradually add powdered sugar, then heavy cream and vanilla. Beat on medium-high for 2 minutes until fluffy.
- Remove about ⅓ cup of frosting and stir in black gel food coloring until desired shade is reached.
- Spread white frosting evenly over cooled cookie cake.
- Fill a piping bag with black frosting. Pipe a small circle in the center, then concentric circles spaced about 1 inch apart out to the edge.
- Using a toothpick, gently drag from the center outward through the black circles every 1-2 inches to create a web pattern. Wipe toothpick clean between each drag.
- Refrigerate for at least 15 minutes to set frosting before slicing.
Notes
Don’t overbake – the center should look slightly underdone for a fudgy texture. Room temperature ingredients are important for proper creaming. Chill frosting if it gets too soft for piping. Practice the web drag on a plate first if needed. Clean toothpick between each drag for crisp lines.
Nutrition
- Serving Size: 1 slice
- Calories: 420
- Sugar: 35
- Sodium: 180
- Fat: 24
- Saturated Fat: 15
- Carbohydrates: 50
- Fiber: 2
- Protein: 4
Keywords: spider web cake, chocolate cookie cake, Halloween dessert, fudgy chocolate cake, easy Halloween recipe


