Love this? Save it for later!
Share the inspiration with your friends
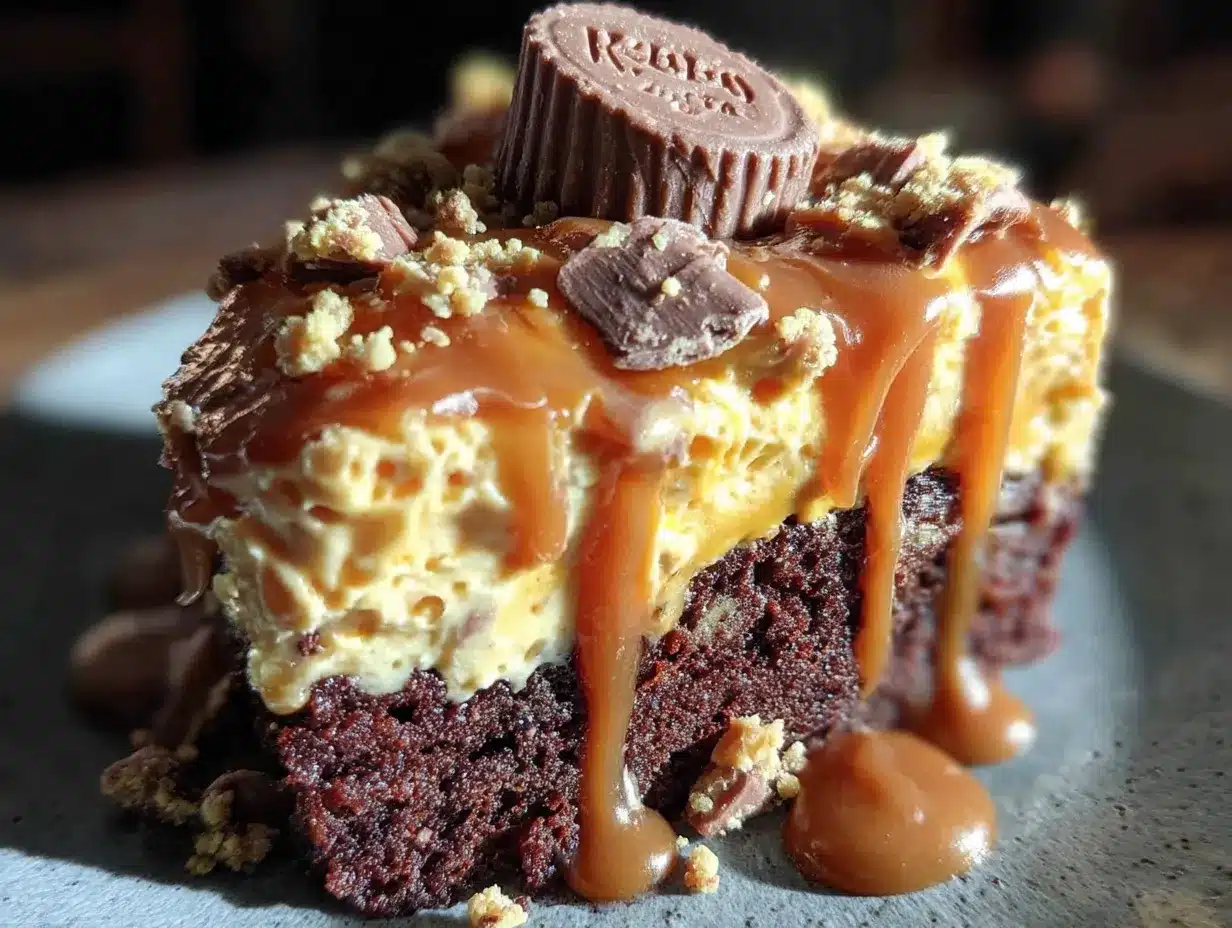
Last Tuesday, I walked into the break room at my daughter’s school and saw a cake sitting on the counter that made me stop mid-sentence. I was mid-rant about a project deadline, and honestly, I forgot what I was saying. The cake was covered in what looked like a waterfall of chocolate ganache, with peanut butter cups peeking out like little treasures. My friend Jen, who works the front desk, just laughed and handed me a fork. “It’s my grandma’s poke cake,” she said, “but I added a little something.” That little something turned out to be a whole lot of Reese’s.
I stood there, fork in hand, trying to have a normal conversation while my brain was completely distracted by the layers of chocolate cake, the creamy peanut butter filling seeping into every forkful, and that signature crunch of chopped peanut butter cups on top. I mean, I’ve had poke cakes before. I’ve even made a few. But this one? This one was different. It had this perfect balance of textures—soft, gooey, crunchy, creamy—all in one bite. I asked Jen for the recipe before I even finished my slice. She scribbled it on a sticky note, and I practically ran home to try it myself. Maybe you’ve been there—you taste something and you just know you need to make it, like, immediately.
Now, I’ve tweaked it a bit since that first sticky-note version. I swapped the boxed mix for a from-scratch chocolate cake that’s richer and stays moist for days. I added a little more peanut butter to the filling because, let’s be real, you can never have too much. And I figured out the best way to get that ganache to set just right so it slicks perfectly over the top without turning into a puddle. This cake has become my go-to for potlucks, birthday parties, and honestly, random Tuesdays when I need a little joy. It’s the kind of dessert that makes people close their eyes when they take a bite. And that’s why I keep making it.
Why You’ll Love This Recipe
Let me tell you why this Reese’s Peanut Butter Chocolate Poke Cake has earned a permanent spot in my recipe binder. I’ve tested this cake more times than I care to admit—some batches were too dry, some fillings were too runny, and one time I forgot the eggs entirely (don’t ask). But this version? It’s the one. It’s the one I bring to every gathering, the one people ask me for, and the one that disappears faster than anything else on the dessert table.
- Quick & Easy: This cake comes together in about 45 minutes of active time, plus chilling. It’s perfect for busy weeknights when you need a showstopper without spending all day in the kitchen.
- Simple Ingredients: You probably have most of these in your pantry already. Cocoa powder, flour, sugar, butter, eggs, peanut butter, and a bag of Reese’s cups. No fancy grocery trips needed.
- Perfect for Parties: This cake is a crowd-pleaser through and through. I’ve brought it to birthday parties, church potlucks, and neighborhood cookouts, and it always gets rave reviews from kids and adults alike.
- Crowd-Pleaser: Seriously, I’ve never met anyone who didn’t love this cake. It’s got chocolate, peanut butter, and that irresistible poke-cake texture that soaks up all the goodness.
- Unbelievably Delicious: The combination of moist chocolate cake, creamy peanut butter filling, and rich chocolate ganache is next-level comfort food. It’s the kind of dessert that makes you close your eyes after the first bite.
What makes this recipe different from all the other poke cakes out there? It’s the technique. Instead of just pouring sweetened condensed milk over the cake, I make a proper peanut butter filling that seeps into every hole and creates these little pockets of creamy goodness. The ganache is made with real chocolate, not just cocoa powder, so it sets up with a beautiful shine. And the chopped Reese’s on top? That’s the final touch that takes it over the top.
This cake isn’t just good—it’s the kind that makes you close your eyes after the first bite. It’s comfort food reimagined, with the same soul-soothing satisfaction but a little extra love. Perfect for impressing guests without stress, or turning a simple Tuesday into something memorable.
What Ingredients You Will Need
This recipe uses simple, wholesome ingredients to deliver bold flavor and satisfying texture without the fuss. Most of these are pantry staples, so you can whip this up anytime a craving strikes. Here’s everything you’ll need:
For the Chocolate Cake
- 2 cups all-purpose flour (spooned and leveled for accuracy)
- 2 cups granulated sugar
- 3/4 cup unsweetened cocoa powder (I prefer Ghirardelli for its deep chocolate flavor)
- 2 teaspoons baking soda
- 1 teaspoon baking powder
- 1 teaspoon salt
- 1 cup buttermilk, room temperature (adds incredible moisture)
- 1/2 cup vegetable oil
- 2 large eggs, room temperature
- 2 teaspoons vanilla extract
- 1 cup hot coffee (or hot water—coffee enhances the chocolate flavor without making it taste like coffee)
For the Peanut Butter Filling
- 1 can (14 ounces) sweetened condensed milk
- 1/2 cup creamy peanut butter (I use Jif for consistent texture, but any brand works)
- 1 teaspoon vanilla extract
For the Chocolate Ganache
- 1 cup heavy cream
- 8 ounces semi-sweet chocolate chips (or chopped chocolate bars)
- 2 tablespoons unsalted butter, softened
For the Topping
- 1 1/2 cups chopped Reese’s Peanut Butter Cups (about 12-15 mini cups or 6 regular-sized cups)
- Optional: 1/4 cup chopped salted peanuts for extra crunch
Ingredient Tips: Make sure your buttermilk and eggs are at room temperature for the best texture. If you don’t have buttermilk, you can make a quick substitute by adding 1 tablespoon of lemon juice or white vinegar to 1 cup of milk and letting it sit for 5 minutes. For the peanut butter, use creamy, not chunky, for the smoothest filling. And please, please use good-quality chocolate for the ganache—it makes a huge difference in the final taste and shine.
Equipment Needed
You don’t need a ton of fancy equipment for this cake, which is part of why I love it. Here’s what you’ll need:
- 9×13-inch baking pan (glass or metal works fine)
- Electric hand mixer or stand mixer (for the cake batter—you can mix by hand, but it’s a workout)
- Large mixing bowls (at least two)
- Medium saucepan (for the ganache)
- Wooden skewer or the handle of a wooden spoon (for poking holes)
- Measuring cups and spoons
- Whisk
- Spatula
- Cutting board and sharp knife (for chopping the Reese’s)
If you don’t have an electric mixer, you can absolutely mix the cake batter by hand with a whisk. It just takes a little more elbow grease. And if you don’t have a wooden skewer for poking holes, a chopstick or even the tines of a fork will work—just make sure the holes are big enough for the filling to seep in.
Preparation Method
Alright, let’s get to the fun part. Follow these steps carefully, and you’ll have a cake that’ll make you look like a baking pro.
Step 1: Make the Chocolate Cake
Preheat your oven to 350°F (175°C). Grease your 9×13-inch baking pan with butter or non-stick spray, then dust it with a little cocoa powder—this helps the cake release easily and adds a tiny extra chocolate hit.
In a large bowl, whisk together the flour, sugar, cocoa powder, baking soda, baking powder, and salt. Make sure there are no lumps—if your cocoa powder is clumpy, sift it in.
In a separate bowl, whisk together the buttermilk, oil, eggs, and vanilla extract until smooth. Pour the wet ingredients into the dry ingredients and mix until just combined. Don’t overmix, or the cake will be tough. Now, slowly pour in the hot coffee while mixing on low speed. The batter will be very thin—that’s normal. It’s supposed to be that way.
Pour the batter into your prepared pan and bake for 30-35 minutes, or until a toothpick inserted in the center comes out with just a few moist crumbs. Let the cake cool in the pan for 10 minutes, then poke holes all over the top with your skewer or spoon handle. Space the holes about 1 inch apart.
Step 2: Make the Peanut Butter Filling
While the cake is still warm (this is important!), make the filling. In a medium bowl, whisk together the sweetened condensed milk, peanut butter, and vanilla extract until completely smooth. It should be thick but pourable.
Slowly pour the filling over the warm cake, making sure it seeps into all the holes. Use a spatula to spread it evenly if needed. Don’t worry if some pools on top—it will soak in as the cake cools. Let the cake cool completely at room temperature, then refrigerate for at least 1 hour. This step is crucial for the filling to set properly.
Step 3: Make the Chocolate Ganache
Once the cake is chilled, make the ganache. Place the chocolate chips in a heat-safe bowl. Heat the heavy cream in a small saucepan over medium heat until it just starts to simmer—don’t let it boil. Pour the hot cream over the chocolate chips and let it sit for 3 minutes without stirring. Then, gently whisk until smooth and shiny. Stir in the butter until melted and incorporated.
Let the ganache cool for 5-10 minutes until it thickens slightly but is still pourable. Pour it over the chilled cake and spread it evenly with a spatula. It should cover the entire surface.
Step 4: Add the Toppings
While the ganache is still wet, sprinkle the chopped Reese’s Peanut Butter Cups all over the top. If you’re using salted peanuts, add those too. Gently press them into the ganache so they stick. Refrigerate the cake for at least 2 more hours, or until the ganache is firm. This is the hardest part—waiting.
Cooking Tips & Techniques
I’ve made this cake more times than I can count, and I’ve learned a few things along the way. Here are my best tips for success:
- Don’t skip the coffee. I know it sounds weird, but hot coffee enhances the chocolate flavor without making the cake taste like coffee. If you’re really opposed, use hot water instead, but the cake won’t be as rich.
- Poke the holes while the cake is warm. If you wait until it’s cool, the holes won’t be as effective, and the filling won’t soak in properly. Trust me, I learned this the hard way.
- Use room temperature ingredients. Cold eggs and cold buttermilk can make the batter lumpy and affect the cake’s texture. Take them out of the fridge about 30 minutes before you start.
- Don’t overmix the batter. Mix just until the flour disappears. Overmixing develops gluten, which makes the cake tough and dense. We want tender, not tough.
- Let the ganache cool slightly. If you pour it on while it’s too hot, it will melt the peanut butter filling and create a mess. Let it sit for 5-10 minutes until it’s warm but not hot.
- Chill thoroughly. This cake needs time in the fridge for the filling and ganache to set properly. Don’t rush it—overnight is even better if you have the time.
One time, I was in a hurry and poured the ganache on while it was still too hot. It melted the peanut butter filling and created this weird, separated mess. The cake still tasted good, but it looked terrible. So learn from my mistake—patience is key here.
Variations & Adaptations
This cake is incredibly versatile. Here are some ways to make it your own:
- Gluten-Free Version: Substitute the all-purpose flour with a 1:1 gluten-free baking flour blend. I’ve used Bob’s Red Mill with great results. The texture will be slightly different, but it’s still delicious.
- Dairy-Free Version: Use a dairy-free butter substitute and replace the buttermilk with almond milk mixed with a little lemon juice. For the ganache, use coconut cream instead of heavy cream and dairy-free chocolate chips.
- Peanut-Free Version: Swap the peanut butter for sunflower seed butter or almond butter, and use chopped allergy-friendly chocolate candies instead of Reese’s. The flavor will be different, but the texture will be just as good.
- Extra Chocolatey Version: Add 1/2 cup of chocolate chips to the cake batter before baking, and drizzle some melted white chocolate over the top along with the ganache.
- Salty-Sweet Version: Sprinkle flaky sea salt over the top before the ganache sets. That salty-sweet combo is absolutely addictive.
Personally, I love the salty-sweet version. I tried it on a whim one night when I was craving that combo, and now I can’t go back. The flaky salt cuts through the richness perfectly.
Serving & Storage Suggestions
This cake is best served cold or at room temperature. I actually prefer it straight from the fridge—the filling and ganache are firmer, and the texture is almost like a candy bar. If you want it softer, let it sit out for 15-20 minutes before serving.
For presentation, I like to cut the cake into squares and serve each piece with a dollop of whipped cream or a scoop of vanilla ice cream. The cold, creamy ice cream against the rich, fudgy cake is pure heaven. A drizzle of warm chocolate sauce or caramel would also be amazing.
Storage: Store any leftover cake in an airtight container in the refrigerator for up to 5 days. The flavors actually get better after a day or two as they meld together. You can also freeze the cake for up to 3 months. Wrap individual slices tightly in plastic wrap, then place them in a freezer-safe bag. Thaw in the refrigerator overnight before serving.
Reheating: If you want to enjoy this cake warm, microwave individual slices for 10-15 seconds. Just be careful not to overheat it, or the ganache will melt into a puddle. I like to do this and then add a scoop of ice cream on top—warm cake, cold ice cream. Yes, please.
Nutritional Information & Benefits
Let’s be real—this is a decadent dessert, not a health food. But here’s the estimated nutritional breakdown per serving (based on 16 servings):
| Nutrient | Amount Per Serving |
|---|---|
| Calories | 480 |
| Total Fat | 26g |
| Saturated Fat | 11g |
| Cholesterol | 55mg |
| Sodium | 380mg |
| Total Carbohydrates | 58g |
| Dietary Fiber | 3g |
| Sugars | 42g |
| Protein | 9g |
While this cake is definitely a treat, it does have some redeeming qualities. Peanut butter provides protein and healthy fats, and cocoa powder is rich in antioxidants. The buttermilk adds calcium and probiotics. But honestly, I make this cake because it makes people happy, not because it’s good for them. Everything in moderation, right?
Conclusion
This Reese’s Peanut Butter Chocolate Poke Cake is more than just a dessert—it’s an experience. It’s the cake that makes people stop mid-conversation, the one that gets requested for every birthday and potluck, and the one that disappears before you even get a second slice. I’ve made it for my family, my friends, my neighbors, and even my daughter’s entire third-grade class (they loved it). And every single time, someone asks for the recipe.
I hope you give this cake a try. Don’t be afraid to make it your own—add more peanut butter, swap the chocolate, throw in some pretzels for crunch. The beauty of this recipe is that it’s forgiving and adaptable. And if you make it, I’d love to hear about it. Drop a comment below and let me know how it turned out, or share a photo on Pinterest and tag me. Honestly, seeing your creations is my favorite part of this whole blogging thing.
So go ahead, preheat that oven, and make yourself a cake that’ll make you close your eyes with every bite. You deserve it.
Frequently Asked Questions
Can I use a boxed cake mix instead of making the cake from scratch?
Absolutely! If you’re short on time, a boxed chocolate cake mix works perfectly. Just prepare it according to the package directions for a 9×13-inch pan, then proceed with the poking and filling steps. The from-scratch version is richer, but the boxed version is still delicious.
How long does this cake need to chill before serving?
I recommend at least 3 hours total—1 hour after adding the peanut butter filling and 2 hours after adding the ganache. Overnight is even better. The filling needs time to soak into the cake and set, and the ganache needs time to firm up.
Can I use crunchy peanut butter instead of creamy?
You can, but I don’t recommend it. The crunchy bits can make the filling lumpy and harder to pour into the holes. If you only have crunchy, try blending it in a food processor for a few seconds to smooth it out, or just go with it—the texture will be different but still tasty.
How should I store leftovers?
Store leftovers in an airtight container in the refrigerator for up to 5 days. The cake actually gets better after a day or two as the flavors meld. You can also freeze individual slices wrapped in plastic wrap for up to 3 months.
Can I make this cake ahead of time for a party?
Yes! This cake is perfect for making ahead. Prepare it the day before, let it chill overnight, and add the chopped Reese’s just before serving for the freshest look. The flavors will be even better after a day in the fridge.
Pin This Recipe!
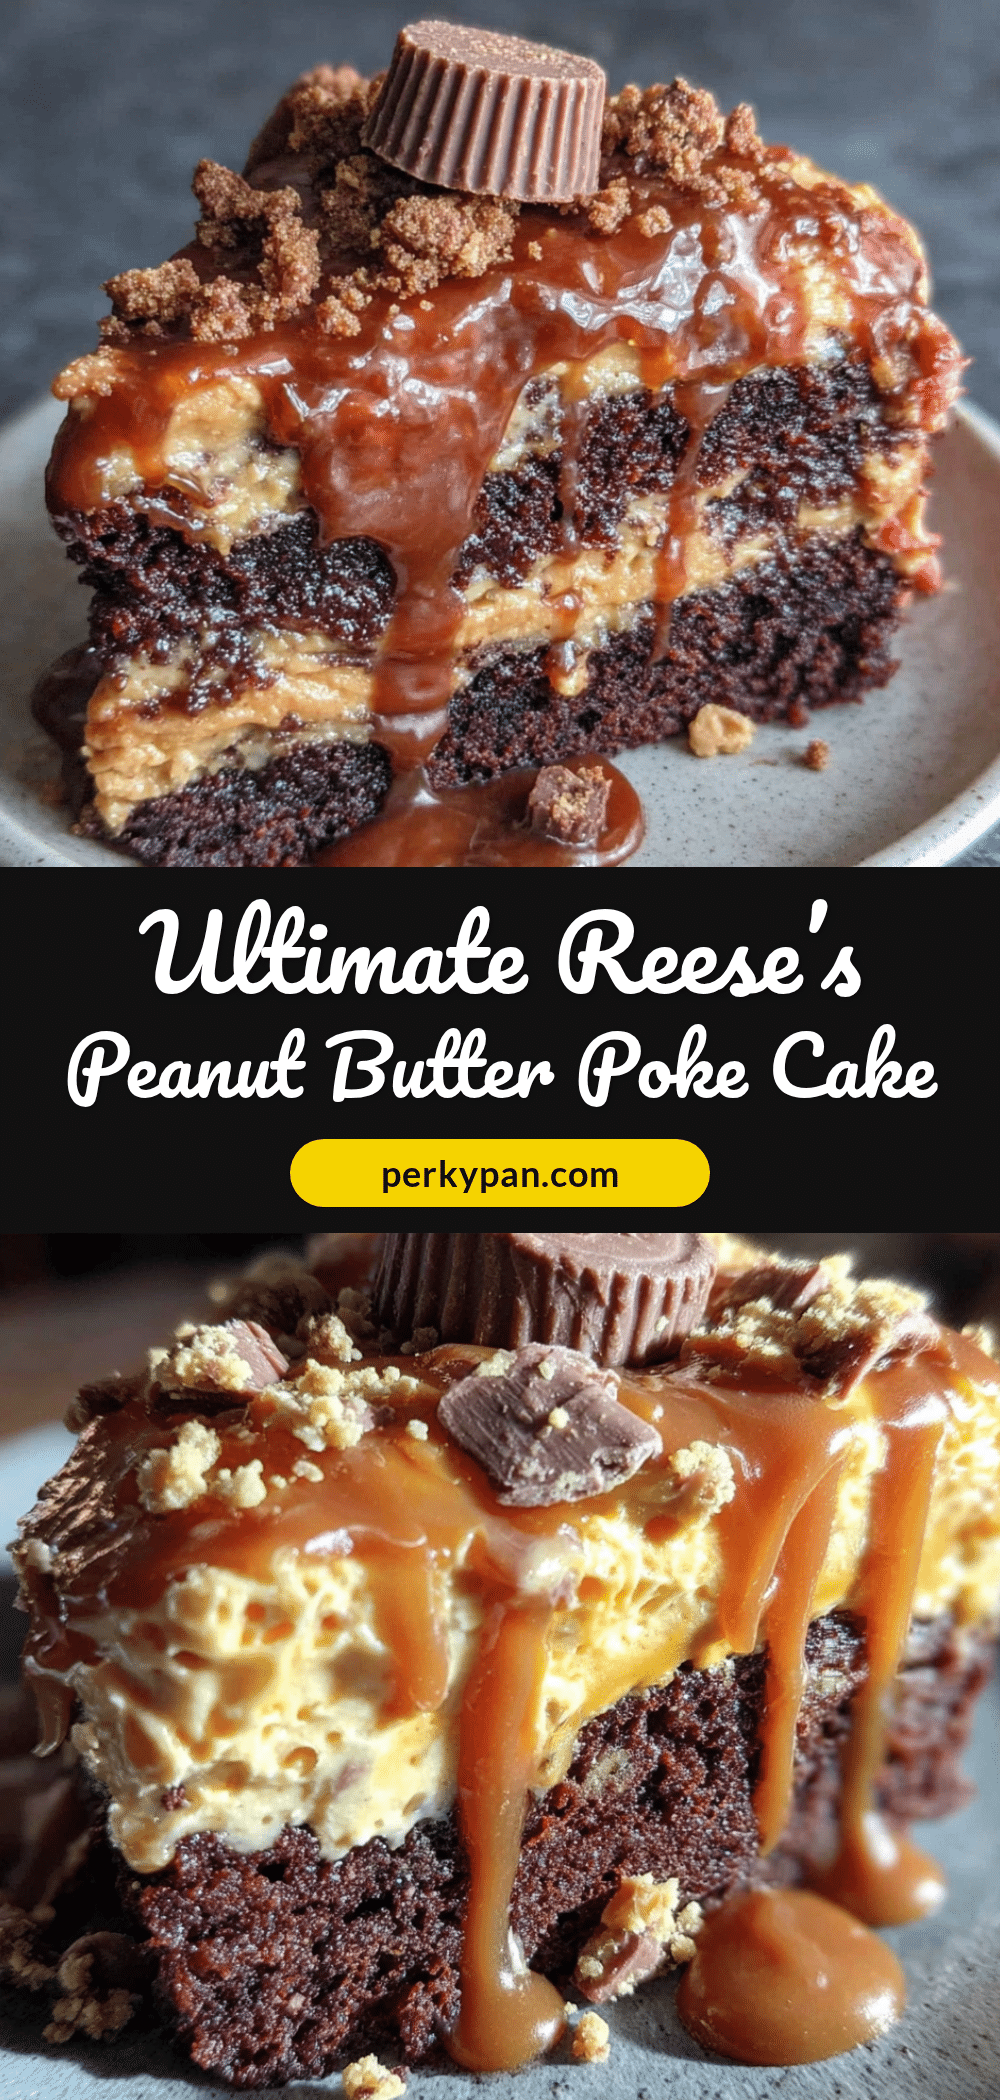
Ultimate Reese’s Peanut Butter Poke Cake Recipe
A decadent chocolate poke cake filled with creamy peanut butter, topped with rich chocolate ganache and chopped Reese’s cups. This crowd-pleasing dessert is perfect for parties and potlucks.
- Prep Time: 45 minutes
- Cook Time: 30 minutes
- Total Time: 3 hours 15 minutes (includes chilling)
- Yield: 16 servings 1x
- Category: Dessert
- Cuisine: American
Ingredients
- 2 cups all-purpose flour (spooned and leveled)
- 2 cups granulated sugar
- 3/4 cup unsweetened cocoa powder
- 2 teaspoons baking soda
- 1 teaspoon baking powder
- 1 teaspoon salt
- 1 cup buttermilk, room temperature
- 1/2 cup vegetable oil
- 2 large eggs, room temperature
- 2 teaspoons vanilla extract
- 1 cup hot coffee (or hot water)
- 1 can (14 ounces) sweetened condensed milk
- 1/2 cup creamy peanut butter
- 1 teaspoon vanilla extract
- 1 cup heavy cream
- 8 ounces semi-sweet chocolate chips (or chopped chocolate bars)
- 2 tablespoons unsalted butter, softened
- 1 1/2 cups chopped Reese’s Peanut Butter Cups (about 12–15 mini cups or 6 regular-sized cups)
- 1/4 cup chopped salted peanuts (optional)
Instructions
- Preheat oven to 350°F (175°C). Grease a 9×13-inch baking pan with butter or non-stick spray and dust with cocoa powder.
- In a large bowl, whisk together flour, sugar, cocoa powder, baking soda, baking powder, and salt until no lumps remain.
- In a separate bowl, whisk together buttermilk, oil, eggs, and vanilla extract until smooth. Pour wet ingredients into dry ingredients and mix until just combined. Slowly pour in hot coffee while mixing on low speed. Batter will be thin.
- Pour batter into prepared pan and bake for 30-35 minutes, or until a toothpick inserted in center comes out with a few moist crumbs. Let cool in pan for 10 minutes.
- While cake is still warm, poke holes all over the top with a wooden skewer or spoon handle, spacing holes about 1 inch apart.
- Make the peanut butter filling: In a medium bowl, whisk together sweetened condensed milk, peanut butter, and vanilla extract until smooth. Pour over warm cake, ensuring it seeps into all holes. Let cool completely at room temperature, then refrigerate for at least 1 hour.
- Make the chocolate ganache: Place chocolate chips in a heat-safe bowl. Heat heavy cream in a small saucepan over medium heat until it just simmers. Pour hot cream over chocolate chips and let sit for 3 minutes without stirring. Gently whisk until smooth and shiny. Stir in butter until melted.
- Let ganache cool for 5-10 minutes until slightly thickened but still pourable. Pour over chilled cake and spread evenly with a spatula.
- While ganache is still wet, sprinkle chopped Reese’s Peanut Butter Cups and optional salted peanuts over top. Gently press into ganache. Refrigerate for at least 2 hours, or until ganache is firm.
- Serve cold or at room temperature. Cut into squares and enjoy.
Notes
Don’t skip the coffee—it enhances chocolate flavor without tasting like coffee. Poke holes while cake is warm for best absorption. Use room temperature ingredients for best texture. Let ganache cool slightly before pouring to avoid melting the filling. Chill thoroughly for best results; overnight is even better.
Nutrition
- Serving Size: 1 square (1/16 of ca
- Calories: 480
- Sugar: 42
- Sodium: 380
- Fat: 26
- Saturated Fat: 11
- Carbohydrates: 58
- Fiber: 3
- Protein: 9
Keywords: Reese's, peanut butter, poke cake, chocolate cake, ganache, dessert, potluck, birthday cake


