Love this? Save it for later!
Share the inspiration with your friends
There used to be a tiny bakery tucked between a laundromat and a nail salon on the corner of Oak and Elm that made the most incredible pumpkin cheesecake pie. When they closed abruptly two autumns ago, I honestly felt a little lost. That first November without their creamy, spiced slice sitting in a flimsy cardboard box felt wrong, like the holidays had lost a key player. After twelve tries — some were soupy disasters, one was so dense it could have doubled as a doorstop — I finally got it.
This creamy no-bake pumpkin cheesecake pie is the one. It captures that same velvety texture and bold pumpkin flavor, but you don’t even need to turn on the oven. I mean, who wants to heat up the kitchen when you could be sipping cider and watching the leaves fall? The filling sets up beautifully in the fridge, and the gingersnap crust adds this warm, snappy contrast that makes every bite worth closing your eyes for. Maybe you’ve been there, chasing a dessert memory that feels just out of reach. This recipe brings it home.
Why You’ll Love This Recipe
Let me tell you why this creamy no-bake pumpkin cheesecake pie has become my go-to for every fall gathering. It started as a personal mission, but now it is the dessert friends request before I even ask what to bring.
- Quick & Easy: Comes together in under 30 minutes of active time, perfect for busy weeknights or last-minute holiday cravings. No oven required.
- Simple Ingredients: No fancy grocery trips needed; you likely already have cream cheese, pumpkin puree, and spices in your kitchen.
- Perfect for Thanksgiving and Fall Parties: Great for Friendsgiving, potlucks, cozy dinners, or as a make-ahead dessert that frees up oven space.
- Crowd-Pleaser: Always gets rave reviews from kids and adults alike. The texture is so smooth, even people who “don’t like pumpkin” ask for seconds.
- Unbelievably Delicious: The combo of tangy cream cheese, earthy pumpkin, and warm spices is next-level comfort food.
What makes this recipe different from the rest is the technique. Blending the cream cheese with a splash of heavy cream creates an ultra-smooth, mousse-like texture that sets perfectly without gelatin. It isn’t just another no-bake pie — it is my best version, tested and tweaked until it was just right. This recipe is the kind that makes you close your eyes after the first bite. It’s comfort food reimagined — faster, easier, but with the same soul-soothing satisfaction. Perfect for impressing guests without stress, or turning a simple Tuesday into something memorable.
What Ingredients You Will Need
This creamy no-bake pumpkin cheesecake pie uses simple, wholesome ingredients to deliver bold flavor and satisfying texture without the fuss. Most are pantry staples, making it easy to whip up anytime the craving hits.
- For the Crust:
- 2 cups gingersnap cookie crumbs (about 8 ounces, or use graham crackers for a milder flavor)
- 6 tablespoons unsalted butter, melted (adds richness and helps the crust hold together)
- 2 tablespoons granulated sugar (optional, if your cookies aren’t sweet enough)
- Pinch of salt (balances the sweetness)
- For the Filling:
- 16 ounces cream cheese, softened to room temperature (I recommend Philadelphia for the smoothest texture)
- 1 cup pumpkin puree (not pumpkin pie filling — look for 100% pure pumpkin, like Libby’s)
- 3/4 cup packed light brown sugar (adds deep, molasses-like sweetness)
- 1 teaspoon vanilla extract
- 1 teaspoon ground cinnamon
- 1/2 teaspoon ground ginger
- 1/4 teaspoon ground nutmeg
- 1/4 teaspoon ground cloves
- 1/2 cup heavy cream, cold (whipped to stiff peaks for that airy, mousse-like texture)
- For the Topping (optional but recommended):
- 1 cup heavy cream, cold
- 2 tablespoons powdered sugar
- 1/2 teaspoon vanilla extract
- Freshly grated nutmeg or cinnamon for garnish
For the crust, I recommend using store-bought gingersnap cookies for convenience. They have that perfect spicy kick that complements the pumpkin. If you prefer a milder crust, graham crackers work wonderfully too. Look for firm, small-curd cream cheese for best texture — the block kind, not the spreadable tub. In a pinch, you can swap the heavy cream in the filling with full-fat coconut cream for a dairy-free option. Just chill the can overnight and scoop off the solid part.
Equipment Needed
You don’t need a fancy kitchen to pull off this creamy no-bake pumpkin cheesecake pie. Here is what you will need:
- 9-inch pie dish (glass or ceramic works best for even cooling)
- Electric mixer (handheld or stand mixer — I’ve used both, and a hand mixer is totally fine)
- Mixing bowls (one large, one medium)
- Measuring cups and spoons
- Spatula (for scraping down the bowl and smoothing the filling)
- Ziploc bag or rolling pin (for crushing cookies if you don’t have a food processor)
- Plastic wrap (for covering the pie while it chills)
If you don’t have a food processor, no worries. Place the cookies in a ziploc bag and crush them with a rolling pin or even a heavy-bottomed pan. It is a little extra arm work, but oddly satisfying. For the mixer, a handheld electric mixer is a budget-friendly option that works perfectly. Just make sure your bowls are completely clean and dry before whipping the cream.
Preparation Method
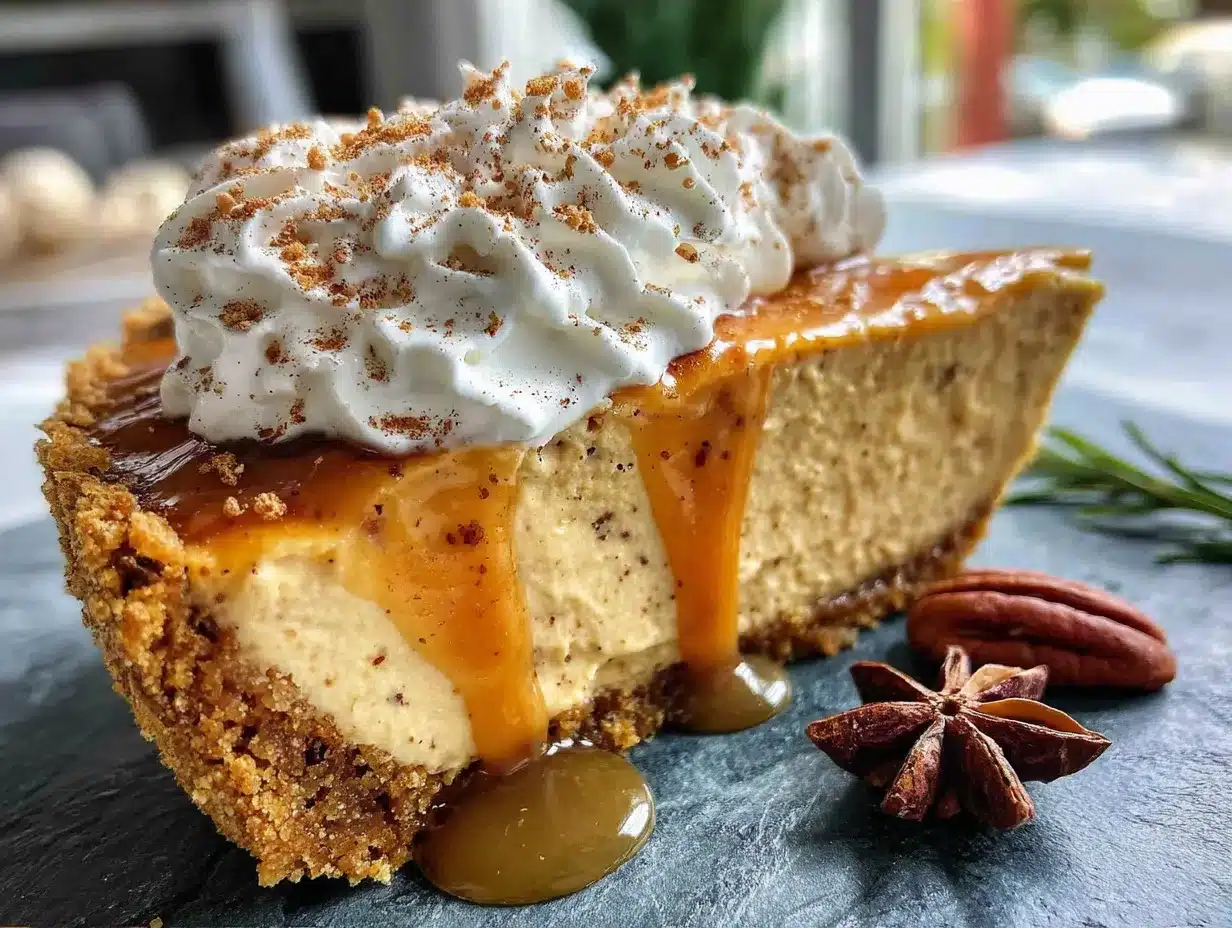
Let me walk you through making this creamy no-bake pumpkin cheesecake pie. I’ve included all the little details that make the difference between a good pie and a great one.
- Make the crust. In a medium bowl, combine the gingersnap crumbs, melted butter, sugar, and salt. Stir until the mixture looks like wet sand and holds together when pressed. Press the mixture firmly and evenly into the bottom and up the sides of a 9-inch pie dish. Use the bottom of a measuring cup to really pack it down. Pop it in the refrigerator to set while you make the filling — about 15 minutes is plenty.
- Whip the cream. In a clean, cold bowl, pour in the heavy cream. Using an electric mixer on medium-high speed, whip the cream until soft peaks form. This takes about 2-3 minutes. You want peaks that hold their shape but are still soft and billowy. Be careful not to over-whip, or you will end up with butter. Set the whipped cream aside in the refrigerator.
- Beat the cream cheese. In a large bowl, beat the softened cream cheese with an electric mixer on medium speed until smooth and creamy, about 2 minutes. Scrape down the sides and bottom of the bowl with a spatula. Make sure there are no lumps — this is the key to a silky filling.
- Add the pumpkin and spices. Add the pumpkin puree, brown sugar, vanilla extract, cinnamon, ginger, nutmeg, and cloves to the cream cheese. Beat on medium speed until everything is well combined and smooth, about 1-2 minutes. Scrape down the bowl again. The mixture will be thick and fragrant — it should smell like fall in a bowl.
- Fold in the whipped cream. Remove the whipped cream from the fridge. Add about one-third of it to the pumpkin mixture and gently fold it in with a spatula. This lightens the mixture and makes it easier to fold in the rest. Add the remaining whipped cream and fold gently until no white streaks remain. Be patient here — over-mixing can deflate the air and make the pie dense.
- Fill the crust. Pour the filling into the chilled crust. Use your spatula to spread it evenly and smooth the top. Give the pie dish a few gentle taps on the counter to release any air bubbles.
- Chill the pie. Cover the pie loosely with plastic wrap and refrigerate for at least 6 hours, but overnight is best. The filling needs time to set and firm up. I know it’s hard to wait, but trust me — it is worth it. The texture becomes perfectly sliceable and incredibly creamy.
- Make the whipped topping (optional). Just before serving, whip the remaining heavy cream, powdered sugar, and vanilla extract until stiff peaks form. Spread or pipe it over the chilled pie. Grate a little fresh nutmeg on top for a beautiful finish.
A quick note: If your filling seems a little soft after chilling, don’t panic. Sometimes it just needs an extra hour or two. Every fridge is a little different. Also, if you are short on time, you can speed up the setting process by placing the pie in the freezer for about 2 hours. Just let it sit at room temperature for 10 minutes before slicing.
Cooking Tips & Techniques
Over the course of my twelve attempts, I learned a few things the hard way. Let me save you some trouble with these tips for the perfect creamy no-bake pumpkin cheesecake pie.
Room temperature ingredients are non-negotiable. I once tried to rush and used cold cream cheese straight from the fridge. The filling turned out lumpy and never really smoothed out. Let your cream cheese sit on the counter for at least 30 minutes before you start. If you are in a hurry, cut it into small cubes and let it sit for 15 minutes.
Don’t skip the crust chilling step. I know it feels like an extra step, but a well-chilled crust holds its shape much better when you add the filling. Otherwise, the crust can get soggy or crumble when you try to slice the pie. Trust me on this one.
Fold, don’t stir. When you add the whipped cream to the pumpkin mixture, use a gentle folding motion. Stirring vigorously will deflate all that lovely air you worked to create. Think of it like you are wrapping the cream around the pumpkin mixture, not beating it in.
Use a metal pie dish for faster chilling. Metal conducts cold much better than glass or ceramic. If you have a metal tart pan, use it. The pie will set faster and more evenly.
One mistake I made early on was using pumpkin pie filling instead of pure pumpkin puree. The pie was overly sweet and had a weird, gelatinous texture. Always check the label — you want 100% pure pumpkin, not the pre-sweetened stuff.
Variations & Adaptations
One of the best things about this creamy no-bake pumpkin cheesecake pie is how easily it adapts to different tastes and dietary needs. Here are a few variations I have tried and loved.
Gluten-Free Version: Swap the gingersnap cookies for gluten-free gingersnaps or gluten-free graham crackers. The rest of the recipe is naturally gluten-free, so this is a simple swap that works beautifully. I have made it this way for a friend with celiac disease, and she couldn’t tell the difference.
Dairy-Free Version: Use dairy-free cream cheese (like Kite Hill or Tofutti) and replace the heavy cream with full-fat coconut cream. Chill the can of coconut milk overnight, then scoop off the solid cream and whip it just like regular cream. The flavor is slightly different, but still deliciously creamy.
Chocolate-Pumpkin Swirl: Melt 4 ounces of dark chocolate and let it cool slightly. After you pour the filling into the crust, drop spoonfuls of melted chocolate on top and swirl it with a knife. The chocolate adds a rich, decadent layer that pairs perfectly with the pumpkin spice.
Maple Pecan Topping: Instead of the whipped cream, top the pie with a layer of maple-flavored whipped cream and sprinkle with toasted pecans. Just add 2 tablespoons of maple syrup to the whipped cream instead of powdered sugar. The nutty crunch is amazing.
Spice It Up: If you like a bolder spice profile, add 1/4 teaspoon of cardamom or a pinch of black pepper to the filling. It sounds unusual, but black pepper actually enhances the flavor of pumpkin and cinnamon.
Serving & Storage Suggestions
This creamy no-bake pumpkin cheesecake pie is best served cold, straight from the refrigerator. The texture is at its peak when it is well-chilled — firm enough to slice cleanly but still incredibly creamy and luscious on the tongue.
For a beautiful presentation, run a thin knife under hot water, wipe it dry, and then slice the pie. Wipe the knife clean between each slice for picture-perfect pieces. Serve each slice with a generous dollop of whipped cream and a light dusting of cinnamon or freshly grated nutmeg.
This pie pairs wonderfully with a cup of hot coffee, spiced chai latte, or a glass of cold milk. For a full fall dessert spread, serve it alongside a warm apple crisp or a slice of classic pumpkin bread.
Storage: Cover the pie tightly with plastic wrap or transfer it to an airtight container. It will keep in the refrigerator for up to 5 days. The flavors actually deepen and meld together after a day or two, so leftovers are often even better.
Freezing: You can freeze this pie for up to 2 months. Wrap it tightly in plastic wrap, then a layer of aluminum foil. Thaw it overnight in the refrigerator before serving. Do not freeze the pie with the whipped topping — add that fresh after thawing.
Reheating: This is a no-bake pie, so there is no need to reheat it. However, if you prefer a slightly softer texture, let it sit at room temperature for 10-15 minutes before slicing.
Nutritional Information & Benefits
Here is an approximate nutritional breakdown per serving (based on 12 servings, without optional whipped topping):
- Calories: 380
- Fat: 26g
- Carbohydrates: 32g
- Protein: 6g
- Fiber: 2g
- Sugar: 22g
While this is definitely a treat, it does offer some surprising benefits. Pumpkin is packed with vitamin A, which supports eye health and immune function. It also provides fiber and potassium. The cream cheese adds a good amount of protein and calcium. The spices — cinnamon, ginger, and nutmeg — are known for their anti-inflammatory properties.
This pie is naturally vegetarian and can be made gluten-free or dairy-free with simple substitutions. It contains dairy, gluten (depending on the crust), and nuts (if using pecan topping). Always check your specific ingredient labels for allergens.
I love that this dessert feels indulgent but uses real, whole ingredients. It is the kind of treat that satisfies a craving without making you feel heavy or sluggish. And honestly, a little pumpkin spice is good for the soul.
Conclusion
This creamy no-bake pumpkin cheesecake pie is more than just a dessert — it is a little piece of fall that you can make in your own kitchen without any fuss. It brings back that memory of the little bakery on Oak and Elm, but now it is even better because I can share it with the people I love. The silky texture, the warm spices, the crunchy gingersnap crust — every bite is pure comfort.
I hope you give this recipe a try and make it your own. Maybe you will add a chocolate swirl, or top it with toasted pecans, or just enjoy it exactly as written. Whatever you do, I would love to hear about it. Leave a comment below and tell me how your pie turned out, or share a photo on Pinterest and tag me. Your version might just become someone else’s new favorite.
Happy baking — well, no-baking! — and here is to making memories one slice at a time.
Frequently Asked Questions
Can I use a store-bought crust for this recipe?
Absolutely! A store-bought graham cracker crust will work perfectly and save you even more time. Just make sure it is a 9-inch crust. The filling will set up just the same.
How do I know when the pie is fully set?
The pie is ready when the center is firm to the touch and doesn’t jiggle when you gently shake the dish. For best results, refrigerate for at least 6 hours, but overnight is ideal for the firmest texture.
Can I make this pie ahead of time?
Yes, this is a great make-ahead dessert. You can prepare it up to 2 days in advance and keep it covered in the refrigerator. Just add the whipped topping right before serving for the freshest look and taste.
Why did my filling turn out lumpy?
Lumpy filling usually happens when the cream cheese isn’t fully softened. Make sure your cream cheese is at room temperature before you start. If you still see lumps, beat it for another minute or two until completely smooth before adding the other ingredients.
Can I use fresh pumpkin instead of canned?
Yes, you can use fresh pumpkin puree. Just make sure to drain it well after cooking and mashing. Fresh pumpkin tends to have more water content than canned, which can make the filling softer. To fix this, let the puree sit in a fine-mesh strainer for an hour to remove excess liquid before using.
Pin This Recipe!
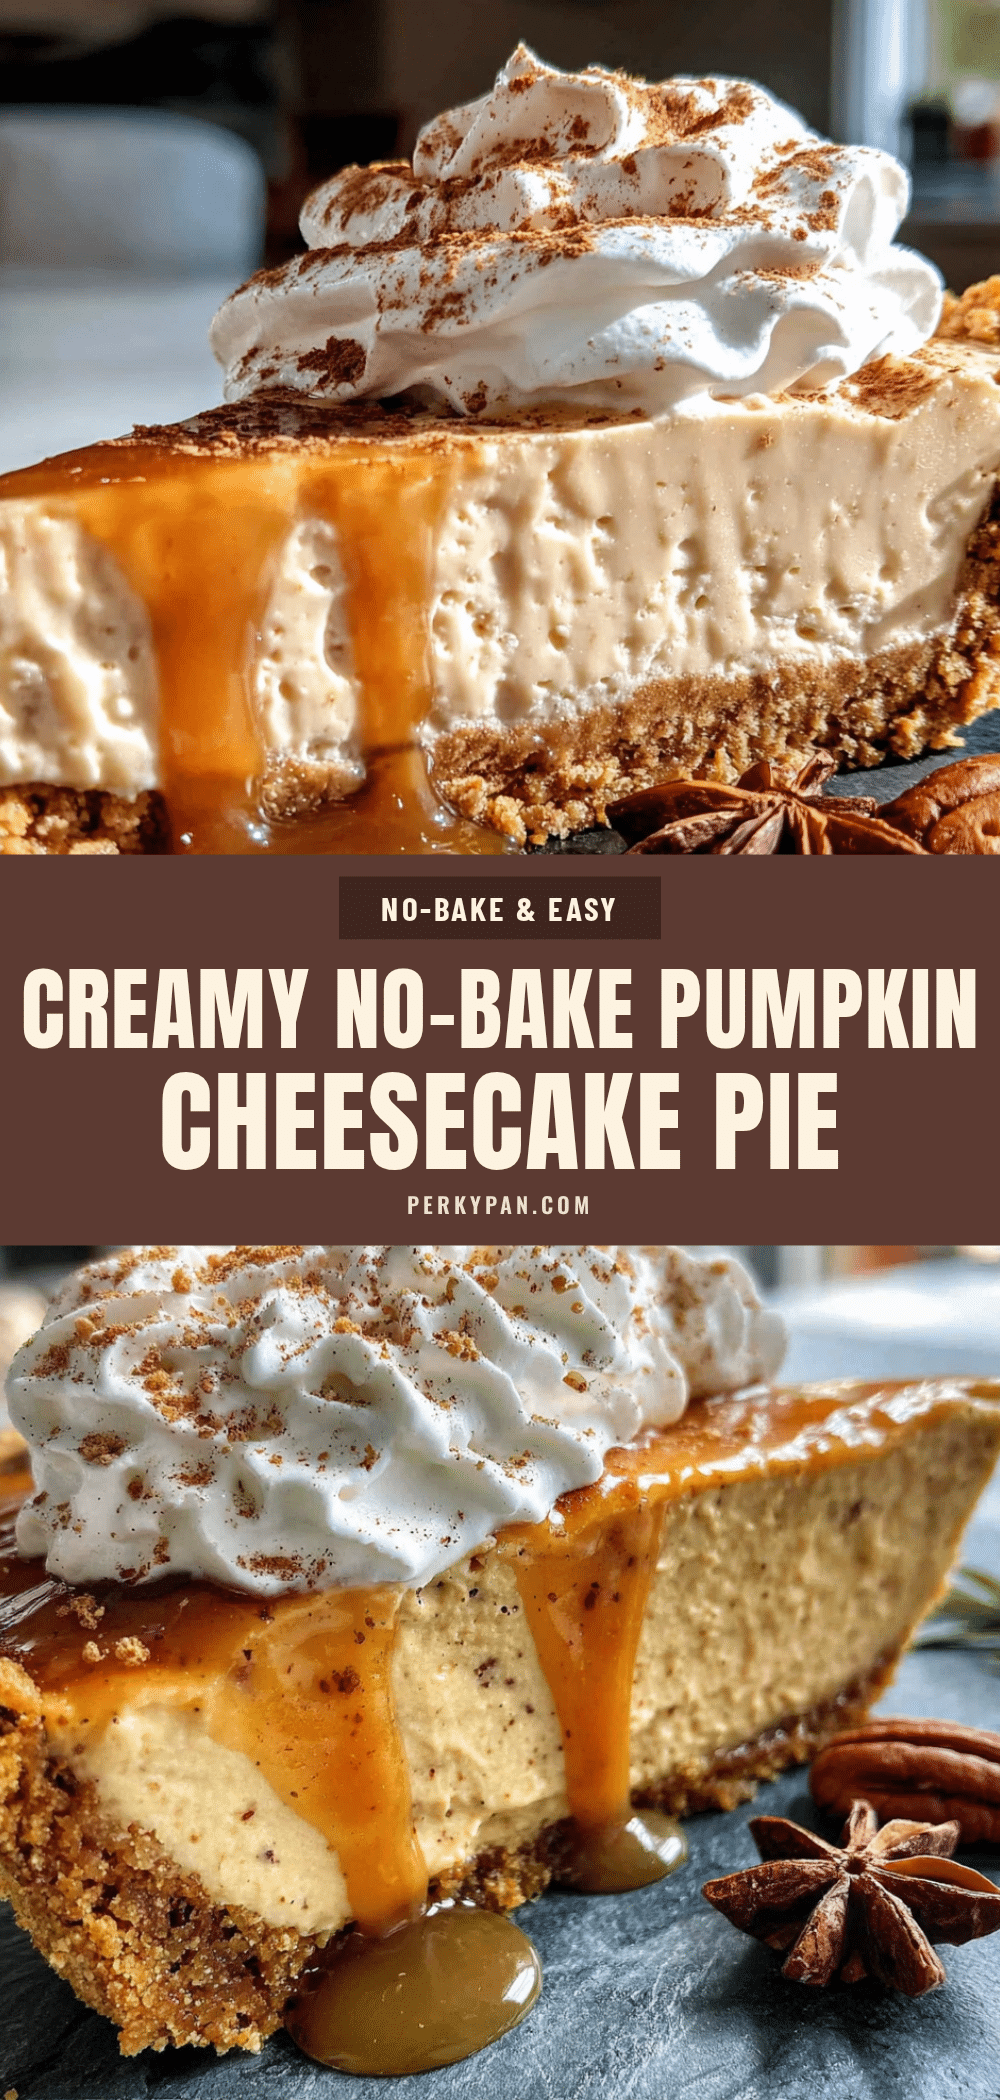
Creamy No-Bake Pumpkin Cheesecake Pie: Easy 30-Minute Dessert
This creamy no-bake pumpkin cheesecake pie captures the velvety texture and bold pumpkin flavor of a classic bakery favorite, but without turning on the oven. The filling sets beautifully in the fridge, and the gingersnap crust adds a warm, snappy contrast.
- Prep Time: 30 minutes
- Cook Time: 0 minutes
- Total Time: 6 hours 30 minutes (includes chilling)
- Yield: 12 servings 1x
- Category: Dessert
- Cuisine: American
Ingredients
- 2 cups gingersnap cookie crumbs (about 8 ounces, or use graham crackers for a milder flavor)
- 6 tablespoons unsalted butter, melted
- 2 tablespoons granulated sugar (optional)
- Pinch of salt
- 16 ounces cream cheese, softened to room temperature
- 1 cup pumpkin puree (not pumpkin pie filling)
- 3/4 cup packed light brown sugar
- 1 teaspoon vanilla extract
- 1 teaspoon ground cinnamon
- 1/2 teaspoon ground ginger
- 1/4 teaspoon ground nutmeg
- 1/4 teaspoon ground cloves
- 1/2 cup heavy cream, cold
- 1 cup heavy cream, cold (for topping)
- 2 tablespoons powdered sugar (for topping)
- 1/2 teaspoon vanilla extract (for topping)
- Freshly grated nutmeg or cinnamon for garnish
Instructions
- Make the crust: In a medium bowl, combine the gingersnap crumbs, melted butter, sugar, and salt. Stir until the mixture looks like wet sand and holds together when pressed. Press the mixture firmly and evenly into the bottom and up the sides of a 9-inch pie dish. Use the bottom of a measuring cup to pack it down. Refrigerate for about 15 minutes while you make the filling.
- Whip the cream: In a clean, cold bowl, pour in the heavy cream. Using an electric mixer on medium-high speed, whip the cream until soft peaks form, about 2-3 minutes. Set the whipped cream aside in the refrigerator.
- Beat the cream cheese: In a large bowl, beat the softened cream cheese with an electric mixer on medium speed until smooth and creamy, about 2 minutes. Scrape down the sides and bottom of the bowl.
- Add the pumpkin and spices: Add the pumpkin puree, brown sugar, vanilla extract, cinnamon, ginger, nutmeg, and cloves to the cream cheese. Beat on medium speed until well combined and smooth, about 1-2 minutes. Scrape down the bowl again.
- Fold in the whipped cream: Remove the whipped cream from the fridge. Add about one-third of it to the pumpkin mixture and gently fold it in with a spatula. Add the remaining whipped cream and fold gently until no white streaks remain.
- Fill the crust: Pour the filling into the chilled crust. Use a spatula to spread it evenly and smooth the top. Give the pie dish a few gentle taps on the counter to release any air bubbles.
- Chill the pie: Cover the pie loosely with plastic wrap and refrigerate for at least 6 hours, but overnight is best.
- Make the whipped topping (optional): Just before serving, whip the remaining heavy cream, powdered sugar, and vanilla extract until stiff peaks form. Spread or pipe it over the chilled pie. Garnish with freshly grated nutmeg or cinnamon.
Notes
Room temperature ingredients are non-negotiable for a smooth filling. Don’t skip chilling the crust. Fold the whipped cream gently to keep the filling airy. Use 100% pure pumpkin puree, not pumpkin pie filling. For faster chilling, use a metal pie dish. The pie can be frozen for up to 2 months (without whipped topping).
Nutrition
- Serving Size: 1 slice (1/12 of pie
- Calories: 380
- Sugar: 22
- Fat: 26
- Carbohydrates: 32
- Fiber: 2
- Protein: 6
Keywords: no-bake pumpkin cheesecake, pumpkin pie, fall dessert, Thanksgiving dessert, easy dessert, no-bake pie, pumpkin cheesecake pie


