Love this? Save it for later!
Share the inspiration with your friends
Hand me that big glass bowl,” my neighbor Clara said, peering over the fence last Fourth of July. I was frantically trying to figure out what to bring to a block party, and honestly, I was about five minutes away from just grabbing a bag of chips. She saw the panic in my eyes, wiped her hands on her apron, and just started talking. She didn’t give me a formal recipe with measurements or anything—she just described how her grandmother used to layer things. “You just keep going until it looks like a parade,” she said with a shrug. I grabbed a notepad and scribbled down her words as best I could, feeling a little silly for not knowing how to make something so festive.
That first attempt was a mess, let me tell you. I used a store-bought pudding that was way too runny, and by the time I got to the party, the whole thing looked like a sad, blue-tinged puddle. But Clara just laughed and said, “Told you, you gotta let it set.” So I tried again. And again. Somewhere around the third try, I figured out the trick—a little patience, the right custard, and a whole lot of berries. Now, this best red white and blue berry trifle recipe is my go-to for any summer celebration. It’s the kind of dessert that makes people stop mid-conversation and just stare at the table. You know that feeling when you bring something and everyone goes quiet? Yeah, that’s this trifle. Maybe you’ve been there, scrambling for a last-minute dish that looks like you spent all day on it. This one’s for you.
Why You’ll Love This Recipe
This isn’t just another layered dessert. After testing this recipe about a dozen times (my family is officially tired of berries, I think), I can confidently say this version hits every single note. It has the visual drama of a bakery window display but comes together in your own kitchen without any fancy techniques. Here is why this one stands out:
- Quick & Easy: Comes together in under 30 minutes of active time. The hardest part is waiting for the custard to chill, but that is hands-off time.
- Simple Ingredients: No weird stabilizers or hard-to-find items. You probably have most of this in your pantry right now.
- Perfect for Summer Holidays: Whether it is Memorial Day, the Fourth of July, or just a backyard barbecue, this trifle screams celebration without screaming for attention.
- Crowd-Pleaser: I have brought this to potlucks and watched kids go back for thirds. Adults too, honestly. It disappears faster than the burgers.
- Unbelievably Delicious: The combination of tangy cream cheese, sweet vanilla custard, and fresh berries is pure comfort. It is the kind of dessert that makes you close your eyes after the first bite.
What makes this best red white and blue berry trifle recipe different from the rest is the texture. Instead of using instant pudding that can get grainy, I use a quick stovetop custard that stays silky. The cream cheese layer adds just enough tang to balance the sweetness, and the berries are used both whole and slightly macerated to release their juices. It is not just another layered dessert—it is the version you will make every single year. This is comfort food reimagined for a crowd: showy enough to impress, simple enough to enjoy making.
What Ingredients You Will Need
This recipe uses simple, wholesome ingredients to deliver bold flavor and satisfying texture without the fuss. Most of these are pantry staples, but a few fresh items make all the difference. Here is what you will need:
For the Vanilla Custard Layer
- 2 cups whole milk (adds richness; do not use skim)
- 1/2 cup granulated sugar
- 3 large egg yolks (room temperature helps prevent curdling)
- 3 tablespoons cornstarch
- 1 teaspoon vanilla extract (I prefer pure vanilla, not imitation)
- Pinch of salt
For the Cream Cheese Layer
- 8 ounces cream cheese, softened (full-fat works best for structure)
- 1/2 cup powdered sugar
- 1 teaspoon vanilla extract
- 1 cup heavy cream, cold
For the Berry Layers
- 2 cups fresh strawberries, hulled and sliced (look for bright red, firm berries)
- 2 cups fresh blueberries (smaller berries hold up better in layers)
- 2 cups fresh raspberries (handle gently—they bruise easily)
- 2 tablespoons granulated sugar (for macerating the berries)
- 1 tablespoon lemon juice (fresh squeezed, not bottled)
For the Cake Base
- 1 store-bought pound cake or angel food cake (about 10-12 ounces), cut into 1-inch cubes
- 1/4 cup berry juice or simple syrup (optional, for moistening the cake)
Ingredient Notes: I recommend using Land O’Lakes cream cheese for the tangiest flavor, and Driscoll’s berries when they are in season. For the cake, Sara Lee pound cake works beautifully because it holds its shape without getting mushy. If you want to go gluten-free, use a gluten-free pound cake or even gluten-free vanilla wafers. For a dairy-free option, swap the milk with oat milk and use a dairy-free cream cheese alternative, though the texture will be slightly softer. The berries should be fresh for the best visual effect—frozen berries release too much liquid and will make the trifle weepy.
Equipment Needed
You do not need a professional kitchen for this one, but having the right tools makes the process smoother. Here is what you will need:
- Large trifle bowl or glass serving dish (a 4-quart capacity works best; clear glass shows off the layers)
- Medium saucepan (for the custard; avoid aluminum as it can react with eggs)
- Whisk (a balloon whisk works best for smooth custard)
- Electric mixer or stand mixer (for whipping the cream cheese layer; a hand mixer works fine)
- Mixing bowls (at least two medium ones)
- Sharp knife and cutting board (for slicing strawberries and cubing cake)
- Rubber spatula (for folding and layering)
- Measuring cups and spoons
If you do not have a trifle bowl, a large glass salad bowl works just as well. I have even used a wide-mouth mason jar for individual servings—it looks adorable and makes portion control easy. For the custard, a non-stick saucepan is a lifesaver because it prevents scorching. And honestly, if you do not have a whisk, a fork will do in a pinch for the custard, though you will work a little harder to get it smooth.
Preparation Method
Let us break this down into manageable steps. Trust me, the process is easier than it looks, and the result is absolutely worth every minute.
Step 1: Macerate the Berries (15 minutes active, 30 minutes resting)
In a medium bowl, combine the sliced strawberries, blueberries, and raspberries with 2 tablespoons of granulated sugar and 1 tablespoon of lemon juice. Gently toss to coat. Let them sit at room temperature for at least 30 minutes. This draws out the natural juices and creates a light syrup that will soak into the cake layers. You will notice the berries getting glossy and the liquid pooling at the bottom—that is exactly what you want. Do not skip this step; it makes a huge difference in flavor.
Step 2: Make the Vanilla Custard (20 minutes active, 2 hours chilling)
In a medium saucepan, whisk together the sugar, cornstarch, and salt. In a separate bowl, whisk the egg yolks until they are pale and slightly thickened, about 1 minute. Slowly pour the milk into the egg yolks while whisking constantly—this tempers the eggs so they do not scramble. Pour the egg mixture into the saucepan with the dry ingredients and whisk until smooth.
Place the saucepan over medium heat and cook, whisking constantly, until the mixture thickens and just begins to bubble. This takes about 5-7 minutes. You will feel the whisk start to resist as the custard thickens. Once you see a few lazy bubbles break the surface, remove it from heat immediately. Stir in the vanilla extract. Pour the custard through a fine-mesh sieve into a clean bowl to catch any lumps. Cover with plastic wrap directly on the surface (this prevents a skin from forming) and refrigerate for at least 2 hours until completely chilled.
Step 3: Make the Cream Cheese Layer (10 minutes)
In a large mixing bowl, beat the softened cream cheese with an electric mixer until smooth and fluffy, about 2 minutes. Add the powdered sugar and vanilla, and beat until combined. In a separate bowl, whip the cold heavy cream until stiff peaks form—this takes about 3-4 minutes with a hand mixer. Gently fold the whipped cream into the cream cheese mixture using a rubber spatula. Be gentle here; you want to keep the air in the whipped cream to maintain a light, mousse-like texture. Set aside.
Step 4: Assemble the Trifle (15 minutes)
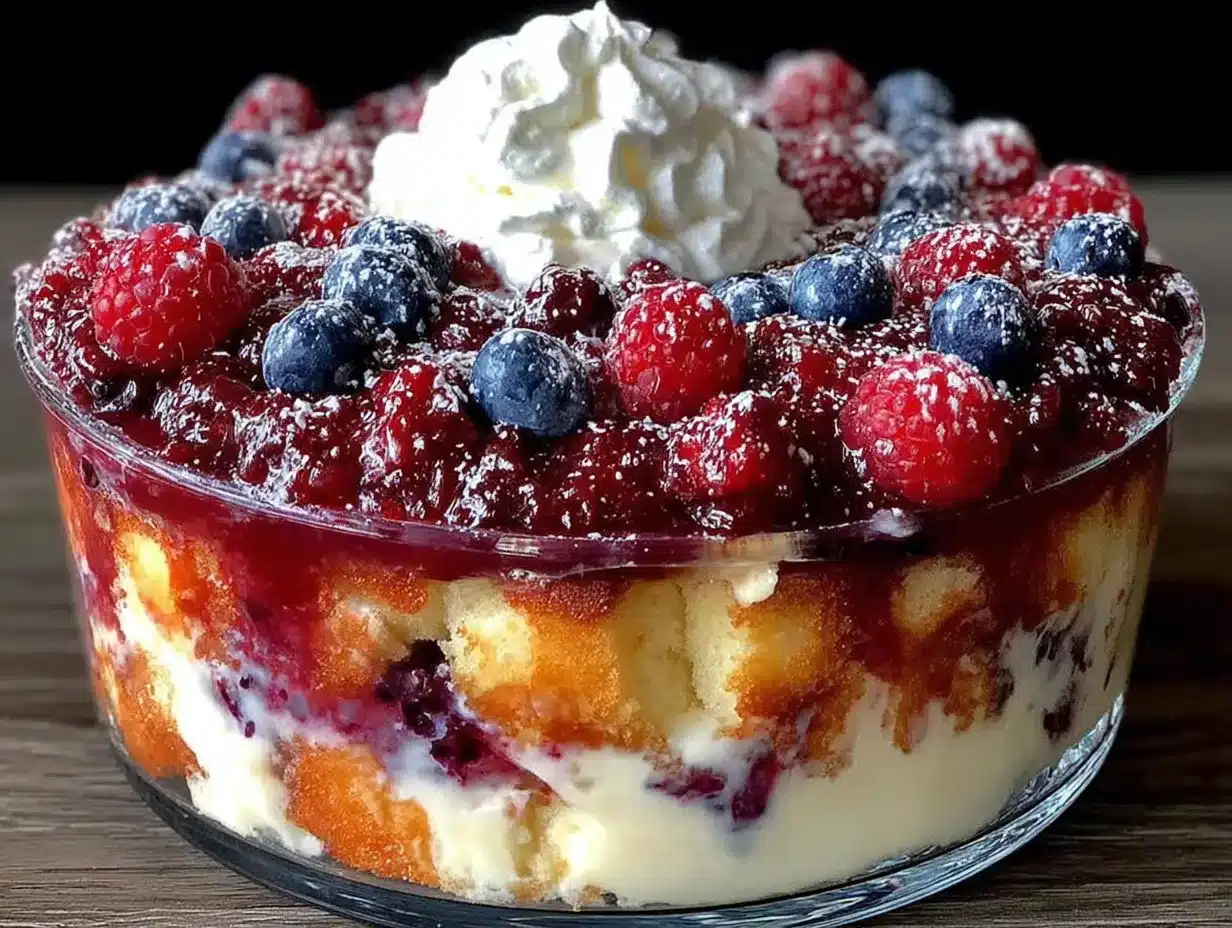
Now for the fun part. Make sure your trifle bowl is clean and dry. Start with a layer of cake cubes at the bottom—about one-third of the total. Drizzle a little of the berry juice or simple syrup over the cake if you want extra moisture. Spoon about one-third of the macerated berries over the cake, including some of the juice. Spread half of the chilled custard over the berries in an even layer. Then spread half of the cream cheese mixture over the custard. Repeat the layers: cake, berries, custard, cream cheese. Finish with a final layer of cake and top with the remaining berries and their juice. Reserve a few perfect berries for the very top garnish.
Cover the trifle loosely with plastic wrap and refrigerate for at least 4 hours, but overnight is better. This allows the flavors to meld and the layers to set properly. The cake will absorb the berry juices and custard, creating that perfect spoonable texture.
Step 5: Garnish and Serve (5 minutes)
Just before serving, add the reserved berries on top in a decorative pattern. You can also add a few mint leaves for color if you have them. Serve chilled, and scoop all the way down to get every layer in each serving.
Cooking Tips & Techniques
I have made this best red white and blue berry trifle recipe at least ten times, and I have learned a few things the hard way. Here are the tips that made the biggest difference:
Don’t rush the custard. The first time I made this, I tried to speed up the custard by turning the heat to high. Big mistake. It curdled and I had to start over. Keep the heat at medium and whisk constantly. If you see any lumps forming, just keep whisking—sometimes they smooth out. If not, the sieve will catch them.
Let the trifle rest. I know it is tempting to serve it right away, but the texture is completely different after a few hours in the fridge. The cake softens, the flavors blend, and the whole thing becomes this cohesive, dreamy dessert. One time I served it after only an hour, and it was good, but the next day? It was incredible.
Use a sharp knife for the cake. If you use a dull knife, you will crush the cake cubes and end up with crumbs instead of neat layers. A serrated knife works best for pound cake. Cut the cubes into even 1-inch pieces so they layer evenly.
Wash and dry your berries thoroughly. Wet berries will make the trifle watery. After rinsing, spread them on a paper towel-lined baking sheet and pat them dry. This extra step prevents the dreaded soggy bottom.
Make it ahead of time. This trifle actually tastes better the next day. I often make it the day before a party and just add the final garnish right before serving. It saves so much stress on the day of the event.
Variations & Adaptations
One of the best things about this recipe is how flexible it is. Here are a few ways I have adapted it over the years:
Dairy-Free Version: Use full-fat coconut milk for the custard and a dairy-free cream cheese alternative like Kite Hill. The texture will be slightly less firm, but the flavor is still fantastic. I made this for a friend with lactose intolerance, and she said it was the best dessert she had had in years.
Gluten-Free Version: Swap the pound cake for a gluten-free vanilla cake or even gluten-free ladyfingers. I have used Schär’s gluten-free pound cake, and it works beautifully. Just be careful not to over-soak the cake as gluten-free versions can get mushy faster.
Seasonal Berry Swap: In the summer, I use a mix of blackberries and raspberries when they are at their peak. In the fall, sliced peaches and blackberries make a gorgeous combination. The red, white, and blue theme is perfect for patriotic holidays, but honestly, any berry combination works.
Boozy Adult Version: For a grown-up twist, soak the cake cubes in a mixture of 2 tablespoons of Grand Marnier or limoncello mixed with 2 tablespoons of simple syrup. The citrus notes pair beautifully with the berries. I tried this for a New Year’s Eve party, and it was a hit.
Individual Servings: Instead of one large trifle, layer everything into wide-mouth mason jars or small glass cups. These are perfect for picnics or barbecues where you do not want to deal with serving dishes. Plus, they look adorable on a dessert table.
Serving & Storage Suggestions
This trifle is best served cold, straight from the refrigerator. I like to let it sit at room temperature for about 10 minutes before serving—it takes the chill off and lets the flavors open up. Use a large spoon or a clear glass serving spoon to scoop all the way down so each serving gets every layer.
Complementary Dishes: This trifle pairs beautifully with grilled meats like barbecue chicken or burgers. The cool, creamy texture is a perfect contrast to smoky, charred flavors. For drinks, a crisp lemonade or a chilled rosé works wonders. If you are serving it for brunch, it goes well with a simple quiche or frittata.
Storage: Cover the trifle tightly with plastic wrap and store it in the refrigerator for up to 3 days. The flavor actually improves on day two as the layers meld together. After day three, the cake can get a bit too soft, and the berries may start to weep. I do not recommend freezing this dessert—the texture of the custard and cream cheese will separate when thawed.
Reheating: You do not need to reheat this one. It is meant to be served cold. If you have leftovers, just scoop them into a container and enjoy them cold the next day. Honestly, I have eaten this for breakfast straight from the fridge, and I am not ashamed.
Flavor Development: The trifle is at its peak 12 to 24 hours after assembly. The cake absorbs the berry juices and custard, becoming almost like a berry-soaked bread pudding. The cream cheese layer firms up nicely, and the whole thing becomes a cohesive, spoonable dessert. If you are planning a party, make it the day before for the best results.
Nutritional Information & Benefits
This trifle is a dessert, so it is not exactly health food, but it does have some redeeming qualities. Here is a rough estimate per serving (based on 12 servings):
- Calories: Approximately 380
- Fat: 22g
- Carbohydrates: 42g
- Protein: 6g
- Fiber: 3g
- Sugar: 32g
Health Highlights: Berries are packed with antioxidants, vitamin C, and fiber. Blueberries are known for their brain health benefits, while strawberries provide a good dose of vitamin C for immune support. The cream cheese and custard add calcium and protein, though they also bring the fat content up. If you are watching your sugar intake, you can reduce the sugar in the custard by a tablespoon or two without affecting the texture too much.
Dietary Considerations: This recipe contains dairy, eggs, and gluten (from the cake). It is not suitable for vegans or those with celiac disease unless you use the substitutions mentioned above. For a lower-carb option, use a sugar substitute like monk fruit in the custard and a low-carb pound cake, though the texture will be slightly different.
Conclusion
This best red white and blue berry trifle recipe has become my signature dish for summer celebrations, and I think it deserves a spot in your rotation too. It is the kind of dessert that looks like you spent hours fussing over it, but really, it is just a series of simple steps that come together beautifully. The creamy custard, the tangy cream cheese, the juicy berries, and the soft cake—every bite is a little different, and that is what makes it so fun to eat.
I love this recipe because it reminds me of that conversation with Clara, the one that started with me panicking and ended with a dessert that made everyone at the block party smile. Food has a way of doing that—connecting us, saving us from last-minute stress, and making ordinary moments feel special. I hope you give this trifle a try and make it your own. Maybe you will use different berries, or add a splash of your favorite liqueur, or serve it in little jars for a picnic. However you make it, I would love to hear about it. Drop a comment below and tell me how it turned out, or share a photo of your creation. Happy cooking, and here is to many more celebrations around the table!
Frequently Asked Questions
Can I use frozen berries instead of fresh?
You can, but I recommend thawing them completely and draining off the excess liquid first. Frozen berries release a lot of water as they thaw, which can make the trifle watery. Fresh berries give the best texture and visual appeal for this best red white and blue berry trifle recipe.
How far in advance can I make this trifle?
You can assemble the trifle up to 24 hours in advance. In fact, it tastes better the next day. Just wait to add the final garnish of fresh berries on top until right before serving so they stay bright and fresh-looking.
Can I use instant pudding instead of making custard from scratch?
You can, but the texture will be different. Instant pudding tends to be firmer and less silky than homemade custard. If you are short on time, use a good quality instant vanilla pudding mix prepared with whole milk. It will still taste great, just not quite as luxurious.
What is the best way to cut the cake for the layers?
Use a serrated knife to cut the pound cake into 1-inch cubes. A serrated knife cuts cleanly without crushing the cake. If the cake is very soft, you can chill it for 15 minutes in the freezer first to make cutting easier.
How do I prevent the trifle from getting soggy?
Do not over-soak the cake cubes. If you are adding berry juice or simple syrup, use just a light drizzle—about 1 tablespoon per layer. Also, make sure your berries are thoroughly dried after washing. Pat them dry with paper towels to remove excess moisture before adding them to the layers.
Pin This Recipe!
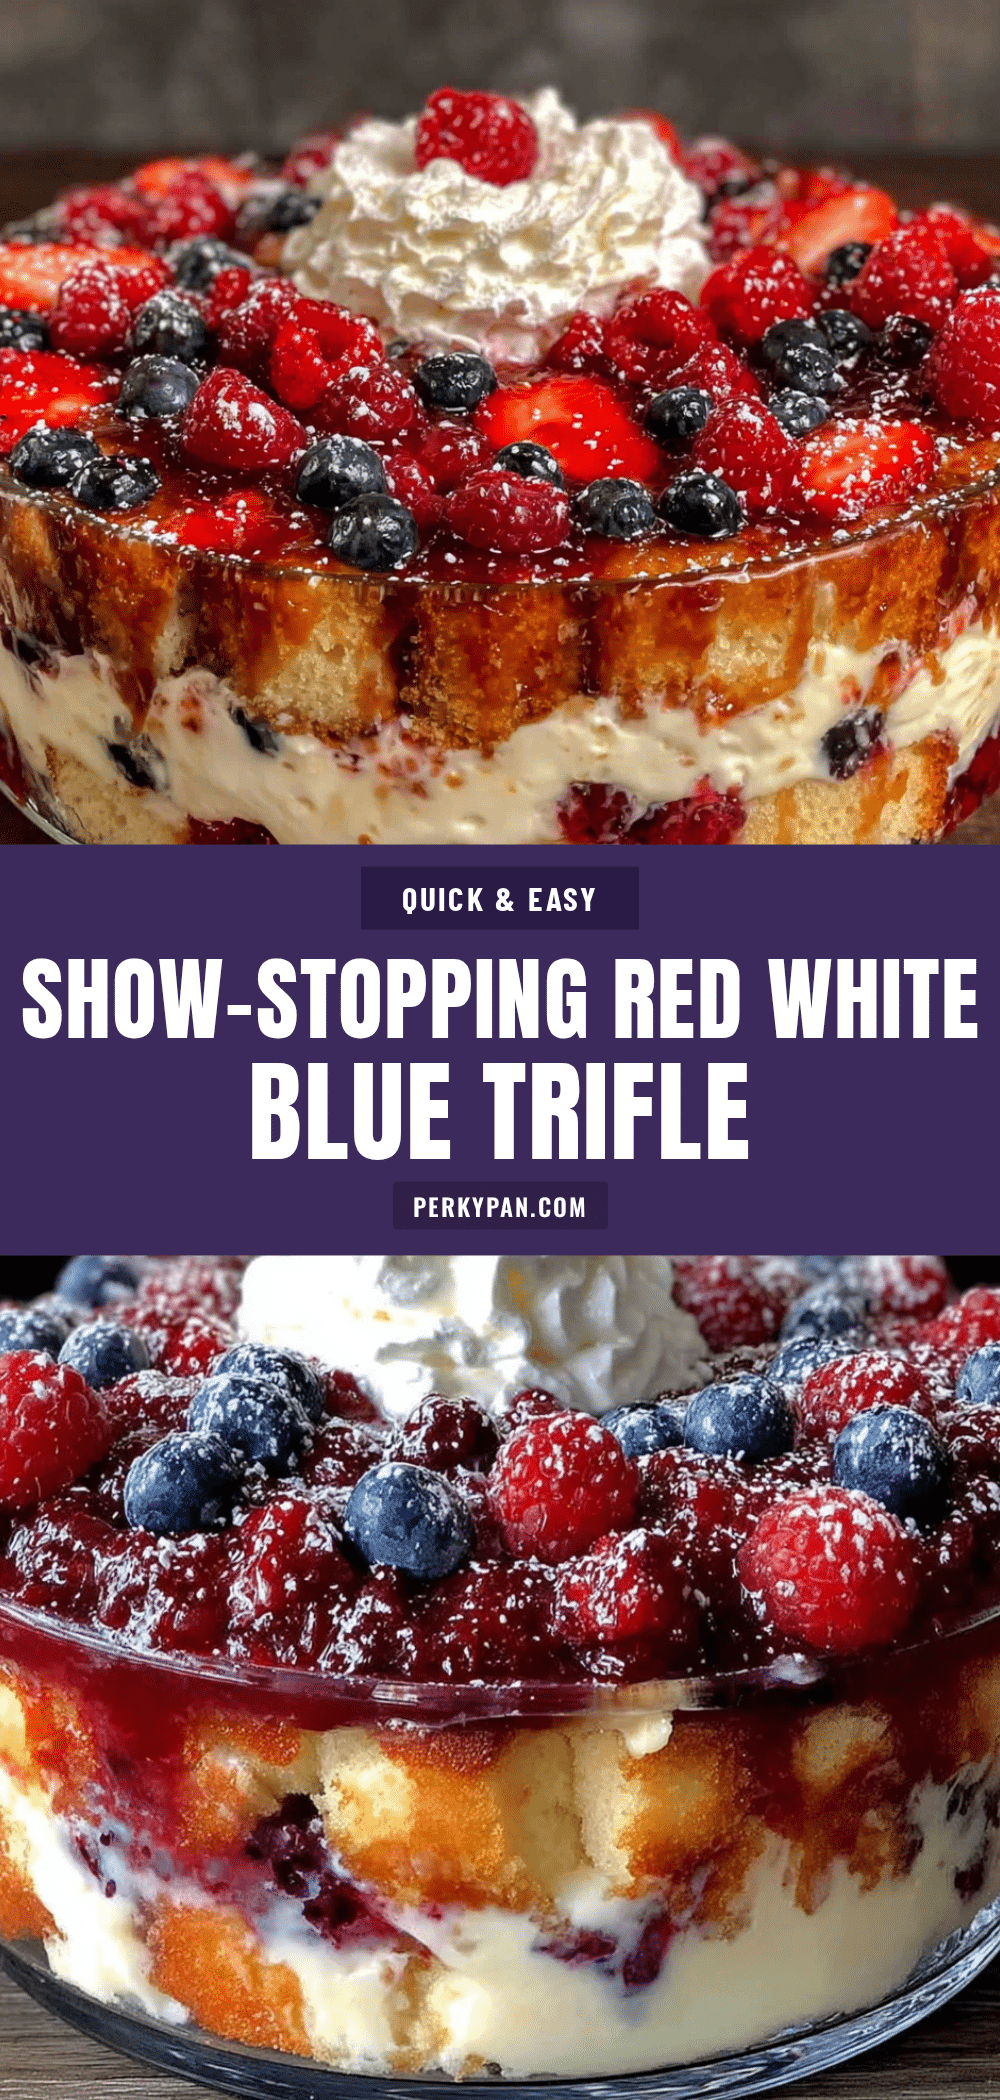
Best Red White and Blue Berry Trifle Recipe
This stunning red, white, and blue berry trifle is the perfect patriotic dessert for summer celebrations. Layers of silky vanilla custard, tangy cream cheese, fresh macerated berries, and soft cake come together for a show-stopping treat that’s surprisingly easy to make.
- Prep Time: 30 minutes
- Cook Time: 20 minutes
- Total Time: 4 hours 50 minutes (includes chilling)
- Yield: 12 servings 1x
- Category: Dessert
- Cuisine: American
Ingredients
- 2 cups whole milk
- 1/2 cup granulated sugar
- 3 large egg yolks
- 3 tablespoons cornstarch
- 1 teaspoon vanilla extract
- Pinch of salt
- 8 ounces cream cheese, softened
- 1/2 cup powdered sugar
- 1 teaspoon vanilla extract
- 1 cup heavy cream, cold
- 2 cups fresh strawberries, hulled and sliced
- 2 cups fresh blueberries
- 2 cups fresh raspberries
- 2 tablespoons granulated sugar
- 1 tablespoon lemon juice
- 1 store-bought pound cake or angel food cake (about 10–12 ounces), cut into 1-inch cubes
- 1/4 cup berry juice or simple syrup (optional)
Instructions
- In a medium bowl, combine the sliced strawberries, blueberries, and raspberries with 2 tablespoons of granulated sugar and 1 tablespoon of lemon juice. Gently toss to coat. Let them sit at room temperature for at least 30 minutes.
- In a medium saucepan, whisk together the sugar, cornstarch, and salt. In a separate bowl, whisk the egg yolks until pale and slightly thickened, about 1 minute. Slowly pour the milk into the egg yolks while whisking constantly. Pour the egg mixture into the saucepan with the dry ingredients and whisk until smooth.
- Place the saucepan over medium heat and cook, whisking constantly, until the mixture thickens and just begins to bubble, about 5-7 minutes. Remove from heat immediately. Stir in the vanilla extract. Pour the custard through a fine-mesh sieve into a clean bowl. Cover with plastic wrap directly on the surface and refrigerate for at least 2 hours until completely chilled.
- In a large mixing bowl, beat the softened cream cheese with an electric mixer until smooth and fluffy, about 2 minutes. Add the powdered sugar and vanilla, and beat until combined. In a separate bowl, whip the cold heavy cream until stiff peaks form, about 3-4 minutes. Gently fold the whipped cream into the cream cheese mixture using a rubber spatula. Set aside.
- In a clean trifle bowl, start with a layer of cake cubes at the bottom—about one-third of the total. Drizzle a little of the berry juice or simple syrup over the cake if desired. Spoon about one-third of the macerated berries over the cake, including some of the juice. Spread half of the chilled custard over the berries in an even layer. Then spread half of the cream cheese mixture over the custard. Repeat the layers: cake, berries, custard, cream cheese. Finish with a final layer of cake and to…
- Cover the trifle loosely with plastic wrap and refrigerate for at least 4 hours, but overnight is better.
- Just before serving, add the reserved berries on top in a decorative pattern. Serve chilled.
Notes
For best results, let the trifle rest overnight in the refrigerator. The cake will absorb the berry juices and custard, creating a perfect spoonable texture. Use fresh berries for the best visual effect—frozen berries release too much liquid. If you don’t have a trifle bowl, a large glass salad bowl works well. For individual servings, use wide-mouth mason jars.
Nutrition
- Serving Size: 1 serving (1/12 of r
- Calories: 380
- Sugar: 32
- Sodium: 220
- Fat: 22
- Saturated Fat: 13
- Carbohydrates: 42
- Fiber: 3
- Protein: 6
Keywords: berry trifle, red white and blue dessert, Fourth of July dessert, patriotic dessert, summer dessert, layered dessert, trifle recipe


