Love this? Save it for later!
Share the inspiration with your friends
Introduction
The summer I turned thirty, I found myself sitting on a park bench in the middle of a bustling city, nursing a cracked to-go coffee cup and scribbling recipes into my battered notebook. Honestly, I wasn’t expecting dessert ideas from the quiet, elderly man feeding pigeons beside me, but there he was, casually explaining how to make the perfect classic tiramisu with espresso-soaked ladyfingers. He wasn’t a chef, just a retired plumber named Luigi with a twinkle in his eye and a lifetime of Italian family secrets tucked away in his memory.
He described the balance between the creamy mascarpone and the bold espresso like it was a love story, and I couldn’t help but imagine the scene in his small kitchen back in Naples. I forgot to jot down one of the steps because a dog ran past and startled me, but Luigi laughed it off and repeated the tip with even more enthusiasm. Maybe you’ve been there—caught up in a moment where a recipe feels less like instructions and more like a shared experience. That’s exactly why this tiramisu recipe stayed with me, and why I keep making it whenever I need a little sweetness and warmth in my day.
Why You’ll Love This Recipe
After testing countless tiramisu recipes, this version stands out for its simplicity and authentic flavor. I’ve learned a lot from Luigi—and a bit from my own kitchen experiments—so trust me when I say this recipe hits the sweet spot between classic and approachable.
- Quick & Easy: Comes together in under 30 minutes, perfect for those evenings when you want impressive dessert without the fuss.
- Simple Ingredients: Uses pantry staples and everyday items like espresso, ladyfingers, and mascarpone—nothing exotic to hunt for.
- Perfect for Entertaining: Whether it’s a dinner party or a casual weekend treat, tiramisu always impresses without stress.
- Crowd-Pleaser: Loved by kids and adults alike; the espresso-soaked ladyfingers add a gentle kick that keeps everyone coming back for more.
- Unbelievably Delicious: The creamy mascarpone layer balanced with the slight bitterness of espresso-soaked ladyfingers delivers classic Italian comfort in every bite.
This recipe isn’t just another tiramisu—it’s the one I trust when I want that perfect texture and flavor combo. The secret? A gentle soak of the ladyfingers in fresh espresso, which keeps them moist but not soggy, paired with a lightly whipped mascarpone mixture that melts in your mouth. Honestly, it’s the kind of dessert that makes you close your eyes the moment you taste it. If you’ve ever tried to make tiramisu and ended up with soggy layers or heavy creaminess, this recipe will feel like a breath of fresh air.
What Ingredients You Will Need
This recipe relies on straightforward, wholesome ingredients to deliver that classic tiramisu flavor and texture. Most of these are pantry staples, and you can find everything in your local grocery store without any trouble.
- Espresso: 1 ½ cups (360 ml) freshly brewed and cooled (use strong, dark roast espresso for best flavor)
- Ladyfingers (Savoiardi): 24 pieces (look for crisp, firm ladyfingers like Balocco or Loacker brands)
- Mascarpone Cheese: 16 ounces (450 g), room temperature (choose a high-quality, creamy mascarpone for smooth texture)
- Egg Yolks: 4 large, at room temperature (adds richness and helps create that silky custard)
- Granulated Sugar: ¾ cup (150 g) (balances the bitterness of espresso)
- Heavy Cream: 1 cup (240 ml), cold (whipped to soft peaks for lightness)
- Vanilla Extract: 1 teaspoon (pure vanilla gives a subtle sweetness and depth)
- Cocoa Powder: Unsweetened, for dusting (adds that classic final touch)
- Dark Chocolate Shavings (optional): for garnish (adds a little extra indulgence)
If you want to switch things up, you can swap the heavy cream for coconut cream to make it dairy-free, or use almond flour ladyfingers for a gluten-free twist. In summer, adding a handful of fresh raspberries between layers is a lovely seasonal touch. I’ve found that using freshly brewed espresso rather than instant coffee really lifts the tiramisu to authentic levels.
Equipment Needed
- Mixing Bowls: Medium and large bowls for whipping cream and mixing mascarpone—glass or stainless steel preferred for easy cleaning.
- Electric Mixer: Hand mixer or stand mixer to whip egg yolks, sugar, and cream to the right texture (though you can do it by hand if you have strong arms!).
- Spatula: Silicone spatula for folding ingredients gently, preserving airiness in the mascarpone mixture.
- 9×13-inch (23×33 cm) Baking Dish: For layering the tiramisu (alternatively, individual dessert glasses work beautifully for personal servings).
- Sifter: For dusting cocoa powder evenly—if you don’t have one, a fine-mesh sieve works well.
I used to mix everything with a whisk until a friend gifted me a basic hand mixer, and wow, it made whipping the cream so much easier and fluffier. If you’re on a budget, a sturdy balloon whisk and some patience can get you there too. Just keep your bowls chilled in the fridge beforehand for better whipping results.
Preparation Method
- Prepare the espresso: Brew 1 ½ cups (360 ml) of strong espresso and let it cool completely. You can add a tablespoon of coffee liqueur like Marsala or Kahlúa for a boozy touch if you want, but it’s optional. (About 10 minutes)
- Whip egg yolks and sugar: In a medium bowl, whisk together 4 large egg yolks and ¾ cup (150 g) sugar until the mixture is thick, pale, and ribbons form when you lift the whisk. This takes about 5 minutes with an electric mixer on medium speed. (Tip: Be patient here; this step adds lightness to your mascarpone layer.)
- Add mascarpone: Gently fold 16 ounces (450 g) room temperature mascarpone into the egg yolk mixture until smooth and creamy. Avoid overmixing; you want to keep some air in the blend for that silky texture. (About 3 minutes)
- Whip the cream: In a separate large bowl, whip 1 cup (240 ml) cold heavy cream with 1 teaspoon vanilla extract until soft peaks form. This means the cream holds its shape but still moves softly when you tilt the bowl. (About 3–4 minutes)
- Combine cream with mascarpone mixture: Fold the whipped cream gently into the mascarpone mixture in three parts. This keeps the filling light and fluffy. (About 2 minutes)
- Soak ladyfingers: Quickly dip each ladyfinger into the cooled espresso—just 1 or 2 seconds per side. Don’t soak too long or they’ll get mushy! (About 5 minutes total)
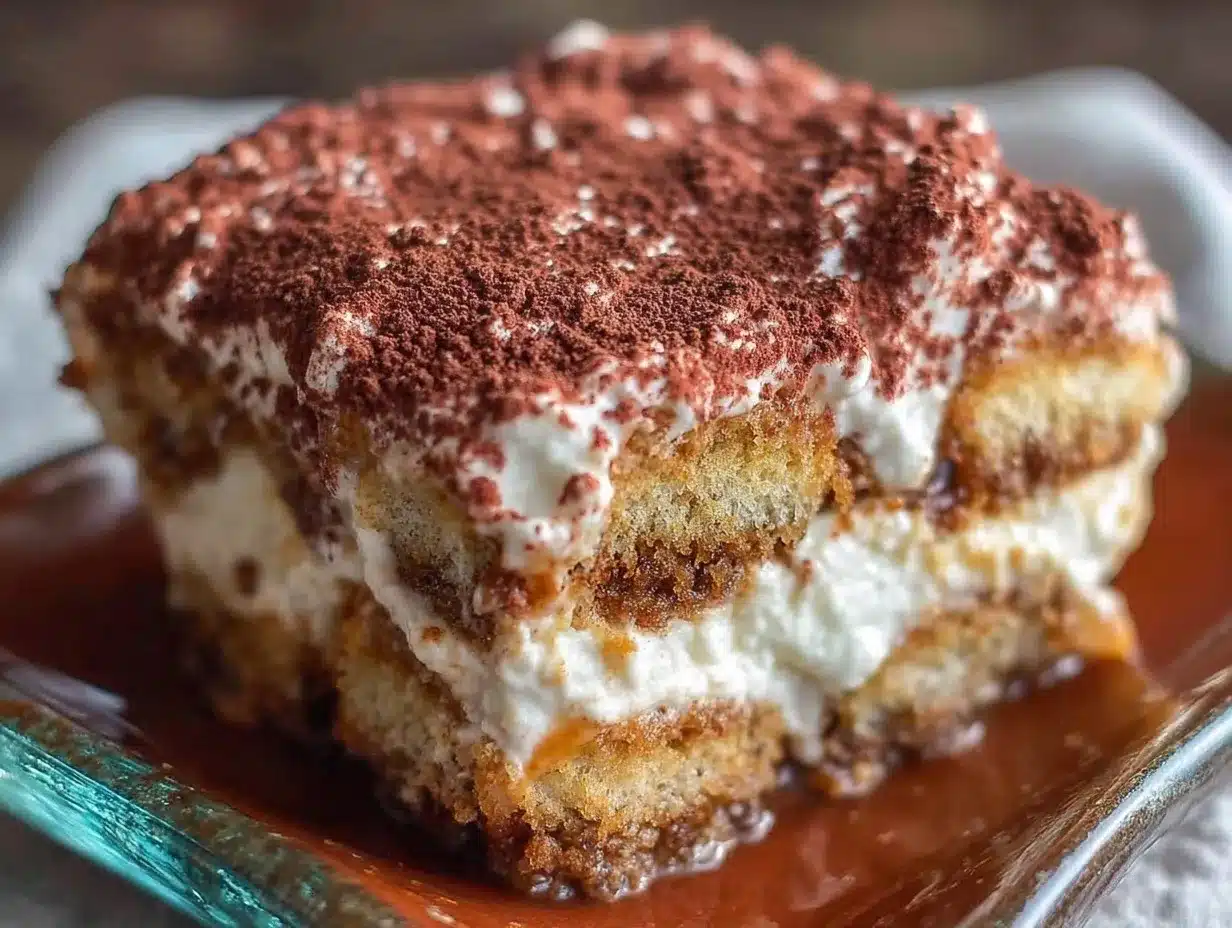
- Assemble the tiramisu: Arrange a layer of soaked ladyfingers evenly in the bottom of your 9×13-inch (23×33 cm) dish. Spread half of the mascarpone cream over the ladyfingers. Repeat with another layer of dipped ladyfingers and the remaining mascarpone cream. Smooth the top with a spatula. (About 10 minutes)
- Chill: Cover the dish with plastic wrap and refrigerate for at least 4 hours, preferably overnight. This resting time allows the flavors to meld and the dessert to firm up perfectly.
- Finish and serve: Just before serving, dust the top generously with unsweetened cocoa powder using a sifter or fine mesh sieve. Optionally, sprinkle with dark chocolate shavings for a touch of elegance.
If you find the mascarpone mixture too thick, a splash of heavy cream can loosen it up without compromising texture. Also, if you’re worried about raw egg yolks, you can gently cook them over a double boiler with sugar before whisking for safety, but I find fresh, high-quality eggs work fine for this classic recipe.
Cooking Tips & Techniques
Getting tiramisu just right is a bit of an art. Here are some tips I’ve picked up after a few trials—and errors:
- Don’t over-soak the ladyfingers: This is the biggest pitfall. Ladyfingers absorb liquid quickly, so dipping them just a second or two in espresso prevents a soggy mess.
- Use room temperature mascarpone: Cold mascarpone is harder to mix and can become lumpy. Let it sit out for about 30 minutes before mixing.
- Whip egg yolks and sugar thoroughly: This step adds air and lightness, so don’t rush it. The mixture should look pale and fluffy.
- Fold, don’t stir: When combining mascarpone and whipped cream, folding preserves the airy texture. Stirring too vigorously can deflate the cream.
- Chill long enough: Tiramisu needs hours in the fridge to set properly. I usually make it the night before so the flavors develop fully.
One time, I tried making tiramisu without chilling it overnight, and the flavors felt flat, and the texture was too loose. Lesson learned! Also, multitasking helps—brew your espresso while whipping the yolks and cream to save time. And if you want to keep it traditional, avoid mixing coffee liqueur in the espresso, but I’m all for a little creative twist now and then.
Variations & Adaptations
Tiramisu is incredibly adaptable, so feel free to make it your own. Here are some ideas I’ve tried or want to try:
- Fruit Twist: Add fresh strawberries or raspberries between the layers for a bright, summery version.
- Chocolate Lover’s: Mix a tablespoon of cocoa powder into the mascarpone cream or add a layer of chocolate ganache for extra indulgence.
- Gluten-Free: Use gluten-free ladyfingers or substitute with thin almond biscuits to keep it safe for gluten-sensitive guests.
- Dairy-Free: Swap mascarpone with a blend of coconut cream and vegan cream cheese; use coconut milk-based whipped cream.
- Alcohol-Free: Simply omit any coffee liqueur and stick to espresso for soaking.
Personally, I once added a splash of orange liqueur to the espresso and dusted the top with candied orange peel—it was a refreshing change that brought a new dimension to the classic. Don’t be afraid to experiment and find what suits your taste buds. If you like the idea of a classic Italian dessert twist, try pairing this tiramisu with a simple espresso or a light dessert wine.
Serving & Storage Suggestions
Tiramisu is best served chilled straight from the fridge. I like to let it sit at room temperature for about 10 minutes before serving—it softens the texture just enough without losing that cool creaminess.
For presentation, dust the top with fresh cocoa powder right before serving to keep it vibrant. You can also add a few dark chocolate shavings or even a sprig of mint for a little color contrast.
If you have leftovers (and, honestly, who doesn’t?), cover the dish tightly with plastic wrap and store it in the refrigerator for up to 3 days. The flavors actually deepen after a day or two, so it tastes even better the next day. For longer storage, tiramisu can be frozen in an airtight container for up to 2 months, but texture may change slightly after thawing.
To reheat frozen tiramisu, thaw overnight in the fridge and serve chilled. Avoid microwaving—this dessert shines cold, and reheating can ruin the delicate mascarpone cream.
Nutritional Information & Benefits
Each serving of this classic tiramisu (about 1/8 of the recipe) contains approximately:
| Calories | 350 kcal |
|---|---|
| Fat | 22 g |
| Carbohydrates | 30 g |
| Protein | 5 g |
| Sugar | 20 g |
The key ingredients, like mascarpone and egg yolks, provide healthy fats and protein, while espresso adds a modest caffeine boost and antioxidants. The ladyfingers are a source of simple carbs, so tiramisu is definitely an indulgence best enjoyed in moderation.
For those watching gluten or dairy intake, the variations discussed earlier can help adapt the recipe to fit dietary needs without sacrificing too much flavor. I appreciate that this dessert can be both a treat and, with small tweaks, fit into a balanced lifestyle.
Conclusion
This perfect classic tiramisu with espresso-soaked ladyfingers isn’t just a dessert; it’s a story, a memory, and a little moment of joy in your day. I love how it brings people together, whether you’re making it for family, friends, or just treating yourself after a long week. The balance of creamy mascarpone and rich espresso-soaked ladyfingers is just unbeatable.
Feel free to adjust sweetness, coffee strength, or even add your own twist—this recipe is a beautiful starting point. I’d love to hear how you make it your own, so don’t hesitate to share your adaptations or questions in the comments below. Let’s keep the tiramisu love going!
Now, go ahead and give this recipe a try—you might just find yourself stealing a spoonful before anyone else gets a chance.
Frequently Asked Questions
Can I use instant coffee instead of espresso for soaking ladyfingers?
Yes, but freshly brewed espresso gives a richer and more authentic flavor. If using instant coffee, make it strong and allow it to cool before dipping.
Is it safe to use raw egg yolks in tiramisu?
Using fresh, high-quality eggs reduces risk. If concerned, you can gently cook the yolks with sugar over a double boiler until thickened before mixing.
How long should I soak the ladyfingers in espresso?
Just 1 to 2 seconds per side to avoid sogginess. They should be moist but still hold their shape.
Can I make tiramisu ahead of time?
Absolutely! It actually tastes better after sitting in the fridge for several hours or overnight to let flavors meld.
What can I use if I don’t have mascarpone cheese?
You can substitute a mix of cream cheese and heavy cream, but the flavor and texture won’t be as authentic. Some prefer a blend of ricotta and cream cheese as another alternative.
Pin This Recipe!
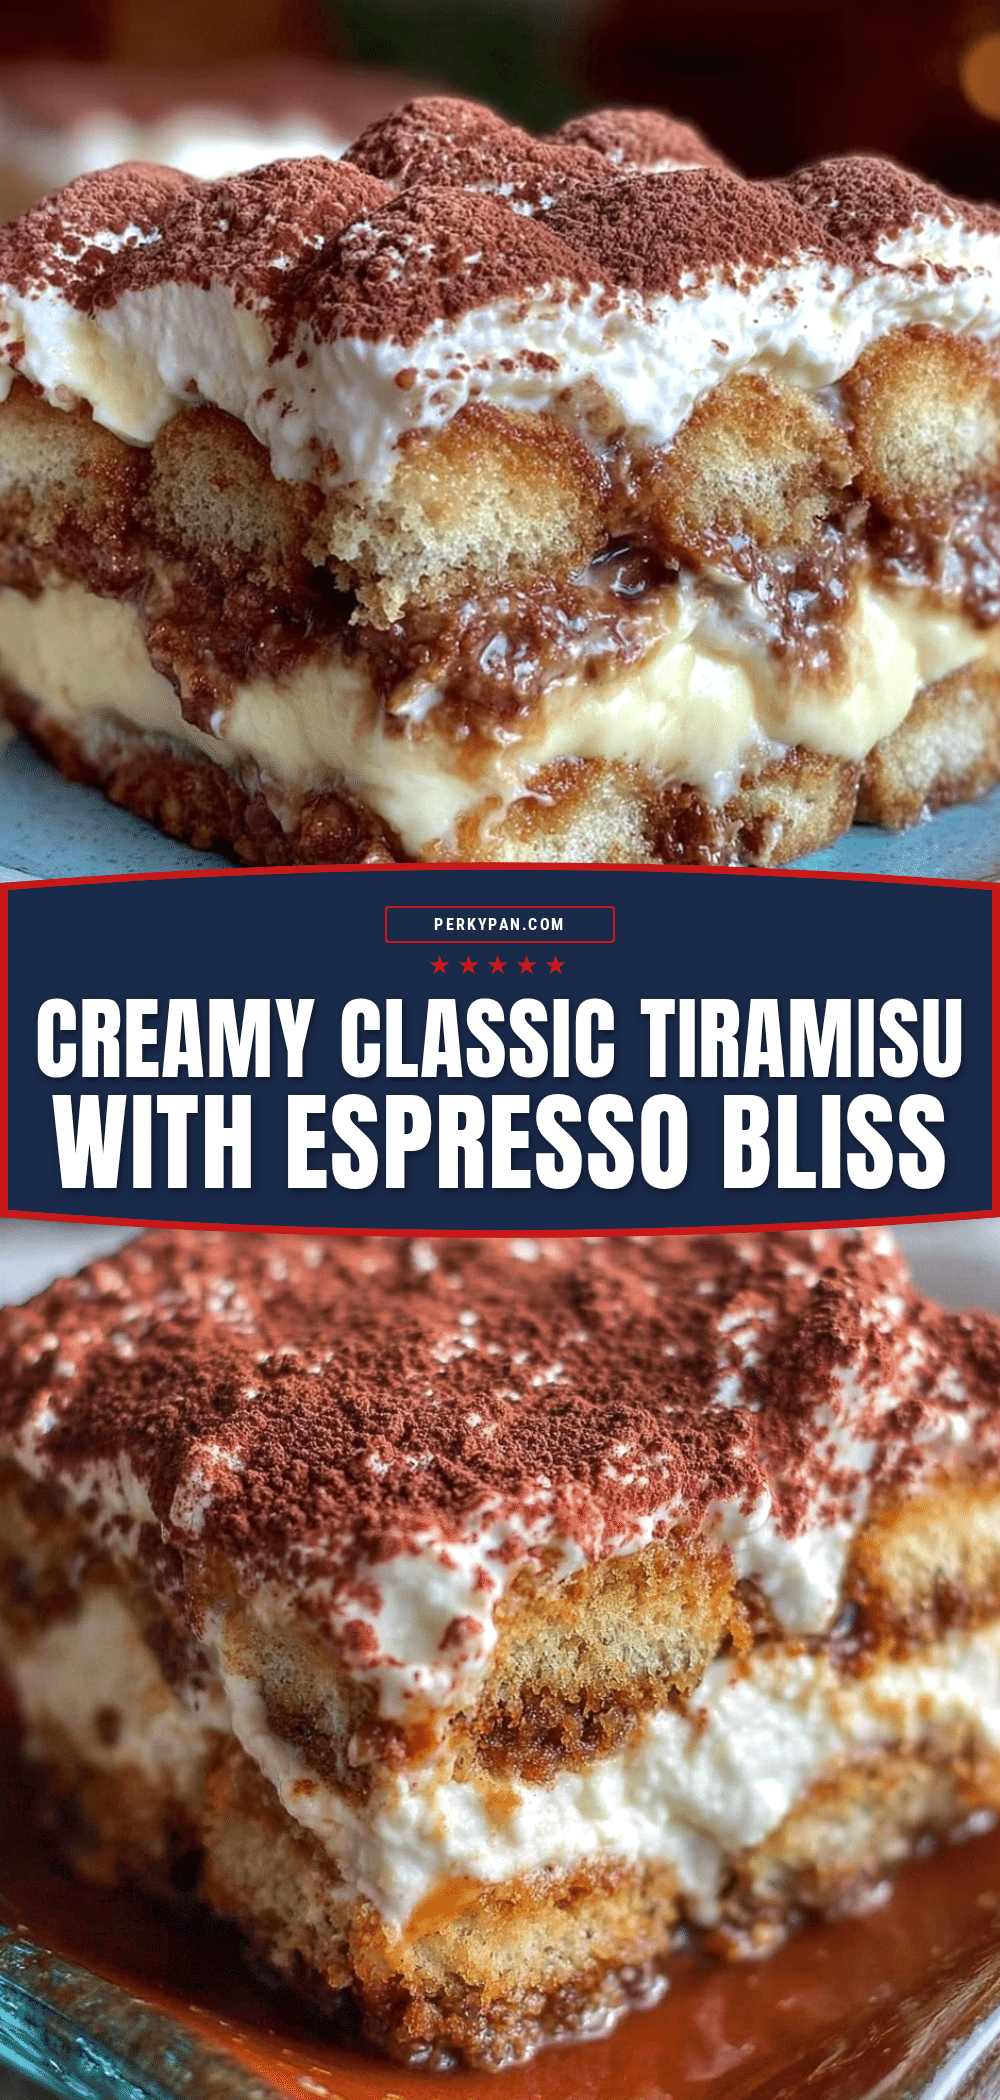
Perfect Classic Tiramisu Recipe with Easy Espresso-Soaked Ladyfingers

A simple and authentic tiramisu recipe featuring espresso-soaked ladyfingers and a creamy mascarpone mixture, perfect for an impressive yet easy dessert.
- Prep Time: 20 minutes
- Cook Time: 0 minutes
- Total Time: 4 hours 20 minutes
- Yield: 8 servings 1x
- Category: Dessert
- Cuisine: Italian
Ingredients
- 1 ½ cups (360 ml) freshly brewed and cooled strong espresso
- 24 ladyfingers (Savoiardi), crisp and firm
- 16 ounces (450 g) mascarpone cheese, room temperature
- 4 large egg yolks, room temperature
- ¾ cup (150 g) granulated sugar
- 1 cup (240 ml) cold heavy cream
- 1 teaspoon vanilla extract
- Unsweetened cocoa powder, for dusting
- Dark chocolate shavings (optional), for garnish
Instructions
- Brew 1 ½ cups (360 ml) of strong espresso and let it cool completely. Optionally add 1 tablespoon coffee liqueur.
- Whisk 4 large egg yolks and ¾ cup (150 g) sugar in a medium bowl until thick, pale, and ribbons form, about 5 minutes.
- Gently fold 16 ounces (450 g) room temperature mascarpone into the egg yolk mixture until smooth and creamy, about 3 minutes.
- In a separate large bowl, whip 1 cup (240 ml) cold heavy cream with 1 teaspoon vanilla extract until soft peaks form, about 3–4 minutes.
- Fold the whipped cream gently into the mascarpone mixture in three parts, about 2 minutes.
- Quickly dip each ladyfinger into the cooled espresso for 1–2 seconds per side to avoid sogginess.
- Arrange a layer of soaked ladyfingers evenly in a 9×13-inch (23×33 cm) dish. Spread half of the mascarpone cream over them.
- Repeat with another layer of dipped ladyfingers and the remaining mascarpone cream. Smooth the top with a spatula.
- Cover the dish with plastic wrap and refrigerate for at least 4 hours, preferably overnight.
- Before serving, dust the top generously with unsweetened cocoa powder and optionally sprinkle with dark chocolate shavings.
Notes
Do not over-soak ladyfingers to avoid sogginess; dip for only 1-2 seconds per side. Use room temperature mascarpone for smooth mixing. Whip egg yolks and sugar thoroughly for lightness. Fold mascarpone and whipped cream gently to preserve airiness. Chill tiramisu for at least 4 hours or overnight for best flavor and texture. Optionally cook egg yolks over double boiler for safety. Variations include gluten-free ladyfingers, dairy-free cream substitutes, and adding fresh fruit or chocolate layers.
Nutrition
- Serving Size: 1/8 of the recipe
- Calories: 350
- Sugar: 20
- Fat: 22
- Carbohydrates: 30
- Protein: 5
Keywords: tiramisu, classic tiramisu, espresso tiramisu, mascarpone dessert, Italian dessert, easy tiramisu, ladyfingers, coffee dessert