Love this? Save it for later!
Share the inspiration with your friends
“I never thought a dessert could steal the spotlight at a grown-up party until that Friday night at Claire’s rooftop gathering,” I confessed to my friend over coffee last week. Claire wasn’t one to fuss over lavish setups, but that evening, she quietly unveiled a dessert charcuterie board so stunning it made everyone pause mid-conversation. Honestly, the way the dark chocolate shards nestled beside juicy berries, and the delicate macarons sat like jewels between clusters of candied nuts—that scene stuck with me. I mean, who knew dessert could be such a showstopper without a single fork in sight?
That night, as the city lights flickered below, I watched guests casually nibble and sip, effortlessly mingling around this edible artwork. And let me tell you, the imperfect moment when a raspberry rolled off the board and onto the floor only added to the charm—it was real, approachable, and totally inviting.
Maybe you’ve been there, wanting to wow your guests with something elegant but feeling stuck on how to make dessert both impressive and easy. That’s exactly why I kept coming back to perfect dessert charcuterie board ideas for elegant entertaining. It’s a blend of creativity and simplicity, perfect for those moments when you want to impress without the stress.
This guide is packed with tips, ingredient must-haves, and techniques I’ve picked up through trial, error, and a fair share of late-night snack cravings. Whether you’re hosting a holiday soirée, a bridal shower, or just craving a stylish sweet spread, these ideas will help you craft a board that feels indulgent, inviting, and uniquely yours.
Why You’ll Love This Recipe
After years of hosting and experimenting, I can say with confidence that these dessert charcuterie board ideas are a game-changer. Here’s why you’ll want to make this your go-to for elegant entertaining:
- Quick & Easy: You can assemble a stunning board in under 30 minutes — perfect for last-minute hosting or when time’s tight.
- Simple Ingredients: No need for exotic or hard-to-find items; most components are pantry staples or easy-to-get treats like fresh fruit, chocolates, and nuts.
- Perfect for Any Occasion: Whether it’s a birthday brunch, cocktail party, or cozy winter gathering, this board fits the vibe effortlessly.
- Crowd-Pleaser: From kids to adults, everyone loves grazing on a variety of sweets and textures.
- Unbelievably Delicious: The careful balance of sweet, tart, crunchy, and creamy components creates a flavor combo that keeps guests coming back for more.
What sets this dessert charcuterie apart is the thoughtful layering of flavors and textures—think silky caramel drizzles paired with crunchy biscotti, or tangy citrus marmalade alongside rich dark chocolate. It’s not just throw-it-on-a-board style. No, this is about crafting a sensory experience that feels elegant but totally doable.
Plus, you’ll find plenty of suggestions for customizing based on seasonality or dietary needs, so you’re covered whether you want to add a personal twist or accommodate guests’ preferences.
What Ingredients You Will Need
This dessert charcuterie board recipe uses simple, wholesome ingredients that bring bold flavor and satisfying texture without any fuss. Most of these you might already have or can easily grab from your local store.
For the Sweet Base
- Assorted chocolates: dark, milk, and white (I prefer Ghirardelli for the smooth, rich melt)
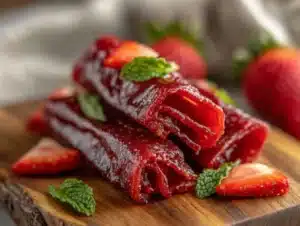
- Fresh berries: strawberries, raspberries, blueberries (in summer, swap with cherries or blackberries)
- Seasonal fresh fruit: sliced apples, pears, or figs (adds freshness and natural sweetness)
- Mini macarons: assorted flavors (optional but adds a delicate touch)
- Honey or caramel drizzle: for a sticky-sweet finish
Nuts & Crunchy Elements
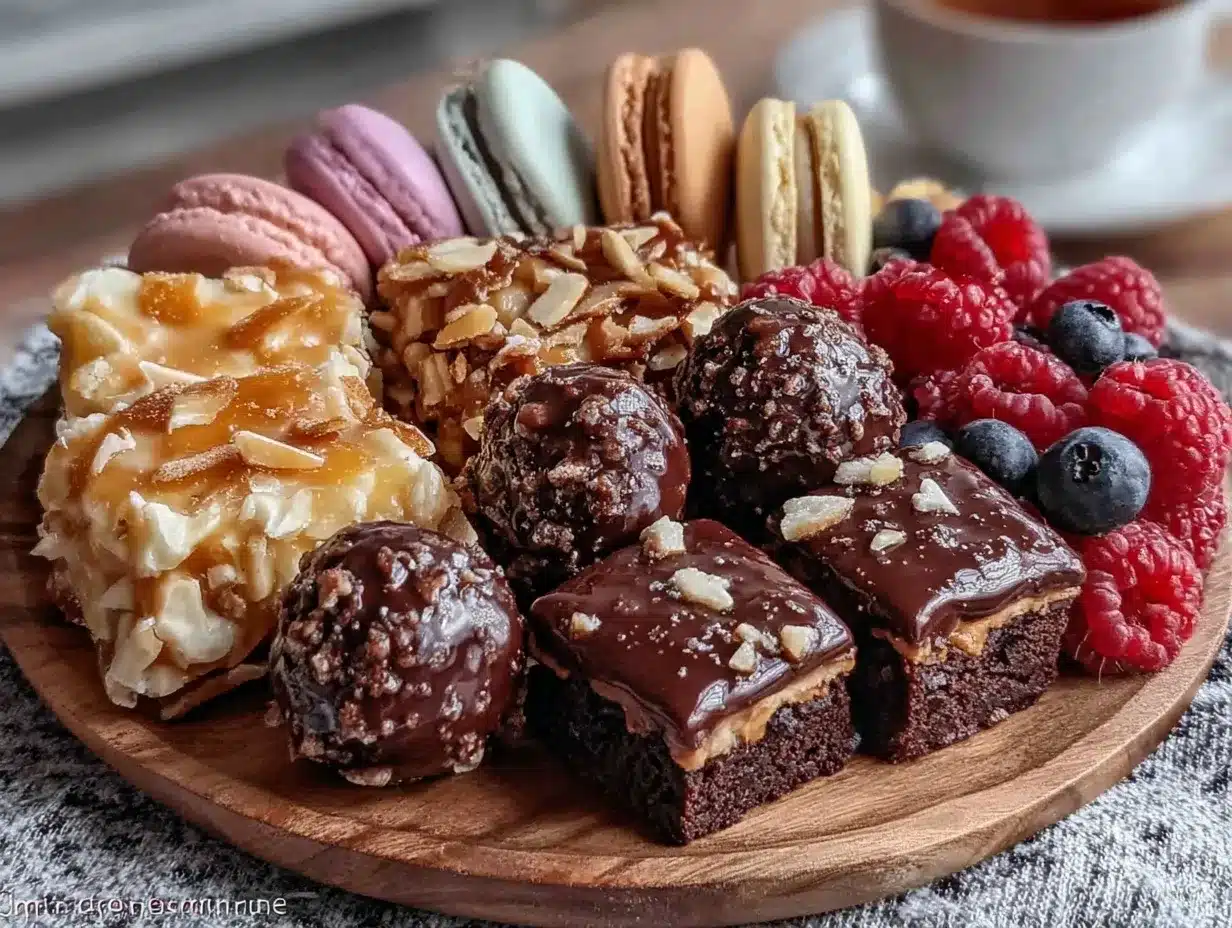
- Salted almonds or pecans: roasted or raw (adds a toasty crunch)
- Biscotti or shortbread cookies: for that buttery snap
- Candied ginger or crystallized orange peel: for a zesty kick
Extras & Garnishes
- Soft cheeses: goat cheese or mascarpone (makes the board creamy and luxurious)
- Jam or marmalade: citrus or berry-based (perfect to pair with cheese and crackers)
- Edible flowers or fresh mint leaves: for color and aroma
Feel free to swap out nuts for seeds if allergies are a concern, or choose dairy-free cheese options to suit dietary needs. The beauty of this board is in its flexibility!
Equipment Needed
Putting together a dessert charcuterie board doesn’t require fancy gadgets, but a few key tools make the process smooth and enjoyable.
- Large wooden or marble serving board: The foundation for your display; I like to use a sturdy bamboo board from Sur La Table for its durability and style.
- Small bowls or ramekins: Great for jams, honey, or loose nuts to keep things tidy.
- Cheese knives or spreaders: Essential if you’re adding soft cheeses or spreads.
- Sharp paring knife: For slicing fruit and trimming chocolates if needed.
- Decorative tongs or spoons: For guests to pick items without touch contamination.
If you don’t have a large board, a clean baking sheet lined with parchment can work in a pinch. Also, I learned the hard way that investing in a good set of cheese knives is worth it—makes spreading and cutting so much less frustrating!
Preparation Method
- Prepare your workspace (5 minutes): Clean your serving board and gather all ingredients near your prep area. This keeps assembly smooth and stress-free.
- Slice and prep fruit (10 minutes): Wash berries and gently pat dry. Slice pears or apples thinly to avoid browning (a quick brush of lemon juice helps). Arrange fruit in small clusters, leaving space between.
- Arrange cheeses and spreads (5 minutes): Place dollops of goat cheese or mascarpone in small bowls or directly on the board. Add a small spoon or spreader for guests.
- Place chocolates and sweets (7 minutes): Break larger chocolate bars into bite-sized pieces. Scatter macarons and candied ginger evenly, balancing colors and textures.
- Add crunchy elements (5 minutes): Position biscotti and nuts in small piles or lines. This adds visual interest and crunch contrast.
- Fill in gaps with jams and drizzles (3 minutes): Spoon jam or marmalade into ramekins. Drizzle honey or caramel lightly over certain areas for a sticky-sweet touch—but don’t overdo it or it gets messy.
- Garnish and final touches (2 minutes): Scatter fresh mint leaves or edible flowers to brighten the board. Step back and adjust any crowded spots.
Pro tip: Keep chilled items like cheeses and fruits refrigerated until just before serving to maintain freshness. If you’re prepping in advance, assemble most elements but hold off on drizzles and delicate garnishes.
Sometimes, I get a little distracted mid-assembly (hello, sneaky taste tests), so I recommend setting a timer to keep things moving—especially if guests are en route!
Cooking Tips & Techniques
Creating a perfect dessert charcuterie board is all about balance and presentation. Here’s what I’ve learned over countless boards and happy guests:
- Choose a mix of textures: Combining creamy, crunchy, juicy, and chewy components keeps it interesting. For example, pairing soft mascarpone with crisp biscotti and fresh berries hits all the notes.
- Keep colors vibrant: Contrast helps the board pop visually. Think dark chocolates against bright red strawberries and green mint leaves.
- Don’t overcrowd the board: Leave breathing room between items to avoid a cluttered look. Sometimes less really is more!
- Use small bowls for sticky or loose items: This prevents mess and keeps the board neat, especially for jams and nuts.
- Temperature matters: Serve cheeses and chocolates slightly chilled but not cold—too cold dulls flavors. Room temperature allows the full taste to shine.
- Mind the flow: Arrange items so guests can easily pick from one side to the other without reaching over. It’s a small thing that makes a big difference in comfort.
One time, I learned the hard way that placing soft cheeses directly next to juicy fruit without separation led to a slippery mess. Now, I always use small bowls or line the cheeses with a few crackers to keep things tidy.
Lastly, multitask by prepping fruit while the kids are at school or setting aside non-perishables the day before. This way, you’re not scrambling right before guests arrive.
Variations & Adaptations
This dessert charcuterie board is incredibly adaptable to fit various tastes and dietary needs. Here are some ideas I’ve tried and loved:
- Gluten-Free Version: Swap biscotti for gluten-free crackers or rice cakes. Use naturally gluten-free chocolates and ensure jams are GF-certified.
- Seasonal Theme: In winter, add spiced nuts, dried cranberries, and candied orange peel. Summer boards shine with fresh stone fruits and edible flowers.
- Vegan-Friendly: Use dairy-free cheeses like cashew-based spreads, vegan chocolates, and fresh fruit. Maple syrup makes a great drizzle alternative to honey.
- Flavor Twists: Add a sprinkle of flaky sea salt over dark chocolate or a dash of cinnamon on roasted nuts for an unexpected kick.
- Personal Touch: I once made a board inspired by a trip to Italy, including amaretti cookies, figs, and mascarpone with lemon zest—guests couldn’t stop talking about it!
Adapting for your guests or season is part of the fun and lets you make the board feel like a signature creation every time.
Serving & Storage Suggestions
Serving your dessert charcuterie board at the right temperature really makes a difference. Plan to let cheeses and chocolates sit out for 15-20 minutes before guests arrive so flavors come alive.
Presentation is key—serve on a beautiful wooden or marble board and arrange with intention. Complement with sparkling wine, coffee, or dessert cocktails to round out the experience.
Leftovers can be stored in airtight containers in the fridge for up to 2 days. To reheat, allow cheeses to come back to room temperature and serve fresh fruit separately to avoid sogginess.
One thing I love: these boards often taste even better the next day after flavors mingle a bit, so don’t hesitate to prepare in advance and enjoy leftovers the next afternoon with a cup of tea.
Nutritional Information & Benefits
While dessert charcuterie boards are indulgent, you can balance treats with fresh fruit and nuts to add nutritional value. Here’s a rough idea per serving (depending on portions):
- Calories: 300-400 kcal
- Protein: 4-6 grams (thanks to nuts and cheese)
- Fiber: 3-5 grams from fresh fruit and nuts
- Calcium: Provided by cheese options
Choosing dark chocolate with 70% cocoa adds antioxidants, and nuts contribute heart-healthy fats. Plus, fresh berries are loaded with vitamins and natural sweetness without added sugars.
For those watching carbs, opt for lower-sugar jams or use more fruit and nuts. Always check labels if allergies or intolerances are a concern.
Conclusion
There’s something truly special about gathering friends or family around a dessert charcuterie board that feels both elegant and relaxed. It’s an effortless way to create a memorable moment without spending hours in the kitchen.
Whether you stick to the classic ideas here or put your own spin with seasonal ingredients and personal favorites, this recipe offers a flexible, foolproof framework that will keep guests raving and coming back for more.
Honestly, I keep making these boards because they bring people together, spark conversation, and turn dessert into an experience. Give it a try at your next gathering—you might just find it becomes your signature party trick.
Feel free to share your own creative twists or questions in the comments below—I love hearing how you make this dessert charcuterie your own!
Frequently Asked Questions
What types of cheeses work best on a dessert charcuterie board?
Soft cheeses like goat cheese, mascarpone, or cream cheese pairs wonderfully with sweet elements. You can also try a mild brie or ricotta for creaminess without overpowering sweetness.
Can I prepare the dessert charcuterie board ahead of time?
Absolutely! Prep most ingredients in advance, but assemble the board close to serving to keep fruits fresh and cheeses at optimal texture.
What are some good non-chocolate options for the board?
Fresh fruits, nuts, biscotti, macarons, and jams add variety and flavor without relying solely on chocolate.
How do I keep fruits from browning on the board?
Brush cut fruits like apples and pears with a little lemon juice right after slicing to slow oxidation and keep them looking fresh.
Are there vegan alternatives for this dessert charcuterie board?
Yes! Use plant-based cheeses, vegan chocolates, fresh fruits, nuts, and maple syrup or agave nectar instead of honey for a vegan-friendly spread.
For an added touch of inspiration, I remember how my crispy garlic chicken party once morphed into a full evening thanks to a simple dessert board that everyone loved. And if you’re curious about impressing with savory appetizers, the herb roasted vegetables I prepared complement this dessert spread beautifully.
Pin This Recipe!

Perfect Dessert Charcuterie Board

An elegant and easy-to-assemble dessert charcuterie board featuring a balance of sweet, tart, crunchy, and creamy components perfect for any occasion.
- Prep Time: 15 minutes
- Cook Time: 0 minutes
- Total Time: 30 minutes
- Yield: 8 servings
- Category: Dessert
- Cuisine: American
Ingredients
- Assorted chocolates: dark, milk, and white (preferably Ghirardelli)
- Fresh berries: strawberries, raspberries, blueberries (or cherries, blackberries in summer)
- Seasonal fresh fruit: sliced apples, pears, or figs
- Mini macarons, assorted flavors (optional)
- Honey or caramel drizzle
- Salted almonds or pecans, roasted or raw
- Biscotti or shortbread cookies
- Candied ginger or crystallized orange peel
- Soft cheeses: goat cheese or mascarpone
- Jam or marmalade: citrus or berry-based
- Edible flowers or fresh mint leaves
Instructions
- Prepare your workspace by cleaning your serving board and gathering all ingredients near your prep area (5 minutes).
- Wash berries and gently pat dry. Slice pears or apples thinly and brush with lemon juice to avoid browning. Arrange fruit in small clusters with space between (10 minutes).
- Place dollops of goat cheese or mascarpone in small bowls or directly on the board. Add a small spoon or spreader for guests (5 minutes).
- Break larger chocolate bars into bite-sized pieces. Scatter macarons and candied ginger evenly, balancing colors and textures (7 minutes).
- Position biscotti and nuts in small piles or lines to add visual interest and crunch contrast (5 minutes).
- Spoon jam or marmalade into ramekins. Drizzle honey or caramel lightly over certain areas for a sticky-sweet touch (3 minutes).
- Scatter fresh mint leaves or edible flowers to brighten the board. Adjust any crowded spots (2 minutes).
Notes
Keep chilled items like cheeses and fruits refrigerated until just before serving to maintain freshness. Assemble most elements in advance but add drizzles and delicate garnishes last minute. Use small bowls for sticky or loose items to prevent mess. Serve cheeses and chocolates slightly chilled but not cold for best flavor.
Nutrition
- Serving Size: Approximately 1/8th
- Calories: 350
- Sugar: 20
- Sodium: 150
- Fat: 22
- Saturated Fat: 8
- Carbohydrates: 30
- Fiber: 4
- Protein: 5
Keywords: dessert charcuterie board, elegant dessert, easy entertaining, party dessert, sweet platter, chocolate board, fruit and nuts dessert