Love this? Save it for later!
Share the inspiration with your friends
“You know that feeling when you hear that perfect wobble sound and can’t help but smile?” That’s exactly what happened to me one lazy Sunday afternoon. I was visiting a quirky little cafe tucked away on a quiet street, the kind of place where you overhear snippets of conversations and find unexpected inspiration. While waiting for my coffee, I noticed someone across the room carefully assembling a multi-colored jello dessert, layer by layer. The gentle clinks of the spoon against the glass and the slow pour of each vibrant layer created this oddly satisfying rhythm — who knew jello could be so mesmerizing?
Honestly, I wasn’t planning to make jello that day, but the visual ASMR of those layers sticking together sparked a playful curiosity. I grabbed a cracked mixing bowl (because the nice ones were in the dishwasher, naturally) and started experimenting at home, making a bit of a mess and occasionally checking if the layers were setting just right. Maybe you’ve been there too — trying something simple but discovering it can turn into a mini art project that’s both delicious and oddly calming.
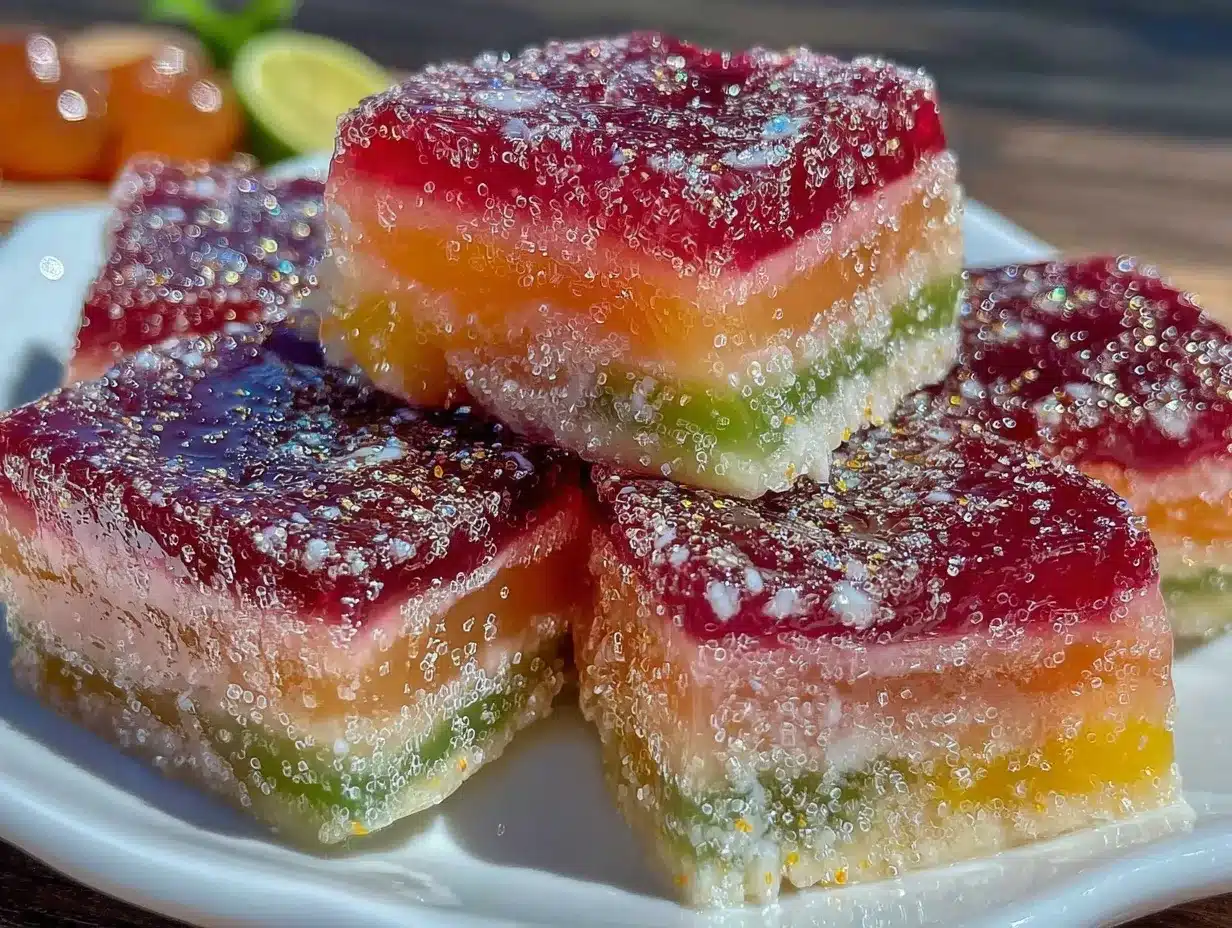
This Satisfying Jello Layering recipe is not just a dessert; it’s a visual treat and a delight for your senses. It sticks with you because it’s as fun to make as it is to eat — perfect for those moments when you want a bit of kitchen zen. Let me tell you, after a few tries and a lot of patience, I nailed the technique and I keep coming back to this recipe whenever I want to impress guests without breaking a sweat.
Why You’ll Love This Recipe
After making this jello layering recipe countless times, I can confidently say it’s a crowd-pleaser and a stress-free project for all skill levels. Here’s why it stands out:
- Quick & Easy: Each layer sets in about 15-20 minutes, so the whole process takes less than two hours — perfect for a weekend treat or a last-minute party dessert.
- Simple Ingredients: You probably already have most of these in your pantry or fridge, no fancy shopping necessary.
- Perfect for Visual ASMR: The layering process is oddly satisfying to watch and even more fun to create yourself.
- Crowd-Pleaser: Kids love the bright colors, and adults appreciate the nostalgic, jelly wobble experience.
- Unbelievably Delicious: The combination of fruity flavors and creamy layers keeps everyone coming back for more.
What makes this recipe truly different is the balance between the crisp, clear layers and the creamy, slightly tangy topping, which you won’t find in your average jello dish. The secret trick I learned was letting each layer chill just long enough to hold but not fully harden — that way, the layers stick beautifully without mixing. Honestly, it’s the kind of recipe that makes you close your eyes after the first bite, savoring the simple joy of childhood in a grown-up kitchen.
What Ingredients You Will Need
This recipe uses straightforward, wholesome ingredients that combine to create both vibrant color and smooth texture. You’ll find most of these in the pantry or fridge, and they’re easy to swap out if needed.
- For the Jello Layers:
- Unflavored gelatin powder (about 2 teaspoons) – helps create firm, clear layers
- Flavored gelatin packets (3-4 flavors, about 3 ounces each) – choose vibrant colors like cherry, lime, and orange
- Boiling water – to dissolve the gelatin powders
- Cold water – to help cool the gelatin before layering
- For the Creamy Layer:
- Sweetened condensed milk (1 cup) – adds richness and a mellow sweetness
- Milk (1 cup) – I prefer whole milk for creaminess, but 2% works too
- Unflavored gelatin powder (1 teaspoon) – to set the creamy layer firmly
Ingredient Tips: I recommend brands like Knox for gelatin for consistent results. If you want to make this recipe dairy-free, swap the sweetened condensed milk with coconut condensed milk and use a plant-based milk alternative. For seasonal twists, you can swap flavored gelatin packets with homemade fruit juice gels, but this will require a bit more patience and experimentation.
Equipment Needed
To make the best jello layers, having the right tools really helps. You’ll need:
- A clear glass or plastic mold or individual cups – glass shows off the layers beautifully
- Mixing bowls – I usually use a medium and a small one, preferably heatproof
- Measuring cups and spoons – accuracy matters for gelatin
- A whisk or spoon – for stirring gelatin without creating bubbles
- Refrigerator space – enough room to chill your layers undisturbed
If you don’t have a fancy mold, no worries! I once used a clean, empty jelly jar and it worked just fine. For budget-friendly options, plastic cups or even silicone molds can do the trick. Just be sure to lightly grease silicone molds for easy release. Also, a digital kitchen timer is handy for timing each layer’s setting, though a phone timer works just as well.
Preparation Method
- Prepare the flavored gelatin layers: In a medium bowl, dissolve one flavored gelatin packet (about 3 oz / 85 g) in 1 cup (240 ml) boiling water. Stir gently until fully dissolved without creating foam. Add ½ cup (120 ml) cold water. Let it cool to room temperature but not set (about 10 minutes).
- Pour the first layer: Pour the cooled gelatin mixture into your mold or cups, about ½ inch (1.25 cm) thick. Place in the refrigerator and chill for about 15-20 minutes until it’s just firm to the touch but not fully set. This is key for perfect layers sticking together.
- Repeat with remaining flavors: Repeat steps 1 and 2 for each gelatin flavor, layering one on top of the other, chilling each layer before adding the next. Be patient here — if you rush, layers will mix, and you’ll lose that stunning effect.
- Prepare the creamy layer: While your last jello layer chills, sprinkle 1 teaspoon (5 g) unflavored gelatin over ¼ cup (60 ml) cold milk in a small bowl. Let it bloom for 5 minutes. Warm the remaining ¾ cup (180 ml) milk gently (do not boil), then stir in the bloomed gelatin until dissolved.
- Mix in the condensed milk: Stir the sweetened condensed milk (1 cup / 300 g) into the warm milk and gelatin mixture until smooth.
- Add the creamy layer: Once the final fruit-flavored layer is ready, gently pour the creamy mixture over it, spreading evenly. Return to the refrigerator and chill for at least 1 hour or until fully set.
- Unmold and serve: To release, dip the mold briefly in warm water (about 5 seconds), then invert onto a serving plate. The layers should hold firm with a beautiful wobble.
Pro Tip: I learned the hard way that rushing the chilling time leads to blurry layers. Use a fingertip test for firmness — the gelatin should feel set but still slightly tacky before adding the next layer.
Cooking Tips & Techniques
Getting those perfect jello layers takes a little patience and some tricks I picked up along the way.
- Bloom gelatin properly: Always sprinkle unflavored gelatin over cold liquid first to prevent lumps and ensure smooth texture.
- Temperature control is crucial: Don’t pour hot gelatin over a chilled layer — it will melt it, ruining the layers. Cool the gelatin to just above room temperature before layering.
- Use a spoon to soften the pour: Pour gelatin gently over the back of a spoon to avoid disturbing the set layer underneath.
- Be patient with chilling: Setting times vary by fridge, so check layers instead of guessing. The right texture is firm but still slightly sticky.
- Keep the mixture foam-free: Avoid whisking vigorously to keep layers crystal clear and avoid bubbles.
Honestly, my first attempts were a mess — I poured the gelatin too warm and ended up with a colorful swirl instead of neat layers. But once I slowed down and trusted the process, it became a fun, almost meditative kitchen project. You’ll get the hang of it quickly, and the results are worth every minute.
Variations & Adaptations
This recipe is pretty flexible and can be adapted to suit different tastes and dietary needs.
- Dairy-Free Version: Swap sweetened condensed milk for coconut condensed milk and use almond or oat milk for the creamy layer.
- Alcohol-Infused Layers: Add a splash of flavored liqueur (like orange or raspberry) to each gelatin layer for an adult twist. Just reduce the water slightly to keep the gel firm.
- Fruit-Chunk Layers: Add small pieces of fresh fruit (like blueberries or kiwi) to each jello layer before chilling for extra texture and flavor bursts.
- Seasonal Flavors: Use pumpkin spice gelatin in fall or berry blends in summer for a festive vibe.
Once, I tried layering with homemade hibiscus and lime juice gels for a tangy, floral version that was a hit at a garden party. Experiment and have fun with colors and flavors — this recipe loves creativity!
Serving & Storage Suggestions
Serve your jello layers chilled for the best wobble and bite. You can present it in a large mold for slicing or individual clear cups for single servings. Pair it with light whipped cream or fresh mint leaves to add a fresh touch.
Store leftovers covered in the refrigerator for up to 3 days. The jello can lose some of its firmness over time but will still taste delicious. To reheat gently (if you want a softer texture), let it sit at room temperature for 15 minutes before serving.
Flavors meld beautifully overnight, so making this a day ahead actually improves the taste and texture. Just be sure to cover it tightly to prevent fridge odors from sneaking in.
Nutritional Information & Benefits
This jello layering treat is relatively low in calories compared to many desserts, thanks to mostly water-based gelatin layers. Here’s a rough estimate per serving (1/8 of recipe):
- Calories: ~150
- Protein: 3g (from gelatin)
- Sugar: 25g (mostly from sweetened condensed milk and flavored gelatin)
- Fat: 2g (from milk and condensed milk)
Gelatin provides collagen, which some find beneficial for skin and joint health. If you use dairy-free options, the fat profile changes slightly, but it remains a light, indulgent dessert. Just keep in mind the sugar content if you’re watching intake.
Conclusion
This satisfying jello layering recipe is a fun, sensory-rich dessert that combines simple ingredients with a bit of patience to create a stunning visual treat. Whether you’re looking to impress friends or just want a playful kitchen project, it’s worth every wobble.
Feel free to customize the flavors and colors to suit your mood or occasion — it’s your canvas! I love this recipe because it’s both nostalgic and fresh, making me feel like a kid again while still indulging like an adult. Give it a try, and let me know how your layers turned out — I’m always curious about new twists!
FAQs
How long does each jello layer need to set before adding the next?
About 15-20 minutes until the layer is firm to the touch but slightly sticky, which helps the next layer stick without mixing.
Can I use homemade fruit juice instead of flavored gelatin packets?
Yes, but homemade gels take longer to set and may require additional gelatin. It’s a fun experiment but expect longer chilling times.
What’s the best way to unmold layered jello without breaking it?
Dip the mold in warm water for about 5 seconds, then invert onto a plate. The warm water loosens the edges without melting the layers.
Can I prepare this dessert a day ahead?
Absolutely! In fact, chilling overnight improves flavor melding and texture. Just cover it tightly to avoid fridge odors.
How do I make this recipe dairy-free?
Swap sweetened condensed milk with coconut condensed milk and use a plant-based milk like almond or oat milk for the creamy layer. Make sure your gelatin is also suitable for your dietary needs.
Pin This Recipe!
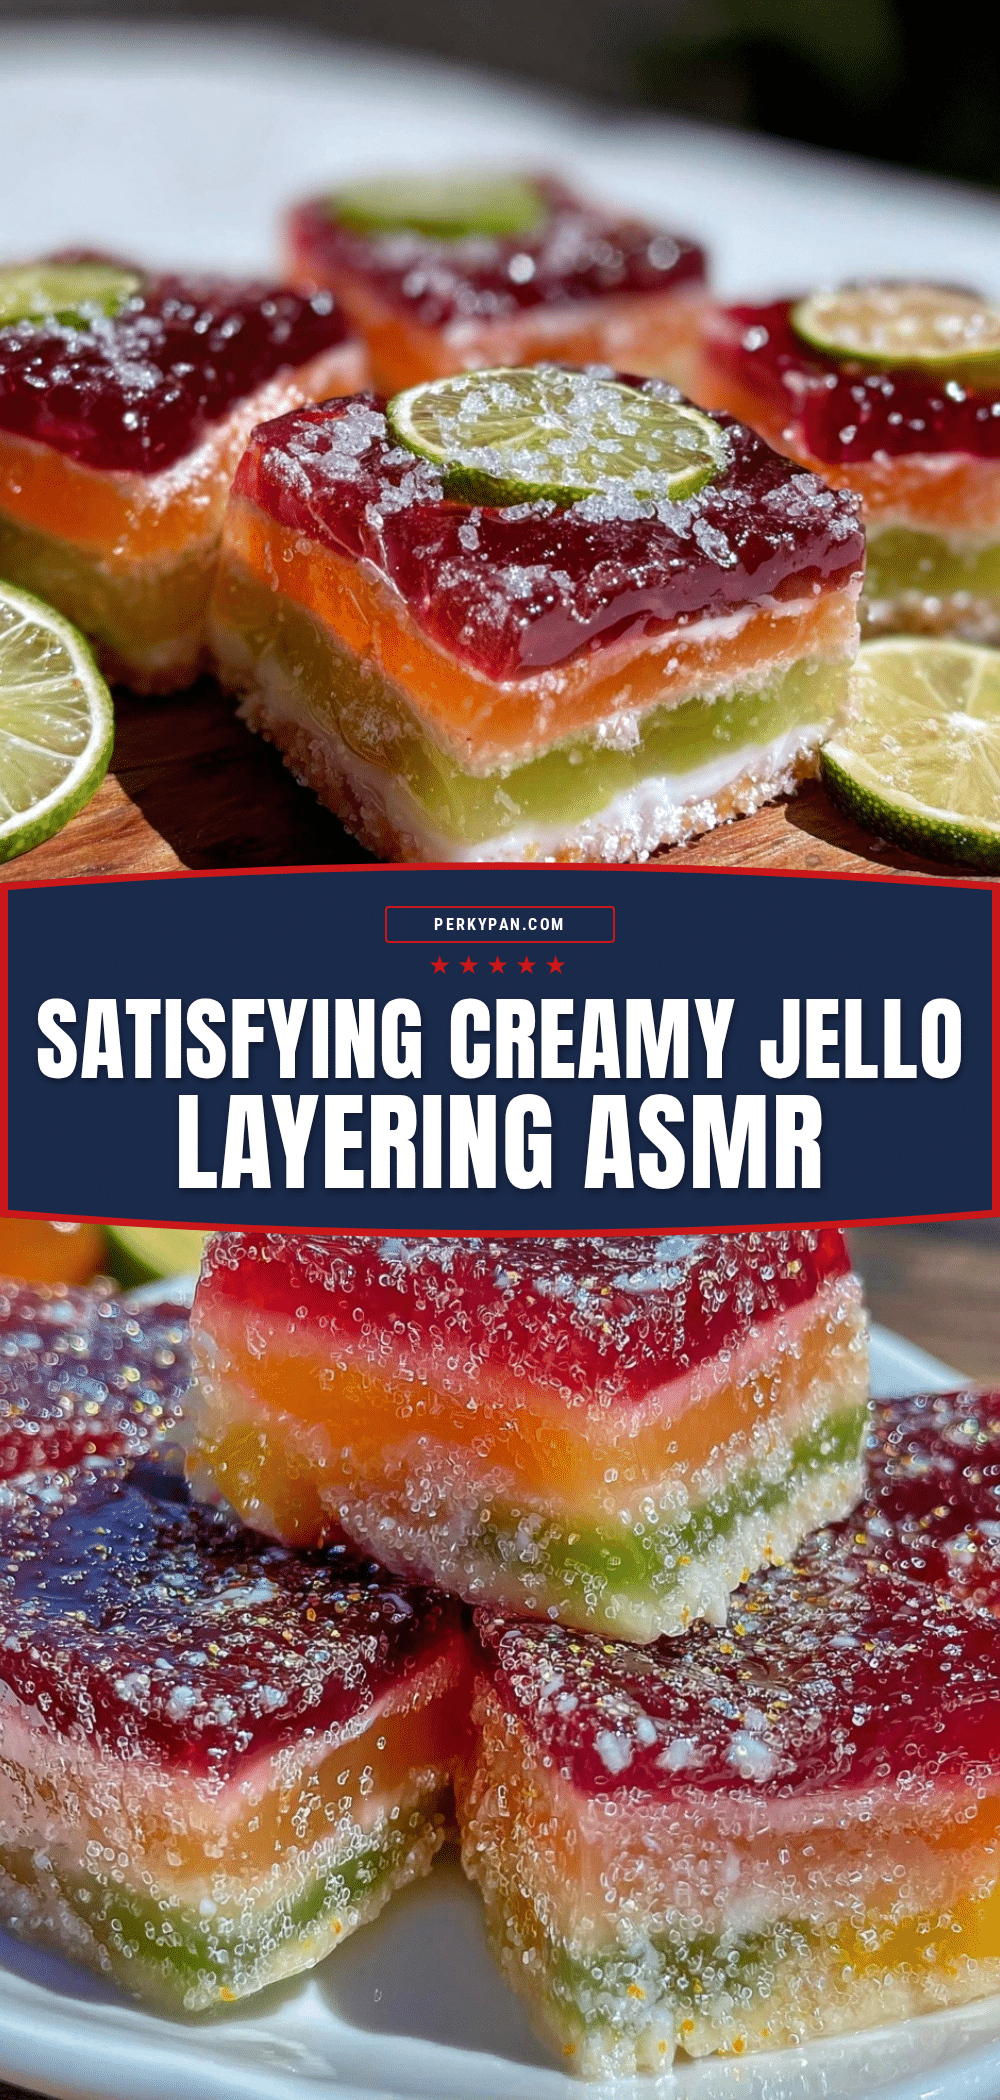
Satisfying Jello Layering Recipe Easy Step-by-Step Guide for Stunning ASMR Treats
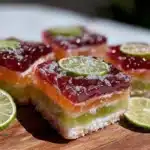
A fun and visually stunning layered jello dessert that combines fruity gelatin layers with a creamy topping, perfect for a playful kitchen project and crowd-pleasing treat.
- Prep Time: 20 minutes
- Cook Time: 1 hour 30 minutes
- Total Time: 1 hour 50 minutes
- Yield: 8 servings
- Category: Dessert
- Cuisine: American
Ingredients
- Unflavored gelatin powder (about 2 teaspoons) for jello layers
- Flavored gelatin packets (3-4 flavors, about 3 ounces each) – cherry, lime, orange recommended
- Boiling water
- Cold water
- Sweetened condensed milk (1 cup)
- Milk (1 cup) – whole or 2%
- Unflavored gelatin powder (1 teaspoon) for creamy layer
Instructions
- In a medium bowl, dissolve one flavored gelatin packet (about 3 oz / 85 g) in 1 cup (240 ml) boiling water. Stir gently until fully dissolved without creating foam. Add ½ cup (120 ml) cold water. Let it cool to room temperature but not set (about 10 minutes).
- Pour the cooled gelatin mixture into your mold or cups, about ½ inch (1.25 cm) thick. Place in the refrigerator and chill for about 15-20 minutes until it’s just firm to the touch but not fully set.
- Repeat steps 1 and 2 for each gelatin flavor, layering one on top of the other, chilling each layer before adding the next.
- While your last jello layer chills, sprinkle 1 teaspoon (5 g) unflavored gelatin over ¼ cup (60 ml) cold milk in a small bowl. Let it bloom for 5 minutes. Warm the remaining ¾ cup (180 ml) milk gently (do not boil), then stir in the bloomed gelatin until dissolved.
- Stir the sweetened condensed milk (1 cup / 300 g) into the warm milk and gelatin mixture until smooth.
- Once the final fruit-flavored layer is ready, gently pour the creamy mixture over it, spreading evenly. Return to the refrigerator and chill for at least 1 hour or until fully set.
- To release, dip the mold briefly in warm water (about 5 seconds), then invert onto a serving plate. The layers should hold firm with a beautiful wobble.
Notes
Let each gelatin layer chill until firm but still slightly tacky to ensure layers stick without mixing. Pour gelatin gently over the back of a spoon to avoid disturbing set layers. Avoid whisking vigorously to keep layers clear and bubble-free. Use fingertip test for firmness before adding next layer. For dairy-free version, swap sweetened condensed milk with coconut condensed milk and use plant-based milk alternatives.
Nutrition
- Serving Size: 1/8 of the recipe
- Calories: 150
- Sugar: 25
- Fat: 2
- Protein: 3
Keywords: jello layering, layered jello, ASMR dessert, easy jello recipe, creamy jello, colorful jello, party dessert, gelatin dessert