Love this? Save it for later!
Share the inspiration with your friends
“I wasn’t planning on baking cookies that evening,” I admit, “but there I was, standing in my tiny kitchen with a cracked mixing bowl and a bag of cocoa powder that had been sitting untouched for months.” It all started when my neighbor, Mrs. Caldwell, mentioned her secret to the perfect Oreo cookie—darker, richer, and with a satisfyingly crispy crunch. Honestly, I wasn’t expecting much from this casual chat while borrowing sugar last Thursday night. But that little conversation sparked something that turned into my newest obsession: crispy homemade Oreo cookies darker and richer than ever.
The smell of cocoa and vanilla swirling in the air, the way the dough felt just right between my fingers, and that first bite—oh, that first bite! It was like rediscovering Oreos all over again, but somehow better. Maybe you’ve been there, too: craving a familiar treat but wanting it just a bit more intense, more textured, more homemade. Well, this recipe fills that craving perfectly, and I can’t wait to share all the details with you.
Let me tell you, these cookies aren’t just your average knockoff. They have a depth of flavor that comes from using high-quality dark cocoa and a touch of espresso powder (trust me on that), plus a crispness that you won’t find in store-bought versions. And the best part? You don’t need a fancy kitchen or a pantry stacked with specialty ingredients. Just a few staples, a bit of patience, and you’re in cookie heaven.
Why You’ll Love This Recipe
After making these crispy homemade Oreo cookies darker and richer than ever several times, I can honestly say they’ve become a staple for both casual snacking and impressing friends. Here’s why you’ll want to keep this recipe close:
- Quick & Easy: The dough comes together in about 15 minutes, and baking takes less than 15 more. Perfect for those sudden cookie cravings or last-minute get-togethers.
- Simple Ingredients: No need to run to specialty stores. Most of what you need is probably already in your kitchen—cocoa powder, flour, butter, sugar, and vanilla.
- Perfect for Sharing: These cookies are a hit at parties, potlucks, or even just a cozy night in with a glass of milk.
- Crowd-Pleaser: Kids, adults, picky eaters—they all love the crunch and that rich chocolatey flavor.
- Unbelievably Delicious: The crispy texture combined with the darker, more intense chocolate flavor creates a cookie that’s anything but ordinary.
What sets this recipe apart is the balance of crispy edges with a slightly tender center, achieved by careful chilling and the addition of espresso powder to bring out the cocoa’s complexity. I’ve tried other homemade Oreo recipes before, but this one nails the classic with a grown-up twist that’s just irresistible. Whether you’re making these for a special occasion or just because you deserve a treat, they won’t disappoint.
What Ingredients You Will Need
This recipe uses simple, wholesome ingredients to deliver bold flavor and a satisfying texture without the fuss. Most are pantry staples, and substitutions are easy if needed.
- All-purpose flour – 1 ¾ cups (220g), sifted for a light texture
- Unsweetened dark cocoa powder – ¾ cup (75g), preferably Dutch-processed for a richer flavor
- Baking soda – ½ teaspoon, to help the cookies rise slightly
- Salt – ½ teaspoon, balances the sweetness
- Unsalted butter – 1 cup (227g), softened but not melted (I recommend using Kerrygold for the creaminess)
- Granulated sugar – 1 cup (200g), for the perfect crisp
- Brown sugar – ½ cup (110g), packed, adds moisture and depth
- Large eggs – 2, room temperature for even mixing
- Pure vanilla extract – 2 teaspoons, high-quality vanilla makes a difference
- Espresso powder – 1 teaspoon (optional but highly recommended for enhancing the chocolate flavor)
For the filling:
- Powdered sugar – 1 ½ cups (180g), sifted for smoothness
- Unsalted butter – ½ cup (113g), softened
- Vanilla extract – 1 teaspoon
- Heavy cream – 2 tablespoons, or as needed for desired consistency
Substitution tips: You can swap all-purpose flour with gluten-free 1:1 baking flour if you need a gluten-free version. For a dairy-free adaptation, use vegan butter and coconut cream for the filling. If espresso powder isn’t on hand, just leave it out; the cookies will still be delicious, but a bit less complex.
Equipment Needed
- Mixing bowls: A large bowl for the dough and a smaller one for the filling.
- Electric mixer or stand mixer: Helpful for creaming butter and sugar smoothly, but a sturdy hand mixer works fine.
- Sifter or fine mesh sieve: To sift dry ingredients and powdered sugar, ensuring no lumps.
- Baking sheets: Flat and rimmed to prevent sliding cookies.
- Parchment paper or silicone baking mat: Prevents sticking and helps with even baking.
- Cooling racks: To let cookies cool completely and maintain crispness.
- Measuring cups and spoons: For precise ingredient amounts.
If you don’t have a mixer, don’t worry. I’ve made these cookies by hand with a wooden spoon more times than I can count. It just takes a little elbow grease. Also, using parchment paper is a game-changer for cleanup and cookie shape consistency. Budget-wise, a silicone baking mat is a worthy investment for any baker—it lasts forever and makes these cookies come out beautifully every time.
Preparation Method

- Preheat your oven to 350°F (175°C). Line two baking sheets with parchment paper or silicone mats to keep your cookies from sticking.
- Sift together the dry ingredients: In a medium bowl, sift 1 ¾ cups (220g) all-purpose flour, ¾ cup (75g) dark cocoa powder, ½ teaspoon baking soda, and ½ teaspoon salt. This ensures an even mix and avoids clumps.
- Cream the butter and sugars: In a large bowl, use an electric mixer to beat 1 cup (227g) unsalted butter, 1 cup (200g) granulated sugar, and ½ cup (110g) packed brown sugar until light and fluffy—about 3-4 minutes. The mixture should look pale and smooth.
- Add eggs and flavorings: Beat in 2 large eggs, one at a time, then stir in 2 teaspoons vanilla extract and 1 teaspoon espresso powder. Mixing slowly helps avoid splatter.
- Combine wet and dry: Gradually add the sifted dry ingredients to the wet mixture, mixing on low speed just until incorporated. Don’t overmix—stop as soon as you don’t see flour.
- Chill the dough: Shape the dough into a disk, wrap it tightly in plastic wrap, and refrigerate for at least 1 hour. This step is crucial for the cookies to hold their shape and get that perfect crisp edge.
- Roll and cut: Lightly flour your surface and roll the chilled dough to about ⅛ inch (3 mm) thickness. Use a 2-inch (5 cm) round cookie cutter to cut out circles. Gather scraps and re-roll once.
- Bake: Place cookies about 1 inch (2.5 cm) apart on the baking sheets. Bake for 10-12 minutes or until the edges are crisp and the centers are set but slightly soft. The cookies will harden as they cool.
- Cool completely: Transfer cookies to wire racks and let cool fully before filling.
- Make the filling: Beat ½ cup (113g) softened unsalted butter until creamy. Gradually add 1 ½ cups (180g) powdered sugar, 1 teaspoon vanilla extract, and 2 tablespoons heavy cream. Beat until smooth and spreadable. Adjust cream quantity for consistency.
- Assemble: Spread or pipe a generous dollop of filling onto the flat side of one cookie, then sandwich with another. Press gently to spread filling evenly but avoid squeezing out.
Pro tip: If your dough feels too sticky while rolling, sprinkle a bit more flour but not too much—it can dry out the cookies. Also, keep the chilled dough cold; if it warms too much, pop it back in the fridge for 15 minutes before continuing. If your cookies bake too flat, check your baking soda’s freshness or try chilling the dough longer next time.
Cooking Tips & Techniques
Making cookies crisp yet tender is a bit of a balancing act, but here are some tips I’ve learned over countless batches:
- Butter temperature matters: Softened, not melted. Too soft and the dough spreads too much; too cold and it won’t cream properly.
- Don’t skip chilling: This isn’t just tradition—it keeps the dough firm and helps the cookies bake evenly, locking in that crispy edge with a tender center.
- Use Dutch-processed cocoa: It has a smoother, less acidic flavor that really deepens the chocolate taste, making these Oreos stand out.
- Espresso powder adds magic: Just a teaspoon enhances the chocolate without tasting like coffee. I learned this trick from a pastry chef friend, and it truly makes a difference.
- Watch baking time carefully: Overbaking dries the cookies, underbaking leaves them too soft. The edges should be firm and centers just set.
- Rotate baking sheets: Ovens can have hot spots. Swapping pans halfway through baking ensures even crispness.
- Filling consistency: The filling should be smooth but not runny. If it’s too stiff, mix in a bit more cream; too soft, add powdered sugar gradually.
One time, I forgot to chill the dough and my cookies turned out flat pancakes. Lesson learned! Now I never skip that step. These little details make the difference between good cookies and truly memorable ones.
Variations & Adaptations
One of the joys of homemade cookies is making them your own. Here are some ways I’ve tweaked this crispy homemade Oreo cookies recipe to suit different tastes and needs:
- Mint Oreo twist: Add ½ teaspoon peppermint extract to the filling for a classic cool flavor. I like to add a few drops of green food coloring, too, for that iconic look.
- Gluten-free option: Substitute the all-purpose flour with a 1:1 gluten-free baking flour blend. I recommend Bob’s Red Mill for consistent results.
- Vegan adaptation: Use vegan butter and swap eggs for ¼ cup unsweetened applesauce or flax eggs. For the filling, coconut cream works beautifully instead of dairy.
- Seasonal berry filling: Mix in 2 tablespoons of homemade berry jam into the buttercream for a fruity surprise.
- Double chocolate filling: Stir in 2 tablespoons melted dark chocolate into the filling for extra richness.
I once made a batch with orange zest in the dough and it was a subtle but delightful twist that made these cookies festive for holiday gifting. Feel free to experiment—this recipe is flexible and forgiving.
Serving & Storage Suggestions
These crispy homemade Oreo cookies are best served at room temperature. The filling is soft but firm enough to hold its shape, making them perfect for snack time or dessert platters.
Pairing them with a cold glass of milk, hot coffee, or even a scoop of vanilla ice cream takes the experience up a notch. For a fun party idea, arrange them on a platter next to a bowl of fresh strawberries or raspberries.
Store cookies in an airtight container at room temperature for up to 5 days. If you want to keep them longer, freezing is a great option—just wrap them individually in plastic wrap and place in a freezer bag for up to 3 months. Thaw at room temperature before serving.
Reheating isn’t necessary, but if you like a warm cookie, pop them in a 300°F (150°C) oven for 5 minutes. The crispness comes back beautifully, and the filling softens slightly.
Fun fact: these cookies actually taste better after a day or two as the flavors meld and the texture balances out—a little patience goes a long way!
Nutritional Information & Benefits
Each crispy homemade Oreo cookie contains approximately:
| Nutrient | Amount per cookie |
|---|---|
| Calories | 150 kcal |
| Fat | 8 g |
| Saturated fat | 5 g |
| Carbohydrates | 18 g |
| Sugar | 12 g |
| Protein | 1.5 g |
Using dark cocoa powder provides antioxidants that support overall health, and the espresso powder adds a negligible amount of caffeine but boosts the chocolate’s richness. This recipe is not gluten-free by default but can be adjusted easily. It contains dairy and eggs, so it’s not suitable for vegan diets unless adapted as mentioned earlier.
From a wellness perspective, making cookies at home means you control the ingredients, avoid preservatives, and can tweak sugar levels to your preference. Honestly, a little indulgence now and then is part of a balanced life, especially when those treats are homemade with care.
Conclusion
If you’ve been searching for a crispy homemade Oreo cookie recipe that’s darker and richer than anything you’ve tried, this is it. I love how these cookies bring back the nostalgia of classic Oreos but with that special homemade touch that makes each bite feel like a treat you crafted just for yourself.
Feel free to customize the filling, experiment with flavors, or keep things traditional. Either way, you’re in for a delicious experience that’s surprisingly simple to make. I can’t wait to hear how these cookies become part of your baking routine or maybe your next party’s star.
Go ahead, grab your mixing bowl and try this recipe. And when you do, please leave a comment below—I’d love to know what variation you tried or any tips you discovered along the way. Baking is more fun when we share the journey, after all!
Happy baking, and remember: sometimes the best treats come from a little kitchen magic and a cracked bowl.
FAQs
How can I make these Oreo cookies extra crispy?
Chilling the dough for at least an hour before baking and baking until the edges are firm but not burnt helps achieve that perfect crispness. Also, using granulated sugar rather than all brown sugar contributes to a crispier texture.
Can I prepare the cookie dough ahead of time?
Yes! The dough can be made up to 3 days ahead and kept tightly wrapped in the refrigerator. This actually improves flavor and texture.
Is it necessary to use espresso powder in the dough?
No, it’s optional but highly recommended. It enhances the chocolate flavor without adding a coffee taste. You can leave it out if you don’t have it on hand.
How should I store the finished cookies?
Store in an airtight container at room temperature for up to 5 days. For longer storage, freeze them individually wrapped for up to 3 months.
Can I make these cookies vegan or gluten-free?
Absolutely! Use vegan butter and egg substitutes like flax eggs for a vegan version. For gluten-free, swap the flour with a 1:1 gluten-free baking flour blend. Adjust baking times slightly as needed.
Pin This Recipe!
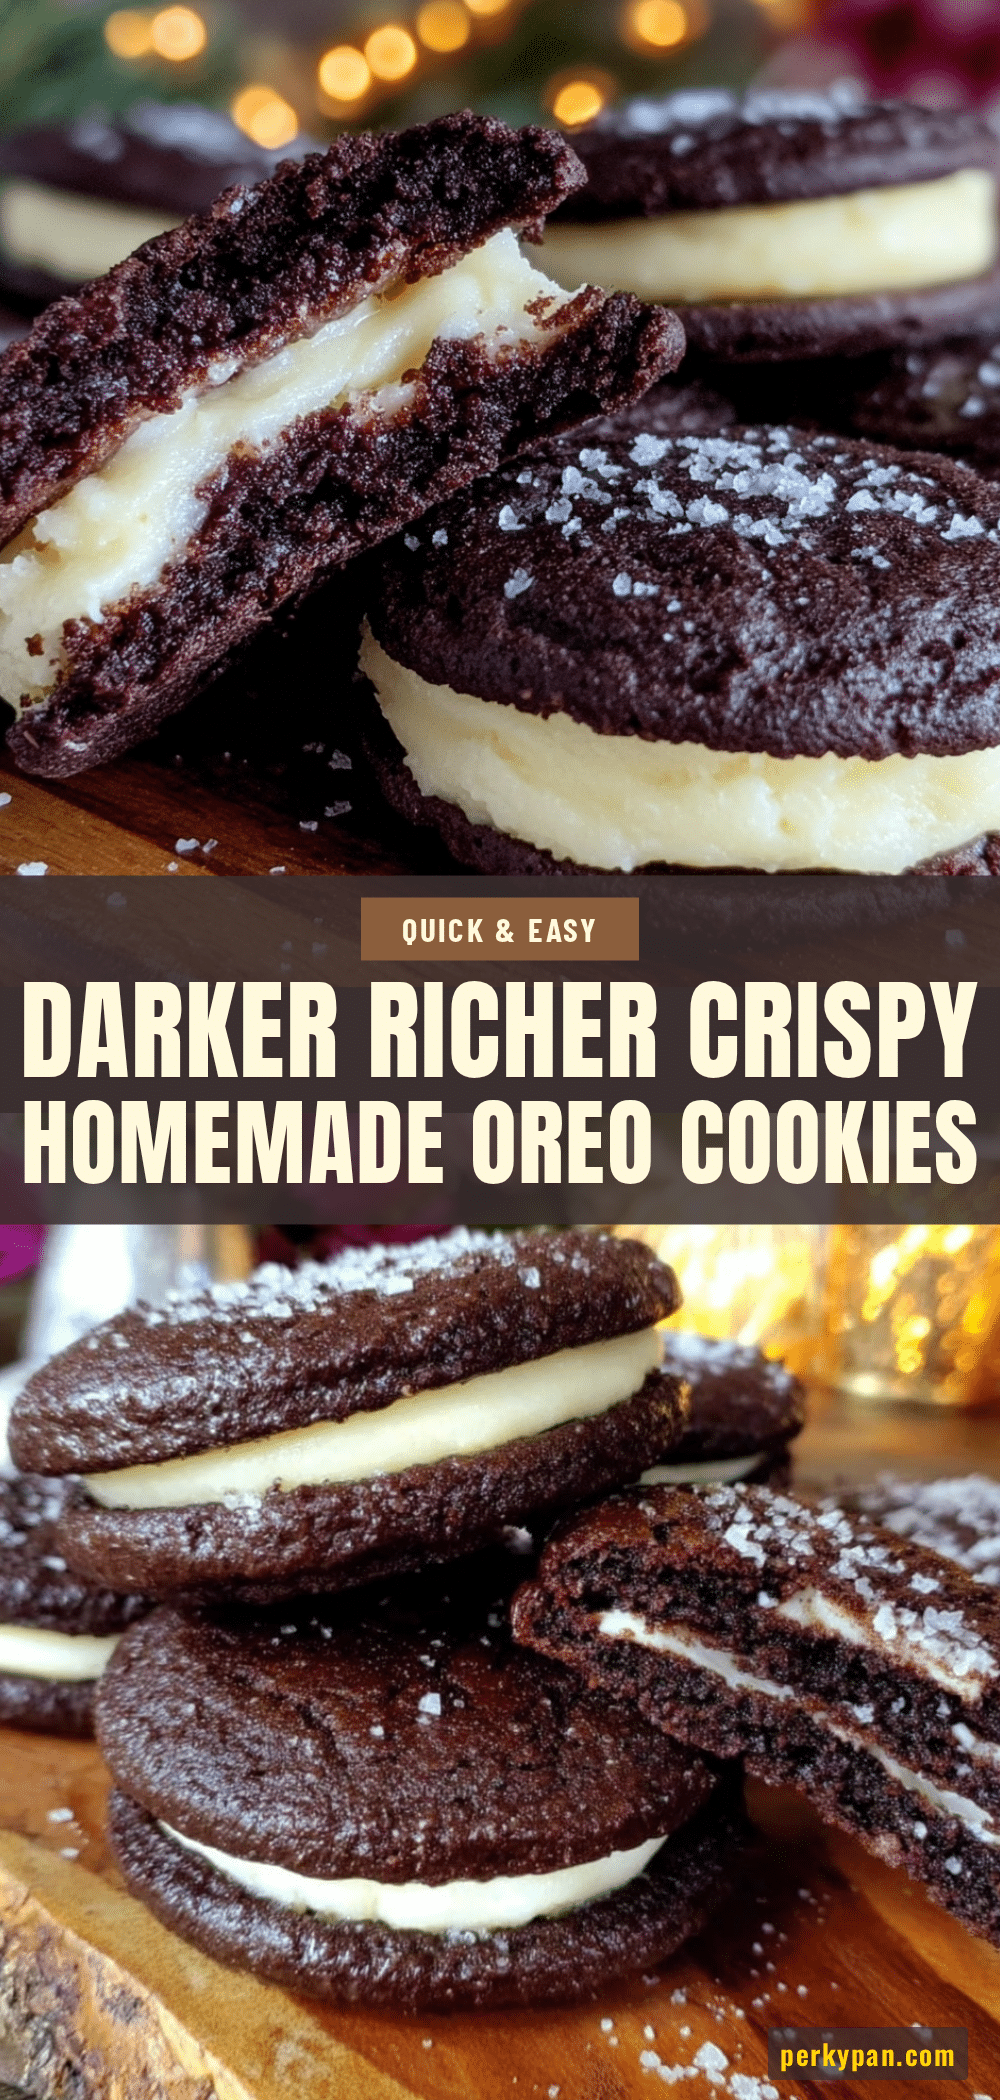
Crispy Homemade Oreo Cookies Recipe Easy Darker Richer Than Ever

These crispy homemade Oreo cookies are darker, richer, and have a satisfyingly crispy crunch with a tender center. Made with high-quality dark cocoa and espresso powder, they offer a grown-up twist on the classic treat.
- Prep Time: 15 minutes
- Cook Time: 12 minutes
- Total Time: 1 hour 27 minutes
- Yield: 24 cookies 1x
- Category: Dessert
- Cuisine: American
Ingredients
- 1 ¾ cups (220g) all-purpose flour, sifted
- ¾ cup (75g) unsweetened dark cocoa powder, preferably Dutch-processed
- ½ teaspoon baking soda
- ½ teaspoon salt
- 1 cup (227g) unsalted butter, softened but not melted
- 1 cup (200g) granulated sugar
- ½ cup (110g) packed brown sugar
- 2 large eggs, room temperature
- 2 teaspoons pure vanilla extract
- 1 teaspoon espresso powder (optional)
- For the filling:
- 1 ½ cups (180g) powdered sugar, sifted
- ½ cup (113g) unsalted butter, softened
- 1 teaspoon vanilla extract
- 2 tablespoons heavy cream, or as needed for desired consistency
Instructions
- Preheat your oven to 350°F (175°C). Line two baking sheets with parchment paper or silicone mats.
- Sift together the dry ingredients: all-purpose flour, dark cocoa powder, baking soda, and salt.
- Cream the butter and sugars using an electric mixer until light and fluffy, about 3-4 minutes.
- Beat in the eggs one at a time, then stir in vanilla extract and espresso powder.
- Gradually add the sifted dry ingredients to the wet mixture, mixing on low speed just until incorporated.
- Shape the dough into a disk, wrap tightly in plastic wrap, and refrigerate for at least 1 hour.
- Lightly flour your surface and roll the chilled dough to about ⅛ inch (3 mm) thickness. Cut out circles with a 2-inch (5 cm) round cookie cutter.
- Place cookies about 1 inch (2.5 cm) apart on baking sheets and bake for 10-12 minutes until edges are crisp and centers set but slightly soft.
- Transfer cookies to wire racks and cool completely before filling.
- Make the filling by beating softened butter until creamy. Gradually add powdered sugar, vanilla extract, and heavy cream until smooth and spreadable.
- Assemble cookies by spreading or piping filling onto one cookie and sandwiching with another. Press gently to spread filling evenly.
Notes
Chill dough for at least 1 hour to achieve crispy edges and tender centers. Use Dutch-processed cocoa for richer flavor. Espresso powder is optional but enhances chocolate depth. Rotate baking sheets halfway through baking for even crispness. Adjust filling consistency with heavy cream or powdered sugar as needed. Dough can be made up to 3 days ahead and refrigerated. Store cookies in airtight container at room temperature up to 5 days or freeze up to 3 months.
Nutrition
- Serving Size: 1 cookie
- Calories: 150
- Sugar: 12
- Fat: 8
- Saturated Fat: 5
- Carbohydrates: 18
- Protein: 1.5
Keywords: Oreo cookies, homemade cookies, crispy cookies, dark cocoa, espresso powder, chocolate cookies, easy cookie recipe