Love this? Save it for later!
Share the inspiration with your friends
Introduction
“You won’t believe this, but I accidentally invented the Crispy Ramen Grilled Cheese Melt one rainy Thursday evening.” I had just gotten home from a long day, craving something comforting but not quite in the mood for my usual grilled cheese. I opened the pantry and found a pack of instant ramen staring back at me. Now, you know that feeling when you’re half distracted by a podcast and trying to figure out dinner? Yeah, that was me. I was about to make ramen the usual way when the power flickered—classic—and I realized the stove was acting up.
So, there I was, staring at two slices of bread and a block of cheddar cheese, with that ramen package unopened. Then it hit me: what if I crushed the noodles and used them to coat my grilled cheese? It sounded crazy, but honestly, I was up for the challenge. I grabbed a cracked bowl, smashed the noodles with a rolling pin (making a bit of a mess, naturally), and layered everything together. The sizzle when the crispy ramen kissed the buttered pan was music to my ears. By the time it was golden and the cheese was melting into a gooey dream, I knew I’d stumbled on something special.
Maybe you’ve been there too—looking for a quick, fun twist on a classic. This recipe stuck with me because it’s that unexpected crowd-pleaser with a crunchy exterior and a melty heart that makes every bite feel like a little celebration. Plus, it’s quick, simple, and uses ingredients you probably already have lying around. Let me tell you, once you try this Crispy Ramen Grilled Cheese Melt, you might just find yourself craving it on those offbeat nights too.
Why You’ll Love This Recipe
After a few rounds of tinkering in the kitchen, I can confidently say this Crispy Ramen Grilled Cheese Melt is a total winner for anyone who loves a fun twist on comfort food. Here’s what makes it stand out:
- Quick & Easy: You can whip this up in under 15 minutes—perfect for hectic weeknights or surprise guests.
- Simple Ingredients: No need for fancy groceries; just ramen, bread, cheese, and butter. I usually grab Black Diamond cheddar for that creamy melt.
- Perfect for Snacking or Lunch: Whether it’s a midday pick-me-up or a casual snack, this recipe hits the spot.
- Crowd-Pleaser: Kids, teens, and adults alike can’t resist that crispy crunch paired with gooey cheese inside.
- Texture Combo: The unexpected crunch from the ramen crust adds a crispy edge that takes grilled cheese to another level.
This isn’t just another grilled cheese sandwich. The secret technique of crushing ramen noodles to create a crunchy outer layer adds a whole new dimension. I find this method keeps the sandwich from getting soggy, especially if you’re packing it for lunch or a quick bite on the go. Honestly, it’s comfort food with a playful attitude, and I bet you’ll impress even the pickiest eaters without breaking a sweat.
What Ingredients You Will Need
This recipe uses simple, pantry-friendly ingredients to build a crave-worthy crispy ramen grilled cheese melt. Everything is easy to find, and there’s room to swap or tweak based on what you have.
- Instant ramen noodles (1 pack, uncooked, discard seasoning) – I prefer Nissin Top Ramen for its crispiness when toasted
- Bread slices (2 thick slices, white or whole wheat works) – thicker bread holds the filling better
- Cheese (2-3 oz / 60-85g, shredded or sliced) – sharp cheddar or mozzarella for gooey melt
- Butter (2 tbsp / 28g, softened) – for spreading on bread and frying
- Optional: a pinch of garlic powder or smoked paprika for extra flavor in the ramen coating
Feel free to swap the bread for gluten-free varieties if needed, and if you want a dairy-free option, use vegan cheese and a plant-based butter alternative. The crushed ramen acts like a crispy crust, so it’s perfect for those who want a little crunch without extra fuss.
Equipment Needed

- Mixing bowl (for crushing ramen noodles)
- Rolling pin or heavy pan (to crush the noodles evenly)
- Non-stick skillet or frying pan (medium size)
- Spatula (for flipping the sandwich)
- Grater (if shredding your own cheese)
If you don’t have a rolling pin, a sturdy glass bottle works just as well for crushing the ramen. I like using a non-stick skillet because it helps get that golden crust without the sandwich sticking or burning. Also, a good spatula with some flexibility makes flipping this crispy creation much easier. For budget-friendly options, cast iron skillets can be great too, though they might need a little extra butter to prevent sticking.
Preparation Method
- Crush the ramen noodles: Open the ramen pack and discard the seasoning packet. Place the dry noodles in a mixing bowl and crush them into small pieces using a rolling pin or the bottom of a heavy pan. Aim for bite-sized crumbs, not powdery dust. This should take about 3-4 minutes.
- Prepare the bread: Spread softened butter evenly on one side of each bread slice. The buttered sides will be the exterior that crisps up.
- Coat the bread with crushed ramen: On a plate, spread the crushed ramen noodles. Press the buttered sides of the bread into the crushed ramen, coating them evenly. Don’t be shy—press gently to make sure the noodles stick well. This step gives the sandwich its signature crunchy shell.
- Assemble the sandwich: Place one slice of bread, ramen side down, on a clean surface. Add the cheese evenly across the bread, making sure to cover from edge to edge for maximum gooeyness. Top with the second slice, ramen side up.
- Cook the sandwich: Heat your non-stick skillet over medium-low heat. Carefully place the sandwich in the pan. Cook for about 3-4 minutes on the first side until golden brown and crispy. Flip carefully with a spatula, cooking the other side another 3-4 minutes. The cheese should be melted and gooey inside by then.
- Serve immediately: Remove from the pan and let it sit for a minute before slicing diagonally. This brief rest helps keep the cheese from oozing everywhere.
Pro tip: If the sandwich is browning too fast before the cheese melts, lower the heat slightly and be patient. Slow and steady cooks the cheese perfectly without burning the crust. Also, if you want to add a flavor kick, sprinkle a little garlic powder or smoked paprika on the butter before coating with ramen.
Cooking Tips & Techniques
Cooking this Crispy Ramen Grilled Cheese Melt is as much about patience as it is about technique. Here are some tips I learned the hard way:
- Don’t rush the cooking: Medium-low heat is your best friend here. You want the ramen crust to toast golden and crunchy without burning before the cheese melts.
- Press gently: When coating the bread in crushed ramen, press just enough to stick without smashing the noodles flat. This texture contrast makes all the difference.
- Use a lid if needed: If your cheese isn’t melting fast enough, cover the pan loosely with a lid for a minute or two to trap heat and speed melting.
- Butter is key: Don’t skimp on the butter on the bread’s exterior—it helps get that irresistible golden crisp.
- Flip carefully: Use a wide spatula and take your time flipping to keep the sandwich intact and the ramen crust in place.
I once tried cooking this on high heat to save time—huge mistake. The crust burned while the cheese barely melted. Learning to slow down made all the difference. Also, I sometimes toast the crushed ramen separately for a minute to bring out nutty flavors before coating the bread, but that’s optional if you’re in a hurry.
Variations & Adaptations
This recipe is fun because you can tweak it easily to suit different tastes or dietary needs:
- Spicy kick: Mix some chili flakes or sriracha into the crushed ramen before coating for a fiery twist.
- Veggie boost: Add thin slices of tomato, spinach, or sautéed mushrooms inside for extra flavor and texture.
- Gluten-free option: Use gluten-free bread and check ramen brand ingredients; some offer gluten-free noodles that work great.
- Cheese swaps: Try pepper jack for a bit of heat or provolone for a milder, creamier melt.
- Cooking method: This works well in a panini press too—just watch the cooking time closely to avoid burning the ramen crust.
One time, I added a thin layer of pesto inside for a fresh flavor that surprised even my most skeptical friends. You can really make this recipe your own, depending on what you have on hand or what mood you’re in.
Serving & Storage Suggestions
This Crispy Ramen Grilled Cheese Melt is best served hot right off the skillet to enjoy the full contrast of crispy exterior and gooey cheese inside. Slice diagonally for a classic presentation that’s easy to hold and dip.
Pair it with a simple side salad or a cup of tomato soup for a cozy meal. I’ve also enjoyed it with sweet potato fries for a fun twist on comfort food. For drinks, a cold glass of iced tea or a sparkling lemonade balances the richness nicely.
If you have leftovers (though rare!), wrap them tightly in foil and store in the fridge for up to 2 days. To reheat, pop it in a skillet over medium heat for a few minutes on each side to bring back that crunch. Avoid the microwave if you want to keep the texture intact.
Flavors deepen slightly the next day, making it a surprisingly good next-day snack that just needs crisping up again.
Nutritional Information & Benefits
While indulgent and comforting, this recipe uses simple ingredients that can fit into a balanced diet. Here’s a rough estimate per serving:
- Calories: 400-450 kcal
- Protein: 15-18g (from cheese and bread)
- Fat: 20-25g (mostly from butter and cheese)
- Carbohydrates: 35-40g (from bread and noodles)
Cheese provides a good source of calcium and protein, while the ramen noodles add carbs for energy. Using whole wheat bread can boost fiber content. For those watching sodium, opt for low-sodium ramen and cheese varieties.
From a wellness standpoint, this recipe is a fun treat that combines familiar comfort with a bit of creativity. It’s a reminder that simple ingredients can create satisfying meals without complex or processed foods.
Conclusion
This Crispy Ramen Grilled Cheese Melt is one of those recipes that proves simple ideas can turn into something truly special. It’s quick, fun, and hits that perfect balance between crunchy and gooey that keeps you coming back for more. Whether you’re feeding hungry kids, entertaining friends, or just treating yourself after a long day, this melt has your back.
Honestly, I love making this when I want something easy but different. It sneaks in that nostalgic grilled cheese vibe but with a playful crispy twist you won’t find anywhere else. Give it a try, and don’t be afraid to make it your own with the variations suggested above.
Let me know how your Crispy Ramen Grilled Cheese Melt turns out! I’m always curious to hear about new spins or little kitchen wins. Happy cooking, and here’s to many crispy, gooey bites ahead!
FAQs
Can I use any flavor of ramen noodles for this recipe?
Yes, but it’s best to discard the seasoning packet and use just the plain noodles. Flavored noodles might make the crust too salty or overpower the cheese.
How do I keep the ramen crust from falling off?
Press the crushed noodles gently but firmly onto the buttered side of the bread. The butter acts like glue to hold the noodles in place during cooking.
Can I make this melt ahead of time?
It’s best fresh, but you can assemble it and refrigerate for up to a few hours before cooking. Just coat the bread with ramen right before frying to keep it crispy.
What cheese melts best for this sandwich?
Sharp cheddar and mozzarella are classics, but pepper jack or provolone also melt nicely and add different flavor profiles.
Is this recipe suitable for gluten-free diets?
You can make it gluten-free by using gluten-free bread and ramen noodles labeled gluten-free. Just check ingredient labels carefully.
And if you’re interested in other creative grilled cheese ideas, you might enjoy my crispy garlic chicken recipe that pairs great with melty sandwiches or my easy easy mac and cheese for extra cheesy comfort.
Pin This Recipe!
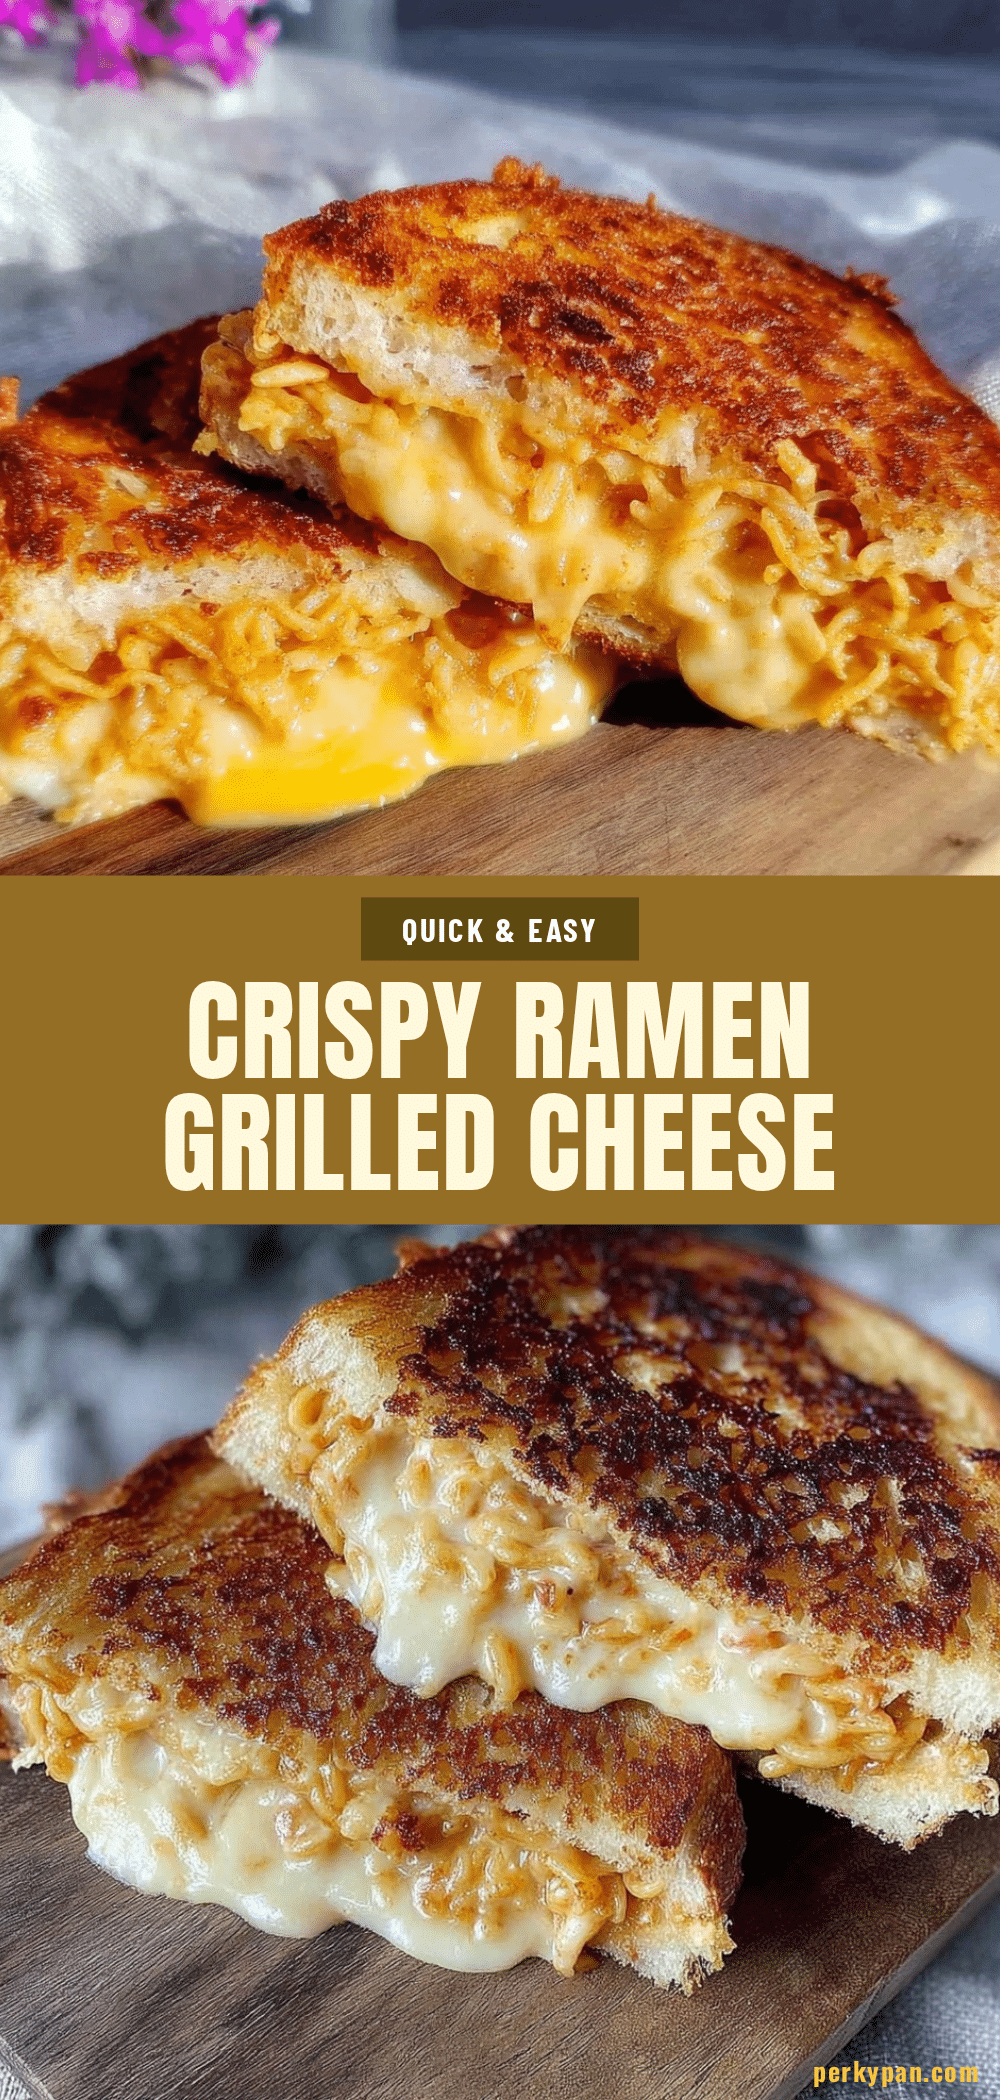
Crispy Ramen Grilled Cheese Melt

A quick and fun twist on classic grilled cheese featuring a crunchy ramen noodle crust and gooey melted cheese inside. Perfect for a comforting snack or lunch.
- Prep Time: 5 minutes
- Cook Time: 8 minutes
- Total Time: 13 minutes
- Yield: 1 sandwich (1 serving) 1x
- Category: Snack
- Cuisine: American
Ingredients
- 1 pack instant ramen noodles (uncooked, discard seasoning)
- 2 thick slices bread (white or whole wheat)
- 2–3 oz (60-85g) cheese (shredded or sliced, sharp cheddar or mozzarella)
- 2 tbsp (28g) butter (softened)
- Optional: pinch of garlic powder or smoked paprika
Instructions
- Open the ramen pack and discard the seasoning packet. Place the dry noodles in a mixing bowl and crush them into small pieces using a rolling pin or the bottom of a heavy pan, aiming for bite-sized crumbs.
- Spread softened butter evenly on one side of each bread slice. The buttered sides will be the exterior that crisps up.
- On a plate, spread the crushed ramen noodles. Press the buttered sides of the bread into the crushed ramen, coating them evenly.
- Place one slice of bread, ramen side down, on a clean surface. Add the cheese evenly across the bread, covering from edge to edge. Top with the second slice, ramen side up.
- Heat a non-stick skillet over medium-low heat. Place the sandwich in the pan and cook for about 3-4 minutes on the first side until golden brown and crispy. Flip carefully and cook the other side for another 3-4 minutes until cheese is melted and gooey.
- Remove from the pan and let sit for a minute before slicing diagonally to serve.
Notes
Use medium-low heat to avoid burning the ramen crust before the cheese melts. Press the crushed noodles gently but firmly onto the buttered bread to keep the crust intact. Optionally, cover the pan loosely with a lid to help cheese melt faster. For gluten-free, use gluten-free bread and ramen noodles. Vegan options possible with plant-based butter and cheese.
Nutrition
- Serving Size: 1 sandwich
- Calories: 425
- Sugar: 3
- Sodium: 700
- Fat: 22
- Saturated Fat: 12
- Carbohydrates: 38
- Fiber: 2
- Protein: 16
Keywords: grilled cheese, ramen, crispy, quick snack, comfort food, easy recipe, cheesy sandwich