Love this? Save it for later!
Share the inspiration with your friends
“You ever get that feeling when the sun is blazing, the grill is fired up, and everyone’s waiting for the fireworks, but you realize your dessert plans are… nowhere?” That was me last July 4th, standing in my tiny kitchen, staring at a half-empty bag of fresh berries and a can of coconut milk. Honestly, I was scrambling for something cool, colorful, and fuss-free to match the festive vibe. The idea came unexpectedly—while chatting with my neighbor, Linda, who casually mentioned how she layers jello cups with coconut and berries for her block party every year.
I wasn’t sold at first. Jello always seemed a bit retro and predictable. But Linda’s version? It was fresh, light, and bursting with summer flavors. She even dropped a funny detail about mixing the coconut layer with a pinch of vanilla to keep it from being too sweet—something I wouldn’t have thought of. So, I gave it a shot that afternoon, juggling a cracked mixing bowl and a persistent toddler tugging at my apron. The result? These Fresh Layered Coconut and Berry Jello Cups that turned into the unexpected star of the night.
Maybe you’ve been there too—looking for a dessert that’s as easy as it is eye-catching, perfect for a crowd, and that brings a little summer magic to your July 4th spread. Let me tell you, this recipe stayed with me because it’s just that kind of treat. It’s cool, creamy, and sweet with just the right tang from the berries. Plus, it’s colorful enough to make your dessert table pop without any stress. So, let’s get to the good stuff and make your holiday shine!
Why You’ll Love This Recipe
After testing and tweaking this recipe over several summers (and yes, a few kitchen mishaps), I’m convinced these Fresh Layered Coconut and Berry Jello Cups are a must-have for your July 4th celebrations. Here’s why they stand out:
- Quick & Easy: Ready in under 30 minutes, with most of the work done while the layers chill—perfect for busy hosts or last-minute dessert needs.
- Simple Ingredients: No need for fancy or hard-to-find items. Most are pantry staples or fresh market finds, making it super convenient.
- Perfect for July 4th: The red, white, and blue layers are festive without being over the top—ideal for backyard barbecues or neighborhood potlucks.
- Crowd-Pleaser: Kids love the sweet jello and berries, while adults appreciate the subtle coconut creaminess that balances the flavors.
- Unbelievably Delicious: The combo of smooth coconut, tart berries, and wobbly jello texture creates a refreshing mouthfeel that’s light yet satisfying.
What makes this recipe different? It’s the layering technique that keeps each flavor distinct but harmonious. Also, blending coconut milk with just a touch of vanilla extract gives it a fresh twist that’s not too sweet or heavy. Unlike traditional jello desserts, this one feels modern and bright—like a little bite of summer in every cup. Honestly, it’s one of those recipes that makes you close your eyes after the first bite and think, “Yep, that’s the good stuff.” Whether you’re impressing guests or just treating yourself after a long day, these cups deliver without the drama.
What Ingredients You Will Need
This recipe uses simple, wholesome ingredients to deliver bold flavor and a satisfying texture without the fuss. Most of these are easy to find at your local grocery store or farmer’s market during summer.
- For the Berry Jello Layer:
- 2 cups water (divided)
- 1 package (3 oz / 85 g) berry-flavored gelatin (I recommend Knox or any natural brand)
- 1 cup fresh mixed berries (blueberries, raspberries, strawberries, roughly chopped)
- For the Coconut Cream Layer:
- 1 can (13.5 oz / 400 ml) full-fat coconut milk, well shaken
- 3 tablespoons sugar (adjust to taste)
- 1 teaspoon pure vanilla extract (adds warmth and depth)
- 1 tablespoon unflavored gelatin powder
- 1/4 cup cold water (to bloom gelatin)
- Optional Garnish:
- Extra fresh berries
- Toasted coconut flakes (adds crunch and color contrast)
Ingredient Tips: For the best coconut layer, choose a coconut milk brand that separates cream from water naturally—this helps create that luscious texture. If you want to keep it dairy-free but lighter, swap sugar for maple syrup or agave nectar. Frozen berries work fine if fresh aren’t available; just thaw and drain excess liquid before layering.
Equipment Needed
- Mixing bowls (at least two medium-sized bowls)
- Measuring cups and spoons
- Whisk or fork for mixing gelatin
- Small saucepan (for gently heating gelatin mixtures)
- Clear plastic or glass cups (4-6 oz / 120-180 ml) for layering — I like using disposable cups for easy clean-up at parties
- Refrigerator space to chill the jello cups
If you don’t have a small saucepan, a microwave-safe bowl works to melt gelatin, but watch closely to avoid overheating. A silicone spatula helps scrape every last bit of coconut cream from the can, which you definitely want to do! For budget-friendly options, thrift stores often have perfectly good glass cups that add a nice touch of class to these desserts.
Preparation Method

- Prepare the Berry Jello Layer (approx. 15 minutes prep + 1 hour chilling):
Bring 1 cup (240 ml) of water to a boil. In a mixing bowl, sprinkle the berry-flavored gelatin over 1 cup (240 ml) of cold water and let it bloom for 5 minutes. Pour the boiling water over the gelatin mixture and stir until fully dissolved. Let it cool slightly (about 5-10 minutes; it should be warm but not hot to touch). - Add the fresh berries to the cooled gelatin mixture and gently stir to combine. Pour this berry layer evenly into your clear cups, filling them about halfway. Place the cups in the refrigerator to set for at least 1 hour or until firm (you can test by gently touching the surface).
- Prepare the Coconut Cream Layer (approx. 15 minutes prep + chilling):
While the berry layer chills, sprinkle 1 tablespoon of unflavored gelatin over 1/4 cup (60 ml) of cold water in a small bowl. Let it bloom for 5 minutes. In a small saucepan, warm 1/2 cup (120 ml) of the coconut milk with sugar over low heat, stirring until the sugar dissolves and the mixture is hot but not boiling. - Remove the saucepan from heat and whisk in the bloomed gelatin until completely dissolved. Stir in the remaining coconut milk (about 1 cup / 240 ml) and the vanilla extract. Let this mixture cool to room temperature—this will prevent melting the berry layer when you add the coconut layer.
- Once the berry layer is fully set, gently pour or spoon the coconut cream mixture over it, filling the cups almost to the top. Return the cups to the refrigerator and chill for another 2-3 hours until the coconut layer is fully set and firm.
- Finishing Touches:
Just before serving, garnish each cup with extra fresh berries and a sprinkle of toasted coconut flakes if desired. These add that little crunch and festive flair that’s perfect for July 4th.
Pro Tip: To avoid mixing layers when pouring the coconut cream, let it cool enough to thicken slightly but still pourable. Pour slowly over the back of a spoon held just above the berry layer to soften the drop.
Cooking Tips & Techniques
Working with gelatin can be a bit tricky if you’re not used to it, but here’s what I’ve learned over multiple tries:
- Bloom Gelatin Properly: Always sprinkle gelatin over cold water and let it sit for at least 5 minutes before dissolving it in warm liquid. This step is key to avoid lumps.
- Temperature Matters: If your gelatin mixture is too hot when layering, it will melt the layer below and create a messy color blend. Cool it to just warm before pouring.
- Layering Technique: Pour slowly and carefully, using a spoon to break the fall of the liquid. This helps keep crisp, clean layers.
- Chill Time: Don’t rush the chilling process. Each layer should be fully set before adding the next to keep the distinct visual effect.
- Multitasking: While waiting for layers to set, prep your garnishes or set the table to save time.
Honestly, the first time I rushed and poured the coconut cream too hot, the layers looked like a pink swirl mess. Learned my lesson quickly! Also, using fresh, firm berries prevents them from sinking or bleeding color into the jello.
Variations & Adaptations
This recipe is quite flexible, so you can tweak it to match your taste or dietary needs:
- Dietary Variation: Use agar-agar powder instead of gelatin for a vegan version. Note that agar sets firmer and faster, so adjust chilling times and amounts accordingly.
- Flavor Swap: Try swapping berry gelatin for lime or lemon flavor and use mango or pineapple chunks instead of berries for a tropical twist.
- Texture Variation: Mix a bit of finely shredded coconut into the coconut cream layer for extra chewiness and texture.
- Cooking Method: If you prefer, make one big layered jello mold instead of individual cups. Just pour each layer gently into a mold and chill thoroughly between layers.
- Personal Favorite: I once added a splash of rum to the coconut layer for an adult-only party. It gave a subtle kick without overpowering the fresh flavors.
Serving & Storage Suggestions
These Fresh Layered Coconut and Berry Jello Cups are best served chilled, straight from the fridge. The cool temperature keeps the layers firm and refreshing, especially on a hot summer day.
For presentation, serve them in clear cups or glass jars to show off the beautiful red, white, and blue layers. Garnish with fresh mint leaves or extra berries for a festive touch. Pair these cups with light dishes like grilled chicken or a crisp salad, and maybe a cold lemonade or iced tea to keep the spread balanced and fresh.
Store leftover jello cups covered tightly with plastic wrap or in an airtight container in the refrigerator for up to 3 days. Avoid freezing, as the texture will be compromised. When reheating (if you must), bring to room temperature for 10 minutes—though these are honestly best enjoyed cold.
Flavors tend to meld and soften overnight, so if you can make them a day ahead, the coconut and berry notes will be even more harmonious.
Nutritional Information & Benefits
Each serving of these jello cups provides a light, low-calorie dessert option with approximately:
| Nutrient | Amount per Serving |
|---|---|
| Calories | 120-150 kcal |
| Fat | 6-8 g (mostly from coconut milk) |
| Carbohydrates | 18-22 g (natural sugars from berries and gelatin) |
| Protein | 2-3 g |
The coconut milk adds healthy medium-chain triglycerides (MCTs), which can support energy and metabolism. Berries are packed with antioxidants and vitamins like vitamin C, making this dessert a little boost of nutrition alongside indulgence. Plus, it’s gluten-free and can be dairy-free if you choose the right coconut milk and gelatin alternatives.
Conclusion
If you’re looking for a dessert that’s as visually stunning as it is delicious, these Fresh Layered Coconut and Berry Jello Cups should be your go-to for July 4th. They’re easy to make, perfect for a crowd, and bring that bright, summery vibe to your celebration without any fuss or fancy ingredients.
I love this recipe because it reminds me of those spontaneous kitchen moments with friends that turn into lasting memories (and great stories). It’s simple, sweet, and just a little bit special.
Give it a try, tweak it to your taste, and don’t forget to share how your jello cups turned out—I’m always curious about new twists or your favorite berry combos. Here’s to a fresh, fun, and festive holiday dessert that everyone will love!
Frequently Asked Questions
Can I make these jello cups ahead of time?
Yes! You can prepare and fully chill the jello cups up to 2 days in advance. Just keep them covered and refrigerated until serving to maintain freshness and texture.
What can I use if I don’t have gelatin?
Agar-agar powder is a great vegetarian alternative. Use about 1 teaspoon agar powder per tablespoon of gelatin and follow package instructions, as agar sets differently and more firmly.
Can I use canned fruit instead of fresh berries?
Fresh berries work best for texture and flavor, but if you use canned fruit, drain it well to avoid watery layers. Choose fruit in juice rather than syrup for less sweetness.
How do I prevent the layers from mixing?
Let each layer fully set in the fridge before adding the next. Also, cool warm gelatin mixtures to room temperature before pouring gently over the back of a spoon onto the set layer.
Are these jello cups kid-friendly?
Absolutely! Kids love the colorful layers and sweet flavors. Just omit any alcohol or adult-only add-ins, and keep an eye on berry pieces if serving to young children.
For more fun and fresh summer treats, you might enjoy my crispy garlic chicken recipe or the delightful lemon blueberry scones perfect for brunch gatherings.
Pin This Recipe!
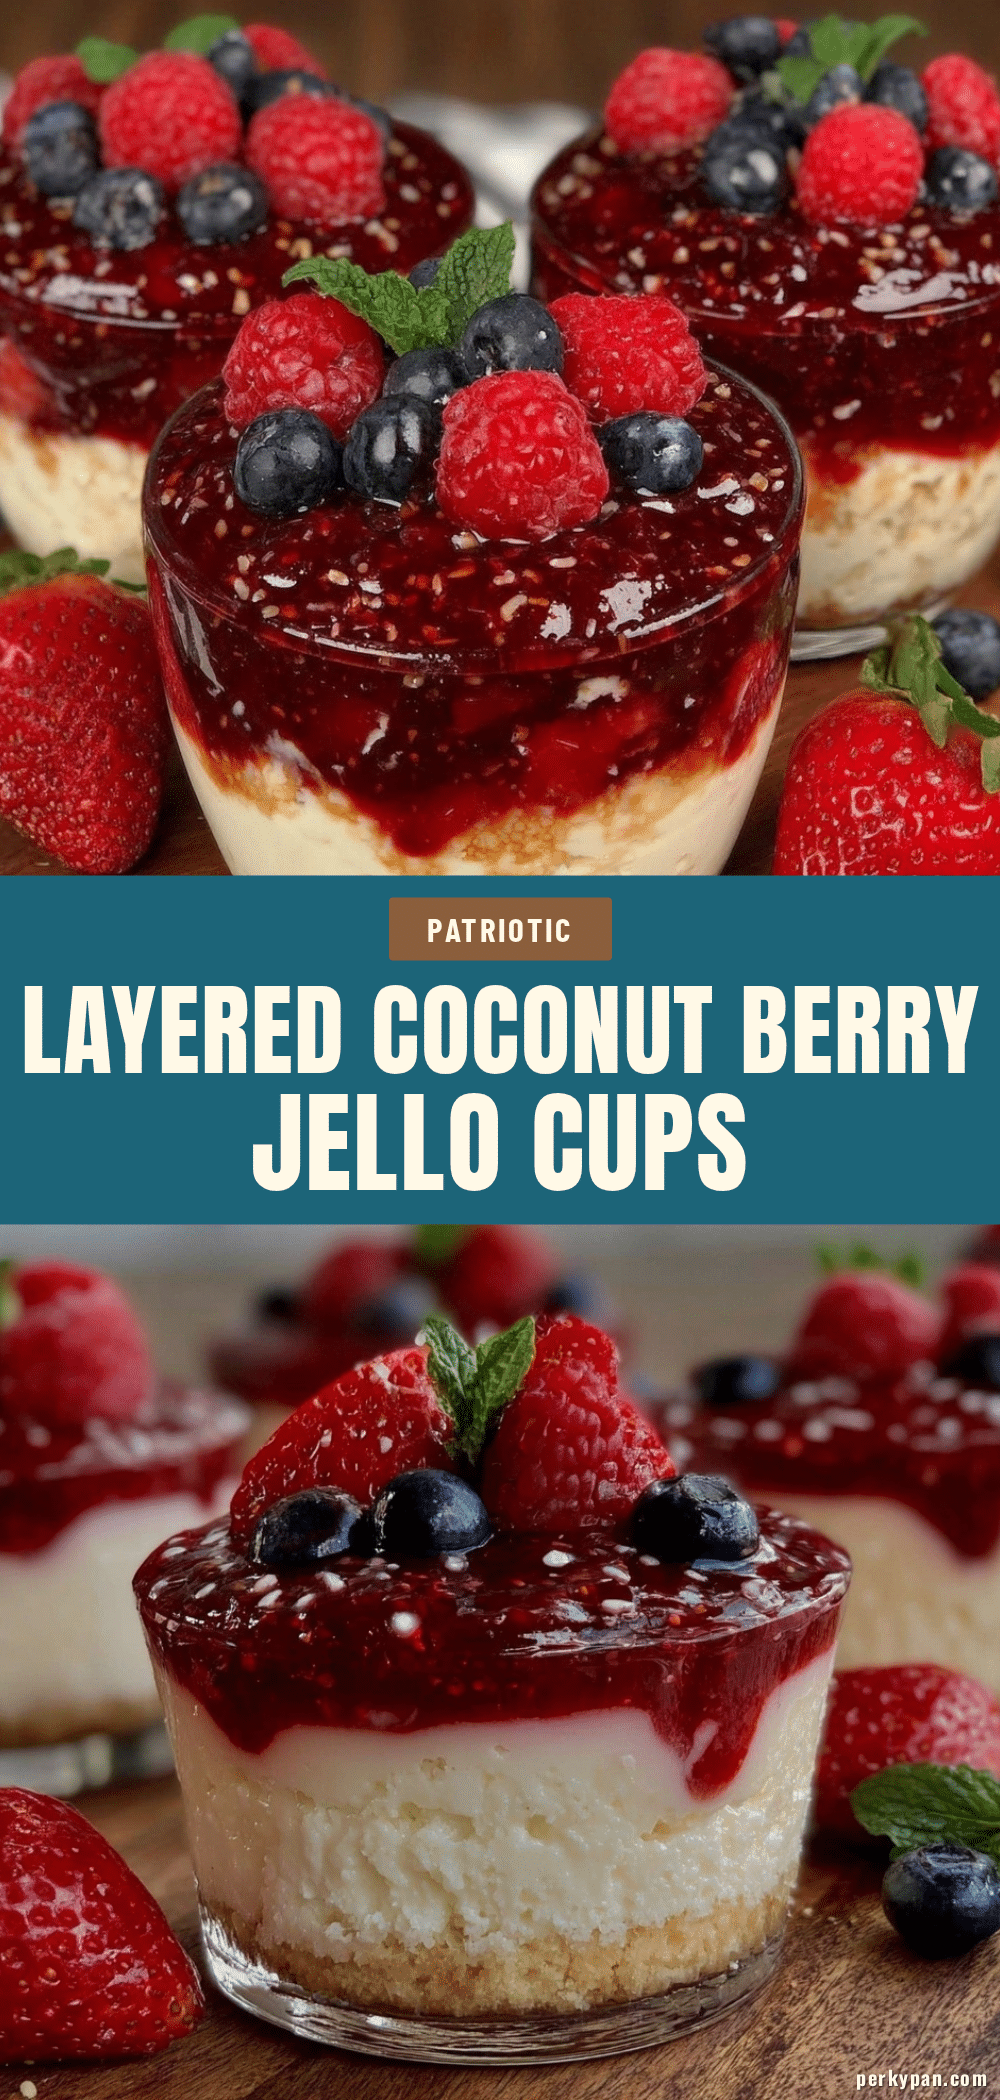
Fresh Layered Coconut and Berry Jello Cups Easy 4th of July Recipe

A cool, creamy, and colorful layered dessert featuring berry-flavored gelatin and a coconut cream layer, perfect for July 4th celebrations and easy to prepare.
- Prep Time: 30 minutes
- Cook Time: 0 minutes
- Total Time: 4 hours
- Yield: 6 servings 1x
- Category: Dessert
- Cuisine: American
Ingredients
- 2 cups water (divided)
- 1 package (3 oz / 85 g) berry-flavored gelatin
- 1 cup fresh mixed berries (blueberries, raspberries, strawberries, roughly chopped)
- 1 can (13.5 oz / 400 ml) full-fat coconut milk, well shaken
- 3 tablespoons sugar (adjust to taste)
- 1 teaspoon pure vanilla extract
- 1 tablespoon unflavored gelatin powder
- 1/4 cup cold water (to bloom gelatin)
- Optional garnish: extra fresh berries
- Optional garnish: toasted coconut flakes
Instructions
- Bring 1 cup (240 ml) of water to a boil. In a mixing bowl, sprinkle the berry-flavored gelatin over 1 cup (240 ml) of cold water and let it bloom for 5 minutes.
- Pour the boiling water over the gelatin mixture and stir until fully dissolved. Let it cool slightly (about 5-10 minutes; warm but not hot).
- Add the fresh berries to the cooled gelatin mixture and gently stir to combine. Pour this berry layer evenly into clear cups, filling about halfway.
- Place the cups in the refrigerator to set for at least 1 hour or until firm.
- Sprinkle 1 tablespoon of unflavored gelatin over 1/4 cup (60 ml) of cold water in a small bowl and let it bloom for 5 minutes.
- In a small saucepan, warm 1/2 cup (120 ml) of coconut milk with sugar over low heat, stirring until sugar dissolves and mixture is hot but not boiling.
- Remove from heat and whisk in the bloomed gelatin until completely dissolved.
- Stir in the remaining coconut milk (about 1 cup / 240 ml) and vanilla extract. Let cool to room temperature.
- Once the berry layer is set, gently pour or spoon the coconut cream mixture over it, filling cups almost to the top.
- Return cups to refrigerator and chill for another 2-3 hours until coconut layer is fully set and firm.
- Just before serving, garnish each cup with extra fresh berries and toasted coconut flakes if desired.
Notes
Bloom gelatin properly by sprinkling over cold water and letting sit for 5 minutes before dissolving. Cool gelatin mixtures to warm (not hot) before layering to prevent melting layers. Pour coconut cream slowly over the back of a spoon to keep layers distinct. Use fresh, firm berries to avoid color bleeding. Agar-agar can be used as a vegan alternative but sets firmer and faster. Store covered in refrigerator up to 3 days; avoid freezing.
Nutrition
- Serving Size: 1 cup (approx. 4-6 o
- Calories: 135
- Sugar: 15
- Sodium: 50
- Fat: 7
- Saturated Fat: 6
- Carbohydrates: 20
- Fiber: 2
- Protein: 2.5
Keywords: jello cups, layered dessert, coconut cream, berry gelatin, 4th of July dessert, easy summer dessert, patriotic dessert