Love this? Save it for later!
Share the inspiration with your friends
I wasn’t expecting cooking advice from my accountant, but there I was, sitting in his cramped office last April, waiting for him to finish reviewing my quarterly taxes, when he started describing exactly how to make the creamiest scalloped potatoes I’d ever heard of. He was this quiet guy, always wore the same gray sweater, never said much beyond “sign here” and “you’re slightly overpaying.” But that day, maybe because he smelled something good coming from the break room, he just started talking about potatoes. He told me about his grandmother’s recipe, the one she’d make for every family dinner, the one that somehow got his picky kids to actually eat their vegetables without a fight. I scribbled it down on the back of an envelope—I mean, who was I to argue with a man who clearly understood both numbers and comfort food?
Honestly, I almost forgot about that envelope. It sat in my purse for weeks, buried under receipts and grocery lists. Then one rainy Tuesday, when I was staring into my pantry wondering what to make for dinner that wouldn’t require another trip to the store, I found it. The instructions were messy—he’d written “a good glug of cream” and “bake until it smells like heaven”—but I decided to give it a shot. And let me tell you, the first time I pulled those creamy make-ahead scalloped potatoes out of the oven, I knew I’d stumbled onto something special. My kids, who usually push potatoes around their plates, actually asked for seconds. My husband went quiet, which is his way of saying “this is really good.” I knew right then this recipe was a keeper.
The thing about these scalloped potatoes is they solve a problem we all face: how do you get a hot, homemade side dish on the table when you’re already juggling a main course, a vegetable, and probably a screaming toddler? You make them ahead. That’s the secret. These potatoes sit happily in the fridge for a day or two, getting even more flavorful as they wait, and then you just pop them in the oven when you’re ready. Maybe you’ve been there—standing in your kitchen at 5 PM, wondering how you’re going to pull off another weeknight dinner without losing your mind. I’ve been there too, and this recipe is my answer. It’s creamy, it’s cheesy, it’s kid-approved, and it makes you look like you have your life together even when you absolutely don’t.
Why You’ll Love This Recipe
I’ve tested this recipe at least a dozen times—tweaking the cream ratio, adjusting the cheese, experimenting with different potato varieties—and I can confidently say this version is the one. It’s the one that works every single time, even when you’re distracted or tired or cooking for a crowd. Here’s why I think you’ll love it as much as I do:
- Truly Make-Ahead Friendly: You can assemble these scalloped potatoes up to two days in advance. That’s a game-changer for holidays, busy weeknights, or any time you want to get ahead of the chaos. Just layer, cover, and refrigerate. When you’re ready, bake them straight from the fridge—just add a few extra minutes.
- Kid-Approved Texture: Let’s face it, kids can be picky about creamy dishes. Some scalloped potatoes turn out gluey or grainy, but these are perfectly tender with a silky sauce that kids actually love. My own children, who once declared they “don’t like potatoes that are wet,” now ask for these by name.
- Simple Pantry Ingredients: No fancy cheese, no obscure spices, no trips to three different stores. You need potatoes, cream, milk, butter, flour, cheese, and a few seasonings. That’s it. I bet you have most of these in your kitchen right now.
- Budget-Friendly: Potatoes are one of the cheapest ingredients you can buy, and this recipe stretches them into a side dish that feels luxurious. It’s the kind of recipe that makes you feel like you’re serving something special without spending much at all.
- Crowd-Pleaser: I’ve brought these scalloped potatoes to potlucks, family reunions, and holiday dinners. They disappear fast. Even people who say they “don’t really like scalloped potatoes” end up going back for seconds. There’s something about that creamy, cheesy top layer that gets everyone.
What makes this recipe different from other scalloped potatoes? It’s the technique. Most recipes tell you to just layer raw potatoes with sauce and hope for the best. But I spent a lot of time figuring out why some batches turned out perfect and others were a watery mess. The secret is partially cooking the potatoes before layering, which prevents them from releasing too much starch and water into the sauce. It’s a small step that makes a huge difference. The result is a dish that’s consistently creamy, never watery, and always satisfying.
This isn’t just a good recipe—it’s the kind that makes you close your eyes after the first bite. It’s comfort food reimagined: richer than you expected, but not heavy. It’s the side dish that steals the show, the one your family will request for every holiday, the one you’ll make on random Tuesdays just because you want something warm and good. And honestly, isn’t that what cooking is all about?
What Ingredients You Will Need
This recipe uses simple, wholesome ingredients to deliver that rich, creamy texture and bold flavor without any fuss. Most of these are pantry staples, so you probably won’t need to buy much. Let me walk you through each one and share a few tips I’ve learned along the way.
For the Potatoes
- 3 pounds Yukon Gold potatoes (about 6-7 medium potatoes) – Yukon Golds are my absolute favorite for scalloped potatoes. They have a naturally buttery flavor and a creamy texture that holds up beautifully during baking. Russets work in a pinch, but they can get a bit mealy. Red potatoes are too waxy and won’t absorb the sauce as well. I recommend sticking with Yukon Golds for the best results.
- 2 tablespoons unsalted butter – For greasing the baking dish and adding richness to the sauce. Salted butter works if that’s all you have, just reduce the added salt slightly.
For the Cream Sauce
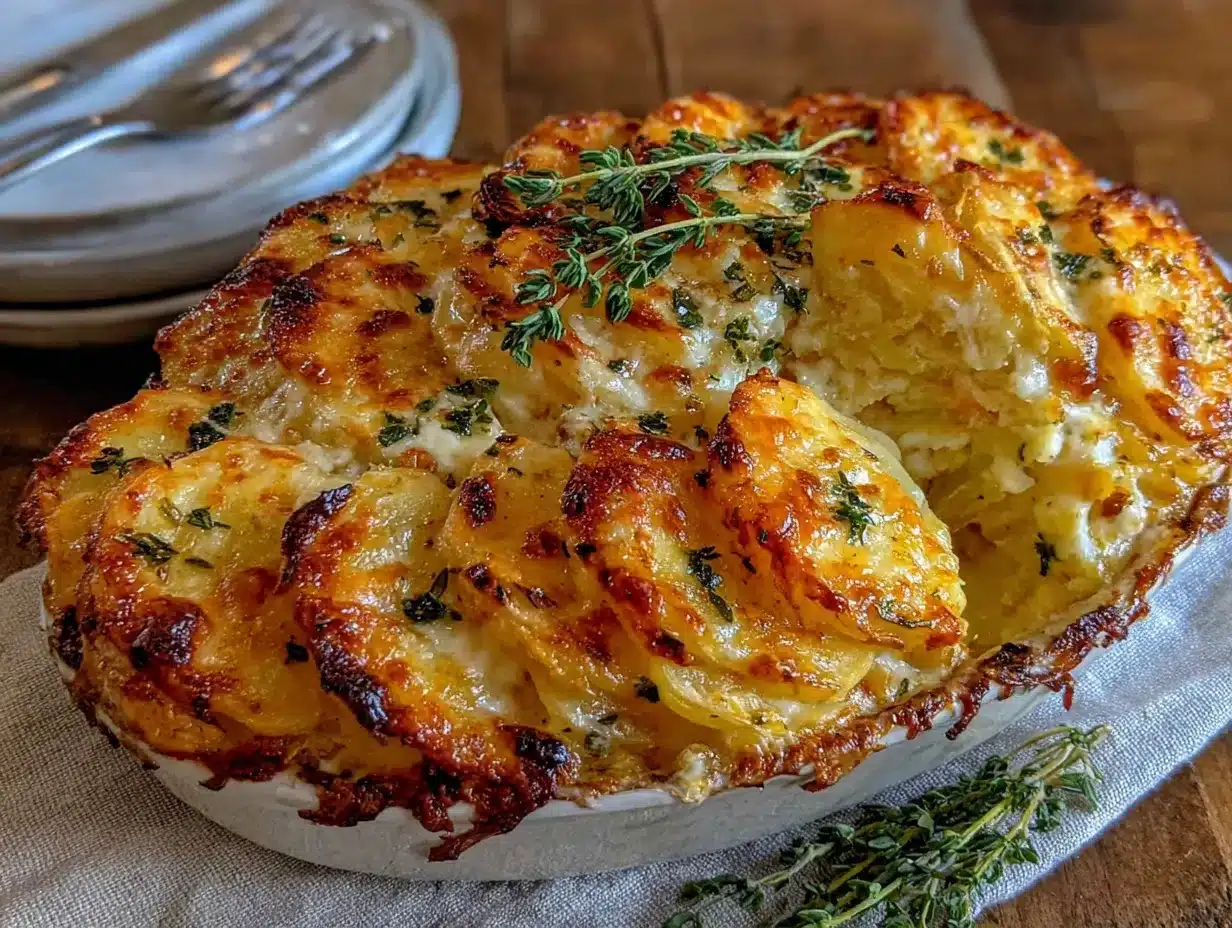
- 2 cups heavy cream – This is what makes the sauce so luscious. Don’t substitute with milk alone, or the sauce will be too thin. If you want to lighten it up a bit, you can use 1 cup heavy cream and 1 cup whole milk, but the texture won’t be quite as rich.
- 1 cup whole milk – Helps thin the cream slightly so the sauce isn’t overwhelmingly heavy. I’ve tried this with 2% milk and it works okay, but whole milk gives the best creamy consistency.
- 3 tablespoons all-purpose flour – This thickens the sauce. You can use a gluten-free all-purpose flour blend if needed, but I haven’t tested this with any other thickeners like cornstarch.
- 3 tablespoons unsalted butter – For making the roux, which is the base of the sauce. I prefer unsalted here so I can control the salt level.
- 1 teaspoon salt – I use fine sea salt. If you’re using kosher salt, you might need a bit more. Season to taste as you go.
- ½ teaspoon black pepper – Freshly ground is always better. It adds a subtle warmth that complements the creamy sauce.
- ¼ teaspoon garlic powder – Not enough to taste garlicky, just enough to add depth. Trust me on this one.
- ⅛ teaspoon nutmeg – This is my secret ingredient. A tiny pinch of freshly grated nutmeg does something magical to cream-based sauces. It’s not noticeable as “nutmeg,” it just makes everything taste more… complete. Don’t skip it.
For the Cheese
- 2 cups shredded sharp cheddar cheese (about 8 ounces) – Sharp cheddar gives the best flavor. I’ve tried mild cheddar and it’s fine, but you lose that tangy kick that makes these potatoes so addictive. I recommend shredding your own cheese from a block—pre-shredded cheese has anti-caking agents that can make the sauce grainy. My favorite brand for this is Tillamook or Cabot, both melt beautifully.
- ½ cup grated Parmesan cheese – This adds a salty, nutty flavor and helps create that golden-brown crust on top. I use the real stuff from the refrigerated section, not the green can.
Optional Additions
- 1 small onion, thinly sliced – If you want extra flavor, you can layer thin onion slices between the potatoes. I do this sometimes when I’m feeling fancy, but I leave it out when I’m cooking for my kids since they’re not onion fans.
- 2 cloves garlic, minced – A little fresh garlic in the sauce is lovely, but again, my kids prefer it without. I usually add it to the butter when making the roux.
Equipment Needed
You don’t need any fancy gadgets for this recipe, which is part of why I love it. Here’s what you’ll need:
- 9×13-inch baking dish – This is the perfect size for a double batch or a single recipe that serves 8-10. If you’re making a smaller batch, an 8×8-inch dish works, but you’ll need to adjust the layering.
- Large pot – For parboiling the potato slices. A 5-quart pot is ideal.
- Medium saucepan – For making the cream sauce. A heavy-bottomed saucepan works best to prevent scorching.
- Sharp knife or mandoline – A sharp chef’s knife will do the job, but a mandoline makes slicing the potatoes uniformly thin so much easier. I have a simple Benriner mandoline that cost about $20 and it’s one of my most-used kitchen tools. Just watch your fingers!
- Cutting board – Preferably a large one to hold all those potato slices.
- Whisk – For smoothing out the roux and sauce. A silicone whisk is great for nonstick pans.
- Wooden spoon or spatula – For stirring the potatoes gently.
- Box grater – For shredding your own cheese. It’s a little extra work, but the texture is so much better.
- Aluminum foil – For covering the dish during the first part of baking.
Preparation Method
Now let’s get to the good part. I’ve broken this down into clear steps, and I’ve included all the little details I’ve learned from making these potatoes more times than I can count. Trust the process, and you’ll end up with the creamiest scalloped potatoes you’ve ever made.
Step 1: Prep the Potatoes
Peel your potatoes and slice them into ⅛-inch thick rounds. If you’re using a mandoline, this goes fast—just be careful with your fingers. If you’re using a knife, take your time and try to get them as uniform as possible. Even slices mean even cooking. Place the slices in a large bowl of cold water as you go to prevent them from turning brown. I learned this the hard way after my first batch came out looking grayish.
Step 2: Parboil the Potatoes
Bring a large pot of salted water to a boil. Add the drained potato slices and cook for exactly 5 minutes. You’re not trying to cook them through—just soften them slightly so they don’t release too much starch into the sauce later. Drain them gently and spread them out on a clean kitchen towel or paper towels to cool and dry. This step is non-negotiable, I’ve tried skipping it and ended up with watery scalloped potatoes every single time.
Step 3: Make the Cream Sauce
In a medium saucepan, melt 3 tablespoons of butter over medium heat. Once it’s foamy, whisk in the flour and cook for 1-2 minutes, stirring constantly. This is your roux, and it should smell slightly nutty but not brown. Slowly pour in the heavy cream and milk, whisking continuously to prevent lumps. Bring the mixture to a gentle simmer, then reduce the heat to low. Add the salt, pepper, garlic powder, and nutmeg. Let it cook for 3-4 minutes, stirring occasionally, until it thickens enough to coat the back of a spoon. Remove from heat and stir in 1½ cups of the shredded cheddar cheese until melted and smooth. Taste the sauce and adjust seasoning if needed—it should be well-seasoned since the potatoes will absorb some of the salt.
Step 4: Layer the Potatoes
Preheat your oven to 375°F (190°C). Grease your 9×13-inch baking dish with the remaining 2 tablespoons of butter. Spread a thin layer of the cream sauce on the bottom of the dish—just enough to coat it. Arrange one-third of the parboiled potato slices in an even layer, slightly overlapping them. Pour one-third of the remaining sauce over the potatoes, spreading it evenly. Repeat this process two more times, ending with a final layer of sauce on top. Sprinkle the remaining ½ cup of shredded cheddar and the Parmesan cheese over the top.
Step 5: Bake (or Refrigerate)
If you’re baking right away, cover the dish with aluminum foil and bake for 30 minutes. Then remove the foil and bake for another 20-25 minutes, until the top is golden brown and bubbly, and the potatoes are tender when pierced with a fork. If you’re making these ahead, cover the dish tightly with foil and refrigerate for up to 2 days. When you’re ready to bake, add about 15-20 minutes to the covered baking time since you’re starting from cold. I usually bake covered for 40 minutes, then uncovered for 20 minutes when making these from the fridge.
Step 6: Rest and Serve
Let the scalloped potatoes rest for 10-15 minutes after coming out of the oven. This is crucial—I know it’s hard to wait, but the sauce needs time to set up. If you serve them right away, they’ll be runny. After resting, they’ll hold their shape beautifully. Garnish with a sprinkle of fresh parsley or chives if you’re feeling fancy, though I usually skip that for family dinners.
Cooking Tips & Techniques
Over the years, I’ve made pretty much every mistake you can make with scalloped potatoes. I’ve had them turn out watery, burnt on top but raw in the middle, and once I even forgot to add the cheese entirely (we ate them anyway, and they were still pretty good). Here are the tips I wish someone had told me from the start:
Don’t skip the parboiling step. I know it adds an extra pot to wash, but it’s the difference between creamy potatoes and a watery mess. Raw potatoes release starch and water as they cook, which thins out your sauce. Parboiling them for just 5 minutes removes some of that excess starch and starts the cooking process, so they finish baking evenly without flooding the dish.
Slice your potatoes uniformly. This is where a mandoline really shines. If some slices are thick and others are thin, the thin ones will turn to mush while the thick ones stay crunchy. Aim for ⅛-inch thickness across the board. If you’re using a knife, take your time and check your slices as you go.
Season each layer. I mentioned this in the instructions, but it bears repeating. If you just season the sauce and pour it over the potatoes, the middle layers might be bland. I like to sprinkle a tiny pinch of salt and pepper between each potato layer as I build the dish. It makes a noticeable difference.
Let it rest before serving. I can’t stress this enough. Those 10-15 minutes after baking are when the sauce thickens and the potatoes settle. If you dig in right away, you’ll end up with a soupy mess. I usually set a timer and force myself to wait. The anticipation is worth it.
Watch the top for burning. Ovens vary, so check your potatoes during the last 10 minutes of uncovered baking. If the top is getting too dark but the potatoes aren’t tender yet, tent loosely with foil. I’ve had to do this a few times with my finicky oven.
Variations & Adaptations
One of the best things about this recipe is how adaptable it is. I’ve tried several variations over the years, and here are my favorites:
Cheesy Bacon Scalloped Potatoes: Cook 6 strips of bacon until crispy, crumble them, and sprinkle half between the layers and the rest on top before the final bake. My family goes crazy for this version. It adds a smoky, salty crunch that’s absolutely addictive.
Herb-Infused Cream Sauce: Add 2 sprigs of fresh thyme and 1 sprig of rosemary to the cream sauce while it simmers, then remove them before layering. The herbal notes elevate the dish and make it feel more elegant. I do this for holiday dinners when I want something a little special.
Vegetarian and Gluten-Free Adaptation: Use a gluten-free all-purpose flour blend in the roux (I’ve had good luck with Bob’s Red Mill 1-to-1). Everything else is naturally gluten-free. To make it vegetarian, just use your favorite vegetarian Parmesan-style cheese.
Dairy-Free Version: Substitute the heavy cream with full-fat canned coconut milk and the milk with unsweetened oat milk. Use dairy-free butter and vegan cheddar shreds. The texture won’t be quite as rich, but it’s still surprisingly creamy. I’ve made this for a friend with dairy allergies and she loved it.
Spicy Kick: Add ½ teaspoon of smoked paprika and a pinch of cayenne pepper to the cream sauce. It gives the potatoes a subtle warmth without being overwhelming. My husband loves this version, though the kids prefer the original.
Serving & Storage Suggestions
These scalloped potatoes are incredibly versatile when it comes to serving. They pair beautifully with roasted chicken, grilled steak, baked ham, or even a simple green salad for a lighter meal. I especially love them alongside a holiday roast or a Sunday pot roast. The creamy, rich texture is the perfect complement to savory mains.
For serving, I recommend letting the dish rest for 10-15 minutes after baking, then scooping generous portions onto plates. The top layer will be beautifully golden and slightly crispy, while the bottom layers stay tender and creamy. If you want a prettier presentation, you can use a large spatula to lift out individual portions—though honestly, we usually just scoop and eat.
Refrigerator Storage: Leftovers keep beautifully in an airtight container for up to 4 days. The flavors actually meld together and get even better overnight. To reheat, place individual portions in a microwave-safe dish and microwave in 30-second bursts until hot, or reheat the whole dish in a 350°F oven for 15-20 minutes, covered with foil.
Freezer Storage: These scalloped potatoes freeze well for up to 3 months. Let them cool completely, then wrap the dish tightly in plastic wrap and aluminum foil. To thaw, move to the refrigerator overnight. Reheat in a 350°F oven, covered, for 25-30 minutes. The texture might be slightly softer than fresh, but they’re still delicious. I’ve made a double batch and frozen one for busy weeks—it’s a lifesaver.
Nutritional Information & Benefits
Here’s the honest truth: these scalloped potatoes are a comfort food, not a health food. But that doesn’t mean they don’t have some redeeming qualities. Potatoes are actually a good source of vitamin C, potassium, and fiber (especially if you leave the skins on, though I peel them for this recipe). The calcium from the cheese and milk is great for bone health, and the butter provides a small amount of vitamin A.
For a family-friendly side dish, the nutritional profile is reasonable. A serving (about 1 cup) contains approximately 350-400 calories, 22g of fat, 32g of carbohydrates, and 10g of protein. The protein content is higher than you might expect, thanks to the cheese and milk. If you’re watching your sodium, you can reduce the salt in the sauce and use low-sodium cheese.
This recipe is suitable for vegetarians (depending on your cheese choices) and can be made gluten-free and dairy-free with the substitutions mentioned above. It’s not low-carb or keto-friendly due to the potatoes, but it’s perfect for a balanced meal when paired with a protein and a vegetable.
Conclusion
I’ve made these creamy make-ahead scalloped potatoes more times than I can count, and they never get old. They’re the side dish that makes every meal feel special, whether it’s a Tuesday night dinner or a holiday feast. The fact that you can make them ahead of time? That’s just the cherry on top. It means one less thing to worry about when you’re already juggling a million other tasks.
I really hope you give this recipe a try. Don’t be afraid to make it your own—add extra cheese, throw in some herbs, or leave the onion out if that’s what your family prefers. The best recipes are the ones that adapt to your life, not the other way around. And if your kids go back for seconds, well, that’s the kind of win we all need.
If you make these scalloped potatoes, I’d love to hear how they turn out. Leave a comment below and let me know what you think—did your family love them? Did you try any fun variations? And don’t forget to share this recipe with a friend who could use a little creamy comfort in their life. Happy cooking, friend!
Frequently Asked Questions
Can I use Russet potatoes instead of Yukon Golds?
Yes, you can, but the texture will be a bit different. Russets are starchier and can become mealy if overcooked. I recommend sticking with Yukon Golds for the creamiest results, but if Russets are what you have, they’ll still work. Just be careful not to overbake them.
How far in advance can I make these scalloped potatoes?
You can assemble the entire dish up to 2 days in advance. Just cover it tightly with foil and refrigerate. When you’re ready to bake, add about 15-20 minutes to the covered baking time since you’re starting from cold. I’ve also frozen them for up to 3 months with great results.
Why did my scalloped potatoes turn out watery?
This usually happens for one of two reasons: either you skipped the parboiling step, or you didn’t let the dish rest after baking. Parboiling removes excess starch from the potatoes, which prevents them from releasing water into the sauce. And letting the dish rest for 10-15 minutes allows the sauce to thicken properly.
Can I make this recipe dairy-free?
Absolutely! Substitute the heavy cream with full-fat canned coconut milk, the milk with unsweetened oat milk, and use dairy-free butter and vegan cheddar shreds. The texture won’t be quite as rich, but it’s still creamy and delicious. I’ve made this version for dairy-free friends and they’ve always enjoyed it.
How do I reheat leftover scalloped potatoes?
The best way is in the oven at 350°F for 15-20 minutes, covered with foil. This helps them reheat evenly without drying out. You can also microwave individual portions in 30-second bursts, but the texture won’t be quite as good. Leftovers will keep in the fridge for up to 4 days.
Pin This Recipe!
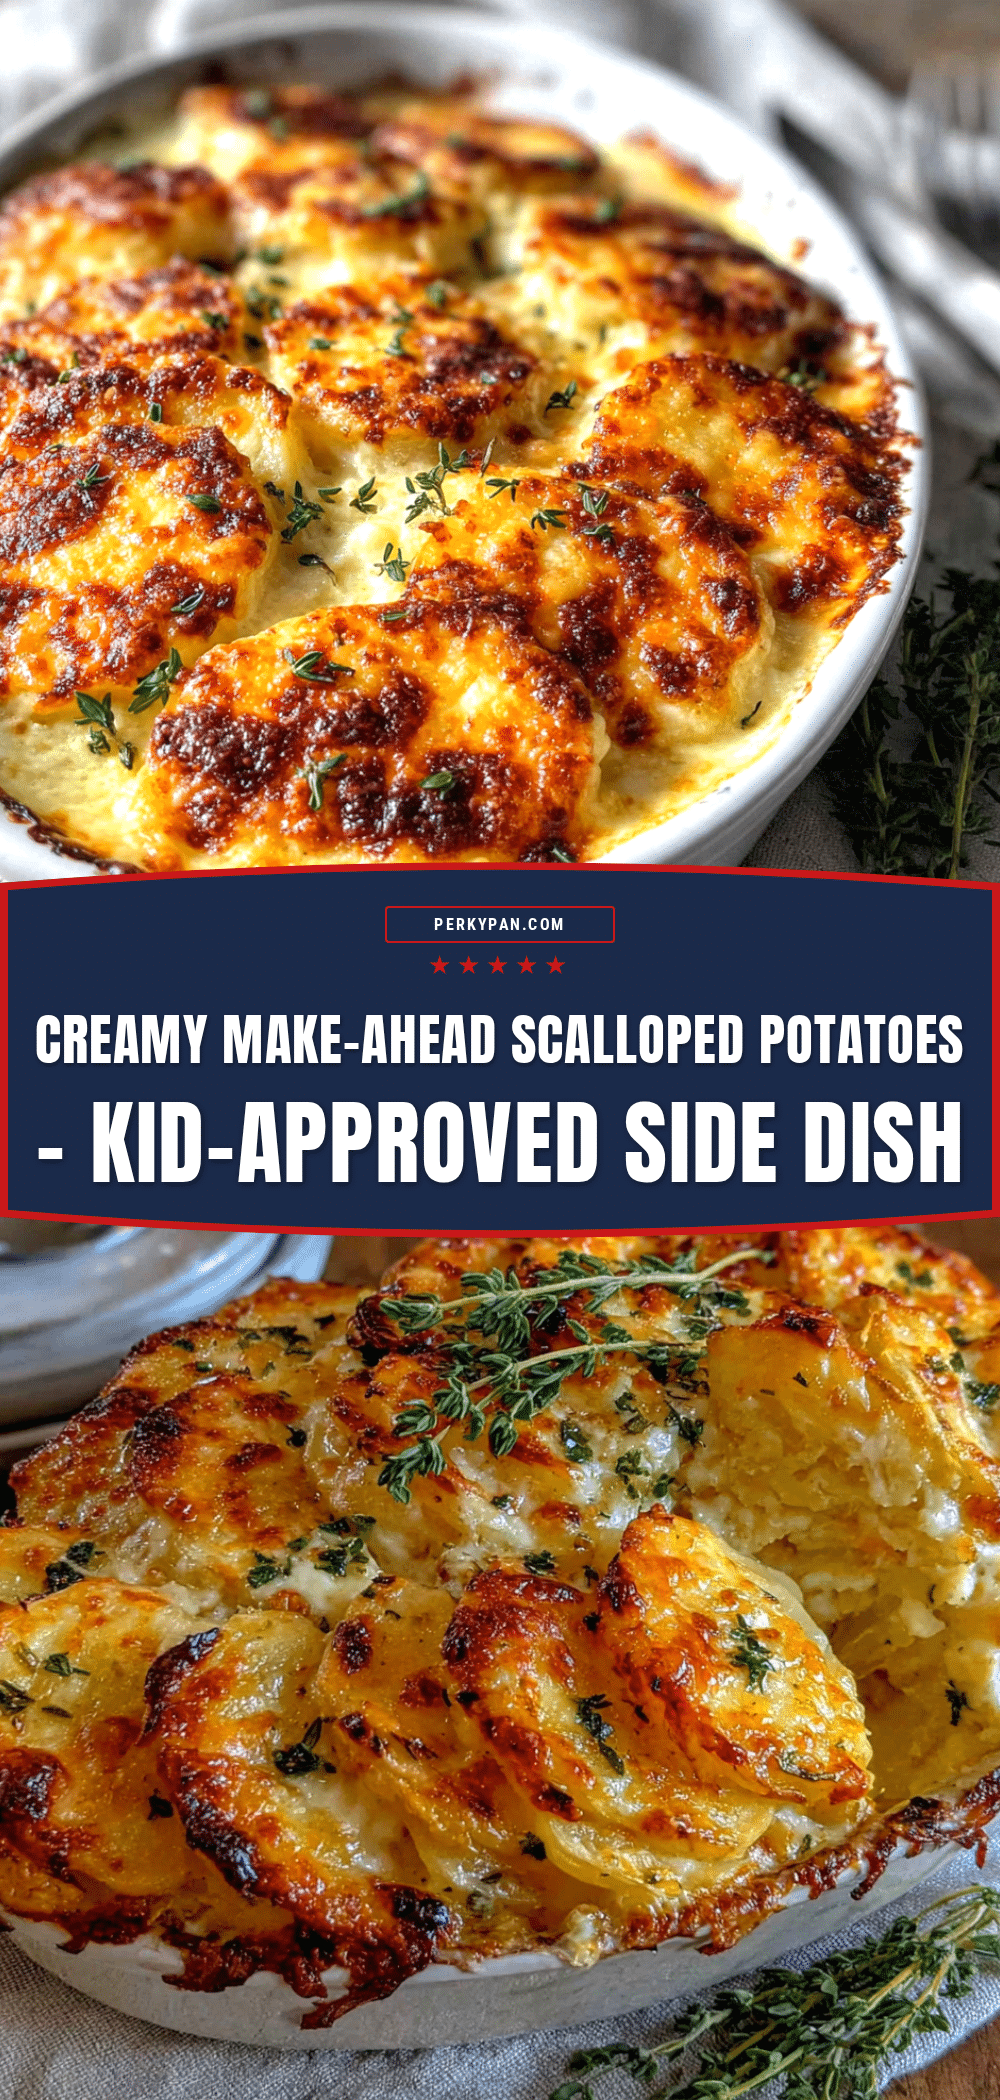
Creamy Make-Ahead Scalloped Potatoes – Easy Kid-Approved Side Dish

These creamy make-ahead scalloped potatoes are the perfect side dish for busy weeknights or holiday feasts. Made with Yukon Gold potatoes, a rich cream sauce, and sharp cheddar cheese, they can be assembled up to two days in advance and baked when ready.
- Prep Time: 20 minutes
- Cook Time: 50 minutes
- Total Time: 1 hour 10 minutes
- Yield: 8 servings 1x
- Category: Side Dish
- Cuisine: American
Ingredients
- 3 pounds Yukon Gold potatoes (about 6–7 medium potatoes)
- 2 tablespoons unsalted butter (for greasing)
- 2 cups heavy cream
- 1 cup whole milk
- 3 tablespoons all-purpose flour
- 3 tablespoons unsalted butter (for roux)
- 1 teaspoon fine sea salt
- ½ teaspoon freshly ground black pepper
- ¼ teaspoon garlic powder
- ⅛ teaspoon nutmeg
- 2 cups shredded sharp cheddar cheese (about 8 ounces)
- ½ cup grated Parmesan cheese
- 1 small onion, thinly sliced (optional)
- 2 cloves garlic, minced (optional)
Instructions
- Peel the potatoes and slice them into ⅛-inch thick rounds. Place slices in a bowl of cold water to prevent browning.
- Bring a large pot of salted water to a boil. Drain the potato slices and add them to the boiling water. Cook for exactly 5 minutes. Drain gently and spread on a clean kitchen towel or paper towels to cool and dry.
- In a medium saucepan, melt 3 tablespoons of butter over medium heat. Whisk in the flour and cook for 1-2 minutes, stirring constantly, until the roux smells slightly nutty but not brown.
- Slowly pour in the heavy cream and milk, whisking continuously to prevent lumps. Bring to a gentle simmer, then reduce heat to low. Add salt, pepper, garlic powder, and nutmeg. Cook for 3-4 minutes, stirring occasionally, until the sauce thickens enough to coat the back of a spoon.
- Remove from heat and stir in 1½ cups of the shredded cheddar cheese until melted and smooth. Taste and adjust seasoning if needed.
- Preheat oven to 375°F (190°C). Grease a 9×13-inch baking dish with the remaining 2 tablespoons of butter.
- Spread a thin layer of the cream sauce on the bottom of the dish. Arrange one-third of the parboiled potato slices in an even layer, slightly overlapping. Pour one-third of the remaining sauce over the potatoes. Repeat layering two more times, ending with a final layer of sauce on top.
- Sprinkle the remaining ½ cup of shredded cheddar and the Parmesan cheese over the top.
- If baking immediately, cover the dish with aluminum foil and bake for 30 minutes. Remove foil and bake for another 20-25 minutes, until the top is golden brown and bubbly and the potatoes are tender when pierced with a fork.
- If making ahead, cover tightly with foil and refrigerate for up to 2 days. When ready to bake, add about 15-20 minutes to the covered baking time (bake covered for 40 minutes, then uncovered for 20 minutes).
- Let the scalloped potatoes rest for 10-15 minutes before serving. Garnish with fresh parsley or chives if desired.
Notes
Don’t skip the parboiling step—it prevents watery potatoes. Slice potatoes uniformly for even cooking. Season each layer with a pinch of salt and pepper. Let the dish rest for 10-15 minutes after baking to allow the sauce to set. Watch the top for burning during the last 10 minutes of uncovered baking; tent with foil if needed.
Nutrition
- Serving Size: 1 cup
- Calories: 380
- Sugar: 4
- Sodium: 520
- Fat: 22
- Saturated Fat: 14
- Carbohydrates: 32
- Fiber: 3
- Protein: 10
Keywords: scalloped potatoes, make-ahead, creamy, kid-friendly, side dish, holiday, comfort food