Love this? Save it for later!
Share the inspiration with your friends
Jen wasn’t trying to impress anyone. I’d stopped by her place on a random Tuesday night to drop off a book I’d borrowed, and the smell hit me before I even got past the front door. Warm spices—cinnamon, clove, something deeply nutty—wrapped around me like a hug. I stood there for a second, just breathing it in, while she waved me in with a flour-dusted hand and told me to grab a fork.
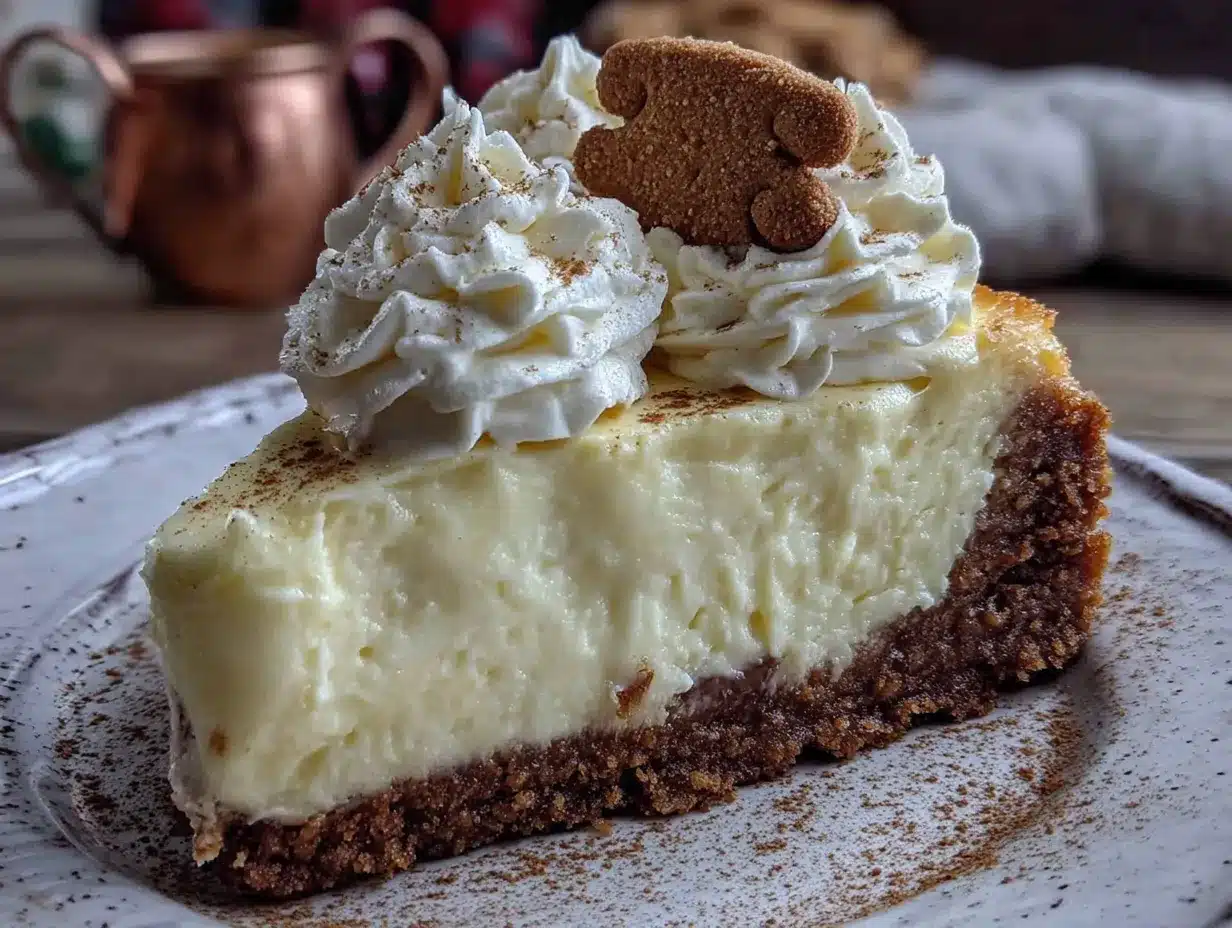
There, cooling on her counter, was the most beautiful cheesecake I’d ever seen. Golden, crack-free, sitting on a dark, sandy crust that looked like it belonged in a bakery window. She shrugged when I asked about it. “Oh, it’s nothing. Just eggnog cheesecake. I threw it together this morning.” Threw it together. Like it was no big deal. Meanwhile, I’d spent the last three holiday seasons wrestling with complicated custards and water baths that always leaked. Maybe you’ve been there—standing in your kitchen at 10 PM, covered in batter, wondering why you thought this was a good idea.
That night, sitting on her worn-out couch with a slice of that cheesecake balanced on my knee, I knew I had to figure it out. Because here’s the thing—this wasn’t just good. It was the kind of good that makes you close your eyes and forget what you were talking about. The filling was creamy and light, with just enough eggnog flavor to feel festive without being overwhelming. And that crust? Gingersnaps. Crunchy, spicy, the perfect contrast to the silky filling. She made it sound so casual, but honestly, it was one of the best desserts I’d ever had.
I asked for the recipe, of course. She scribbled it on a sticky note, and I’ve been making it ever since. It’s become my go-to for every holiday gathering, and I’m pretty sure it’s the reason I get invited back to things.
Why You’ll Love This Recipe
This easy eggnog cheesecake with gingersnap crust is the holiday dessert you didn’t know you needed. Let me tell you why it’s earned a permanent spot in my rotation:
- Quick & Easy: No water bath, no complicated steps. This comes together in about 20 minutes of active prep time. The oven does the rest.
- Simple Ingredients: You can find everything at your regular grocery store. No hunting down specialty items or spending a fortune.
- Perfect for the Holidays: Whether it’s Christmas dinner, a cookie swap, or just a cozy night in, this cheesecake fits right in.
- Crowd-Pleaser: I’ve served this to everyone from picky kids to serious foodies. It gets rave reviews every single time.
- Unbelievably Delicious: The combination of spiced eggnog filling and crunchy gingersnap crust is pure magic. It’s rich but not heavy, festive but not fussy.
What makes this one different from all the other eggnog cheesecake recipes out there? It’s the texture. Most recipes use a ton of heavy cream or sour cream, which can make the filling dense or tangy. I use a specific ratio of cream cheese to eggnog that gives you that silky, melt-in-your-mouth consistency without any weird aftertaste. Plus, the gingersnap crust isn’t just a suggestion—it’s the star. The spicy snap of the cookies cuts through the richness of the filling in a way that a plain graham cracker crust just can’t match.
This isn’t just another holiday dessert. It’s the one that makes people ask for the recipe. It’s comfort food, holiday-style—faster and easier than a traditional cheesecake, but with all the soul-soothing satisfaction.
What Ingredients You Will Need
This recipe uses simple, wholesome ingredients to deliver bold flavor and satisfying texture without the fuss. Most of these are pantry staples during the holiday season, which makes this even easier to throw together on a whim.
For the Gingersnap Crust
- 2 cups (about 200g) gingersnap cookies, finely crushed – I recommend Nabisco or a store-brand equivalent. You want a consistent, fine crumb for the best texture.
- 6 tablespoons (85g) unsalted butter, melted – Salted butter works in a pinch, just skip the added salt later.
- 2 tablespoons (25g) granulated sugar – This helps the crust hold together and adds a touch of sweetness.
- Pinch of salt – Only if using unsalted butter. It balances the sweetness.
For the Eggnog Cheesecake Filling
- 32 ounces (about 900g) cream cheese, softened to room temperature – Full-fat is non-negotiable here. Low-fat cream cheese will make the filling grainy and won’t set properly.
- 1 cup (200g) granulated sugar – Regular white sugar works best. Don’t substitute with brown sugar—it’ll change the flavor and texture.
- 3 large eggs, room temperature – Cold eggs can cause the batter to curdle. Let them sit on the counter for 30 minutes before you start.
- 1 cup (240ml) high-quality eggnog – This is where the flavor comes from, so use a good one. I like the brand from my local dairy, but any full-fat eggnog will work. Avoid low-fat or light versions—they have too much water and will make the cheesecake watery.
- 1 teaspoon vanilla extract – Pure vanilla, not imitation, if you can swing it.
- 1 tablespoon all-purpose flour – This helps stabilize the filling and prevent cracking. It’s a little trick I learned after a few too many cracked cheesecakes.
- 1/2 teaspoon ground nutmeg, plus more for garnish – Freshly grated is amazing, but pre-ground works perfectly fine.
- 1/4 teaspoon ground cinnamon – Just enough to warm up the flavor.
- Pinch of ground cloves – It’s subtle, but it makes the eggnog flavor pop.
For the Optional Topping
- 1 cup (240ml) heavy cream – For homemade whipped cream.
- 2 tablespoons powdered sugar – To sweeten the cream.
- 1/2 teaspoon vanilla extract – Same as above—pure is better.
- Extra ground nutmeg or crushed gingersnaps for garnish – Makes it look pretty!
Ingredient Selection Tips: When choosing your eggnog, look for one that’s thick and creamy—almost like a milkshake consistency. The thicker the eggnog, the richer your cheesecake will be. For the cream cheese, I always use Philadelphia. It’s consistent, and I know exactly how it’ll behave. If you’re using a store brand, just make sure it’s full-fat and block-style, not whipped or spreadable.
Substitution Guidance: Need a gluten-free option? Use gluten-free gingersnap cookies—they’re widely available now. For a dairy-free version, you can try dairy-free cream cheese and a plant-based eggnog, but I’ll be honest—the texture won’t be exactly the same. It’ll still be tasty, just a bit less creamy.
Equipment Needed
You don’t need a fancy kitchen to make this cheesecake. Here’s what you’ll need:
- 9-inch springform pan – This is essential. A regular cake pan won’t work because you need to remove the sides without damaging the cheesecake. I’ve had my cheap one from Target for years, and it works perfectly.
- Electric mixer – A stand mixer or hand mixer both work. You need to beat the cream cheese until it’s fluffy, and doing that by hand is a serious arm workout.
- Large mixing bowls – One for the crust, one for the filling.
- Food processor or zip-top bag and rolling pin – For crushing the gingersnaps. The food processor is faster, but if you don’t have one, just put the cookies in a bag and go to town with a rolling pin. It’s oddly satisfying.
- Measuring cups and spoons – Accuracy matters in baking.
- Spatula – For scraping down the bowl and smoothing the top.
- Roasting pan or large baking dish – For the water bath. Even though this recipe doesn’t require one, I still recommend using one for the most consistent results. More on that in the tips section.
- Aluminum foil – To wrap the springform pan so water doesn’t leak in.
- Cooling rack – For cooling the cheesecake slowly.
Budget-Friendly Options: Don’t have a springform pan? You can use a deep-dish pie plate, but the slices won’t be as neat. A hand mixer is cheaper than a stand mixer and works just as well for this recipe.
Maintenance Tip: After you’re done, wash your springform pan by hand. The latch mechanism can rust in the dishwasher, and nobody wants a rusty cheesecake.
Preparation Method
Alright, let’s get to it. Here’s how to make this easy eggnog cheesecake with gingersnap crust, step by step.
Step 1: Preheat and Prep
Preheat your oven to 325°F (160°C). Position the rack in the middle of the oven. While it’s heating up, take your cream cheese and eggs out of the fridge to come to room temperature. This is important—cold ingredients lead to a lumpy filling. Trust me, I learned this the hard way.
Step 2: Make the Gingersnap Crust
Place the gingersnap cookies in your food processor and pulse until you have fine crumbs. You should have about 2 cups. If you’re using the bag method, put the cookies in a sturdy zip-top bag, seal it, and crush them with a rolling pin until no large pieces remain. Pour the crumbs into a medium bowl, add the melted butter, sugar, and salt (if using). Stir with a fork until the mixture looks like wet sand and holds together when you press it in your fist.
Pour the crust mixture into your springform pan. Use the bottom of a measuring cup or a flat-bottomed glass to press it down firmly and evenly. Make sure you go up the sides about an inch—this helps contain the filling. Pop the pan in the fridge while you make the filling. This helps the crust set and prevents it from crumbling when you cut the cheesecake later.
Step 3: Make the Filling
In a large mixing bowl, beat the softened cream cheese with an electric mixer on medium speed until it’s smooth and fluffy—about 2 minutes. Scrape down the sides and bottom of the bowl with a spatula. Add the sugar and beat for another 2 minutes until it’s light and creamy.
Add the eggs one at a time, beating on low speed after each addition just until combined. Overbeating at this stage adds too much air, which can cause cracks later. Seriously, just mix until the yolk disappears into the batter.
Now add the eggnog, vanilla extract, flour, nutmeg, cinnamon, and cloves. Mix on low speed until everything is just combined. The batter should be smooth and silky, with a pale golden color. Give it one last scrape-down to make sure there aren’t any cream cheese lumps hiding at the bottom.
Step 4: Assemble and Bake
Take the crust out of the fridge. Pour the filling over the crust and use your spatula to smooth the top into an even layer. Give the pan a gentle tap on the counter to release any air bubbles.
Now, here’s where you have a choice. You can bake this cheesecake without a water bath, and it’ll still be good. But if you want that silky, crack-free top, I recommend using one. Wrap the bottom and sides of your springform pan tightly with two layers of aluminum foil. Place the wrapped pan in a large roasting pan. Carefully pour hot water into the roasting pan until it reaches about halfway up the sides of the springform pan. Be careful not to splash water onto the cheesecake!
Bake for 55 to 65 minutes. The edges should look set and slightly puffed, but the center should still jiggle slightly when you gently shake the pan. It will continue to set as it cools. If you notice the top browning too quickly, tent it loosely with foil after 40 minutes.
Step 5: Cool and Chill
Turn off the oven and crack the door open. Let the cheesecake sit in the oven for 1 hour. This slow cooling helps prevent cracks caused by sudden temperature changes. After an hour, remove the cheesecake from the water bath and set it on a cooling rack. Run a thin knife around the edge of the pan to loosen the cheesecake—this also helps prevent cracking as it shrinks.
Let it cool completely at room temperature, then cover the pan with plastic wrap and refrigerate for at least 4 hours, but preferably overnight. I know it’s hard to wait, but this is where the magic happens. The flavors meld together, and the texture becomes perfectly creamy.
Cooking Tips & Techniques
Here are some things I’ve learned the hard way so you don’t have to.
Don’t Skip the Room Temperature Ingredients
I know, I know—it’s annoying to wait. But cold cream cheese creates lumps that no amount of mixing will fix. And cold eggs can cause the batter to separate. Set everything out 30 to 45 minutes before you start. Your future self will thank you.
The Water Bath Trick
I used to skip water baths because they seemed like a hassle. Then I made a cheesecake that cracked so badly it looked like a map of the Grand Canyon. The water bath creates a humid environment that helps the cheesecake bake evenly and prevents the top from drying out and cracking. If you’re worried about water leaking in, double-wrap the pan with heavy-duty foil. I’ve never had a leak using this method.
How to Tell When It’s Done
The center should jiggle like Jell-O when you shake the pan gently. If the whole thing wobbles like a wave, it needs more time. If it’s completely firm, it’s overbaked. The residual heat will finish cooking the center as it cools.
Prevent Cracks
Besides the water bath, here’s another trick: don’t open the oven door during the first 45 minutes of baking. The sudden rush of cold air can cause the cheesecake to fall and crack. Also, run a knife around the edge immediately after baking—this releases the tension as the cheesecake shrinks.
My Biggest Failure
One Christmas, I was in a rush and used cold cream cheese straight from the fridge. The batter was lumpy, so I overmixed it trying to fix it. The result? A dense, cracked mess that tasted okay but looked terrible. I covered it with a mountain of whipped cream and nobody noticed, but I knew. Now I never skip the room temperature step.
Variations & Adaptations
This easy eggnog cheesecake with gingersnap crust is pretty perfect as-is, but here are some ways to make it your own.
Boozy Eggnog Cheesecake
Add 2 tablespoons of dark rum or bourbon to the filling along with the eggnog. The alcohol adds warmth and depth without making it taste boozy. Just don’t add too much, or the filling won’t set properly.
Chocolate Eggnog Cheesecake
Melt 4 ounces of semi-sweet chocolate and swirl it into the filling before baking. Or, substitute the gingersnap crust with chocolate wafer cookies for a double-chocolate experience. I tried this last year, and it was a hit with the chocolate lovers in my family.
Gluten-Free Version
Use gluten-free gingersnap cookies for the crust. Everything else in the filling is naturally gluten-free, so you’re good to go. Just double-check your eggnog label—some brands add weird thickeners.
Mini Cheesecakes
Line a muffin tin with paper liners and press the crust mixture into the bottom. Fill each cup with the filling and bake for 18 to 22 minutes. Perfect for parties or when you don’t want to share a whole cake.
Spiced Pecan Topping
Toast 1/2 cup of chopped pecans with a tablespoon of butter, a pinch of cinnamon, and a tablespoon of brown sugar. Sprinkle over the top of the cheesecake before serving. The crunch is amazing.
Serving & Storage Suggestions
This cheesecake is best served cold, straight from the fridge. Let it sit at room temperature for about 10 minutes before slicing—this makes it easier to cut clean slices. Use a sharp, thin-bladed knife and wipe it clean between cuts for the prettiest slices.
Presentation Ideas: Top each slice with a dollop of whipped cream, a sprinkle of nutmeg, and a crushed gingersnap. For a festive touch, add a sprig of fresh rosemary or a cinnamon stick. It looks beautiful on a holiday dessert table.
What to Serve With It: This cheesecake pairs beautifully with a cup of spiced coffee or hot cocoa. For a dessert spread, serve it alongside gingerbread cookies or a simple apple crisp. If you’re feeling fancy, a glass of dessert wine like Moscato or a late-harvest Riesling complements the creamy, spiced flavors.
Storage Instructions: Store leftover cheesecake in the refrigerator, covered tightly with plastic wrap or in an airtight container, for up to 5 days. The flavors actually get better after a day or two as they meld together.
Freezing Instructions: This cheesecake freezes beautifully. Once it’s fully chilled and set, wrap the entire pan (or individual slices) tightly in plastic wrap, then a layer of aluminum foil. Freeze for up to 3 months. To thaw, transfer it to the refrigerator overnight. Don’t thaw at room temperature—it can get watery.
Reheating Tip: I don’t recommend reheating this cheesecake. It’s meant to be served cold. But if you like a slightly softer texture, let a slice sit at room temperature for 20 minutes before serving.
Nutritional Information & Benefits
Here’s the thing about cheesecake—it’s a treat, not a health food. But that doesn’t mean it can’t have some redeeming qualities.
Estimated Nutritional Values (per slice, based on 12 servings):
| Nutrient | Amount |
|---|---|
| Calories | 420 |
| Total Fat | 28g |
| Saturated Fat | 16g |
| Cholesterol | 115mg |
| Sodium | 320mg |
| Total Carbohydrates | 36g |
| Sugars | 28g |
| Protein | 8g |
Health Benefits of Key Ingredients: Eggnog is made with milk and eggs, which provide calcium and protein. The ginger in gingersnaps has anti-inflammatory properties, and cinnamon is packed with antioxidants. Does that make this a health food? No. But it makes me feel a little better about having a second slice.
Dietary Considerations: This recipe contains dairy, eggs, and gluten. For a dairy-free version, use dairy-free cream cheese and plant-based eggnog. For gluten-free, use gluten-free gingersnaps. This recipe is not suitable for a vegan diet due to the cream cheese and eggs.
Personal Wellness Perspective: I believe in balance. I eat salads most days, but during the holidays, I’m all about the dessert. This cheesecake is worth every single calorie. One slice is satisfying, and you won’t feel the need to go back for thirds. It’s rich enough to hit the spot without overdoing it.
Conclusion
Honestly, this easy eggnog cheesecake with gingersnap crust has become my signature holiday dessert. It’s the one I’m asked to bring to every party, the one my family expects on Christmas Eve, the one I look forward to making all year. And the best part? It’s so simple. No fuss, no stress, just a gorgeous, creamy, spiced cheesecake that tastes like the holidays in every bite.
I hope you give this recipe a try. Don’t be afraid to make it your own—add a splash of bourbon, swap the crust, pile on the whipped cream. The beauty of this cheesecake is that it’s forgiving. It wants you to succeed. And when you pull that perfect, crack-free cake out of the oven, you’re going to feel like a rockstar.
If you make this, I’d love to hear about it! Leave a comment below and tell me how it turned out. Did you add a twist? Did your family fight over the last slice? Share your photos on Pinterest and tag me—I love seeing your creations. And if you’re looking for more holiday dessert inspiration, check out my gingerbread trifle or this cranberry orange pound cake for another festive option.
Happy baking, friend. Go make something delicious.
Frequently Asked Questions
Can I use store-bought eggnog?
Absolutely! In fact, I recommend it. Just make sure you’re using a full-fat, high-quality eggnog. Avoid the light or low-fat versions—they have too much water and will make your cheesecake watery.
Why did my cheesecake crack?
Cracks usually happen from overbaking, sudden temperature changes, or the cheesecake sticking to the pan. To prevent this, use a water bath, don’t open the oven door during baking, and run a knife around the edge as soon as it comes out of the oven.
Can I make this cheesecake ahead of time?
Yes! In fact, I recommend it. This cheesecake needs at least 4 hours to chill, but it’s even better after 24 hours. Make it a day or two ahead, and keep it covered in the fridge until you’re ready to serve.
Can I freeze this cheesecake?
Yes, it freezes beautifully. Wrap the fully chilled cheesecake (or individual slices) tightly in plastic wrap and then foil. Freeze for up to 3 months. Thaw overnight in the fridge before serving.
What if I don’t have a springform pan?
You can use a deep-dish pie plate or a 9-inch cake pan lined with parchment paper. Just know that it will be harder to remove the cheesecake cleanly. A springform pan is really the best tool for the job.
Pin This Recipe!
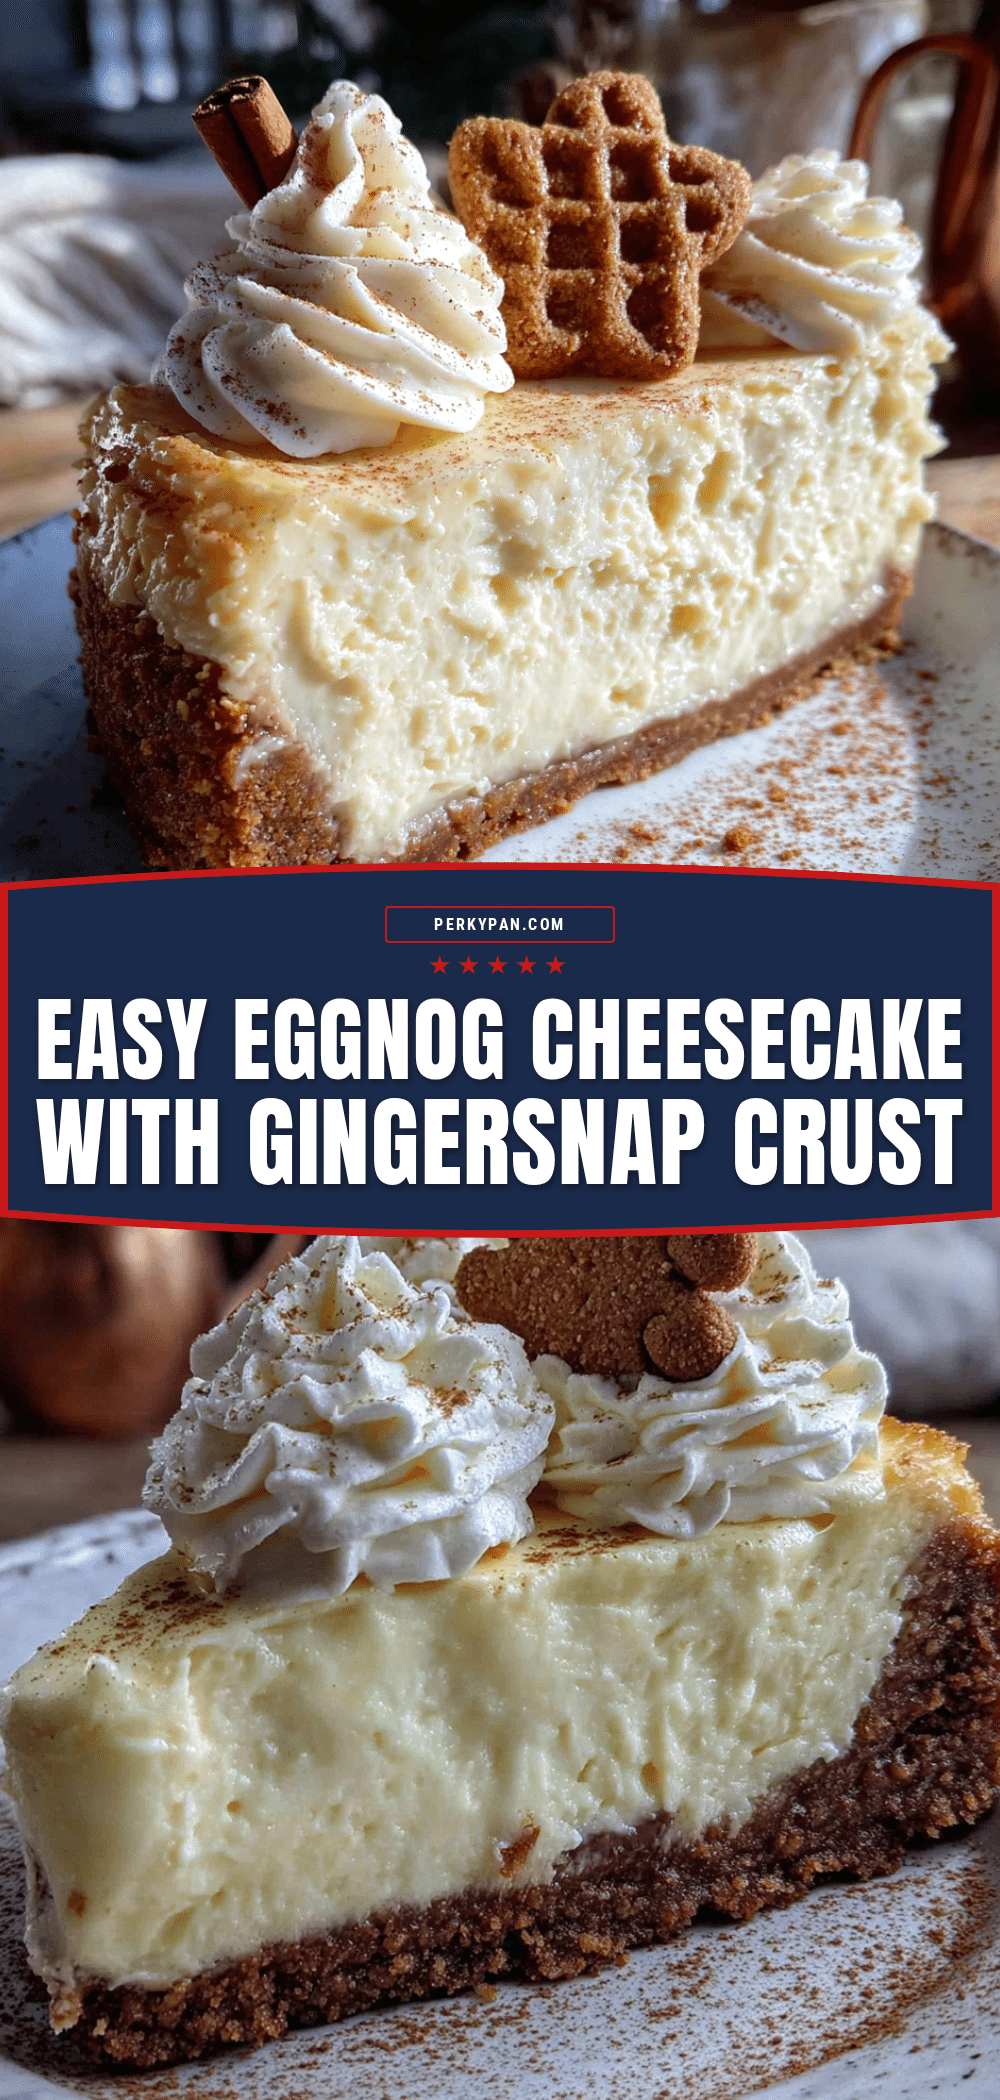
Easy Eggnog Cheesecake with Gingersnap Crust – Best Holiday Dessert
This easy eggnog cheesecake with a crunchy gingersnap crust is the perfect holiday dessert. Creamy, spiced, and simple to make, it’s a crowd-pleaser that tastes like Christmas in every bite.
- Prep Time: 20 minutes
- Cook Time: 55-65 minutes
- Total Time: 5 hours 15 minutes (including chilling)
- Yield: 12 servings 1x
- Category: Dessert
- Cuisine: American
Ingredients
- 2 cups (about 200g) gingersnap cookies, finely crushed
- 6 tablespoons (85g) unsalted butter, melted
- 2 tablespoons (25g) granulated sugar
- Pinch of salt (if using unsalted butter)
- 32 ounces (about 900g) cream cheese, softened to room temperature
- 1 cup (200g) granulated sugar
- 3 large eggs, room temperature
- 1 cup (240ml) high-quality eggnog
- 1 teaspoon vanilla extract
- 1 tablespoon all-purpose flour
- 1/2 teaspoon ground nutmeg, plus more for garnish
- 1/4 teaspoon ground cinnamon
- Pinch of ground cloves
- 1 cup (240ml) heavy cream (for optional topping)
- 2 tablespoons powdered sugar (for optional topping)
- 1/2 teaspoon vanilla extract (for optional topping)
- Extra ground nutmeg or crushed gingersnaps for garnish (optional)
Instructions
- Preheat your oven to 325°F (160°C). Position the rack in the middle of the oven. Take cream cheese and eggs out of the fridge to come to room temperature.
- Make the crust: Pulse gingersnap cookies in a food processor until fine crumbs form. Alternatively, crush in a zip-top bag with a rolling pin. In a medium bowl, combine crumbs, melted butter, sugar, and salt (if using). Stir until mixture resembles wet sand.
- Press crust mixture firmly into the bottom and about 1 inch up the sides of a 9-inch springform pan. Refrigerate while making the filling.
- Make the filling: In a large bowl, beat softened cream cheese with an electric mixer on medium speed until smooth and fluffy, about 2 minutes. Scrape down sides. Add sugar and beat for another 2 minutes until light and creamy.
- Add eggs one at a time, beating on low speed after each addition just until combined. Do not overbeat.
- Add eggnog, vanilla extract, flour, nutmeg, cinnamon, and cloves. Mix on low speed until just combined. Batter should be smooth and silky.
- Pour filling over chilled crust. Smooth the top with a spatula. Tap the pan gently on the counter to release air bubbles.
- Optional water bath: Wrap the bottom and sides of the springform pan tightly with two layers of aluminum foil. Place in a large roasting pan and pour hot water until it reaches halfway up the sides of the springform pan.
- Bake for 55 to 65 minutes. Edges should be set and slightly puffed, center should jiggle slightly. If browning too quickly, tent with foil after 40 minutes.
- Turn off oven and crack the door open. Let cheesecake sit in the oven for 1 hour. Then remove from water bath and place on a cooling rack. Run a thin knife around the edge of the pan.
- Let cool completely at room temperature, then cover with plastic wrap and refrigerate for at least 4 hours, preferably overnight.
- For optional topping: Beat heavy cream, powdered sugar, and vanilla extract until stiff peaks form. Serve on slices with a sprinkle of nutmeg or crushed gingersnaps.
Notes
For best results, use room temperature ingredients. A water bath helps prevent cracks. Let cheesecake chill overnight for optimal flavor and texture. Store leftovers in the refrigerator for up to 5 days or freeze for up to 3 months.
Nutrition
- Serving Size: 1 slice
- Calories: 420
- Sugar: 28
- Sodium: 320
- Fat: 28
- Saturated Fat: 16
- Carbohydrates: 36
- Protein: 8
Keywords: eggnog cheesecake, gingersnap crust, holiday dessert, Christmas cheesecake, easy cheesecake


