Love this? Save it for later!
Share the inspiration with your friends
My coworker Nadia watched me staring at my bank account app on my phone during our lunch break. I was trying to figure out how I was going to afford gifts for my entire extended family that year, and the numbers were not cooperating. She didn’t say anything at first. Then she slid a mason jar across the table toward me, filled with something dark and powdery and tied with a simple piece of twine. “This,” she said, “is how I do Christmas.”
That jar changed everything for me, honestly. It was homemade hot cocoa mix, layered beautifully with mini marshmallows and chocolate shavings on top. She told me she makes about fifteen of them every December, and her family actually fights over who gets which flavor. I opened it up that afternoon and made myself a cup at work, and let me tell you—it was better than anything I’d ever bought from a store. The richness, the creaminess, the way it melted into the milk like it was meant to be there. I asked her for the recipe right then and there, and she scribbled it on a napkin without even looking up from her sandwich.
I’ve been making these homemade hot cocoa mix jars ever since, and I’ve tweaked the recipe to make it even more budget-friendly. Because let’s face it—gift-giving during the holidays can get expensive fast. But these jars? They cost about three dollars each to make, and they look like you spent way more. I’ve gifted them to neighbors, teachers, my mail carrier, and even my picky teenage nephew who usually rolls his eyes at anything homemade. He asked for a refill. That’s when I knew I had something special.
Maybe you’ve been there too, trying to stretch your gift budget while still wanting to give something thoughtful. These jars are the answer. They’re practical, personal, and honestly, they taste incredible. And the best part? You probably already have most of the ingredients in your pantry right now.
Why You’ll Love This Recipe
I’ve tested this recipe at least a dozen times over the past few years, tweaking the ratios until every single cup comes out silky and rich. I’ve learned that the quality of the cocoa powder really matters, but you don’t need the expensive stuff—I’ve found that store-brand unsweetened cocoa works beautifully as long as you balance it with the right amount of sugar and powdered milk. This recipe has been family-approved by everyone from my five-year-old niece to my eighty-year-old grandmother, and it’s been neighbor-tested too. Every single person who has received one of these jars has asked for the recipe.
- Wallet-Friendly: Each jar costs around three dollars to make, compared to fifteen or twenty dollars for similar store-bought mixes. You can make ten jars for the price of two fancy ones.
- Simple Ingredients: You likely already have sugar, cocoa powder, and salt in your kitchen. The only special ingredient is powdered milk, which costs about five dollars for a big box that makes multiple batches.
- Perfect for Gifting: These jars work for Christmas, birthdays, teacher appreciation, hostess gifts, or just because. They’re appropriate for literally anyone.
- Crowd-Pleaser: Kids love the fun of making their own hot cocoa, and adults appreciate the rich, authentic flavor that doesn’t come from a packet.
- Unbelievably Delicious: The combination of powdered milk and real cocoa powder creates a creaminess that instant packets just can’t match. It’s comfort in a mug.
What makes this recipe different from the countless other hot cocoa mix recipes out there is the ratio. I’ve experimented with the perfect balance of sweet to chocolatey to creamy, and this is the one that makes people close their eyes after the first sip. It’s not too sweet, not too bitter—it’s just right. And the texture is silky smooth, never grainy or thin.
This recipe is comfort food reimagined—cheaper, faster, and made with love. It’s perfect for impressing guests without stress, or for turning a simple winter evening into something memorable. And honestly, it’s the kind of gift that makes people feel seen and cared for, which is really what the holidays are all about.
What Ingredients You Will Need
This recipe uses simple, pantry-friendly ingredients to create a rich and creamy hot cocoa mix that rivals anything you can buy. The beauty of this recipe is that every ingredient has a specific job, and together they create something truly special. Here’s what you’ll need:
- Granulated Sugar (2 cups / 400g): This provides the sweetness and helps the mix dissolve smoothly into hot milk or water. I’ve tried using powdered sugar, but it can make the mix clump. Granulated works best. (Adds sweetness and body)
- Unsweetened Cocoa Powder (1 cup / 100g): This is the star of the show. I recommend a natural unsweetened cocoa powder like Hershey’s or the store brand. Dutch-processed cocoa will work too, but it will give a milder, less intense chocolate flavor. (Provides rich chocolate flavor)
- Powdered Milk (1 ½ cups / 160g): This is what makes your hot cocoa creamy and rich without needing fresh milk. It dissolves completely and adds body to the drink. I use Nestlé Nido or the store brand, but any powdered milk works. (Creates creaminess)
- Powdered Creamer (½ cup / 60g): This adds extra richness and a velvety texture. You can use coffee creamer or a non-dairy creamer for a dairy-free option. I’ve also used coconut milk powder for a tropical twist. (Adds extra creaminess)
- Salt (¼ teaspoon / 1.5g): Don’t skip this! Salt enhances the chocolate flavor and balances the sweetness. It makes the cocoa taste more complex and less one-dimensional. (Enhances flavor)
- Mini Marshmallows (optional, for layering): These are for the visual appeal of the jar. They add a fun, festive touch and make the gift feel more complete. (Adds visual appeal)
- Chocolate Shavings or Chips (optional, for layering): A few chocolate shavings on top of the jar make it look extra special. You can use a chocolate bar and a vegetable peeler to make shavings. (Adds decoration)
Ingredient Selection Tips: For the best texture, look for a powdered milk that is fine and not clumpy. I’ve found that the boxed powdered milk from the baking aisle works better than the canned stuff. For the cocoa powder, don’t buy the “hot cocoa mix” packets—buy pure unsweetened cocoa powder. It’s cheaper and gives you control over the sweetness. If you want to make a dark chocolate version, substitute half the cocoa powder with dark cocoa powder like Hershey’s Special Dark.
Substitution Guidance: For a dairy-free version, use powdered coconut milk or soy milk powder and a non-dairy creamer. For a sugar-free version, use a granulated sugar substitute like monk fruit sweetener or erythritol. Just note that the texture might be slightly different. For a peppermint version, add ½ teaspoon of peppermint extract to the mix and stir well before layering.
Equipment Needed
You don’t need fancy equipment for this recipe, which is part of what makes it so great. Here’s what you’ll need:
- Mason Jars (pint-sized or quart-sized): Pint jars (16 oz) are perfect for individual gifts. Quart jars (32 oz) work well for larger batches or family gifts. You can find them at craft stores, grocery stores, or online. I’ve also reused pasta sauce jars—just wash them thoroughly and remove the labels.
- Mixing Bowl (medium-sized): Any medium bowl will work. I use a glass bowl because it doesn’t hold onto smells or flavors.
- Whisk: A whisk is essential for combining the dry ingredients evenly. A fork will work in a pinch, but a whisk is much more efficient.
- Funnel (optional but helpful): A small funnel makes it much easier to pour the mix into the jars without spilling. You can find plastic funnels at the dollar store.
- Ribbon or Twine: For decorating the jars. I like using natural twine for a rustic look, but any ribbon works.
- Gift Tags: You can buy pre-made tags or make your own from cardstock. Include the instructions for making the cocoa.
- Measuring Cups and Spoons: Standard measuring tools for accuracy.
Budget-Friendly Alternatives: If you don’t have mason jars, you can use any clean, dry jar with a tight-fitting lid. Pasta sauce jars, pickle jars, or even empty peanut butter jars work great. Just make sure they’re thoroughly washed and dried. For the funnel, you can roll a piece of paper into a cone shape and tape it. It works just as well.
Preparation Method
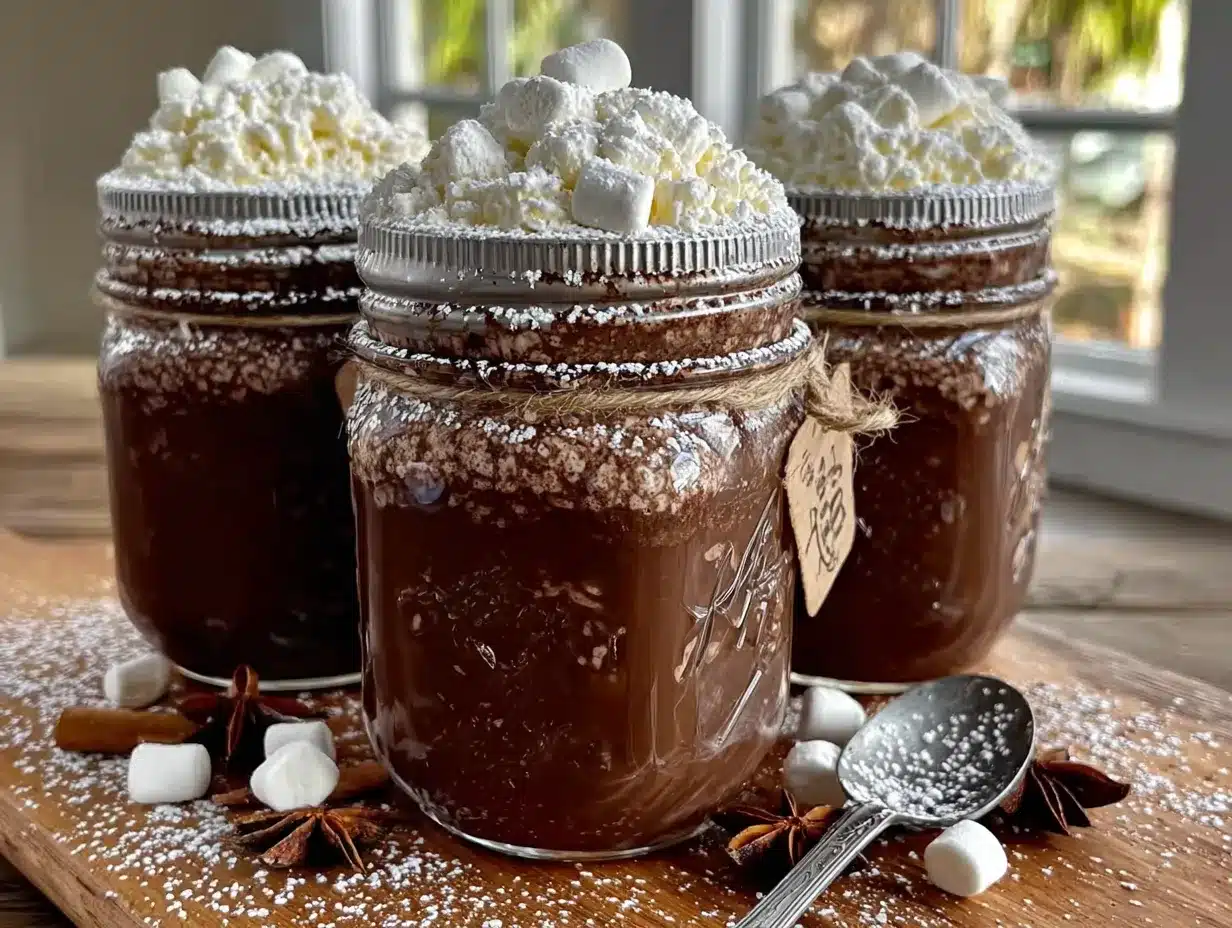
Making these homemade hot cocoa mix jars is incredibly simple, but there are a few tricks to getting the layers perfect. Follow these steps, and you’ll have beautiful, gift-ready jars in under 30 minutes.
- Prepare your workspace. Clear your counter and gather all your ingredients and equipment. Make sure your jars are clean and completely dry—any moisture can cause the mix to clump. I learned this the hard way when I made a batch and the sugar started dissolving from trapped moisture. Not pretty.
- Combine the dry ingredients. In your medium mixing bowl, add the 2 cups of granulated sugar, 1 cup of unsweetened cocoa powder, 1 ½ cups of powdered milk, ½ cup of powdered creamer, and ¼ teaspoon of salt. Whisk everything together thoroughly. This is important—you want the ingredients to be evenly distributed so every cup of cocoa tastes the same. Whisk for at least 30 seconds, making sure there are no streaks of cocoa or sugar.
- Check for clumps. Run your whisk through the mixture and break up any clumps you find. If you see any hard bits, press them against the side of the bowl with the back of a spoon. The mix should be smooth and powdery, like fine sand.
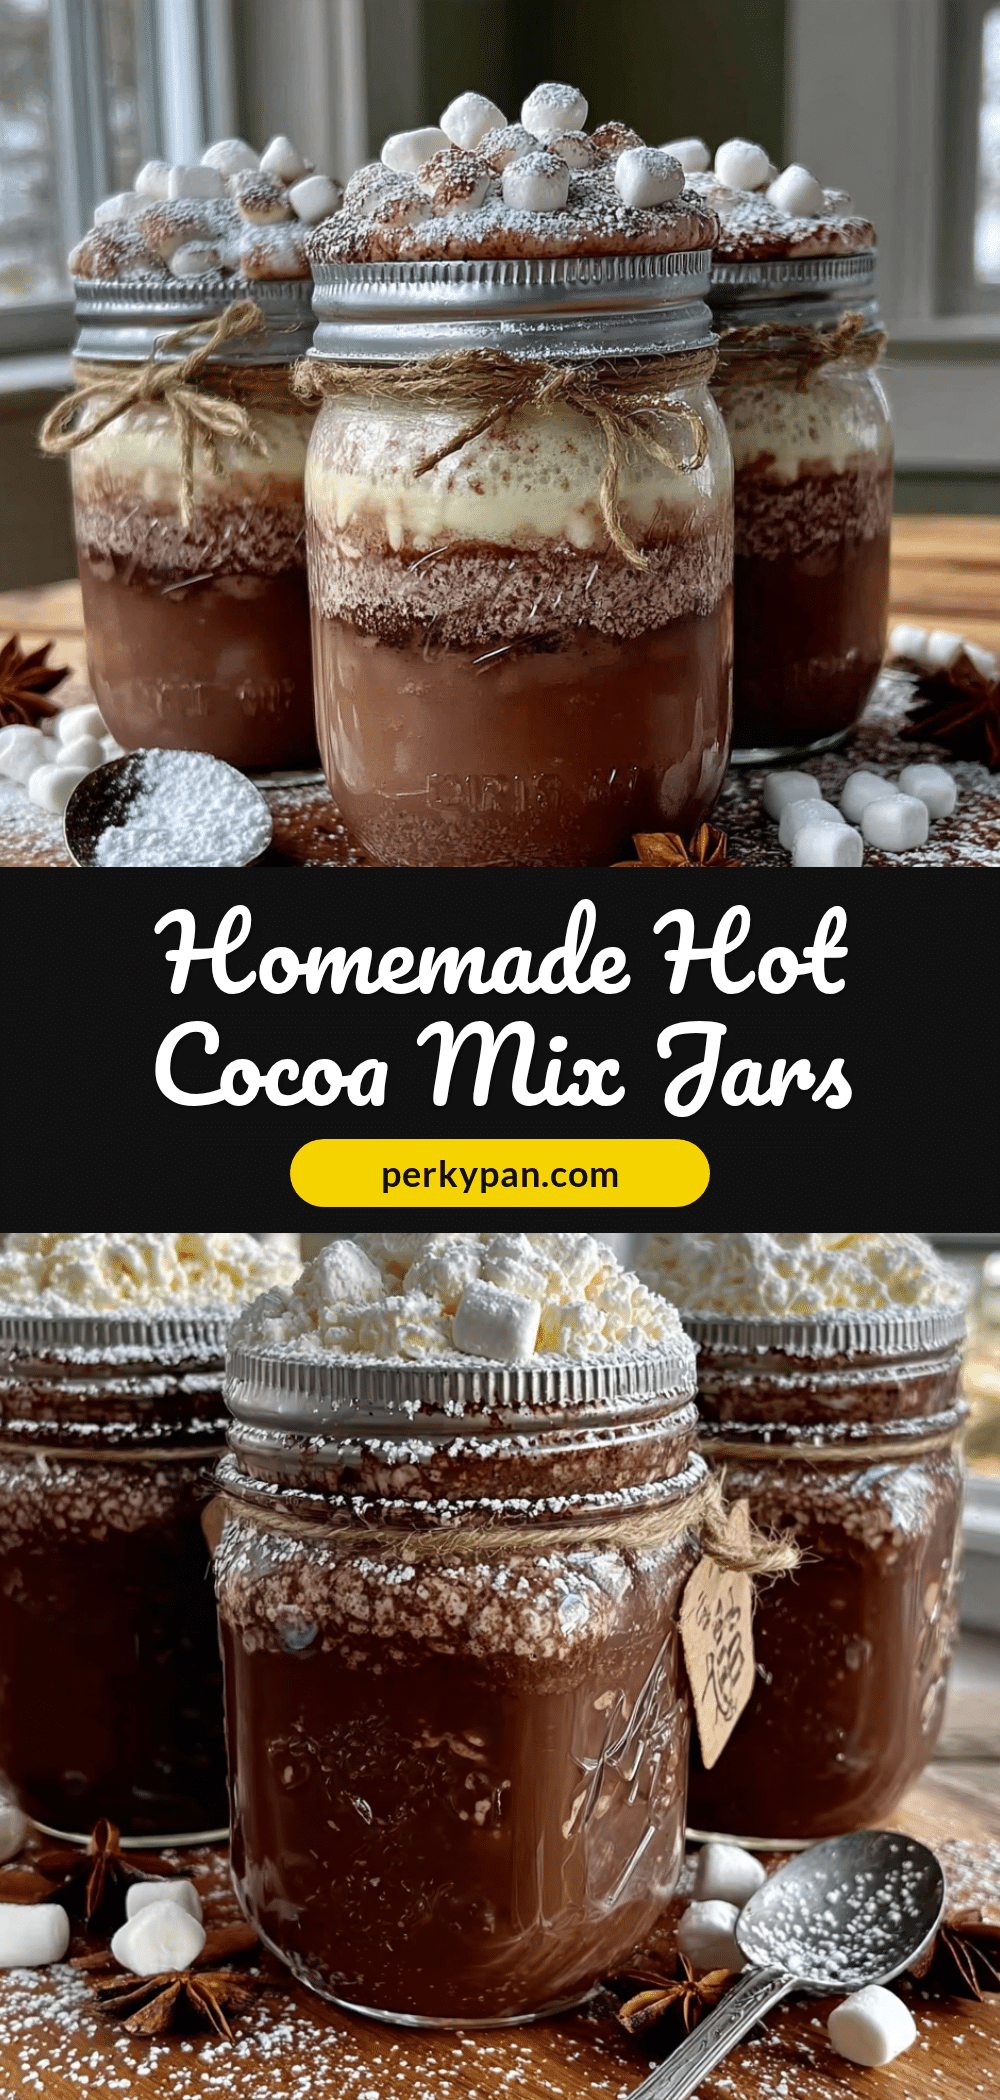
- Layer the jars (optional but recommended). This is the fun part that makes the jars look professional and gift-worthy. Start by spooning about ½ inch of the cocoa mix into the bottom of your jar. Tap the jar gently on the counter to settle the mix. Then add a layer of mini marshmallows. Repeat with another layer of cocoa mix, then marshmallows, and so on, until you reach the top. End with a layer of cocoa mix, then top with a few chocolate shavings or chips. The key is to tap the jar gently between layers to create clean, distinct stripes.
- Seal the jars. Screw the lids on tightly. If you’re using mason jars, make sure the bands are snug but not overly tight. Give the jar a gentle shake to see if the layers hold—if they mix together, you didn’t tap them enough. That’s okay! It will still taste amazing, even if it doesn’t look perfect.
- Decorate the jars. Cut a piece of ribbon or twine and tie it around the neck of the jar. Attach a gift tag with the following instructions: “To make hot cocoa: Add 3 tablespoons of mix to a mug. Pour in 6-8 ounces of hot milk or water. Stir well and enjoy!” You can also add a personal note or a fun sticker.
- Make a test cup (optional but highly recommended). Before you gift all your jars, make one cup of cocoa to make sure the flavor is perfect. Add 3 tablespoons of mix to a mug, pour in 6-8 ounces of hot milk (or water), and stir until fully dissolved. Taste it and adjust the sweetness or chocolate intensity if needed. This is your chance to tweak the recipe before giving it away.
Sensory Cues: When you whisk the dry ingredients, you should see a uniform, dark brown powder that smells intensely chocolatey. When you pour the milk over the mix, you should see it dissolve almost immediately, creating a smooth, glossy liquid. The finished cocoa should be thick enough to coat the back of a spoon but thin enough to drink comfortably. If it’s too thin, add more mix. If it’s too thick, add more milk.
Troubleshooting Tips: If your cocoa mix clumps in the jar, it might be because of humidity. Store the jars in a cool, dry place and make sure they’re completely sealed. If the cocoa tastes bland, add another pinch of salt—it really does make a difference. If it’s too sweet, reduce the sugar by ¼ cup next time. If it’s not chocolatey enough, add an extra 2 tablespoons of cocoa powder.
Cooking Tips & Techniques
I’ve made more batches of this hot cocoa mix than I can count, and I’ve learned a few things along the way. Here are my best tips for getting it right every time.
Don’t skip the salt. I know it sounds weird to add salt to something sweet, but trust me on this one. Salt is a flavor enhancer, and it makes the chocolate taste deeper and more complex. Without it, the cocoa can taste flat and one-dimensional. I once forgot to add salt to a batch, and my husband asked if I’d changed the recipe. He noticed the difference immediately.
Use hot milk, not water, for the best results. While the mix will work with water, hot milk creates a much creamier, richer cup of cocoa. The powdered milk in the mix helps, but fresh milk takes it to another level. If you’re gifting these jars, include that tip on the gift tag. Your recipients will thank you.
Layer with patience. The layered look is what makes these jars so gift-worthy, but it requires a bit of patience. Tap the jar gently on the counter after each layer to settle the mix. If you rush, the layers will blend together and you’ll end up with a jar that looks like a muddy mess. It will still taste good, but it won’t have that wow factor.
Make a double batch. Trust me, once you start making these, you’ll want to make more. A double batch takes the same amount of time as a single batch, and you’ll have extras on hand for unexpected guests or last-minute gifts. I usually make a triple batch in November and store the extra mix in an airtight container in my pantry. It lasts for months.
Use a funnel for clean layers. A small funnel makes it much easier to pour the mix into the jars without getting it on the sides. If you don’t have a funnel, you can use a piece of paper rolled into a cone. This keeps the layers clean and distinct.
Store the jars in a cool, dry place. Humidity is the enemy of powdered mixes. If you live in a humid climate, consider adding a silica gel packet to each jar to absorb moisture. You can save the packets that come with shoes or electronics. Just make sure they’re food-safe and don’t touch the mix directly.
Variations & Adaptations
One of the best things about this recipe is how easy it is to customize. Here are some of my favorite variations that I’ve tried and tested.
Peppermint Hot Cocoa Mix: Add ½ teaspoon of peppermint extract to the dry mix and whisk thoroughly. The extract will be absorbed by the sugar and won’t make the mix clump. Layer the jars as usual, and top with crushed candy canes instead of chocolate shavings. This is my most requested version during the holidays.
Spiced Mexican Hot Cocoa: Add 1 teaspoon of ground cinnamon, ¼ teaspoon of cayenne pepper, and a pinch of nutmeg to the dry mix. The cinnamon adds warmth, and the cayenne adds a subtle heat that builds as you drink. This version is perfect for adults who want something a little different. I like to include a cinnamon stick in the jar for decoration.
Dark Chocolate Hot Cocoa Mix: Substitute half of the unsweetened cocoa powder with dark cocoa powder, like Hershey’s Special Dark. This creates a richer, more intense chocolate flavor that’s less sweet. I also reduce the sugar by ¼ cup to balance the bitterness of the dark cocoa. This is my personal favorite for cold winter nights.
Dairy-Free Hot Cocoa Mix: Use powdered coconut milk or soy milk powder instead of powdered milk, and use a non-dairy creamer like coconut creamer. Make sure to check the labels to ensure they’re truly dairy-free. This version works beautifully and tastes just as creamy as the original. I’ve gifted this to friends with lactose intolerance, and they were thrilled.
Extra Creamy Hot Cocoa Mix: Add an extra ¼ cup of powdered creamer and an extra ¼ cup of powdered milk to the mix. This creates a thicker, richer cup of cocoa that’s almost like drinking melted chocolate. It’s decadent and indulgent, perfect for when you want a real treat.
Sugar-Free Hot Cocoa Mix: Substitute the granulated sugar with a granulated sugar substitute like monk fruit sweetener or erythritol. I’ve also used stevia, but it can have a bitter aftertaste, so I recommend monk fruit. The texture will be slightly different, but the flavor is still great. This version is perfect for diabetics or anyone watching their sugar intake.
Serving & Storage Suggestions
These jars are designed to be gifted, but they’re also perfect for keeping in your own pantry for those cold winter nights when you need something warm and comforting.
Serving Temperature: Hot cocoa is best served steaming hot, just below boiling. Heat your milk or water until it’s hot but not boiling—around 160°F to 170°F. If it’s too hot, it can burn the cocoa and make it taste bitter. If it’s not hot enough, the mix won’t dissolve properly.
Presentation: For a beautiful presentation, serve the cocoa in a mug with a dollop of whipped cream on top. Add a sprinkle of cocoa powder or cinnamon, and a few mini marshmallows. You can also add a peppermint stick or a cinnamon stick for stirring. It makes the whole experience feel special.
Complementary Dishes or Beverages: Hot cocoa pairs beautifully with cookies, biscotti, or a slice of pound cake. I love serving it with my classic sugar cookies for a cozy winter afternoon. For a boozy adult version, add a shot of peppermint schnapps, Irish cream, or bourbon to the finished cocoa.
Storage Instructions: Store the jars in a cool, dry place away from direct sunlight. The mix will stay fresh for up to 6 months if stored properly. Do not refrigerate, as the moisture in the fridge can cause the mix to clump. If you live in a humid climate, consider adding a food-safe silica gel packet to each jar.
Reheating Tips: If your cocoa cools down, you can reheat it in the microwave or on the stovetop. Just be careful not to boil it, as this can cause the milk solids to separate. Stir well before serving.
How Flavors Develop Over Time: The flavors in the cocoa mix will meld and deepen over time. After about a week, the cocoa will taste even richer and more complex. This is why these jars make such great gifts—they actually get better with a little time.
Nutritional Information & Benefits
While hot cocoa is definitely a treat, it does have some surprising health benefits when made with quality ingredients. Here’s the estimated nutritional information for one serving (3 tablespoons of mix prepared with 8 ounces of whole milk).
| Nutrient | Amount Per Serving |
|---|---|
| Calories | 220-250 |
| Total Fat | 8-10g |
| Saturated Fat | 5-6g |
| Cholesterol | 20-25mg |
| Sodium | 150-200mg |
| Total Carbohydrates | 35-40g |
| Sugars | 30-35g |
| Protein | 6-8g |
| Calcium | 200-250mg |
| Iron | 1-2mg |
Health Benefits of Key Ingredients: Cocoa powder is rich in antioxidants called flavonoids, which can help reduce inflammation and improve heart health. It also contains iron, magnesium, and zinc. The milk provides calcium and vitamin D, which are essential for bone health. And while sugar should be consumed in moderation, a little sweetness can boost your mood and provide quick energy.
Dietary Considerations: This recipe can be made dairy-free, sugar-free, and gluten-free (cocoa is naturally gluten-free). It is not suitable for vegan diets unless you use plant-based milk and creamer. Always check your labels for potential allergens.
Personal Wellness Perspective: I believe in balance. Hot cocoa is a comfort food, and comfort foods have a place in a healthy lifestyle. The key is to enjoy it mindfully—savor each sip, share it with someone you love, and don’t feel guilty about it. Life is too short for bad cocoa.
Conclusion
These homemade hot cocoa mix jars have become a holiday tradition in my house, and I hope they become one in yours too. They’re simple, affordable, and incredibly thoughtful—everything a good gift should be. Whether you’re making them for your child’s teacher, your neighbor, your coworker, or yourself, they’re guaranteed to bring a smile to someone’s face.
I love that this recipe is so flexible. You can make it your own by adding different flavors, changing up the decorations, or packaging it in a unique way. That’s the beauty of homemade gifts—they’re personal and meaningful. And honestly, the fact that it costs so little to make just makes it better. You don’t have to spend a lot to show someone you care.
So go ahead and give it a try. Make a batch, tie on a ribbon, and watch the joy on someone’s face when they open it. And when you do, I’d love to hear about it. Leave a comment below and tell me who you gifted your jars to, or share a photo of your creation on Pinterest. Don’t forget to tag me so I can see your beautiful work!
Happy gifting, and happy sipping. You’ve got this.
Frequently Asked Questions
Can I use this mix to make iced hot cocoa?
Absolutely! To make iced cocoa, dissolve 3 tablespoons of mix in 2-3 tablespoons of hot water or milk, then pour over a glass filled with ice and add cold milk. Stir well and enjoy. It’s a refreshing treat during warmer months.
How long will the hot cocoa mix stay fresh?
When stored in a cool, dry place in an airtight container, the mix will stay fresh for up to 6 months. The powdered milk can last even longer. Just make sure to keep it away from moisture and direct sunlight.
Can I use hot water instead of milk?
Yes, you can use hot water, but the cocoa will be thinner and less creamy. The powdered milk in the mix will still provide some creaminess, but using fresh milk gives the best results. If you’re using water, consider adding a splash of cream or a pat of butter for richness.
What if I don’t have powdered milk?
You can still make the mix without powdered milk, but it won’t be as creamy. Simply increase the powdered creamer to 1 cup to compensate. Alternatively, you can leave the powdered milk out entirely and just use fresh milk when preparing the cocoa. The flavor will still be great.
Can I make these jars with kids?
Yes! This is a wonderful activity to do with children. They can help measure, whisk, and layer the ingredients. Just supervise the whisking to avoid spills. Kids love giving these jars to their teachers and friends, and they feel proud of making something themselves.
Pin This Recipe!
Homemade Hot Cocoa Mix Jars: The Perfect Wallet-Friendly Gift
These homemade hot cocoa mix jars are a budget-friendly, thoughtful gift that costs about three dollars each to make. They’re layered beautifully with mini marshmallows and chocolate shavings, and they taste incredibly rich and creamy.
- Prep Time: 15 minutes
- Cook Time: 5 minutes
- Total Time: 20 minutes
- Yield: 4 servings 1x
- Category: Beverage
- Cuisine: American
Ingredients
- 2 cups (400g) granulated sugar
- 1 cup (100g) unsweetened cocoa powder
- 1 ½ cups (160g) powdered milk
- ½ cup (60g) powdered creamer
- ¼ teaspoon (1.5g) salt
- Mini marshmallows (optional, for layering)
- Chocolate shavings or chips (optional, for layering)
Instructions
- Prepare your workspace. Clear your counter and gather all your ingredients and equipment. Make sure your jars are clean and completely dry.
- Combine the dry ingredients. In a medium mixing bowl, add the granulated sugar, unsweetened cocoa powder, powdered milk, powdered creamer, and salt. Whisk everything together thoroughly for at least 30 seconds until evenly distributed.
- Check for clumps. Run your whisk through the mixture and break up any clumps. The mix should be smooth and powdery, like fine sand.
- Layer the jars (optional but recommended). Spoon about ½ inch of the cocoa mix into the bottom of your jar. Tap the jar gently on the counter to settle the mix. Add a layer of mini marshmallows. Repeat with another layer of cocoa mix, then marshmallows, until you reach the top. End with a layer of cocoa mix, then top with chocolate shavings or chips.
- Seal the jars. Screw the lids on tightly. Give the jar a gentle shake to see if the layers hold.
- Decorate the jars. Cut a piece of ribbon or twine and tie it around the neck of the jar. Attach a gift tag with instructions: ‘To make hot cocoa: Add 3 tablespoons of mix to a mug. Pour in 6-8 ounces of hot milk or water. Stir well and enjoy!’
- Make a test cup (optional but recommended). Add 3 tablespoons of mix to a mug, pour in 6-8 ounces of hot milk (or water), and stir until fully dissolved. Taste and adjust if needed.
Notes
For the best results, use hot milk instead of water. Store jars in a cool, dry place. The mix will stay fresh for up to 6 months. For a dairy-free version, use powdered coconut milk or soy milk powder and a non-dairy creamer. For a sugar-free version, use a granulated sugar substitute like monk fruit sweetener or erythritol.
Nutrition
- Serving Size: 3 tablespoons of mix
- Calories: 220250
- Sugar: 3035
- Sodium: 150200
- Fat: 810
- Saturated Fat: 56
- Carbohydrates: 3540
- Fiber: 12
- Protein: 68
Keywords: hot cocoa mix, homemade gift, mason jar gift, hot chocolate, DIY gift, Christmas gift, budget-friendly gift