Love this? Save it for later!
Share the inspiration with your friends
Melissa wasn’t trying to impress anyone. I’d stopped by her place to drop off a casserole dish I’d borrowed, and the smell—sharp, creamy, a little bit savory—hit me before I even got through the front door. She was just standing there in her kitchen, one hand holding a mixing bowl, the other casually scooping out a taste with a celery stick. “Oh, this old thing?” she said when I asked what she was making. “It’s just a cheese ball. My mom used to make it for every single holiday party.” She said it like it was nothing. Like she wasn’t holding a little miracle in her hands.
I mean, honestly, I’ve made cheese balls before. I’ve eaten plenty of them at potlucks and holiday gatherings. But this one? This one was different. The texture was impossibly smooth, the flavor had this deep, savory punch that I couldn’t quite place, and the nutty coating gave it a satisfying crunch that made you want to go back for just one more bite. “What’s in this?” I asked, trying to sound casual. She just shrugged and handed me the bowl of dried beef she was about to chop up. That’s when I knew I had to get the full story.
You know that feeling when you taste something and your brain just stops for a second? That was me, standing in Melissa’s kitchen, eating a cheese ball that she’d thrown together in about fifteen minutes. No fuss, no fancy presentation, no stress. And that’s the whole point of this recipe, really. It’s the kind of thing you can make without breaking a sweat, but when you set it out at a party, people will think you spent hours on it. Let me tell you—once you make this dried beef cheese ball with pecan crust, you’ll never go back to store-bought appetizers again.
Why You’ll Love This Recipe
I’ve tested this recipe more times than I can count, tweaking the ratios, playing with different cream cheese brands, and even experimenting with the drying time on the pecans. After all that trial and error, I can tell you with confidence—this is the version that works every single time. Here’s why this one stands out from every other cheese ball recipe out there:
- Quick & Easy: You can have this assembled in under 20 minutes. No cooking required, just mixing and chilling. Perfect for when you remember at 4 PM that guests are coming at 6.
- Simple Ingredients: Cream cheese, dried beef, green onions, Worcestershire sauce, and pecans. That’s it. You probably have most of these in your fridge and pantry right now.
- Perfect for Hosting: This is the ultimate party appetizer. It scales beautifully for a crowd, looks impressive on a serving board, and requires zero last-minute fuss. Make it the night before and just pull it out when guests arrive.
- Crowd-Pleaser: I’ve served this at game nights, holiday parties, and casual get-togethers. Every single time, someone asks for the recipe. Kids love it, adults love it—it’s universal.
- Unbelievably Delicious: The combination of creamy, savory, and crunchy is just next-level. The dried beef adds this salty, meaty depth that you don’t get from a standard cheese ball, and the pecans give it a toasty finish that makes every bite interesting.
What really makes this recipe different from the rest is the technique. Most dried beef cheese ball recipes just dump everything in a bowl and call it a day. But I’ve learned that letting the cream cheese come to room temperature, chopping the dried beef into tiny pieces rather than leaving it in strips, and toasting the pecans just slightly before rolling—these little steps make a massive difference. It’s not just another cheese ball. It’s the cheese ball that will have people hovering around your appetizer table all night long.
This is the kind of recipe that makes you look like a hero with almost no effort. It’s comforting, it’s satisfying, and honestly, it’s the first thing to disappear at every party I bring it to. Trust me on this one.
What Ingredients You Will Need
This recipe uses simple, pantry-friendly ingredients that come together to create something truly special. Each component plays a specific role in building that perfect balance of creamy, savory, and crunchy. Here’s what you’ll need:
For the Cheese Ball Base
- 16 ounces cream cheese, softened – Make sure it’s at room temperature for the smoothest mixing. I prefer Philadelphia brand for its consistent texture, but any full-fat cream cheese works well. (Low-fat versions can turn out grainy, so I’d stick with full-fat for best results.)
- 1 package (2.5 ounces) dried beef, finely chopped – This is the star of the show. Look for dried beef in the canned meat aisle or near the jerky section. You want it finely chopped—almost minced—so it distributes evenly throughout the cheese ball without any chewy chunks. I use Armour brand, but any dried beef works.
- 3 green onions, thinly sliced – Use both the white and green parts for the best flavor. The onions add a mild, fresh bite that cuts through the richness of the cream cheese.
- 2 tablespoons Worcestershire sauce – This adds that deep, umami flavor that makes the cheese ball taste like it’s been simmering all day. Don’t skip it—it’s essential.
- 1 teaspoon garlic powder – For a subtle savory backbone. Fresh garlic can be too sharp here, so stick with powder.
- 1/2 teaspoon black pepper – Freshly ground is best for that little bit of heat.
For the Pecan Crust
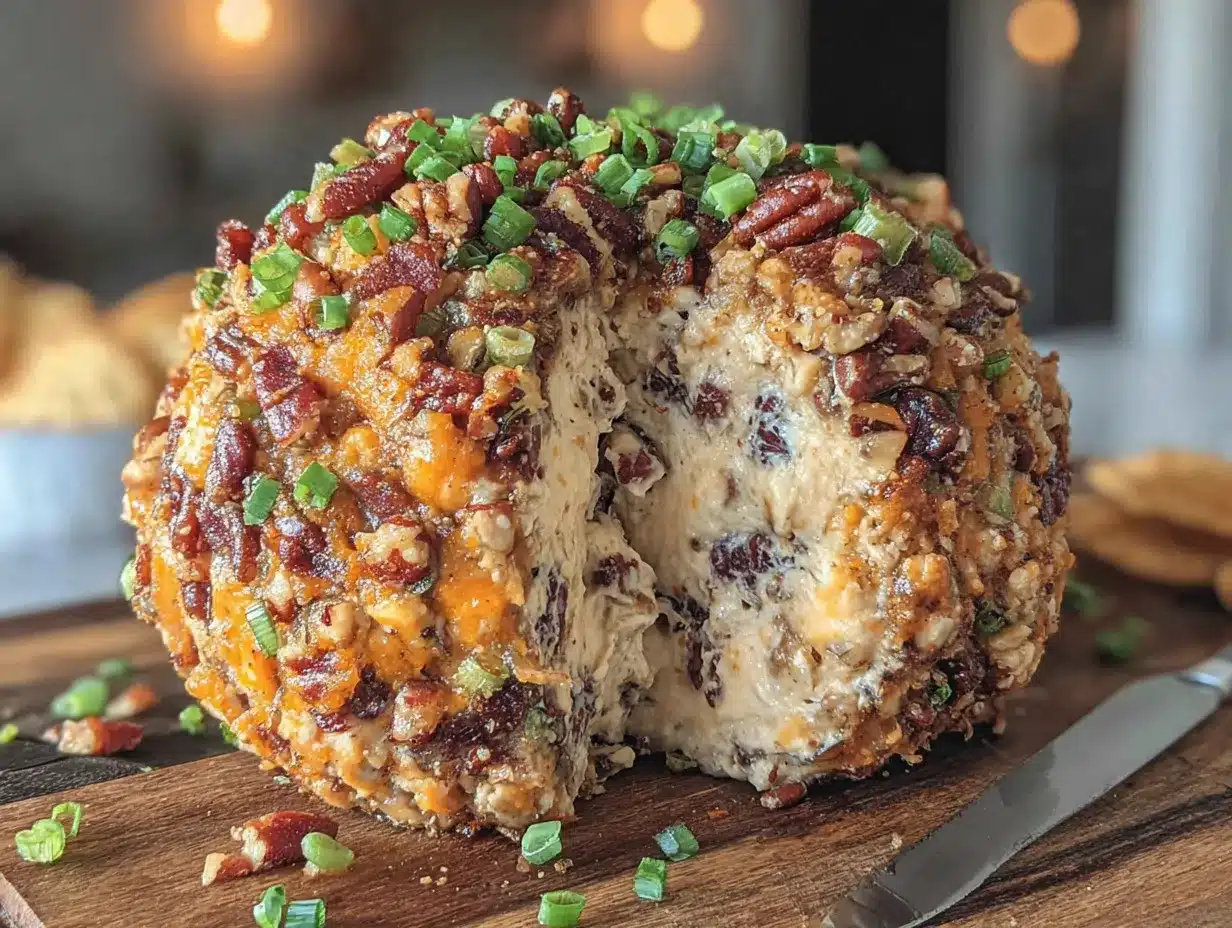
- 1 cup pecans, finely chopped – You want them chopped into small, even pieces so they stick to the cheese ball and create a nice, uniform coating. Toasting them lightly in a dry pan for 2-3 minutes brings out their natural oils and deepens the flavor, but raw works fine too.
- Optional: 1 tablespoon fresh parsley, finely chopped – This is purely for color, but it does add a nice freshness that balances the richness. Totally optional, but pretty.
Ingredient Selection Tips
When choosing your dried beef, look for packages that are pliable and not too dry or brittle. If the beef feels hard or crumbly, it might be past its prime. For the pecans, I recommend buying raw, unsalted nuts and chopping them yourself. Pre-chopped pecans are often uneven and can include bitter pieces from the skin. Plus, whole pecans are usually fresher and more affordable per ounce.
Substitution Guidance
If you can’t find dried beef, you can substitute with prosciutto or even thinly sliced deli roast beef that’s been baked until dry and crumbled. For a vegetarian version, try using sun-dried tomatoes (oil-packed, drained and finely chopped) along with a teaspoon of liquid smoke for that savory depth. And if pecans aren’t your thing, walnuts or even crushed butter crackers make a great alternative coating.
Equipment Needed
The beauty of this recipe is that you don’t need any fancy equipment. Here’s what you’ll need:
- Large mixing bowl – For combining all the ingredients. Any medium-to-large bowl will do.
- Hand mixer or stand mixer – While you can mix by hand with a wooden spoon, a mixer makes the process much faster and ensures a silky-smooth texture. I’ve done it both ways, and the mixer version is definitely creamier.
- Sharp knife and cutting board – For chopping the dried beef, green onions, and pecans.
- Plastic wrap – To wrap the cheese ball while it chills. Press it directly against the surface to prevent a skin from forming.
- Small skillet (optional) – If you decide to toast the pecans, a dry skillet works perfectly.
- Serving platter or cheese board – For the final presentation. A wooden board or a simple white plate lets the cheese ball shine.
If you don’t have a hand mixer, you can absolutely do this by hand. Just make sure your cream cheese is very soft—leave it out for at least an hour—and mix vigorously with a sturdy spoon. It’ll take a few extra minutes, but the results are still fantastic. I’ve done it this way more times than I can count, and honestly, there’s something satisfying about working the ingredients together with your own two hands.
Preparation Method
- Soften the cream cheese. Take your cream cheese out of the refrigerator at least 1 hour before you start. It should be soft enough that you can easily press your finger into it. This step is crucial—cold cream cheese will leave you with lumpy, uneven results. Trust me, I learned this the hard way when I tried to rush it once. The lumps never fully disappeared.
- Prepare your ingredients. While the cream cheese softens, finely chop the dried beef. I like to stack a few slices at a time and cut them into tiny strips, then rotate and cut crosswise until the pieces are about the size of small peas. Slice the green onions thinly, and if you’re toasting the pecans, heat a dry skillet over medium heat for 2 minutes, then add the pecans and stir constantly for 2-3 minutes until fragrant. Let them cool completely before chopping.
- Mix the cheese ball base. In a large mixing bowl, combine the softened cream cheese, Worcestershire sauce, garlic powder, and black pepper. Beat with a hand mixer on medium speed until smooth and fluffy—about 2 minutes. Scrape down the sides of the bowl halfway through to make sure everything is incorporated.
- Add the mix-ins. Fold in the chopped dried beef and sliced green onions using a rubber spatula. Stir until everything is evenly distributed. Take a small taste (on a cracker, of course) and adjust the seasoning if needed. I sometimes add an extra dash of Worcestershire at this point if I want a deeper flavor.
- Shape the cheese ball. Lay out a large piece of plastic wrap on your counter. Scoop the cheese mixture onto the center of the plastic wrap. Gather the edges of the wrap and twist them together, using your hands to shape the mixture into a smooth, round ball. Don’t worry about perfection—you’ll smooth it out more later. Twist the wrap tightly and refrigerate for at least 2 hours, or overnight. (Overnight is better—the flavors really meld together.)
- Prepare the pecan coating. Just before you’re ready to serve, spread the finely chopped pecans on a plate or shallow dish. If you’re using parsley, mix it in with the pecans now.
- Roll the cheese ball. Remove the chilled cheese ball from the refrigerator and unwrap it. Gently roll it in the chopped pecans, pressing lightly so the nuts stick to all sides. Use your hands to pat any bare spots. The cheese ball should be completely coated with a nice, even layer of pecans.
- Let it rest. Place the coated cheese ball on your serving platter and let it sit at room temperature for about 15-20 minutes before serving. This softens it just enough for easy spreading. Trust me, a cheese ball straight from the fridge is too firm and will just tear up your crackers.
- Serve and enjoy. Surround the cheese ball with an assortment of crackers, fresh vegetables like celery sticks and bell pepper strips, or even apple slices for a sweet contrast. Watch it disappear!
One thing I always do: save a tablespoon of the chopped pecans to sprinkle around the base of the cheese ball on the serving platter. It looks intentional and adds a little extra crunch for people who want to scoop up some nuts with their cracker.
Cooking Tips & Techniques
I’ve made this dried beef cheese ball more times than I can count, and I’ve definitely learned a few things along the way—including some mistakes that you can totally avoid.
Don’t skip the chilling time. I know, I know, you’re in a hurry. But if you try to roll the cheese ball in pecans while it’s still warm and soft, you’ll end up with a sticky, nut-covered mess that looks more like a sad meatball than a beautiful appetizer. Two hours minimum in the fridge. Overnight is even better. The texture firms up perfectly and the flavors have time to get friendly with each other.
Chop, chop, chop. The biggest mistake people make with dried beef cheese balls is leaving the beef in big strips. You want it finely chopped—like, almost minced. Big pieces of dried beef create chewy pockets that are unpleasant to bite into. Take the extra three minutes to chop it well. Your guests will thank you.
Toast your pecans. This is optional, but it makes a huge difference. Raw pecans are fine, but toasting them for just 2-3 minutes in a dry pan brings out their natural oils and gives them a deeper, almost buttery flavor. Just watch them carefully—they burn fast. I’ve definitely had to start over with a fresh batch of nuts more than once because I got distracted.
Plan your timing. This is the perfect make-ahead appetizer. You can prep the cheese ball base up to three days in advance, keep it wrapped in the fridge, and then roll it in pecans right before serving. This is my go-to strategy when I’m hosting a party—it’s one less thing to worry about on the day of.
Temperature matters. Serve the cheese ball slightly chilled but not ice-cold. Let it sit out for 15-20 minutes before serving. If it’s been out for more than an hour, it’ll start to get too soft and won’t hold its shape as well. Just keep an eye on it, especially in warm weather.
Variations & Adaptations
This recipe is incredibly forgiving and easy to customize. Here are some variations I’ve tried and loved:
- Spicy Southwest Version: Add 1/4 cup finely chopped pickled jalapeños, 1 teaspoon cumin, and substitute the dried beef with 1/2 cup crumbled cooked chorizo. Roll in crushed tortilla chips instead of pecans. This version is always a hit at game day parties.
- Herb & Garlic Version: Add 2 tablespoons fresh chopped chives, 1 tablespoon fresh dill, and 1 teaspoon dried oregano to the cheese mixture. Roll in a mixture of chopped walnuts and fresh parsley. This lighter version is perfect for spring gatherings.
- Smoky Bacon Version: Substitute the dried beef with 6 strips of crispy bacon, crumbled. Add 1/2 teaspoon smoked paprika to the cream cheese mixture. Roll in a combination of chopped pecans and crispy bacon bits. Warning: this version disappears fastest.
- Dairy-Free Adaptation: Use a high-quality dairy-free cream cheese alternative (I like Kite Hill brand) and check that your Worcestershire sauce is anchovy-free. The texture will be slightly softer, so chill it for at least 4 hours before rolling.
- Sweet & Savory Version: Add 1/4 cup dried cranberries, finely chopped, to the cheese mixture. The sweetness pairs beautifully with the salty dried beef and the nutty pecans. This is my personal favorite for holiday parties.
I once made a double batch for a New Year’s Eve party and divided the mixture into three smaller cheese balls, each rolled in a different coating—pecans, crushed pretzels, and everything bagel seasoning. It was a huge hit and everyone loved having options. Don’t be afraid to get creative!
Serving & Storage Suggestions
This dried beef cheese ball is incredibly versatile when it comes to serving. Here’s how to make it shine:
Serving Temperature: Serve slightly chilled but not cold. Let it sit at room temperature for 15-20 minutes before serving for the best spreading consistency. If you’re serving it outdoors in warm weather, keep it on a plate set over a bowl of ice to prevent it from getting too soft.
What to Serve With It: The classic pairing is buttery crackers or crisp crostini, but don’t stop there. Fresh vegetable sticks—celery, carrot, bell pepper, cucumber—are excellent for a lighter option. Apple slices and pear slices add a sweet contrast that’s absolutely wonderful. For a heartier spread, serve alongside sliced baguette or pretzel chips.
Complementary Dishes: This cheese ball pairs beautifully with a charcuterie board featuring cured meats, olives, and pickled vegetables. It’s also fantastic alongside a bowl of soup or as part of a brunch spread with fresh fruit and pastries.
Storage: Leftover cheese ball can be wrapped tightly in plastic wrap and stored in the refrigerator for up to 5 days. The pecan coating may soften slightly over time, but the flavor actually improves. If you’re making it ahead for a party, I recommend storing the uncoated cheese ball in the fridge and rolling it in pecans the day you plan to serve it.
Freezing: You can freeze the uncoated cheese ball for up to 3 months. Wrap it tightly in plastic wrap, then in aluminum foil. Thaw in the refrigerator overnight, then roll in fresh pecans before serving. I’ve done this multiple times and the texture is still great.
Reheating: This is served cold, so no reheating needed. But if you’ve frozen it, just make sure it’s fully thawed in the fridge before serving.
Flavor Development: Honestly, this cheese ball tastes even better the next day. The flavors have time to meld and deepen, so don’t hesitate to make it a day or two ahead. It’s one of those rare recipes that actually improves with a little patience.
Nutritional Information & Benefits
While this is definitely a treat-yourself appetizer, it does offer some nutritional perks worth mentioning. Here’s an approximate breakdown per serving (based on 16 servings, using about 2 tablespoons of cheese mixture per serving):
- Calories: 180-200
- Protein: 6-7 grams
- Fat: 16-18 grams
- Carbohydrates: 3-4 grams
- Fiber: 1 gram
- Sugar: 1-2 grams
- Sodium: 350-400 mg
Health Benefits: The cream cheese provides calcium and protein, while the pecans are packed with healthy monounsaturated fats, vitamin E, and magnesium. Pecans have been shown to support heart health and reduce inflammation. The dried beef adds a solid protein boost, making this a more satisfying appetizer than many carb-heavy options. Plus, the green onions offer a small dose of vitamin K and antioxidants.
Dietary Considerations: This recipe is naturally low-carb and keto-friendly. It’s also gluten-free as written (just be sure to check your Worcestershire sauce label, as some brands contain malt vinegar from barley). For a lower-sodium version, look for low-sodium dried beef or reduce the amount by half and add extra green onions for flavor.
Potential Allergens: This recipe contains dairy (cream cheese) and tree nuts (pecans). It may also contain gluten if your Worcestershire sauce isn’t certified gluten-free. Always check labels if serving guests with allergies.
I personally love that this appetizer lets me indulge without completely derailing my eating habits. It’s rich and satisfying, so a little goes a long way—and that’s exactly what you want at a party.
Conclusion
Look, I’ve made a lot of appetizers in my time. Some have been complicated, some have been flops, and a few have been genuinely memorable. But this dried beef cheese ball with pecan crust? It’s in a league of its own. It’s the recipe that I come back to again and again, the one that’s saved me more times than I can count when I needed something impressive with minimal effort.
What I love most about this recipe is how forgiving it is. You can tweak the ingredients, adjust the seasonings, swap out the nuts, and it still comes out delicious. It’s the kind of recipe that makes you feel like a confident host, even on days when you’re running behind and the doorbell is about to ring. And honestly? That’s the best kind of recipe to have in your back pocket.
So go ahead—give this one a try. Make it for your next get-together, your next holiday party, or just because you want something special to snack on. I promise you’ll be glad you did. And when someone asks you for the recipe (because they will), you can just shrug and say, “Oh, it’s nothing. Just something I threw together.”
I’d love to hear how yours turns out! Drop a comment below and let me know if you tried any variations or if this cheese ball was a hit at your party. And if you’re looking for more crowd-pleasing appetizer ideas, check out our crispy garlic chicken for another guaranteed hit, or browse our collection of best party appetizers for even more inspiration. Happy hosting!
Frequently Asked Questions
Can I make this cheese ball ahead of time?
Absolutely! In fact, I recommend it. You can prepare the cheese ball base up to 3 days in advance and keep it tightly wrapped in the refrigerator. Just roll it in the pecans right before serving for the freshest texture and flavor.
Can I use low-fat cream cheese?
You can, but I don’t recommend it. Low-fat cream cheese has a higher water content, which can make the cheese ball softer and less stable. It also won’t have the same rich, creamy texture. If you’re watching calories, just use a smaller portion of the full-fat version—it’s more satisfying that way.
What can I use instead of dried beef?
Prosciutto, finely chopped and pan-fried until crispy, works beautifully. You can also use thinly sliced deli roast beef that’s been baked at 300°F for about 10 minutes until dry, then crumbled. For a vegetarian option, try finely chopped sun-dried tomatoes with a splash of liquid smoke.
How long will this cheese ball last in the fridge?
Properly wrapped, the cheese ball will keep for 5-7 days in the refrigerator. The pecan coating may soften slightly after the first day, so if you’re planning to serve it over several days, I recommend storing the uncoated cheese ball and adding fresh pecans each time you serve it.
Can I freeze this cheese ball?
Yes! Freeze the uncoated cheese ball for up to 3 months. Wrap it tightly in plastic wrap, then in aluminum foil. Thaw in the refrigerator overnight, then roll in fresh pecans before serving. The texture will be slightly softer than fresh, but it’s still delicious.
Pin This Recipe!
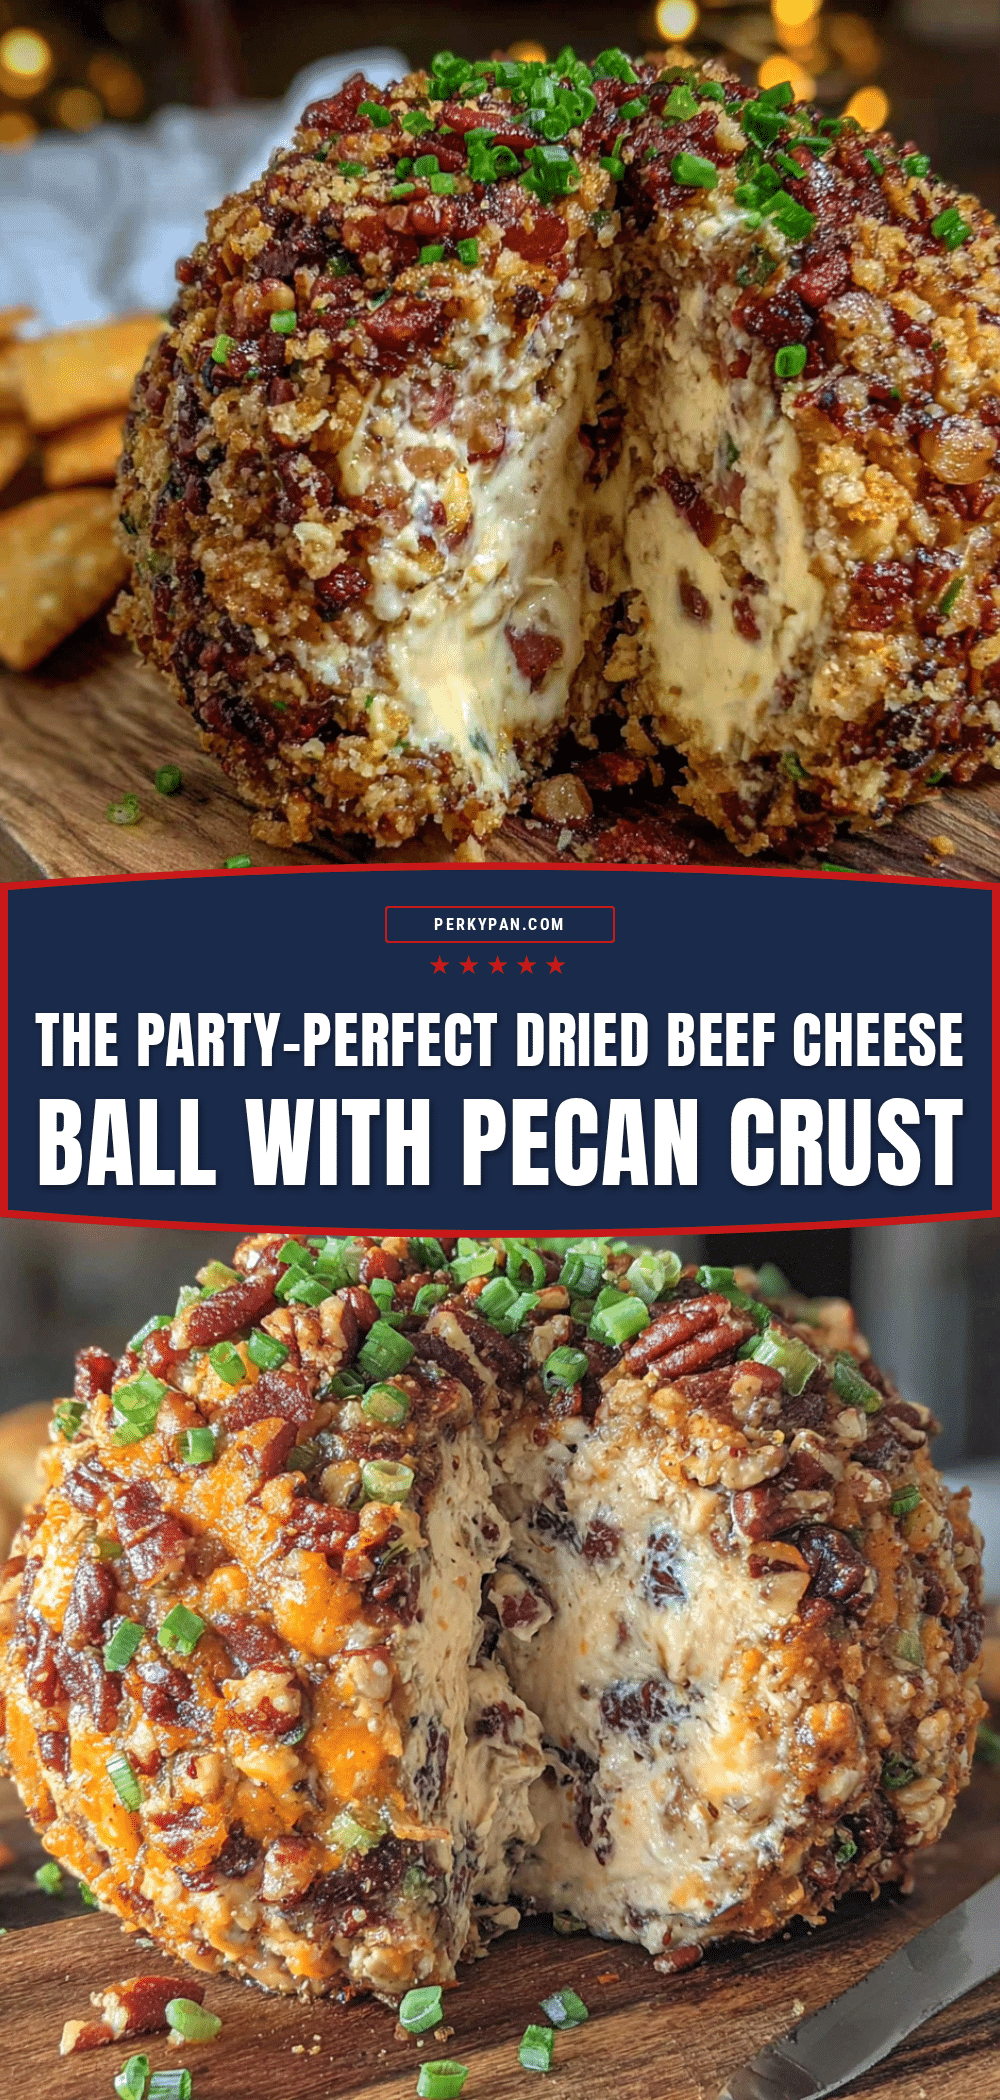
The Best Dried Beef Cheese Ball with Pecan Crust

This creamy, savory cheese ball is packed with dried beef, green onions, and Worcestershire sauce, then coated in crunchy pecans. It’s the ultimate make-ahead party appetizer that comes together in just 20 minutes and always disappears first.
- Prep Time: 20 minutes
- Cook Time: 0 minutes
- Total Time: 2 hours 20 minutes (includes chilling)
- Yield: 16 servings 1x
- Category: Appetizer
- Cuisine: American
Ingredients
- 16 ounces cream cheese, softened
- 1 package (2.5 ounces) dried beef, finely chopped
- 3 green onions, thinly sliced
- 2 tablespoons Worcestershire sauce
- 1 teaspoon garlic powder
- 1/2 teaspoon black pepper
- 1 cup pecans, finely chopped
- 1 tablespoon fresh parsley, finely chopped (optional)
Instructions
- Soften the cream cheese: Take cream cheese out of the refrigerator at least 1 hour before starting. It should be soft enough to easily press your finger into it.
- Prepare ingredients: Finely chop dried beef into small pea-sized pieces. Thinly slice green onions. If toasting pecans, heat a dry skillet over medium heat for 2 minutes, add pecans and stir constantly for 2-3 minutes until fragrant. Let cool completely before chopping.
- Mix the cheese ball base: In a large mixing bowl, combine softened cream cheese, Worcestershire sauce, garlic powder, and black pepper. Beat with a hand mixer on medium speed until smooth and fluffy, about 2 minutes. Scrape down sides of bowl halfway through.
- Add mix-ins: Fold in chopped dried beef and sliced green onions using a rubber spatula until evenly distributed. Taste and adjust seasoning if needed.
- Shape the cheese ball: Lay a large piece of plastic wrap on the counter. Scoop cheese mixture onto center of plastic wrap. Gather edges of wrap and twist together, shaping mixture into a smooth round ball. Twist wrap tightly and refrigerate for at least 2 hours, or overnight.
- Prepare pecan coating: Just before serving, spread finely chopped pecans on a plate or shallow dish. If using parsley, mix it in with pecans.
- Roll the cheese ball: Remove chilled cheese ball from refrigerator and unwrap. Gently roll in chopped pecans, pressing lightly so nuts stick to all sides. Use hands to pat any bare spots.
- Let it rest: Place coated cheese ball on serving platter and let sit at room temperature for 15-20 minutes before serving.
- Serve and enjoy: Surround with crackers, fresh vegetables, or apple slices.
Notes
For best results, let cream cheese come to room temperature. Chop dried beef very finely to avoid chewy pockets. Toasting pecans enhances flavor. Cheese ball can be made up to 3 days ahead; roll in pecans just before serving. Can be frozen uncoated for up to 3 months.
Nutrition
- Serving Size: 2 tablespoons
- Calories: 190
- Sugar: 1
- Sodium: 375
- Fat: 17
- Saturated Fat: 8
- Carbohydrates: 3
- Fiber: 1
- Protein: 6
Keywords: dried beef cheese ball, pecan crust cheese ball, party appetizer, holiday appetizer, make-ahead appetizer, cream cheese ball


