Love this? Save it for later!
Share the inspiration with your friends
I had sworn off scalloped potatoes for years. Honestly, I thought they were a mushy, bland, beige mess that took up valuable oven space during the holidays. The kind of side dish that everyone politely takes a spoonful of and then leaves half-eaten on their plate. Then, three Christmases ago, my sister-in-law, Sarah, showed up to our family dinner carrying a baking dish that smelled like heaven. I watched in disbelief as my notoriously picky uncle went back for thirds. “What is that?” I asked, trying to sound casual. “Oh,” she said with a wry smile, catching me mid-scoop, “just my cheesy scalloped potatoes.” I had been caught in the act of proving myself wrong, and honestly, I couldn’t have been happier about it.
That first bite was a revelation. It wasn’t just creamy; it was decadently rich. The potatoes were tender, not mushy, and the cheese—oh, the cheese—was a golden, bubbly blanket of pure comfort. I had to know her secret. It turns out, the magic is in the method and the quality of the ingredients. This isn’t your grandmother’s watery casserole. This is a Christmas miracle on a plate. If you’ve been on the fence about this classic side dish, let me tell you, this version will change your mind. It certainly changed mine.
The best part? It’s deceptively simple to put together. For years, I thought it required a complicated roux or a long list of fancy ingredients. It doesn’t. With just a few key techniques, you can create a side dish that steals the show from the turkey. This recipe became my go-to for every holiday gathering, and it’s the one dish people request by name. So, if you’re looking for the perfect, foolproof side for your Christmas table, you’ve just found it. Let’s get cooking.
Why You’ll Love This Recipe
This isn’t just another scalloped potato recipe. This is the one you’ll come back to year after year, and here’s why. I’ve tested this version countless times, tweaking the cheese blend and the cook time until it was absolutely perfect. It’s built on a foundation of real experience, not just a list of ingredients.
- Incredibly Creamy, Not Gluey: The secret is a careful layering technique and a touch of cream cheese that guarantees a velvety sauce every single time. No more floury lumps or watery sauce.
- Perfect for Christmas: This dish is a showstopper. It’s rich, indulgent, and feels special enough for the biggest holiday meal. It pairs perfectly with ham, turkey, or roast beef.
- Make-Ahead Friendly: You can assemble this entire dish the day before. Just pop it in the oven while the roast rests, and you have one less thing to stress about on the big day.
- Simple, Real Ingredients: No canned soups or processed cheese sauces here. We’re using real potatoes, real cream, and a blend of cheeses that melt like a dream.
- Always a Crowd-Pleaser: I’ve served this to everyone from my kids to my in-laws, and it gets rave reviews every single time. It’s the kind of dish that makes you close your eyes after the first bite.
What makes this recipe different from the rest is the balance. The sharp cheddar cuts through the richness of the cream, while the Gruyère adds a nutty, complex flavor that you just don’t get from a standard recipe. It’s comfort food reimagined—richer, more flavorful, but with the same soul-soothing satisfaction you crave on a cold winter night. Perfect for impressing your guests without the stress.
What Ingredients You Will Need
This recipe uses simple, wholesome ingredients that come together to create something truly special. The key is using good quality cheese and the right type of potato. Don’t skimp here, as these are the stars of the show.
- For the Potatoes:
- 4 pounds Yukon Gold potatoes, peeled and sliced 1/8-inch thick (Yukon Golds are my go-to because they have a buttery flavor and hold their shape beautifully without becoming mushy. Russets can work, but they are starchier and can fall apart more easily.)
- 2 tablespoons unsalted butter, softened (for greasing the dish)
- For the Cheese Sauce:
- 4 tablespoons unsalted butter
- 1/4 cup all-purpose flour
- 3 cups whole milk, warm (Whole milk is crucial for richness. You can use 2%, but the sauce won’t be as luxuriously creamy.)
- 1 cup heavy cream (This is non-negotiable for that ultra-rich texture.)
- 1 teaspoon salt
- 1/2 teaspoon black pepper
- 1/4 teaspoon ground nutmeg (Freshly grated is best! It adds a subtle warmth that is pure magic with the cheese.)
- 2 cups sharp cheddar cheese, freshly grated (Please, for the love of all things holy, grate your own cheese. Pre-shredded cheese has anti-caking agents that prevent it from melting smoothly.)
- 1 cup Gruyère cheese, freshly grated (This adds an incredible nutty flavor. If you can’t find Gruyère, you can substitute with more cheddar or a good Fontina.)
- 4 ounces cream cheese, softened and cut into cubes (This is my secret ingredient for the silkiest sauce ever.)
- For the Topping:
- 1/2 cup panko breadcrumbs (For that perfect crunchy, golden crust.)
- 2 tablespoons unsalted butter, melted
- 1/4 cup Parmesan cheese, freshly grated
- Fresh thyme or parsley for garnish (optional, but adds a lovely pop of color.)
Equipment Needed
You don’t need a ton of fancy equipment to make this dish, which is part of its charm. Here’s what you’ll need to get the job done right.
- 9×13-inch baking dish: This is the perfect size for a 4-pound batch. A ceramic or glass dish works best for even heat distribution.
- Large pot or Dutch oven: For making the cheese sauce.
- Sharp knife or mandoline slicer: A mandoline is my secret weapon for getting perfectly uniform, thin slices. It makes the layering so much easier and ensures even cooking. If you’re using a knife, just take your time to get them as even as possible.
- Large mixing bowl: For tossing the sliced potatoes.
- Whisk: A good whisk is essential for a lump-free sauce.
- Cheese grater: As I said, freshly grated cheese is a must. A box grater or the grating disc on your food processor works great.
I recommend using a good-quality mandoline. I have a simple, affordable one that has lasted me for years. Just be sure to use the guard—I learned that lesson the hard way! A sharp knife will also do the trick, but a mandoline saves you a lot of time and effort.
Preparation Method
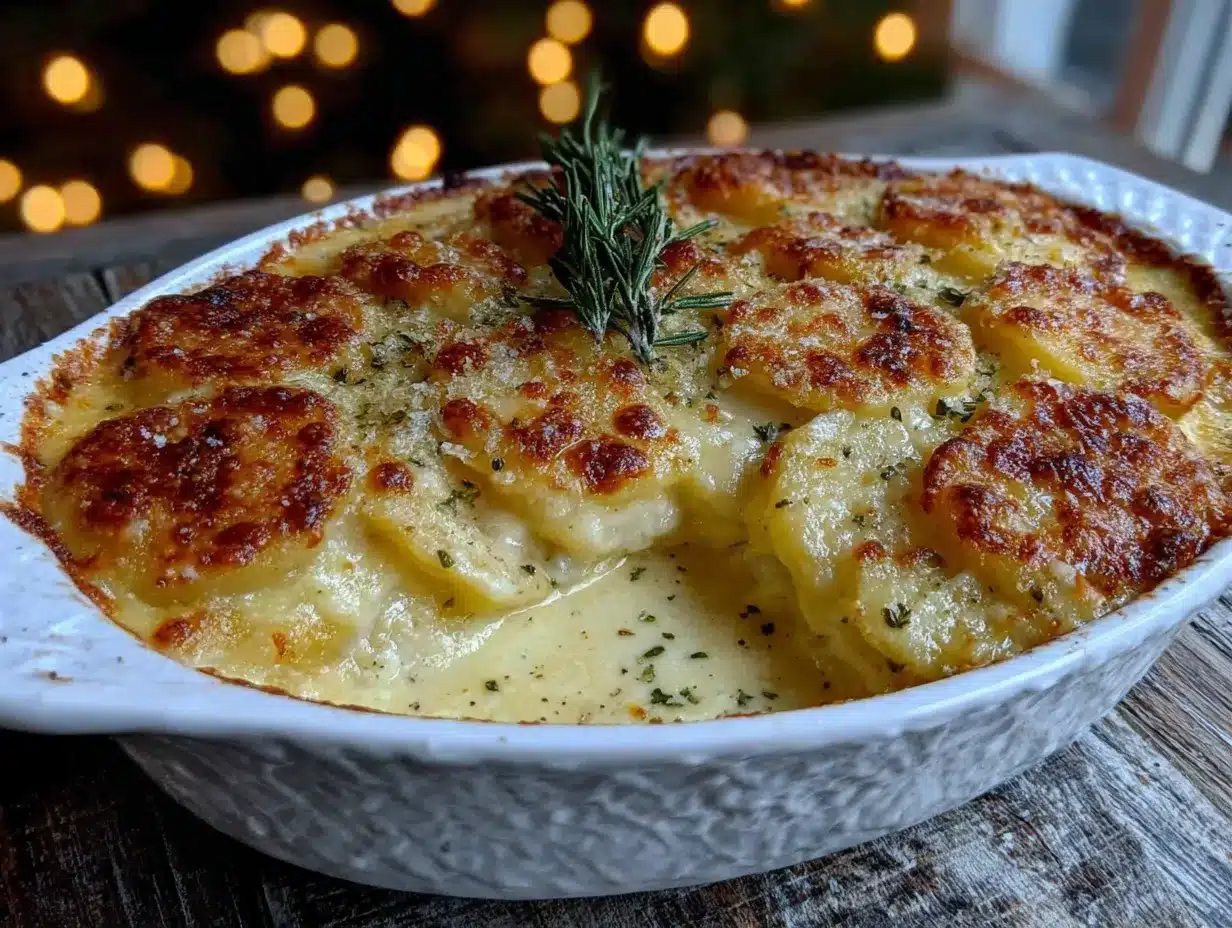
Let’s get to the fun part. Follow these steps, and you’ll have a holiday side dish that will be the talk of the table. Remember, patience is key here—good things take time.
- Preheat and Prep: Preheat your oven to 375°F (190°C). Grease your 9×13-inch baking dish with the 2 tablespoons of softened butter. Set it aside.
- Make the Cheese Sauce: In a large pot or Dutch oven, melt the 4 tablespoons of butter over medium heat. Once melted, whisk in the flour and cook for 1-2 minutes, stirring constantly. This is called a roux, and it’s the base of your sauce. It should smell nutty and look like wet sand. Don’t let it brown.
- Add the Liquids: Slowly pour in the warm milk and heavy cream, whisking constantly to prevent lumps. Continue to whisk until the mixture thickens slightly, about 3-5 minutes. It should be thick enough to coat the back of a spoon.
- Season and Melt the Cheese: Remove the pot from the heat. Stir in the salt, pepper, and nutmeg. Add the shredded cheddar, shredded Gruyère, and cubed cream cheese. Stir gently until all the cheese is completely melted and the sauce is smooth and velvety. Taste it and adjust the seasoning if needed. It should be rich and cheesy.
- Prepare the Potatoes: While the sauce is cooling slightly, peel and slice your potatoes. Place the sliced potatoes in a large bowl. Pour about 1 cup of the warm cheese sauce over them and toss gently to coat. This helps prevent the potatoes from oxidizing and adds an extra layer of flavor.
- Layer the Potatoes: Arrange a third of the potato slices in the bottom of the prepared baking dish, overlapping them slightly. Pour about 1/3 of the remaining sauce over the top. Repeat this layering process two more times, ending with a final generous pour of the cheese sauce on top. Make sure to get the sauce into all the nooks and crannies.
- Make the Topping: In a small bowl, combine the panko breadcrumbs, melted butter, and grated Parmesan cheese. Mix until the breadcrumbs are evenly coated. Sprinkle this mixture evenly over the top of the potatoes.
- Bake: Place the dish on a baking sheet to catch any drips. Bake, uncovered, for 50-60 minutes, or until the potatoes are tender when pierced with a fork and the top is golden brown and bubbly. If the top is browning too quickly, you can tent it loosely with foil for the last 15 minutes.
- Rest and Serve: This is the most important step! Let the dish rest for at least 15-20 minutes before serving. This allows the sauce to thicken and set, so you get nice, neat slices instead of a soupy mess. I know it’s hard to wait, but trust me on this.
Cooking Tips & Techniques
Over the years, I’ve made my fair share of mistakes with this dish. I’ve had sauce that broke, potatoes that were crunchy, and a top that burned before the inside was cooked. Here’s what I’ve learned so you don’t have to repeat my failures.
- Slice Evenly: The number one mistake is uneven potato slices. If they are different thicknesses, some will be mushy while others are still hard. A mandoline is your best friend here. If using a knife, take your time.
- Don’t Boil the Sauce: When making the cheese sauce, keep the heat at medium. If you boil it, the sauce can break and become grainy. You want a gentle simmer at most.
- Freshly Grated Cheese is a Must: I can’t stress this enough. The anti-caking agents in pre-shredded cheese will ruin the texture of your sauce. Spend the two minutes grating your own cheese—it makes a world of difference.
- The Resting Period is Crucial: I once skipped the resting period because I was hungry and in a rush. The result was a delicious but soupy mess. The sauce needs time to thicken and be absorbed by the potatoes. Let it rest, I promise it’s worth the wait.
- Make Ahead Strategy: To make this ahead, assemble the dish completely (without the topping) up to 24 hours in advance. Cover and refrigerate. When ready to bake, add the topping and bake for an additional 10-15 minutes to account for the cold dish starting temperature.
Variations & Adaptations
This recipe is a fantastic base, and you can easily adapt it to fit your tastes or dietary needs. Here are a few of my favorite variations.
- Add Some Heat: For a spicy kick, add 1/2 teaspoon of cayenne pepper or red pepper flakes to the cheese sauce. It pairs wonderfully with the creamy cheese.
- Vegetable Boost: Layer in some thinly sliced leeks or caramelized onions between the potato layers for a sweet, savory depth of flavor. You could also add a layer of wilted spinach.
- Meat Lover’s Version: Add a layer of crispy, crumbled bacon or diced ham between the potato layers. This makes it a more substantial side or even a main dish for a lighter meal.
- Herb Infusion: Add a couple of sprigs of fresh thyme or rosemary to the milk while it warms for a subtle herbal flavor. Just remember to remove them before adding the cheese.
- Dairy-Free Adaptation: You can make a dairy-free version by using unsweetened oat milk or cashew cream, vegan butter, and your favorite dairy-free cheese shreds. The texture will be slightly different, but it’s still delicious. I’ve tried this with a good quality cheddar-style vegan cheese, and it was a hit at a recent potluck.
Serving & Storage Suggestions
This dish is best served warm, right after that crucial resting period. The contrast between the crispy, golden top and the creamy, tender potatoes underneath is pure perfection.
- Serving: Serve it as a side for your Christmas ham, roast turkey, or prime rib. It also pairs beautifully with a simple green salad with a tangy vinaigrette to cut through the richness.
- Storage: Leftovers can be stored in an airtight container in the refrigerator for up to 4 days. The flavors actually meld together even more, making it even better the next day.
- Reheating: The best way to reheat is in the oven at 350°F (175°C) for 15-20 minutes, or until warmed through. You can also reheat individual portions in the microwave, but the topping will lose its crunch. For the best results, reheat in the oven.
- Freezing: You can freeze the assembled, unbaked dish (without the topping) for up to 3 months. Thaw it overnight in the refrigerator, add the topping, and bake as directed, adding about 15 minutes to the bake time.
Nutritional Information & Benefits
While this is an indulgent holiday side dish, it does have some redeeming qualities. The potatoes provide potassium and vitamin C, while the dairy offers calcium and protein. It’s a rich dish, so a serving size of about 1 cup is plenty.
- Estimated Nutritional Values (per serving, about 1 cup):
- Calories: 450
- Fat: 28g
- Carbohydrates: 38g
- Protein: 15g
- Dietary Considerations: This recipe is vegetarian. It can be made gluten-free by using a gluten-free all-purpose flour blend in the roux and gluten-free panko breadcrumbs for the topping.
- Potential Allergens: This recipe contains dairy (milk, butter, cheese, cream) and gluten (flour, panko).
I believe in enjoying the holidays without guilt. This dish is a special treat, and a reasonable portion is perfectly fine as part of a balanced celebration. It’s all about moderation and savoring the moment.
Conclusion
This Christmas Cheesy Scalloped Potatoes recipe is more than just a side dish—it’s a tradition in the making. It’s the dish that converted a skeptic like me, and I know it will win over your family too. It’s rich, creamy, cheesy, and has the most incredible golden crust. It’s everything you want in a holiday side dish.
Don’t be afraid to make it your own. Add some bacon, throw in some herbs, or spice it up with a little cayenne. The beauty of this recipe is its versatility. I absolutely love making this for Christmas dinner because it feels both familiar and special. It’s the kind of dish that brings everyone to the table and makes them smile.
Have you tried this recipe? I’d love to hear how it turned out for you! Leave a comment below and let me know if you made any fun variations. Don’t forget to share this recipe with your friends and family—it’s too good to keep to yourself. Happy cooking, and have a wonderful holiday season!
Frequently Asked Questions (FAQs)
Can I use a different type of potato?
Yes, you can use Russet potatoes, but they are starchier than Yukon Golds and may become a bit more mushy. For the best texture that holds its shape, Yukon Golds are my top recommendation. Red potatoes can also work, but they are waxy and might not absorb the sauce as well.
Why did my cheese sauce turn out lumpy?
Lumpy sauce is usually caused by adding the milk too quickly or not whisking enough. Make sure to add the warm milk slowly while whisking constantly. Also, be sure to use freshly grated cheese, as pre-shredded cheese contains anti-caking agents that can prevent smooth melting.
Can I make this recipe ahead of time?
Absolutely! This is a great make-ahead dish. Assemble the scalloped potatoes completely (without the panko topping), cover, and refrigerate for up to 24 hours. When you’re ready to bake, add the topping and bake as directed, adding an extra 10-15 minutes to the cooking time since you’re starting from a cold dish.
How do I know when the potatoes are fully cooked?
The best way to test is to insert a sharp knife or a thin skewer into the center of the dish. It should slide through the potatoes with little to no resistance. The top should be golden brown and bubbly. If the potatoes are still firm, continue baking and check every 5 minutes.
Can I freeze leftover scalloped potatoes?
Yes, you can freeze them! Let the dish cool completely, then transfer it to an airtight, freezer-safe container. It will keep for up to 3 months. To reheat, thaw it in the refrigerator overnight and then reheat in the oven at 350°F (175°C) until warmed through. The texture of the sauce may change slightly upon thawing, but it will still be delicious.
Pin This Recipe!
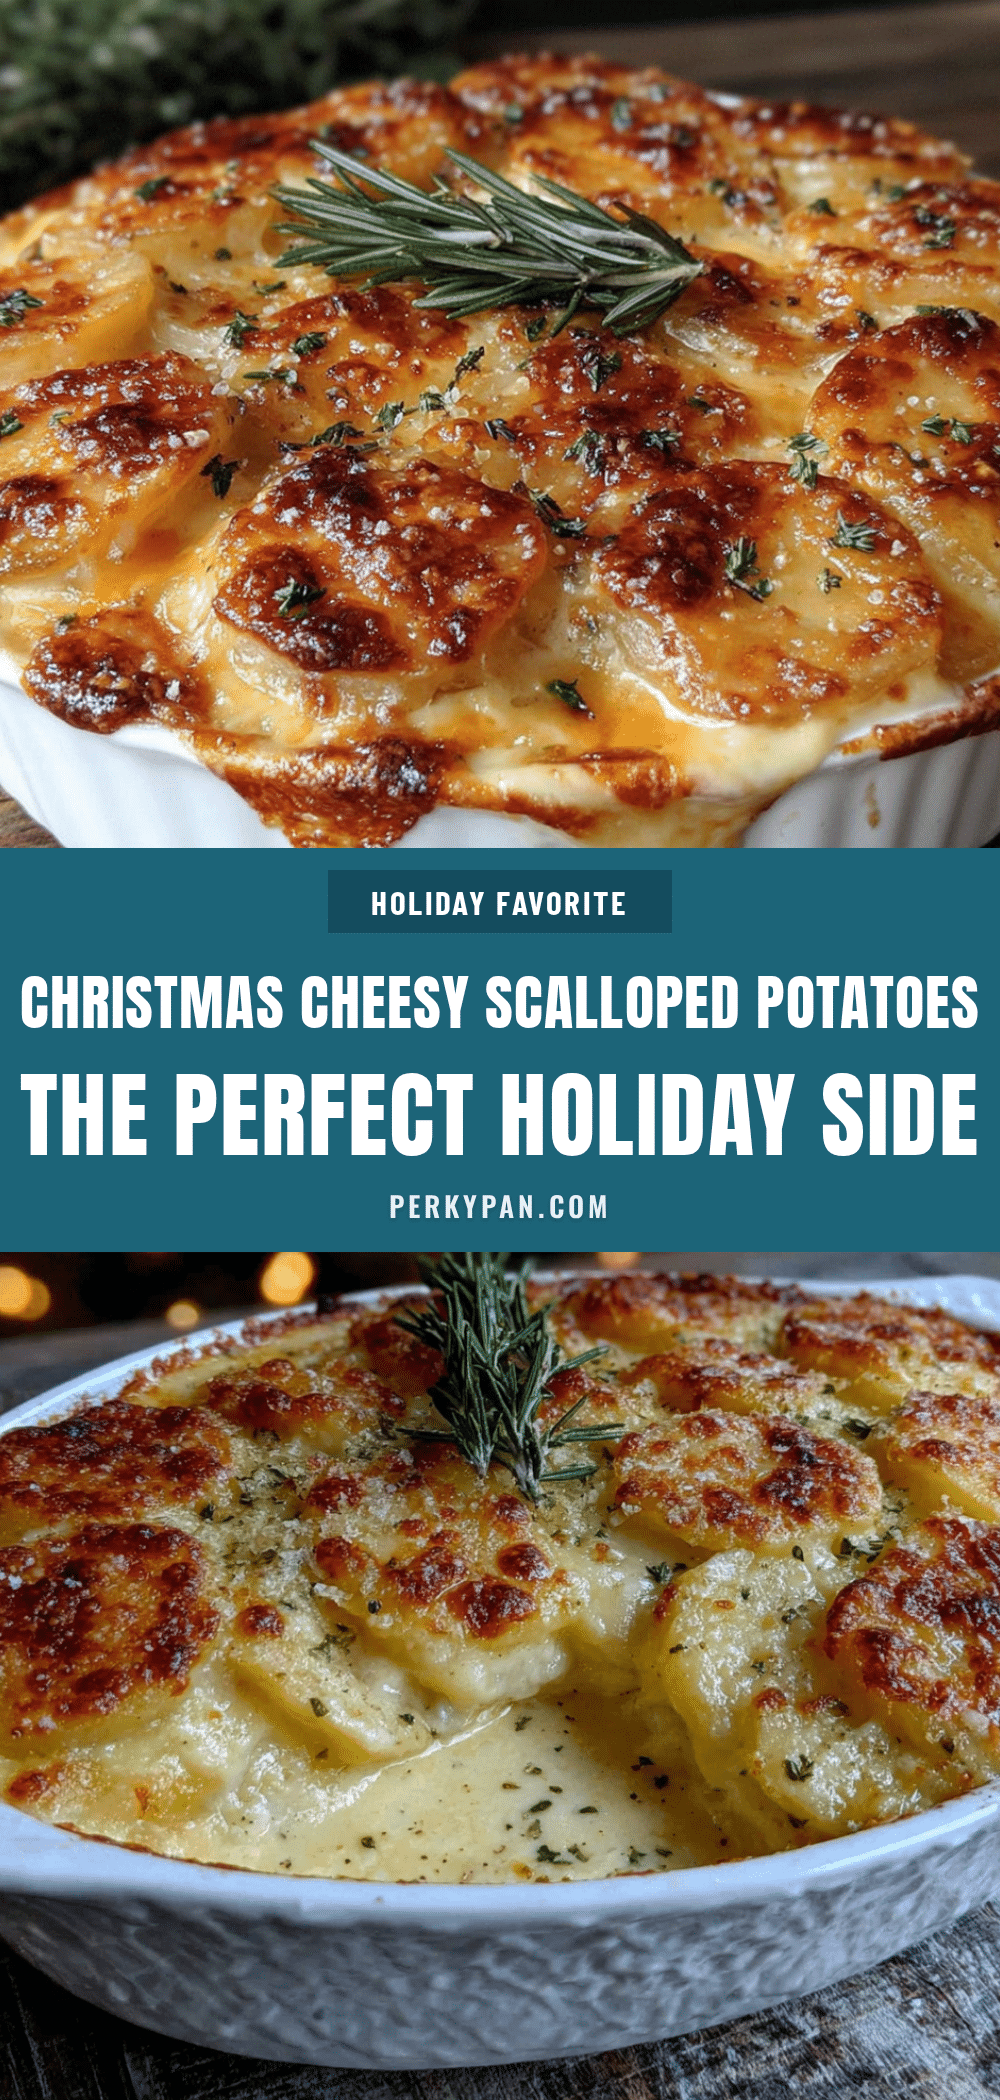
Christmas Cheesy Scalloped Potatoes: Easy Holiday Side
This is the ultimate cheesy scalloped potatoes recipe, perfect for Christmas dinner. It’s incredibly creamy, rich, and has a golden, bubbly cheese crust that will convert even the biggest skeptics.
- Prep Time: 20 minutes
- Cook Time: 60 minutes
- Total Time: 1 hour 20 minutes
- Yield: 8 servings 1x
- Category: Side Dish
- Cuisine: American
Ingredients
- 4 pounds Yukon Gold potatoes, peeled and sliced 1/8-inch thick
- 2 tablespoons unsalted butter, softened
- 4 tablespoons unsalted butter
- 1/4 cup all-purpose flour
- 3 cups whole milk, warm
- 1 cup heavy cream
- 1 teaspoon salt
- 1/2 teaspoon black pepper
- 1/4 teaspoon ground nutmeg
- 2 cups sharp cheddar cheese, freshly grated
- 1 cup Gruyère cheese, freshly grated
- 4 ounces cream cheese, softened and cut into cubes
- 1/2 cup panko breadcrumbs
- 2 tablespoons unsalted butter, melted
- 1/4 cup Parmesan cheese, freshly grated
- Fresh thyme or parsley for garnish (optional)
Instructions
- Preheat your oven to 375°F (190°C). Grease your 9×13-inch baking dish with the 2 tablespoons of softened butter. Set it aside.
- In a large pot or Dutch oven, melt the 4 tablespoons of butter over medium heat. Once melted, whisk in the flour and cook for 1-2 minutes, stirring constantly, until the roux smells nutty and looks like wet sand. Do not let it brown.
- Slowly pour in the warm milk and heavy cream, whisking constantly to prevent lumps. Continue to whisk until the mixture thickens slightly, about 3-5 minutes, until it coats the back of a spoon.
- Remove the pot from the heat. Stir in the salt, pepper, and nutmeg. Add the shredded cheddar, shredded Gruyère, and cubed cream cheese. Stir gently until all the cheese is completely melted and the sauce is smooth and velvety. Taste and adjust seasoning if needed.
- While the sauce is cooling slightly, peel and slice your potatoes. Place the sliced potatoes in a large bowl. Pour about 1 cup of the warm cheese sauce over them and toss gently to coat.
- Arrange a third of the potato slices in the bottom of the prepared baking dish, overlapping them slightly. Pour about 1/3 of the remaining sauce over the top. Repeat this layering process two more times, ending with a final generous pour of the cheese sauce on top.
- In a small bowl, combine the panko breadcrumbs, melted butter, and grated Parmesan cheese. Mix until the breadcrumbs are evenly coated. Sprinkle this mixture evenly over the top of the potatoes.
- Place the dish on a baking sheet to catch any drips. Bake, uncovered, for 50-60 minutes, or until the potatoes are tender when pierced with a fork and the top is golden brown and bubbly. If the top is browning too quickly, tent loosely with foil for the last 15 minutes.
- Let the dish rest for at least 15-20 minutes before serving. This allows the sauce to thicken and set.
Notes
For best results, use freshly grated cheese and a mandoline for even potato slices. The resting period after baking is crucial for the sauce to set. To make ahead, assemble the dish (without topping) up to 24 hours in advance, refrigerate, then add topping and bake, adding 10-15 minutes to the cook time.
Nutrition
- Serving Size: 1 cup
- Calories: 450
- Sugar: 6
- Sodium: 680
- Fat: 28
- Saturated Fat: 17
- Carbohydrates: 38
- Fiber: 3
- Protein: 15
Keywords: scalloped potatoes, cheesy potatoes, Christmas side dish, holiday side dish, creamy potatoes, Yukon Gold potatoes, cheddar, Gruyère, make-ahead