Love this? Save it for later!
Share the inspiration with your friends
I was elbow-deep in a pile of vintage linens at a church rummage sale last spring when the woman running the cash box—a tiny, no-nonsense woman named Gertie who couldn’t have been younger than eighty—started talking about dessert. I wasn’t expecting cooking advice from a rummage sale cashier, but there I was, holding a slightly stained tablecloth, listening to her describe exactly how to make the best banana pudding trifle I’d ever put in my mouth. She told me she’d been making it for sixty years, ever since her mother-in-law taught her during her first year of marriage. “It’s the only thing my husband’s family ever agreed on,” she said, and she laughed so hard she nearly knocked over her coffee cup.
Honestly, I almost didn’t try it. I mean, banana pudding is one of those things everyone thinks they know how to make. You buy the box, you grab some bananas, you call it a day. But Gertie insisted I write down her method on the back of a receipt she fished out of her apron pocket. The paper was crumpled and had a coffee ring on it, but I tucked it in my purse anyway. Three days later, I made it for a Sunday dinner with my family, and let me tell you—I’ve never looked back. My kids, who usually pick at desserts, actually fought over the last spoonful. My husband asked if I’d “finally lost my mind and become a professional baker.” I just smiled and said, “Nope. Just met Gertie.”
Maybe you’ve been there—standing in a kitchen, staring at a pile of bananas that are about to go brown, wondering what to do that doesn’t involve another loaf of banana bread. That’s exactly where this recipe shines. It’s the kind of dessert that feels fancy enough for a birthday party but comes together with ingredients you probably already have in your pantry. And the best part? It doesn’t cost a fortune. A box of vanilla wafers, some instant pudding mix, a few bananas, and some milk—that’s it. You can even use store-brand everything and nobody will know the difference. That’s the kind of cooking I can get behind.
Gertie’s secret, as it turns out, isn’t really a secret at all. It’s patience. She insisted on layering everything just so and letting it rest in the fridge overnight. “You can’t rush a good thing,” she told me, and she was right. The bananas soften just enough, the cookies get that perfect cake-like texture, and the pudding sets into something so creamy and rich you’d swear it took hours of work. But it doesn’t. It takes maybe twenty minutes of hands-on time and a little bit of waiting. That’s the kind of recipe that stays with you—not because it’s complicated, but because it’s so simple and good that you wonder why you ever bothered with anything else.
So here it is, Gertie’s recipe, passed from her mother-in-law to her, from her to me, and now from me to you. I hope you make it for your family, for your next potluck, or just for a Tuesday night when you need something sweet. And if you think about it, raise a spoon to Gertie. She’d like that.
Why You’ll Love This Recipe
This isn’t just another banana pudding recipe. After testing this at family gatherings, church suppers, and even a few picky-kid birthday parties, I can tell you with confidence—this one wins every single time. Here’s why you’ll find yourself coming back to it again and again:
- Budget-Friendly Ingredients: Everything on the list is affordable and available at any grocery store. No specialty items, no expensive extracts. You can feed a crowd for under fifteen dollars, easy.
- Quick Assembly: Twenty minutes of hands-on work, and you’re done. The hardest part is waiting for it to chill. Perfect for busy weeknights or last-minute dessert emergencies.
- Feeds a Crowd: This recipe makes a generous trifle that serves twelve to fourteen people. It’s ideal for potlucks, holiday dinners, or any gathering where you want to show up with something impressive.
- Crowd-Pleaser: Kids love it. Adults love it. Picky eaters love it. I’ve never seen a dessert disappear faster at a family gathering. The combination of creamy pudding, soft bananas, and tender cookies is basically irresistible.
- Make-Ahead Friendly: This is one of those rare desserts that actually gets better after sitting overnight. You can make it a day ahead and just pull it out when you’re ready to serve. No last-minute stress.
What makes this version different from all the others? It’s the layering technique and the resting time. Most recipes tell you to serve it right away, but Gertie’s method of letting it rest overnight transforms the texture completely. The vanilla wafers soften into a cake-like layer, the bananas release their natural sweetness, and everything melds together into one cohesive, incredible dessert. It’s comfort food at its finest—simple, affordable, and absolutely delicious.
What Ingredients You Will Need
This recipe uses simple, pantry-friendly ingredients to deliver big flavor without the fuss. Most of these items are probably already in your kitchen, and if not, they won’t break the bank. Here’s what you’ll need:
For the Pudding Layer
- 2 boxes (3.4 ounces each) instant vanilla pudding mix (I prefer Jell-O brand for consistent results, but store brand works fine)
- 4 cups cold whole milk (2% works too, but whole milk gives the creamiest texture)
- 1 teaspoon vanilla extract (pure vanilla if you have it, imitation works just fine)
For the Layering
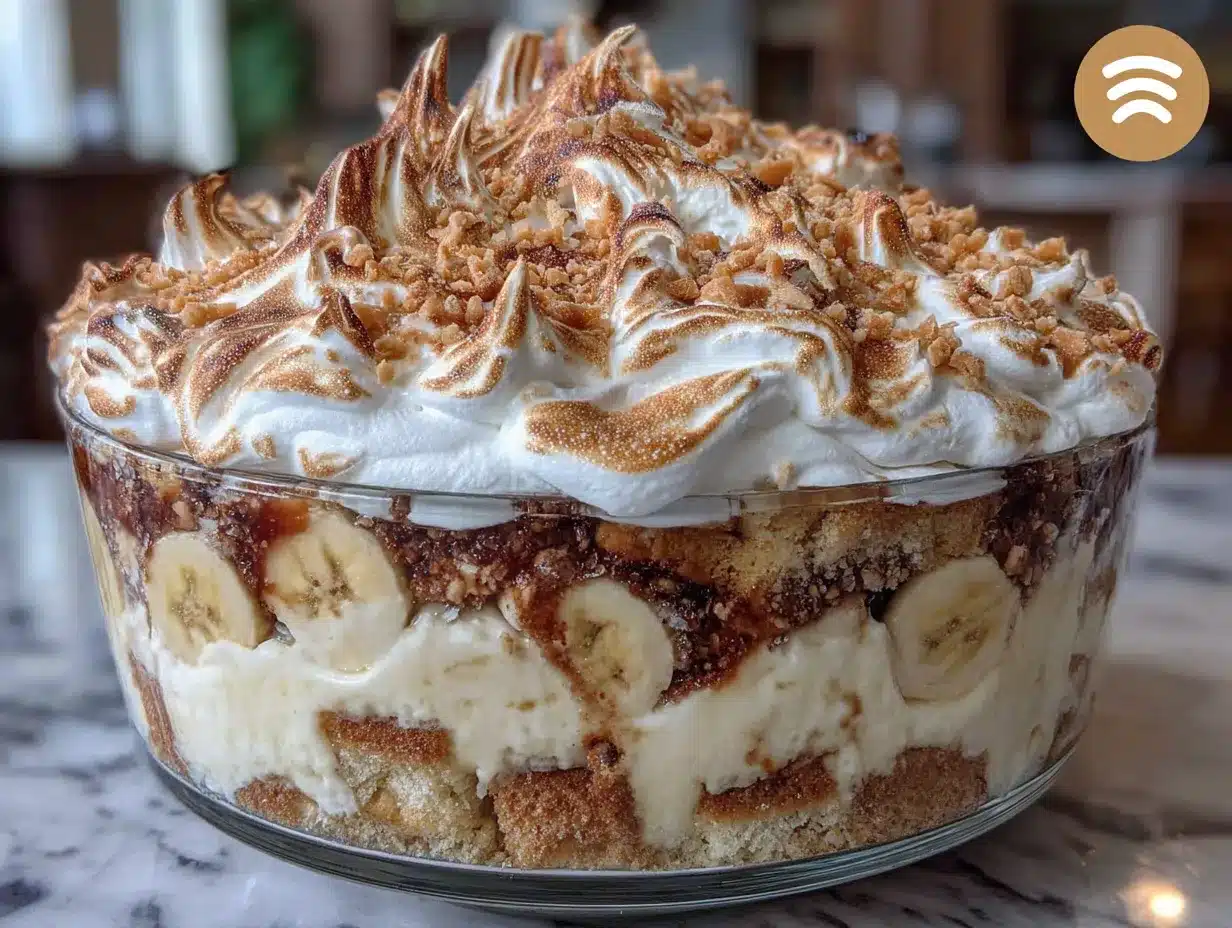
- 1 box (12 ounces) vanilla wafers (Nilla wafers are classic, but any brand will do)
- 6-7 ripe but firm bananas (look for yellow with a few brown spots—too green and they’re not sweet, too brown and they’ll get mushy)
- 1 tablespoon lemon juice (optional, but it prevents the bananas from browning too quickly)
For the Topping
- 1 tub (8 ounces) frozen whipped topping, thawed (Cool Whip is the standard, but any brand works)
- Optional: 1/4 cup crushed vanilla wafers for garnish
- Optional: a few banana slices for decoration
A few notes on ingredients: The instant pudding mix is non-negotiable here. Cook-and-serve pudding won’t set up the same way, and you’ll end up with a soupy mess. Trust me on this one—I learned that lesson the hard way. For the milk, whole milk gives the richest result, but if you’re watching your budget or your waistline, 2% works just fine. Just don’t use skim milk; the pudding won’t be as creamy.
For the bananas, look for ones that are ripe but still firm. You want them sweet enough to eat out of hand but sturdy enough to hold up in layers. If your bananas are on the greener side, let them sit on the counter for a day or two before making this. And if they’re getting too ripe, that’s actually perfect—they’ll add more natural sweetness to the pudding.
One more tip: If you’re making this for a crowd that includes anyone with dairy sensitivities, you can use a plant-based milk like oat milk or almond milk in the pudding. Just be aware that the texture will be slightly less thick. You can also use a dairy-free whipped topping to keep it completely dairy-free.
Equipment Needed
The beauty of this recipe is that you don’t need any fancy equipment. Here’s what you’ll need:
- Large Trifle Bowl or Glass Dish: A 4-quart trifle bowl is perfect for showing off those beautiful layers. If you don’t have one, a large glass casserole dish (9×13) works great too. I’ve even made this in a big mixing bowl when I couldn’t find my trifle dish—it still tastes amazing.
- Large Mixing Bowl: For whisking the pudding. Any medium-to-large bowl will do.
- Whisk: A wire whisk works best for getting the pudding smooth. A hand mixer works too, but honestly, a whisk is faster and easier to clean.
- Sharp Knife: For slicing the bananas. A serrated knife works well, but any sharp knife will do.
- Cutting Board: Just a clean surface for slicing.
- Rubber Spatula: For scraping every last bit of pudding out of the bowl. Waste not, want not.
- Measuring Cups and Spoons: For the milk and vanilla.
If you’re on a tight budget, don’t worry about buying a special trifle dish. A regular glass bowl or even a plastic serving bowl will work. The presentation won’t be as dramatic, but the flavor will be exactly the same. I actually made my first version of this in a cheap plastic bowl from the dollar store, and nobody complained.
Preparation Method
Let’s get to the good part. Follow these steps carefully, and you’ll have a dessert that looks like you spent hours on it—even though you really didn’t.
- Make the Pudding: In a large mixing bowl, combine the two boxes of instant vanilla pudding mix with 4 cups of cold whole milk. Whisk vigorously for about 2 minutes until the pudding starts to thicken. It will be thin at first, then suddenly it’ll start to set. Add the teaspoon of vanilla extract and whisk for another 30 seconds. Let the pudding sit for 5 minutes to fully thicken. You’ll know it’s ready when it holds soft peaks when you lift the whisk.
- Prepare the Bananas: While the pudding is setting, peel and slice the bananas into 1/4-inch rounds. If you’re using the lemon juice, toss the banana slices in a small bowl with the juice to prevent browning. This step isn’t strictly necessary, but it keeps the bananas looking nice if you’re making the trifle a day ahead. Work quickly—bananas start to brown as soon as they’re exposed to air.
- Start Layering: This is where the magic happens. Spread a thin layer of pudding (about 1/2 cup) on the bottom of your trifle bowl or dish. This helps the first layer of cookies stick and prevents them from sliding around. Then, arrange a single layer of vanilla wafers on top of the pudding. Don’t overlap them too much—just a nice, even layer.
- Add Bananas: Arrange a layer of banana slices on top of the cookies. Use about one-third of your sliced bananas for this layer. Spread them evenly so every bite gets some banana.
- Add More Pudding: Spoon about one-third of the remaining pudding over the bananas. Use your spatula to spread it gently to the edges. Don’t press down too hard—you don’t want to squish the bananas.
- Repeat the Layers: Add another layer of vanilla wafers, another layer of bananas, and another layer of pudding. Repeat one more time until you’ve used all your ingredients. You should end with a layer of pudding on top. The number of layers will depend on the size of your dish, but aim for three layers of cookies and bananas.
- Top with Whipped Topping: Spread the thawed whipped topping evenly over the top layer of pudding. Use your spatula to create gentle swirls or peaks for a pretty presentation. If you’re using crushed vanilla wafers for garnish, sprinkle them over the top now.
- Chill: Cover the trifle with plastic wrap or a lid and refrigerate for at least 4 hours, but overnight is best. This is the most important step. The cookies need time to soften into that perfect cake-like texture, and the flavors need time to meld together. I know it’s hard to wait, but trust me—it’s worth it.
- Serve: When you’re ready to serve, add a few fresh banana slices on top for decoration if you like. Use a large spoon to scoop down through all the layers so everyone gets a bit of everything. Serve cold.
A few things to watch for: If your pudding seems too thin after whisking, don’t panic. It will thicken as it sits. If it’s too thick, you might have whisked it too long or used milk that wasn’t cold enough. Just add a splash more milk and whisk gently. And if your bananas start browning before you finish layering, don’t stress—they’ll be covered by pudding anyway.
Cooking Tips & Techniques
After making this recipe more times than I can count, I’ve picked up a few tricks that make the process smoother and the results better. Here’s what I’ve learned:
Don’t Skip the Resting Time. I know it’s tempting to dig in right away, but the overnight rest is what transforms this from good to incredible. The cookies soften into a tender, cake-like layer that’s completely different from the crunchy texture you get if you serve it immediately. If you’re in a rush, aim for at least 4 hours, but overnight really is best.
Use Cold Milk. The pudding mix needs cold milk to set properly. If your milk is room temperature, the pudding will be thin and watery. I keep my milk in the fridge right up until I’m ready to use it. If you forget to chill it, pop it in the freezer for 10 minutes before you start.
Layer Evenly. Take a minute to spread each layer evenly. It makes a huge difference in the final presentation and ensures every bite has the perfect ratio of cookies, bananas, and pudding. I use my fingers to arrange the cookies in a neat pattern—it’s faster than trying to position them with a spoon.
Watch Your Bananas. The biggest mistake I’ve made with this recipe is using bananas that were too ripe. They turn into mush and make the whole thing watery. Stick with bananas that are yellow with just a few brown spots. If they’re already turning brown, use them for banana bread instead.
Work in Batches. If you’re making this for a really big crowd, don’t try to cram everything into one dish. Use two smaller dishes instead. It’s easier to layer evenly, and you can serve one while keeping the other chilled.
Don’t Overmix the Pudding. Whisk just until the pudding thickens, then stop. Overmixing can break down the starches and make the pudding runny. You’ll see it start to thicken after about 2 minutes—that’s your cue to stop.
Variations & Adaptations
One of the best things about this recipe is how easy it is to adapt. Here are some variations I’ve tried and loved:
Chocolate Banana Pudding Trifle: Swap one box of vanilla pudding for chocolate instant pudding. The combination of chocolate and banana is absolutely divine. I made this for a birthday party last summer, and it was gone in fifteen minutes.
Peanut Butter Banana Pudding Trifle: Add 1/2 cup of creamy peanut butter to the pudding mixture when you whisk it. Whisk until smooth. The peanut butter adds richness and pairs beautifully with the bananas. If you have a peanut allergy in the family, use sunflower seed butter instead.
Gluten-Free Version: Use gluten-free vanilla wafers. Most major brands now offer a gluten-free option, and they work perfectly in this recipe. Just check the label to make sure your pudding mix is also gluten-free.
Dairy-Free Version: Use full-fat oat milk or coconut milk for the pudding, and a dairy-free whipped topping. I’ve tested this with oat milk, and the texture is almost identical to the original. Just make sure your vanilla wafers are also dairy-free.
Berry Banana Pudding Trifle: Add a layer of fresh strawberries or blueberries between the banana layers. The tartness of the berries balances the sweetness of the pudding beautifully. This is my go-to summer version.
Individual Servings: Layer everything in small mason jars or dessert cups for a fun, portable option. These are perfect for picnics or parties where people are standing and mingling. Just make sure to chill them the same way.
Serving & Storage Suggestions
This banana pudding trifle is best served cold, straight from the refrigerator. I like to let it sit out for about 10 minutes before serving—just enough to take the chill off without losing the structure. Use a large serving spoon to scoop through all the layers so each serving gets cookies, bananas, and pudding.
For presentation, I love to garnish the top with a few fresh banana slices and a sprinkle of crushed vanilla wafers right before serving. If you’re feeling fancy, a drizzle of caramel sauce or a dollop of extra whipped cream on each serving looks beautiful.
This dessert pairs beautifully with almost any meal. It’s perfect after a heavy dinner like pot roast or lasagna because it feels light despite being rich. It also works wonderfully at brunch—I’ve served it alongside quiche and fresh fruit, and it was a hit.
Storage: Cover the trifle tightly with plastic wrap or transfer leftovers to an airtight container. It will keep in the refrigerator for up to 3 days. The texture changes slightly over time—the cookies get softer and the bananas get more integrated—but it’s still delicious. I actually prefer the flavor on day two.
Freezing: I don’t recommend freezing this dessert. The texture of the bananas and pudding changes too much when thawed, and you’ll end up with a watery mess. If you need to make it ahead, just make it a day or two in advance and keep it in the fridge.
Reheating: This is a cold dessert, so no reheating needed. If it’s been in the fridge for a while and seems too firm, let it sit at room temperature for 15-20 minutes before serving.
Nutritional Information & Benefits
While this is definitely a treat, there are a few bright spots nutritionally. Here’s an approximate breakdown per serving (based on 12 servings):
| Nutrient | Amount Per Serving |
|---|---|
| Calories | 320 |
| Total Fat | 12g |
| Saturated Fat | 6g |
| Cholesterol | 15mg |
| Sodium | 380mg |
| Total Carbohydrates | 52g |
| Dietary Fiber | 2g |
| Sugars | 34g |
| Protein | 4g |
The bananas provide potassium, vitamin B6, and vitamin C, along with a good dose of fiber. The milk in the pudding adds calcium and protein. While this isn’t health food by any stretch, it’s a reasonable dessert option that’s lower in fat than many cakes or pies. If you’re watching your sugar intake, you can use sugar-free pudding mix and a sugar-free whipped topping to cut the sugar by about half.
Potential allergens include dairy, gluten (from the vanilla wafers), and soy (sometimes found in whipped topping). Check labels carefully if you’re serving anyone with food allergies.
Frequently Asked Questions
Can I use homemade pudding instead of instant?
I wouldn’t recommend it. Instant pudding is formulated to set up quickly and hold its structure when layered. Homemade pudding is thinner and won’t give you the same firm layers. If you really want to use homemade, you’ll need to cook it until it’s very thick and let it cool completely before layering.
How do I keep the bananas from turning brown?
Toss the sliced bananas in a little lemon juice or pineapple juice before layering. The acid prevents oxidation, which is what causes browning. You can also layer them directly into the pudding without letting them sit out first. The pudding itself helps prevent browning.
Can I make this the night before?
Absolutely. In fact, it’s better if you do. Making it the night before gives the cookies plenty of time to soften and the flavors to meld. Just cover it tightly and refrigerate overnight. Add any fresh banana garnish right before serving.
How long will leftovers keep?
Leftovers will keep in the refrigerator for up to 3 days. The texture will continue to soften, and the bananas will get more integrated into the pudding, but it’s still delicious. I actually think it’s even better on day two.
Can I use a different type of cookie?
Yes! While vanilla wafers are classic, you can use shortbread cookies, graham crackers, or even ladyfingers. Each will give a slightly different texture and flavor. Just keep in mind that different cookies soften at different rates, so you may need to adjust the resting time.
Conclusion
This banana pudding trifle is the kind of dessert that reminds me why I love cooking for people. It’s simple, affordable, and absolutely delicious. It doesn’t require any fancy techniques or hard-to-find ingredients. It just takes a little patience and a willingness to let time do the work for you.
I hope you’ll make this for your next family dinner, potluck, or holiday gathering. I hope it brings the same kind of joy to your table that it’s brought to mine. And I hope you’ll feel free to make it your own—add chocolate, swap in berries, or just stick with the classic. There’s no wrong way to enjoy this dessert.
If you give this recipe a try, I’d love to hear about it. Leave a comment below and let me know how it turned out. Did your kids love it? Did your picky uncle ask for seconds? Did you add your own twist? Share your story—I read every single comment, and they honestly make my day. And if you’re looking for more budget-friendly dessert ideas, check out my classic bread pudding recipe or my easy chocolate lasagna. Both are perfect for feeding a crowd without breaking the bank.
Now go make some memories in your kitchen. Gertie would approve.
Pin This Recipe!
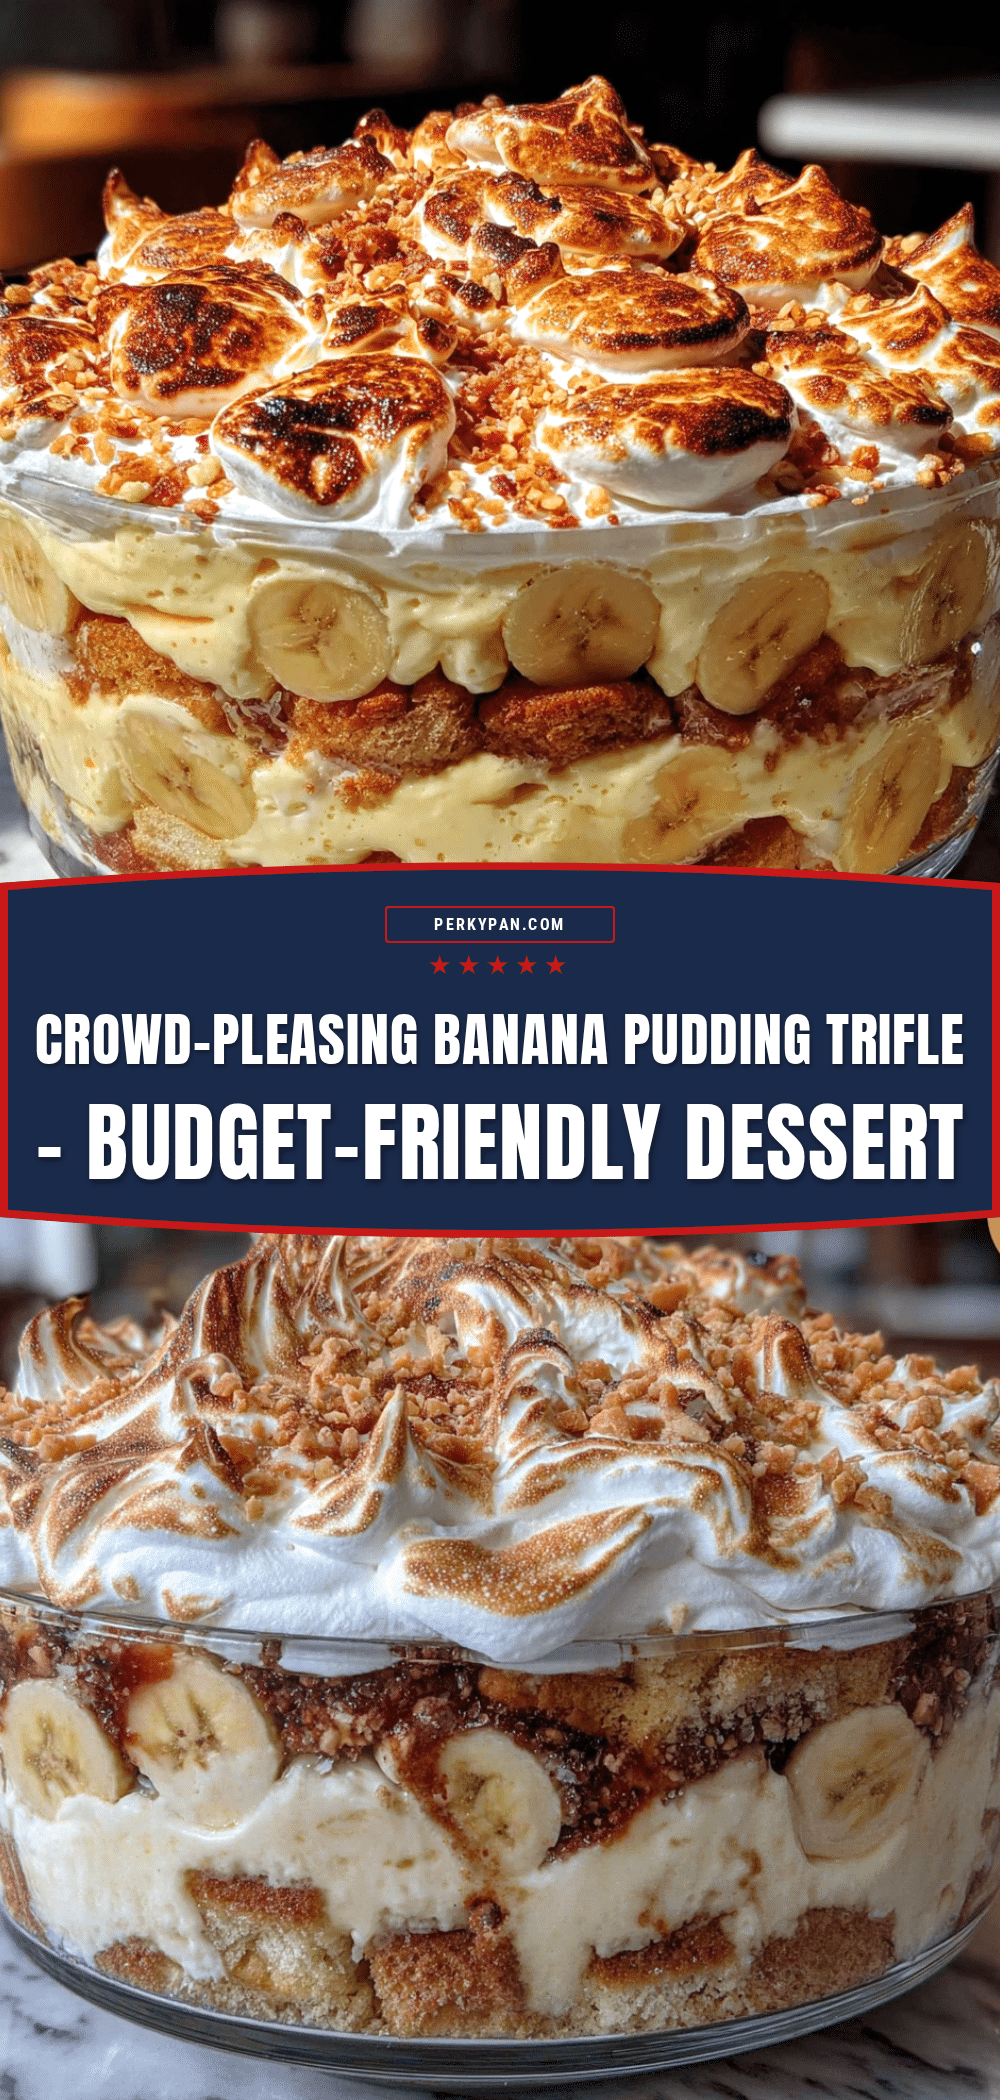
Best Easy Banana Pudding Trifle for a Crowd
This banana pudding trifle is a simple, budget-friendly dessert that feeds a crowd. With layers of creamy vanilla pudding, ripe bananas, and softened vanilla wafers, it’s a make-ahead treat that gets better overnight.
- Prep Time: 20 minutes
- Cook Time: 0 minutes
- Total Time: 4 hours 20 minutes (including chilling)
- Yield: 12-14 servings 1x
- Category: Dessert
- Cuisine: American
Ingredients
- 2 boxes (3.4 ounces each) instant vanilla pudding mix
- 4 cups cold whole milk
- 1 teaspoon vanilla extract
- 1 box (12 ounces) vanilla wafers
- 6–7 ripe but firm bananas
- 1 tablespoon lemon juice (optional)
- 1 tub (8 ounces) frozen whipped topping, thawed
- Optional: 1/4 cup crushed vanilla wafers for garnish
- Optional: a few banana slices for decoration
Instructions
- In a large mixing bowl, combine the two boxes of instant vanilla pudding mix with 4 cups of cold whole milk. Whisk vigorously for about 2 minutes until the pudding starts to thicken. Add the teaspoon of vanilla extract and whisk for another 30 seconds. Let the pudding sit for 5 minutes to fully thicken.
- While the pudding is setting, peel and slice the bananas into 1/4-inch rounds. If using lemon juice, toss the banana slices in a small bowl with the juice to prevent browning.
- Spread a thin layer of pudding (about 1/2 cup) on the bottom of your trifle bowl or dish. Arrange a single layer of vanilla wafers on top of the pudding.
- Arrange a layer of banana slices on top of the cookies, using about one-third of your sliced bananas.
- Spoon about one-third of the remaining pudding over the bananas and spread gently to the edges.
- Repeat the layers: another layer of vanilla wafers, another layer of bananas, and another layer of pudding. Repeat one more time until all ingredients are used, ending with a layer of pudding on top.
- Spread the thawed whipped topping evenly over the top layer of pudding. If using crushed vanilla wafers for garnish, sprinkle them over the top now.
- Cover the trifle with plastic wrap or a lid and refrigerate for at least 4 hours, but overnight is best.
- When ready to serve, add a few fresh banana slices on top for decoration if desired. Use a large spoon to scoop down through all the layers. Serve cold.
Notes
The overnight rest is crucial for the cookies to soften into a cake-like texture. Use cold milk for the pudding to set properly. Bananas should be ripe but firm—yellow with a few brown spots. For dairy-free, use oat milk and dairy-free whipped topping. For gluten-free, use gluten-free vanilla wafers.
Nutrition
- Serving Size: 1 serving (based on
- Calories: 320
- Sugar: 34
- Sodium: 380
- Fat: 12
- Saturated Fat: 6
- Carbohydrates: 52
- Fiber: 2
- Protein: 4
Keywords: banana pudding, trifle, easy dessert, crowd-pleaser, make-ahead, budget-friendly


