Love this? Save it for later!
Share the inspiration with your friends
The power went out halfway through the first real snowstorm of the year. I was supposed to be making a fancy hot chocolate bar for the neighbors who were coming over after shoveling—complete with homemade marshmallows and a dark chocolate ganache situation I had been planning for weeks. But there I was, standing in a dark kitchen with a three-year-old asking for the fifth time if we could go outside, and honestly, I was about two seconds from just handing everyone a plain mug of warm milk and calling it a day.
I grabbed the biggest mixing bowl I owned—the one I usually use for bread dough—and marched outside. The snow was coming down thick and fast, the kind of fluffy, dry stuff that squeaks under your boots. I filled that bowl to the brim, and when I came back inside, shivering and covered in snowflakes, I realized I had no idea what I was actually doing. I mean, I had heard about snow ice cream before, but I always figured it was one of those things that sounds better in theory than in practice. You know the feeling—when you’re already committed to a kitchen experiment and you’re pretty sure it’s going to be a disaster, but you’ve come this far.
I opened the pantry and grabbed what I had: some vanilla extract that was about to expire, a bag of sugar that was getting clumpy, and a can of sweetened condensed milk I had bought for something else entirely. No eggs, of course—because who has eggs when the power’s out? I mixed it all together, and let me tell you, I was not expecting much. The texture looked weird at first, kind of slushy and uneven, and I was already mentally preparing my “well, it was worth a try” speech.
But then I took a bite. And I just stood there in the dark kitchen, spoon in hand, completely stunned. It was creamy, it was sweet, it tasted exactly like the soft-serve vanilla ice cream I used to get from the truck that came around my neighborhood when I was a kid. My neighbor knocked on the door right then, and I handed her a bowl without saying a word. She took one bite and said, “You have to write this down.” So here I am, writing it down for you—because this happy little accident turned into the thing I look forward to every single winter now.
Why You’ll Love This Recipe
This Easy 5-Minute Snow Ice Cream is the kind of recipe that saves the day when you’re hosting and need something fun, fast, and absolutely delicious. Let me tell you why it’s become my go-to for snow day gatherings and impromptu dessert situations.
- Ready in 5 minutes flat: From bowl to bowl, this comes together faster than you can preheat an oven. When guests are arriving and you need a dessert that looks like you planned it, this is your secret weapon.
- No eggs, no fuss: This version uses sweetened condensed milk instead of eggs, which means no worrying about raw eggs or complicated custards. It’s safer, simpler, and honestly tastes better.
- Perfect for parties: Set up a snow ice cream bar with toppings like chocolate sauce, sprinkles, crushed cookies, and fresh berries. Let your guests customize their bowls—it’s always a hit.
- Kid-approved and adult-adored: I’ve served this to everyone from picky toddlers to foodie friends, and the reaction is always the same: wide eyes and requests for seconds.
- Only 3 main ingredients: Snow, sweetened condensed milk, and vanilla extract. That’s it. You probably have these in your kitchen right now.
What makes this recipe different from other snow ice creams I’ve tried is the texture. Most versions use regular milk and sugar, which can turn icy and watery. The sweetened condensed milk creates a creamier, smoother consistency that actually holds up for a few minutes in the bowl without turning into a puddle. Plus, the caramelized notes from the condensed milk add a depth of flavor that plain sugar just can’t match.
This isn’t just a novelty dessert—it’s the kind of thing that makes people stop and say, “Wait, this is actually really good.” When you’re hosting, that’s exactly the reaction you want. It’s impressive without being complicated, which is basically my favorite category of food.
What Ingredients You Will Need
This recipe uses simple, pantry-friendly ingredients to create something that tastes like you spent way more effort than you actually did. Here’s what you’ll need to gather before you head outside with your bowl.
- 8 cups fresh, clean snow – This is the star of the show. You want snow that’s fallen recently, not the stuff that’s been sitting for days or has been plowed. Look for fluffy, white snow from a clean area—away from roads, sidewalks, and anything that might have been treated with salt or chemicals. I personally prefer the snow that falls during the middle of a storm, when it’s light and powdery. (Pro tip: if the snow is heavy and wet, your ice cream will be denser and more like a snow cone. Both are good, just different!)
- 1 can (14 ounces) sweetened condensed milk – This replaces the eggs and regular sugar in traditional recipes. It adds sweetness, creaminess, and a rich, almost buttery flavor that makes this taste like real ice cream. I recommend using Eagle Brand or Borden—both work beautifully. If you’re dairy-free, there are coconut-based sweetened condensed milks available that work well too, though the texture will be slightly different.
- 1 teaspoon vanilla extract – Pure vanilla extract makes a noticeable difference here. The artificial stuff works in a pinch, but since there are so few ingredients, the quality of your vanilla really shines through. I like Nielsen-Massey or simply organic store brands. You can also experiment with other extracts—almond, coconut, or even peppermint for a holiday twist.
- Pinch of salt (optional but recommended) – Just a tiny pinch of fine sea salt balances the sweetness and enhances the vanilla flavor. Don’t skip this if you have it—it’s one of those small details that takes it from good to great.
- Toppings of your choice – This is where you can get creative. I always set out a few options when I’m hosting: chocolate sauce, rainbow sprinkles, crushed Oreos, fresh strawberries, chopped nuts, and a drizzle of caramel. Let your guests build their own masterpieces.
Ingredient selection tips: When choosing your sweetened condensed milk, look for cans that aren’t dented or expired. Give it a good shake before opening—it should be thick and pourable, not watery. If you’re using a dairy-free alternative, be aware that it may not thicken quite as much, so your ice cream will be slightly softer.
Substitution guidance: For a less sweet version, you can use 1 cup of whole milk mixed with 1/2 cup of sugar and 1 teaspoon of vanilla instead of the sweetened condensed milk. The texture won’t be as creamy, but it’ll still be tasty. For a vegan option, use canned coconut cream mixed with maple syrup to taste—about 1/4 cup of maple syrup per cup of coconut cream should do it.
Equipment Needed
The beauty of this recipe is that you don’t need any fancy equipment. No ice cream maker, no thermometer, no special gadgets. Here’s what you’ll need:
- Large mixing bowl – You need something big enough to hold 8 cups of snow plus the other ingredients. I use my biggest stainless steel bowl, about 5 quarts. A glass or ceramic bowl works too, but metal bowls chill faster, which helps keep the snow from melting too quickly.
- Spatula or large spoon – For folding the ingredients together. A rubber spatula works best because it can scrape the sides and incorporate everything evenly without crushing the snow too much.
- Measuring cups and spoons – You’ll need a measuring cup for the snow (I know, it sounds funny, but it helps to have consistent results) and measuring spoons for the vanilla.
- Serving bowls and spoons – For serving immediately. I like to chill my serving bowls in the freezer for a few minutes before scooping—it keeps the ice cream from melting too fast.
- Optional: cookie sheet or tray – If you’re making a snow ice cream bar for a party, a large tray makes it easy to set out all the toppings and let guests serve themselves.
I’ve made this with a plastic bowl and a wooden spoon when I was visiting my sister’s house and didn’t have my usual tools. It worked just fine. The only thing I’d caution against is using a bowl that’s too small—you need room to mix without snow flying everywhere. Trust me on that one. I learned the hard way.
Preparation Method
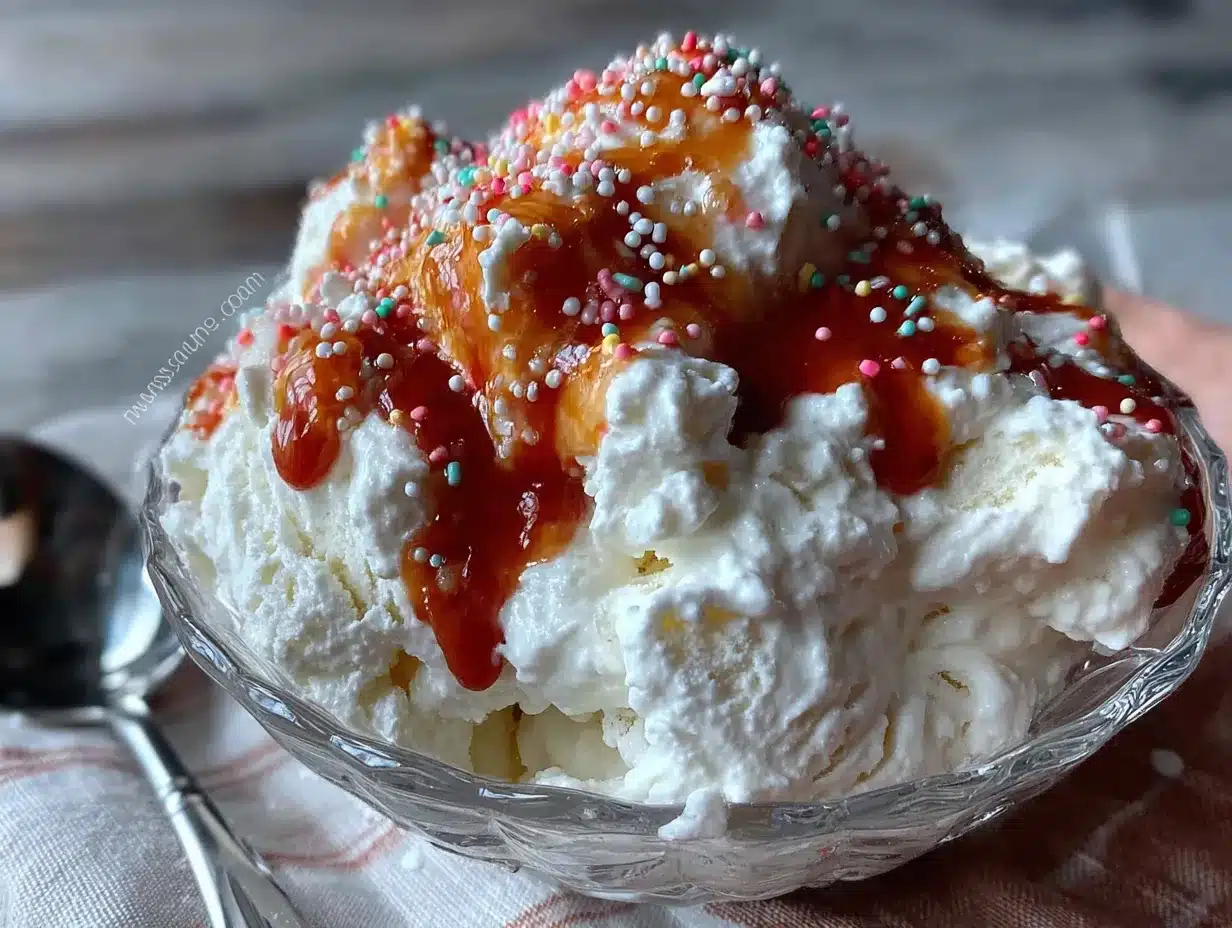
This is the part where it all comes together. Follow these steps, and you’ll have a bowl of creamy, dreamy snow ice cream in less time than it takes to decide what to watch on Netflix.
- Go outside and collect your snow. Wait for a fresh, clean snowfall—ideally during or right after the storm. Head to a spot in your yard that’s away from the road, any treated walkways, and areas where pets might have been. Using a large bowl or clean bucket, gently scoop up the top layer of snow. Don’t pack it down—you want it light and fluffy. Fill your bowl with about 8 cups of snow. If you’re not sure about the measurement, just fill the bowl generously; you can always add more later.
- Bring the snow inside immediately. Snow starts melting the second it hits warm air, so work quickly. Place your bowl of snow on the counter and have your other ingredients ready to go before you start mixing.
- In a small bowl or measuring cup, combine the sweetened condensed milk, vanilla extract, and salt. Stir them together until they’re well mixed. This step is important because it ensures the vanilla and salt are evenly distributed throughout the ice cream, rather than ending up in one spot. (I once forgot to mix them first and ended up with a pocket of pure vanilla that was way too strong. Learn from my mistake!)
- Pour the milk mixture over the snow. Drizzle it evenly across the surface of the snow. Don’t dump it all in one spot—you want it to spread out so you don’t have to stir as much.
- Fold the mixture into the snow gently. Using your spatula or spoon, fold the milk mixture into the snow with a gentle, turning motion. Imagine you’re folding whipped cream into a batter—you want to incorporate everything without deflating the snow too much. Work from the bottom up, bringing the snow from the bottom to the top. This should take about 30 to 45 seconds. You’ll know it’s ready when the mixture looks uniform and creamy, with no white patches of plain snow remaining.
- Check the consistency. The ice cream should be thick and scoopable, like soft-serve. If it’s too runny, add a little more snow and fold gently. If it’s too dry or crumbly, add a tiny splash of milk or another drizzle of sweetened condensed milk. Adjust until it looks right to you.
- Serve immediately. This is not a make-ahead dessert—snow ice cream is best eaten within minutes of making it. Scoop it into chilled bowls, add your toppings, and enjoy right away. The texture will start to change after about 10 minutes as the snow continues to melt.
Sensory cues: When you’re folding, you should hear a soft, swishing sound as the spatula moves through the snow. The mixture will look matte at first, then gradually become glossy as the milk coats the snow crystals. When it’s done, it should look like a soft, fluffy cloud with a slight sheen. The smell is incredible—sweet and vanilla-forward, like a bakery in winter.
Time estimate: Collecting the snow takes about 2 minutes. Mixing takes about 1 minute. Total time from bowl to mouth: about 5 minutes. I’ve timed it.
Cooking Tips & Techniques
After making this recipe more times than I can count, I’ve picked up a few tricks that make the difference between good snow ice cream and absolutely unforgettable snow ice cream. Here’s what I’ve learned—sometimes the hard way.
Choose your snow wisely. Not all snow is created equal. The best snow for this recipe is fresh, dry, and powdery—the kind that falls when temperatures are in the 20s or lower. Wet, heavy snow (the kind that’s perfect for snowballs) will make your ice cream denser and icier. If all you have is wet snow, use a little less sweetened condensed milk to compensate, or expect a texture closer to a snow cone than ice cream.
Chill your bowl and utensils. If you have time, pop your mixing bowl and spatula in the freezer for 10 minutes before you start. Cold tools help keep the snow from melting too quickly during mixing. I also chill my serving bowls—it makes a noticeable difference in how long the ice cream holds up at the table.
Work in small batches. If you’re serving a crowd, make the ice cream in batches rather than trying to double the recipe in one giant bowl. It’s easier to mix evenly, and you’ll get better texture. Plus, it gives your guests the fun of watching you make it fresh. I usually make one batch, serve it, then make another batch while everyone’s eating. It becomes part of the experience.
Don’t overmix. This is the most common mistake I see. People stir and stir, trying to get it perfectly smooth, and end up with soup. The snow melts as you stir, so you want to be efficient. Fold just until everything is combined, then stop. A few tiny lumps of plain snow are fine—they’ll disappear as you eat.
One failure I’ll never forget: The first time I made this for a dinner party, I got distracted talking to a friend and left the bowl of snow on the counter for about 15 minutes before I started mixing. By the time I added the milk, half the snow had melted into water. I ended up with a sad, soupy mess that I had to pass off as “snow milk.” Now I always collect the snow last, right before I’m ready to mix. Learn from my social butterfly mistake.
Variations & Adaptations
One of the best things about this recipe is how easy it is to customize. Here are some variations I’ve tried and loved, perfect for different occasions and dietary needs.
Chocolate Snow Ice Cream: Add 2 tablespoons of unsweetened cocoa powder to the sweetened condensed milk before mixing. Stir until the cocoa is fully dissolved—no lumps allowed. The result is a rich, chocolatey version that tastes like a frozen hot chocolate. I serve this with whipped cream and chocolate shavings when I want to feel extra fancy.
Vegan/Dairy-Free Version: Use canned coconut cream or full-fat coconut milk instead of sweetened condensed milk. Add 3 to 4 tablespoons of maple syrup or agave for sweetness, plus the vanilla and salt. The texture will be slightly icier than the original, but the coconut flavor pairs beautifully with the snow. I’ve made this for a vegan friend’s birthday party, and she said it brought back childhood memories she thought she’d lost.
Peppermint Snow Ice Cream: Replace the vanilla extract with 1/2 teaspoon of peppermint extract and add a drop of red food coloring (optional) for a festive look. Crush up some candy canes and sprinkle them on top. This is my go-to for holiday gatherings—it looks gorgeous on the table and tastes like Christmas in a bowl.
Fruity Version: Fold in 1/2 cup of mashed fresh berries (strawberries, raspberries, or blueberries work best) after the milk mixture is incorporated. Swirl it gently so you get ribbons of fruit throughout the white ice cream. This is perfect for spring snowfalls when you’re craving something bright and fresh.
Maple Walnut: Replace the vanilla with maple extract (or use real maple syrup in place of some of the sweetened condensed milk) and fold in 1/4 cup of chopped toasted walnuts. The combination of maple and snow is surprisingly amazing—it tastes like a frozen pancake breakfast.
My personal favorite variation is the chocolate version with a drizzle of warm peanut butter on top. I discovered this combo on a particularly stressful Wednesday when I needed something ridiculous and comforting. It’s now my secret indulgence.
Serving & Storage Suggestions
Snow ice cream is best enjoyed immediately, but there are a few ways to stretch the experience if you’re hosting.
Serving temperature: Serve this right after making it, while it’s still fluffy and cold. The ideal serving temperature is around 20°F to 25°F—basically, as cold as you can get it without it being frozen solid. I like to scoop it into chilled bowls and pass them around immediately.
Presentation tips for parties: Set up a snow ice cream bar with a variety of toppings in small bowls. Arrange them on a tray with spoons and let guests build their own creations. I always include chocolate sauce, caramel sauce, sprinkles, crushed cookies, fresh fruit, and chopped nuts. A little sign with “Build Your Own Snow Ice Cream” adds a nice touch. For a winter wonderland theme, add some silver or white decorations around the table.
What to serve alongside: This pairs beautifully with warm drinks—hot chocolate, coffee, or spiced apple cider. The contrast between hot and cold is wonderful. I also like to serve small cookies on the side, like shortbread or ginger snaps, for a little crunch.
Storage: If you have leftovers (which rarely happens in my house), you can freeze them. Transfer the snow ice cream to an airtight container and place it in the freezer. It will keep for up to 24 hours, but the texture will change—it becomes harder and icier, more like a frozen treat than creamy ice cream. To serve leftovers, let them sit at room temperature for 5 to 10 minutes to soften slightly.
Reheating (sort of): You can’t really reheat snow ice cream, but if your frozen leftovers are too hard, you can break them up and blend them in a food processor with a splash of milk to restore a softer texture. It won’t be exactly the same as fresh, but it’s still pretty good.
Flavor development: Honestly, this is best fresh. The magic is in the contrast between the cold, fluffy snow and the sweet, creamy milk. That texture doesn’t survive freezing well. So my advice? Make only as much as you’ll eat in one sitting, and enjoy every single bite right away.
Nutritional Information & Benefits
Let’s be real—this is a dessert, and it’s meant to be enjoyed as a treat. But here’s what you should know about what’s in that bowl.
Estimated nutritional values per serving (about 1 cup, without toppings):
- Calories: approximately 220-250
- Fat: 6-8 grams
- Carbohydrates: 38-42 grams
- Sugar: 35-40 grams
- Protein: 4-5 grams
- Calcium: 15-20% of daily value
Health highlights: The sweetened condensed milk provides a good amount of calcium, which is great for bone health. The snow itself is just water, so you’re getting hydration too—bonus! If you use the optional salt, you’re also getting a tiny bit of electrolytes, which is nice after being out in the cold.
Dietary considerations: This recipe is naturally egg-free, nut-free (if you skip the walnut variation), and can be made gluten-free easily (just check your toppings). For a lower-sugar version, use a sugar-free sweetened condensed milk or reduce the amount and add a sugar substitute like stevia. For a dairy-free option, use coconut-based sweetened condensed milk or the coconut cream and maple syrup variation I mentioned earlier.
Potential allergens: Dairy and vanilla extract (which sometimes contains alcohol, though the amount is negligible). If you’re serving guests, it’s always good to ask about allergies before they dig in.
My personal take? This is a special occasion dessert, not an everyday thing. But when you’re making memories on a snow day with friends and family, a little sugar is part of the fun. Balance is key, and this recipe is worth every spoonful.
Conclusion
This Easy 5-Minute Snow Ice Cream is proof that the best recipes often come from the most unexpected places—like a dark kitchen during a snowstorm with no power and a bowl full of questions. It’s simple, it’s fast, and it turns a snowy day into something your guests will talk about long after the last flake has melted.
I love this recipe because it’s not just about the food—it’s about the moment. The laughter as you run outside to collect snow, the gasps when everyone takes their first bite, the way a simple bowl of ice cream can make a gathering feel special without any stress. That’s what hosting is all about, isn’t it? Creating moments that feel effortless but memorable.
I’d love to hear how this turns out for you. Did you try a fun variation? Did your guests go crazy for it? Drop a comment below and let me know—I read every single one, and your ideas might end up in my next batch. And if you snapped a photo, share it on social media and tag me. Nothing makes my day like seeing snow ice cream being made in kitchens all over the world.
So go ahead—grab a bowl, step outside, and make some winter magic. You’ve got this, and honestly, it’s going to be amazing.
Frequently Asked Questions
Can I use snow that’s been on the ground for a few days?
I don’t recommend it. Snow that’s been sitting for a while can collect dirt, debris, and pollutants from the air. For the best flavor and safety, use snow that’s fallen within the last few hours, ideally during an active snowfall. Fresh snow tastes cleaner and has a better texture too.
What if I don’t have sweetened condensed milk?
No problem! You can substitute with 1 cup of whole milk mixed with 1/2 cup of granulated sugar and 1 teaspoon of vanilla extract. The texture will be less creamy and more like a snow cone, but it’ll still be delicious. Just stir until the sugar dissolves completely before adding it to the snow.
Can I make this without a snowstorm?
If you’re craving snow ice cream and Mother Nature isn’t cooperating, you can use shaved ice from a snow cone machine or crushed ice from your blender. The texture won’t be exactly the same—it’ll be crunchier and more like a snow cone—but the flavor will still be there. Just don’t use ice cubes straight from the freezer; they’re too hard and won’t mix well.
How do I know if the snow is safe to eat?
Use common sense. Collect snow from a clean area away from roads, driveways, sidewalks, and any place that might have been treated with salt, chemicals, or de-icers. Avoid snow that has any discoloration or visible debris. If you’re unsure, it’s better to skip it. When in doubt, wait for the next snowfall.
Can I double this recipe for a party?
You can, but I recommend making it in batches instead. Doubling the recipe in one bowl makes it harder to mix evenly, and the snow will start melting before everything is combined. Making individual batches takes only a few extra minutes and gives you better texture. Plus, it’s fun for guests to watch you make it fresh.
Pin This Recipe!
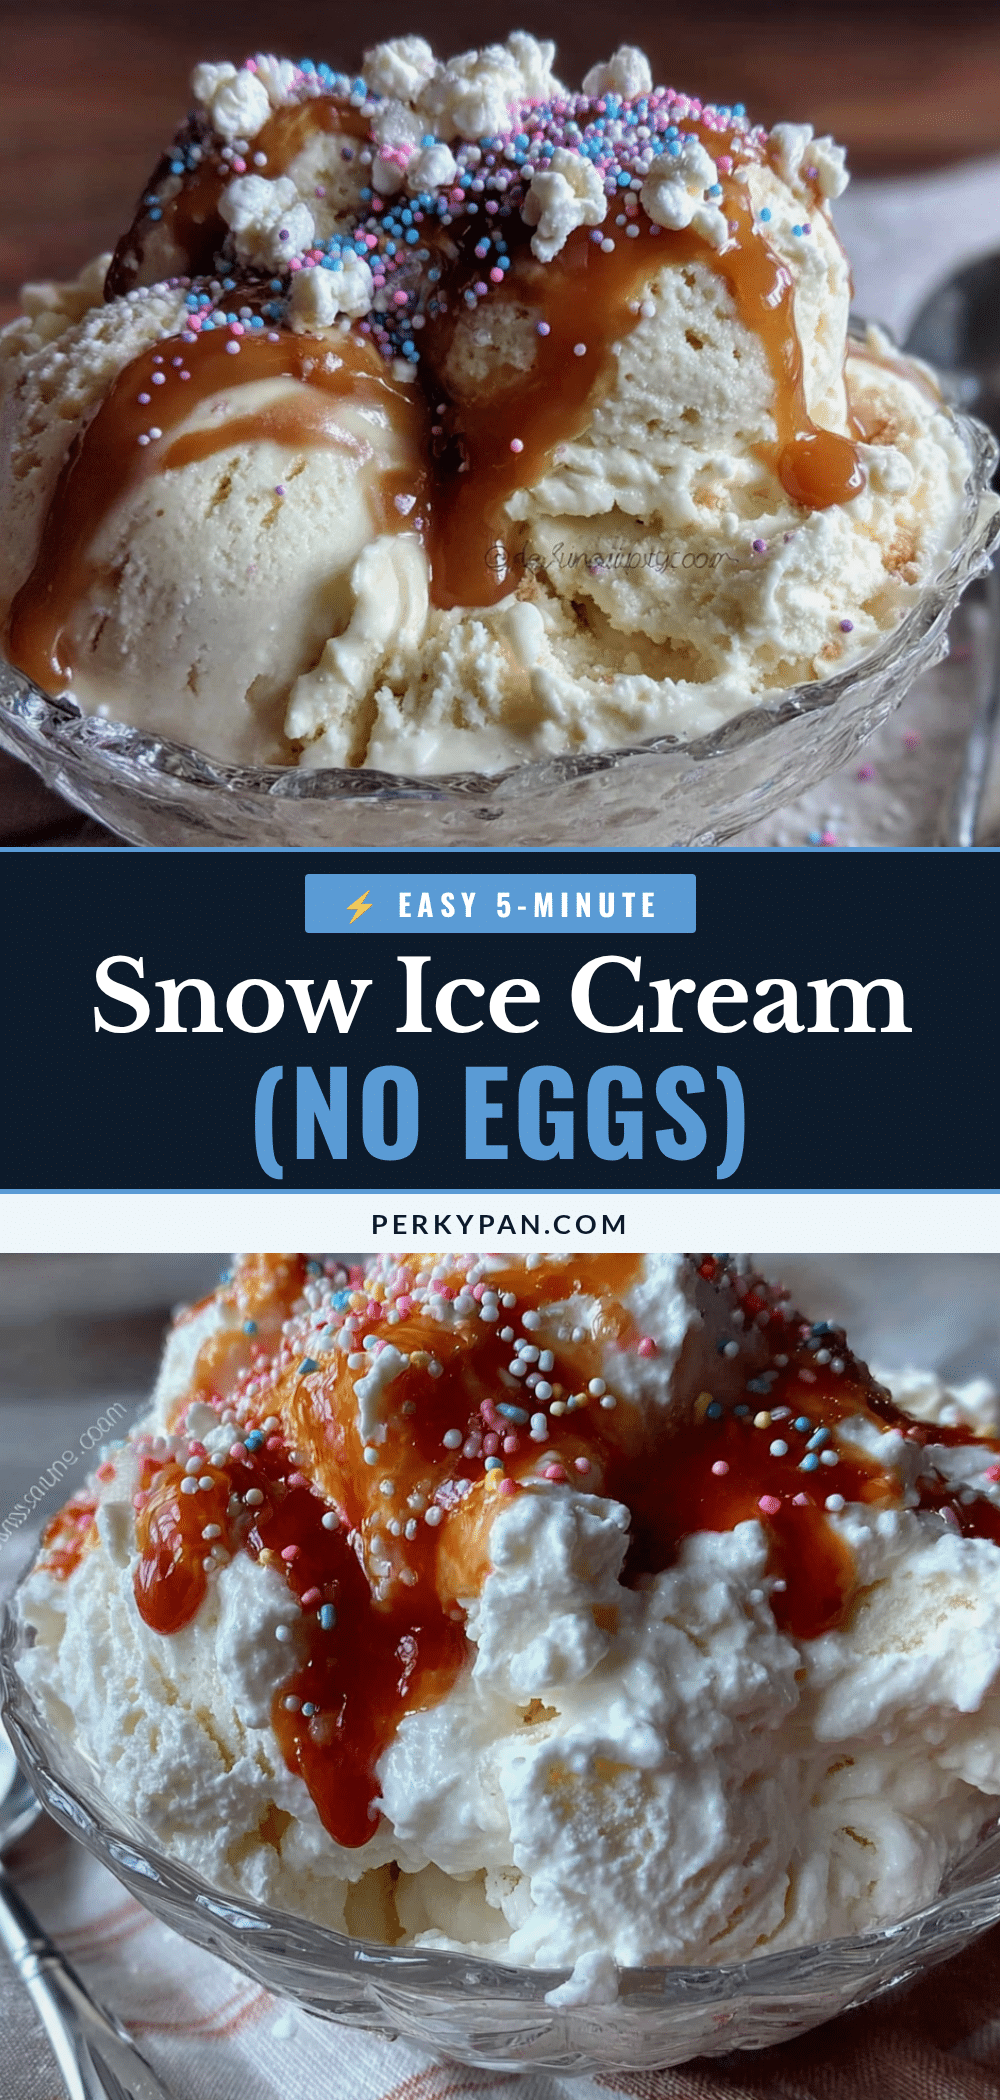
Easy 5-Minute Snow Ice Cream: Best No-Egg Recipe

This Easy 5-Minute Snow Ice Cream is the perfect snow day dessert—creamy, sweet, and made with just 3 main ingredients. No eggs required, ready in minutes, and always a hit with kids and adults alike.
- Prep Time: 5 minutes
- Cook Time: 0 minutes
- Total Time: 5 minutes
- Yield: 4 servings 1x
- Category: Dessert
- Cuisine: American
Ingredients
- 8 cups fresh, clean snow
- 1 can (14 ounces) sweetened condensed milk
- 1 teaspoon vanilla extract
- Pinch of fine sea salt (optional but recommended)
- Toppings of your choice (e.g., chocolate sauce, sprinkles, crushed Oreos, fresh strawberries, chopped nuts, caramel drizzle)
Instructions
- Go outside and collect your snow. Wait for a fresh, clean snowfall. Using a large bowl, gently scoop up the top layer of snow—don’t pack it down. Fill with about 8 cups of snow.
- Bring the snow inside immediately. Have your other ingredients ready before you start mixing.
- In a small bowl or measuring cup, combine the sweetened condensed milk, vanilla extract, and salt. Stir until well mixed.
- Pour the milk mixture evenly over the snow, drizzling across the surface.
- Using a spatula or large spoon, gently fold the milk mixture into the snow with a turning motion, working from the bottom up. Fold for about 30 to 45 seconds until the mixture is uniform and creamy, with no white patches of plain snow remaining.
- Check the consistency. It should be thick and scoopable, like soft-serve. If too runny, add more snow and fold gently. If too dry, add a tiny splash of milk or more sweetened condensed milk.
- Serve immediately in chilled bowls with desired toppings. Enjoy within minutes for best texture.
Notes
Use fresh, clean snow from a spot away from roads, treated walkways, and pets. Chill your bowl and utensils in the freezer for 10 minutes before starting to help prevent melting. Work in small batches for best texture—do not overmix. Serve immediately as texture changes after about 10 minutes. For a dairy-free version, use coconut cream with maple syrup. For chocolate version, add 2 tablespoons unsweetened cocoa powder to the milk mixture.
Nutrition
- Serving Size: 1 cup (without toppi
- Calories: 235
- Sugar: 38
- Sodium: 85
- Fat: 7
- Saturated Fat: 4
- Carbohydrates: 40
- Protein: 4.5
Keywords: snow ice cream, easy snow ice cream, no egg ice cream, 5 minute dessert, snow day recipe, winter dessert, homemade ice cream, kid-friendly dessert


