Love this? Save it for later!
Share the inspiration with your friends
My nephew Leo asked why I couldn’t just wrap the stuffed peppers in crescent roll strips instead of worrying so much about the filling staying perfectly inside. I started to explain why that wouldn’t work—something about moisture ratios and structural integrity and the filling leaking out. Then I stopped. Honestly, I had no good reason except that I’d never seen it done before. So we tried it. And let me tell you, watching a ten-year-old be right about dinner while I stood there holding a spoon felt like exactly the humbling I needed that Tuesday afternoon in late October.
The thing about Halloween dinner is that it always feels like an afterthought. You’re too busy carving pumpkins, sorting candy, and figuring out who borrowed your good mixing bowl to actually plan a meal that feels special. But here’s the thing I learned from that afternoon with Leo—sometimes the best ideas come from someone who hasn’t learned all the rules yet. These mummy-wrapped stuffed peppers started as a joke, a silly idea for a spooky-themed dinner that would make the kids giggle. They ended up becoming our official Halloween tradition, and I’m not even a little embarrassed to admit that.
The peppers themselves get all tender and sweet from roasting, the filling stays perfectly seasoned and satisfying, and that crescent roll wrapping? It gets golden and flaky in a way that makes you wonder why you haven’t been wrapping everything in dough strips your whole life. Maybe you’ve been there—staring at a recipe and thinking there has to be a simpler, more fun way to make it work. That’s exactly where I was, and I’m so glad I listened to the kid instead of my own stubborn instincts.
Why You’ll Love This Recipe
These mummy-wrapped stuffed peppers aren’t just cute—they’re genuinely delicious and surprisingly practical for a busy Halloween evening. Here’s why they’ve earned a permanent spot in our October rotation:
- Kid-Friendly Fun : The mummy wrapping makes dinner feel like part of the Halloween festivities, and kids actually get excited about eating their vegetables when they look this silly.
- Quick Assembly : You can have these prepped and in the oven in about 20 minutes, which leaves plenty of time for costume emergencies and candy sorting.
- Simple Ingredients : Everything comes from a regular grocery run—no specialty items or obscure spices required.
- Make-Ahead Friendly : Assemble them the night before, keep them covered in the fridge, and just pop them in the oven when you’re ready.
- Customizable Filling : The basic recipe works beautifully, but you can easily swap ingredients based on what your family loves.
- Crowd-Pleaser Status : I’ve served these at Halloween parties and watched adults go back for seconds just as eagerly as the kids.
What makes these different from regular stuffed peppers is that crescent roll wrapping. It solves the classic stuffed pepper problem—you know, when the filling tries to escape and you end up with a sad pepper boat and a puddle of rice on the pan. The dough holds everything together while adding this buttery, flaky texture that contrasts perfectly with the tender pepper and savory filling. It’s comfort food that looks like you tried way harder than you actually did, which is honestly my favorite kind of cooking.
These peppers hit that sweet spot between festive and filling. You get the Halloween fun without serving a dinner that leaves everyone hungry for real food an hour later. And honestly, there’s something deeply satisfying about sitting down to a meal that makes everyone at the table smile before they even take a bite.
What Ingredients You Will Need
This recipe relies on simple, pantry-friendly ingredients that come together to create something genuinely special. Most of these items you probably already have on hand, which makes this perfect for those nights when you need dinner to feel fun without a special trip to the store.
For the Peppers and Filling
- 4 large bell peppers (any color works, but red and orange look especially festive for Halloween—I like using a mix for visual appeal)
- 1 pound ground beef or turkey (I prefer 85/15 ground beef for flavor, but ground turkey works beautifully if you’re watching fat content)
- 1 cup cooked rice (white, brown, or cauliflower rice all work—leftover rice is perfect here)
- 1 small onion, finely diced (about 1/2 cup—yellow or sweet onion both work great)
- 2 cloves garlic, minced (or 1 teaspoon garlic powder in a pinch)
- 1 can (15 ounces) tomato sauce (I like Hunt’s or Muir Glen for consistent flavor)
- 1 teaspoon dried Italian seasoning (or a mix of oregano, basil, and thyme)
- 1/2 teaspoon salt (plus more to taste)
- 1/4 teaspoon black pepper
- 1 cup shredded mozzarella cheese (part-skim works fine, but whole milk gives better melt)
For the Mummy Wrapping
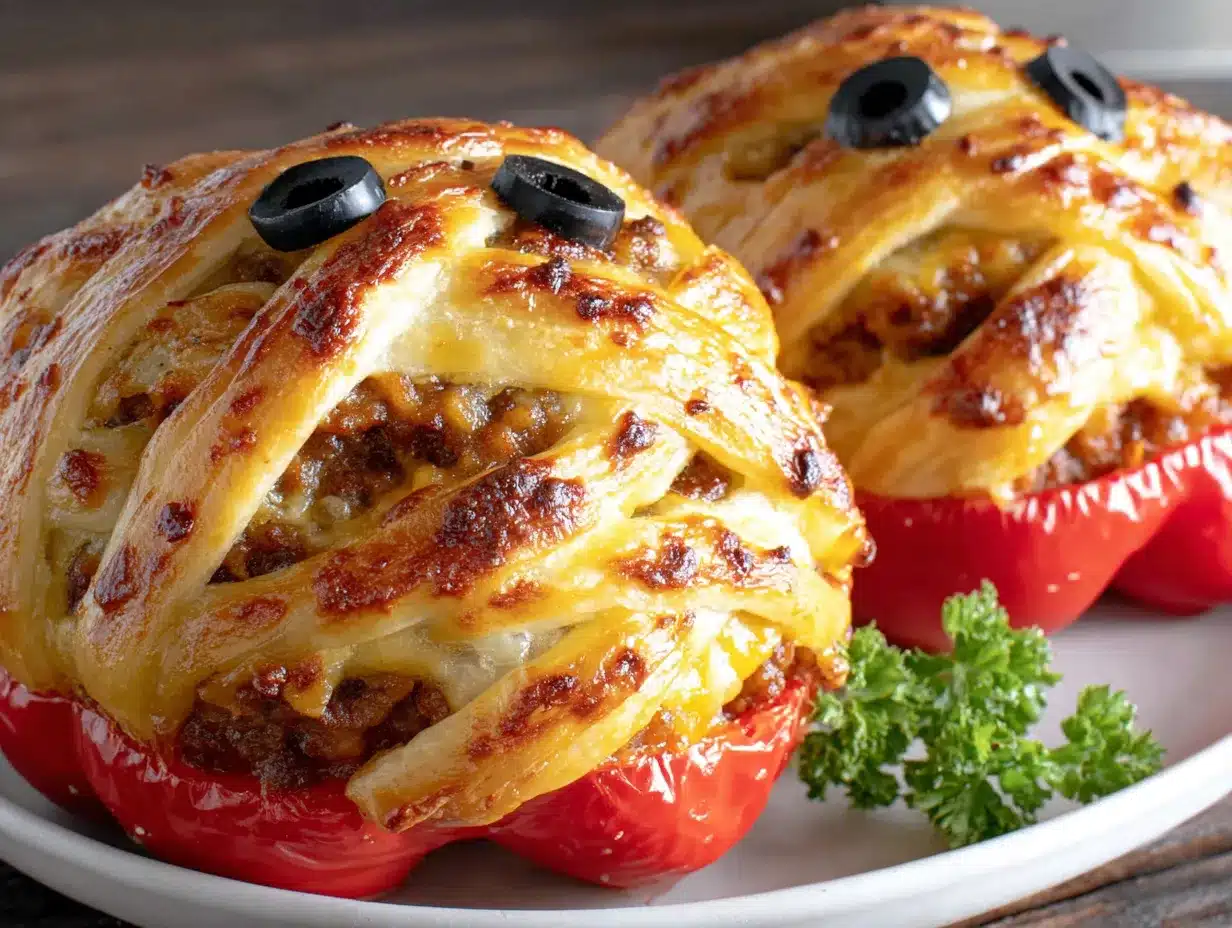
- 1 can (8 ounces) refrigerated crescent roll dough (Pillsbury is my go-to, but store brands work just as well)
- 2 tablespoons melted butter (for brushing—this gives that gorgeous golden color)
- Candy eyes or small olive slices (for the mummy faces—candy eyes are more fun, but olive slices work if you want to keep it savory)
A few notes on ingredient choices—I’ve tested this with both lean ground beef and plant-based crumbles, and both work beautifully. If you’re using plant-based meat, add an extra tablespoon of tomato sauce to keep the filling moist. For the rice, day-old rice that’s been refrigerated works best because it’s slightly drier and holds up better in the filling. Freshly cooked rice is fine too, just let it cool for a few minutes before mixing.
The crescent roll dough is the real star here from a visual standpoint. I’ve tried making my own dough strips, and honestly? The canned version works better. It’s consistent, it bakes up perfectly flaky, and it saves you the trouble of rolling and cutting dough when you’re already busy with Halloween chaos. One can gives you exactly enough strips for four peppers with maybe one or two extras for snacking.
Equipment Needed
You don’t need anything fancy for this recipe, which is part of why I love it so much. Here’s what you’ll want to have ready:
- Large skillet (for cooking the filling—a 12-inch skillet gives you plenty of room)
- Cutting board and sharp knife (for prepping the peppers and onion)
- Medium mixing bowl (for combining the filling ingredients)
- 9×13 inch baking dish (glass or ceramic both work perfectly)
- Pastry brush (for brushing butter on the dough—a silicone brush is easier to clean)
- Small knife or kitchen shears (for cutting the crescent roll dough into strips)
- Aluminum foil (for tenting the peppers if the dough browns too quickly)
If you don’t have a pastry brush, you can absolutely use a paper towel to dab the melted butter onto the dough. It’s not as pretty, but it works. And if your baking dish is slightly smaller, just arrange the peppers so they’re not touching—they need a little space for even cooking. I’ve made these in a cast iron skillet before, and it worked beautifully, so don’t be afraid to improvise with what you have.
Preparation Method
Let me walk you through this step by step. I’ve made these peppers more times than I can count, and I’ve learned a few tricks along the way that make the process smoother.
- Preheat your oven to 375°F. Get this going first so it’s ready when you are. While it’s heating, bring a large pot of water to a boil for blanching the peppers.
- Prep the peppers. Cut the tops off each bell pepper (about 1/2 inch from the top) and remove the seeds and membranes from inside. Be gentle—you want the peppers to stay intact. If they wobble when you set them down, trim a tiny slice off the bottom to create a flat surface. Just don’t cut through the bottom or your filling will leak out.
- Blanch the peppers. Drop the hollowed peppers into the boiling water for 3 minutes. This softens them just enough that they’ll cook through evenly without getting mushy. Drain them upside down on paper towels while you make the filling. I learned this trick after making rock-hard peppers that never fully cooked—three minutes makes all the difference.
- Cook the filling. Heat your large skillet over medium-high heat. Add the ground beef and cook, breaking it up with a spoon, until it’s browned and no longer pink—about 5 to 7 minutes. Drain off any excess fat if needed. Add the diced onion and cook for 2 more minutes until it softens, then add the minced garlic and cook for 30 seconds until fragrant.
- Combine everything. Reduce the heat to low. Stir in the cooked rice, tomato sauce, Italian seasoning, salt, and pepper. Let it simmer for 2 minutes so the flavors meld together. Remove from heat and stir in half of the shredded mozzarella cheese. Taste it and adjust the seasoning—this is your chance to make sure it’s perfect.
- Stuff the peppers. Spoon the filling into each blanched pepper, packing it gently but firmly. Don’t overstuff—leave about 1/4 inch of space at the top so the cheese and dough have room. Place the stuffed peppers upright in your baking dish. If they wobble, nestle them against each other or use crumpled foil to keep them steady.
- Top with cheese. Sprinkle the remaining mozzarella cheese over the tops of the stuffed peppers. This creates a gooey layer that the dough will stick to, plus it adds extra cheesy goodness.
- Create the mummy wrappings. Open the can of crescent roll dough and separate it into the pre-cut triangles. Using a small knife or kitchen shears, cut each triangle lengthwise into 3 or 4 strips—about 1/2 inch wide each. You want them thin enough to look like bandages but thick enough to hold their shape.
- Wrap the peppers. Starting at the bottom of each pepper, wrap the dough strips around in a crisscross pattern, leaving small gaps so you can see the pepper and cheese peeking through. Don’t wrap too tightly—the dough will expand as it bakes. Leave the top partially exposed so the mummy face is visible. Press the ends of the strips gently against the pepper to secure them.
- Brush with butter. Using your pastry brush, gently brush the melted butter over all the dough strips. This is what gives them that gorgeous golden-brown color. Don’t skip this step—unbuttered dough bakes up pale and sad-looking.
- Bake. Place the baking dish in the preheated oven and bake for 20 to 25 minutes. The dough should be golden brown and puffed, and the peppers should be tender when pierced with a fork. If the dough is browning too quickly but the peppers aren’t done yet, loosely tent the dish with aluminum foil for the last 5 minutes.
- Add the eyes. Let the peppers cool for 5 minutes in the dish. Then press candy eyes or olive slices into the exposed pepper tops to create the mummy faces. The residual heat will help them stick. Serve immediately while the cheese is still gooey and the dough is perfectly flaky.
One thing I want to mention—the first time I made these, I forgot to blanch the peppers and ended up with crunchy peppers and perfectly done dough. Not a disaster, but definitely not ideal. The blanching step really does matter for getting that tender-yet-sturdy texture.
Cooking Tips & Techniques
After making these peppers for several Halloweens in a row, I’ve collected a few tips that make the process smoother and the results more consistent.
Don’t overwork the dough. Crescent roll dough is delicate, and handling it too much makes it tough. When you’re cutting the strips, use a sharp knife and cut with one clean motion rather than sawing back and forth. If the dough gets too warm and sticky, pop it in the fridge for 5 minutes before continuing.
Watch your oven temperature. Every oven runs a little differently. I’ve made these in three different ovens, and the baking time varies by about 5 minutes depending on the oven. Start checking at 18 minutes, and look for that deep golden color on the dough. If the dough is browning too fast, tent with foil immediately.
Make the filling ahead. You can cook the filling up to two days in advance and keep it covered in the refrigerator. This makes assembly night incredibly quick—just blanch the peppers, stuff them, wrap them, and bake. I do this every year now because Halloween evening is chaotic enough without adding a full cooking project.
Keep the peppers upright. The biggest challenge with stuffed peppers is keeping them from tipping over. If your peppers are particularly round on the bottom, slice off the thinnest possible layer to create a flat base. You can also pack them tightly together in the dish so they support each other. I’ve even used crumpled aluminum foil rings to keep particularly stubborn peppers standing straight.
Let them rest. Those 5 minutes of resting time after baking aren’t just for safety—they let the filling set up slightly so it doesn’t fall apart when you cut into the pepper. The cheese also cools enough that you won’t burn your mouth on that first bite. Trust me on this one. I was too eager the first time and paid the price.
Variations & Adaptations
One of the best things about this recipe is how flexible it is. Here are some variations I’ve tried and loved:
Vegetarian Version : Swap the ground meat for a plant-based crumble or a mixture of black beans and quinoa. Add an extra 1/4 cup of tomato sauce to keep the filling moist, and consider adding some diced mushrooms for that savory, meaty texture. I made this version for my sister-in-law who’s vegetarian, and she asked for the recipe before she finished eating.
Spicy Southwestern Style : Add 1 teaspoon of chili powder and 1/2 teaspoon of cumin to the filling, and swap the mozzarella for pepper jack cheese. Top with a dollop of sour cream and some fresh cilantro before serving. This version has a nice kick without being overwhelming—perfect for adults who want a little heat with their Halloween fun.
Low-Carb Adaptation : Skip the rice entirely and double the amount of meat and vegetables in the filling. You can also use cauliflower rice instead of regular rice—just make sure to squeeze out as much moisture as possible before adding it to the skillet. The crescent roll wrapping does add carbs, but you could wrap the peppers in thinly sliced provolone cheese instead for a keto-friendly option.
Breakfast for Dinner Version : This one sounds weird but trust me—use breakfast sausage instead of ground beef, swap the tomato sauce for a can of diced tomatoes with green chilies, and add a scrambled egg to the filling. The crescent roll dough already feels breakfast-adjacent, so this version works surprisingly well for a fun weekend dinner.
Gluten-Free Option : Use gluten-free crescent roll dough if you can find it, or make your own gluten-free dough strips using a blend of gluten-free flour and butter. You can also skip the dough entirely and just serve the stuffed peppers with a side of gluten-free bread for dipping in the juices.
Serving & Storage Suggestions
These peppers are best served hot, right out of the oven, when the cheese is still stretchy and the dough is at its flakiest. I like to arrange them on a platter with the mummy faces facing outward so everyone can see the cute details before they dig in.
What to serve with them: A simple side salad with a tangy vinaigrette balances the richness of the peppers beautifully. Roasted broccoli or green beans also work well if you want to double down on the vegetable theme. For a full Halloween spread, I sometimes serve these alongside a bowl of soup and some crusty bread for dipping.
Storage instructions: Leftover peppers keep well in an airtight container in the refrigerator for up to 4 days. The dough will lose some of its crispness, but the flavors actually get better as they meld together overnight. To reheat, place the peppers in a 350°F oven for about 10 minutes, or until warmed through. The microwave works in a pinch, but the dough will be soft rather than flaky.
Freezing tips: You can freeze the assembled but unbaked peppers for up to 3 months. Arrange them on a baking sheet and freeze until solid, then transfer to a freezer bag. To bake from frozen, add about 10 minutes to the baking time and tent with foil if the dough browns too quickly. I’ve done this for Halloween parties where I wanted to minimize day-of prep, and it works beautifully.
Flavor development: Here’s something interesting—the peppers taste even better the next day. The flavors in the filling have time to meld and deepen, and the pepper continues to soften. If you’re making these for a party, consider assembling them a day ahead and baking them fresh. The extra resting time in the fridge does wonderful things to the overall flavor profile.
Nutritional Information & Benefits
Each serving (one stuffed pepper) contains approximately 420 calories, 22 grams of protein, 35 grams of carbohydrates, and 18 grams of fat. The exact numbers will vary based on your specific ingredients and portion sizes.
These peppers offer some solid nutritional benefits. Bell peppers are packed with vitamin C—actually, one red bell pepper contains more vitamin C than an orange. They’re also a great source of vitamin A and fiber. The protein from the meat and cheese helps keep you full and satisfied, and the rice provides energy that lasts through an evening of trick-or-treating or party hosting.
If you’re watching your sodium intake, use low-sodium tomato sauce and reduce the added salt in the filling. The Italian seasoning adds plenty of flavor without extra sodium. For a lighter version, use ground turkey instead of beef, swap the mozzarella for part-skim, and use cauliflower rice. This brings the calorie count down to around 320 per pepper while keeping most of the flavor and texture.
The main allergens in this recipe are dairy (cheese and butter) and gluten (crescent roll dough). For dairy-free needs, use vegan cheese and plant-based butter. For gluten-free needs, use gluten-free crescent dough or skip the wrapping entirely.
Conclusion
These cozy mummy-wrapped stuffed peppers have become my favorite kind of Halloween tradition—the kind that started as a joke and ended up being genuinely wonderful. They’re proof that sometimes the best ideas come from letting go of what you think you know and trying something just because it sounds fun. Leo still reminds me every year about the time I almost said no to his idea, and honestly, I’m glad he does.
Whether you’re making these for a Halloween party, a family dinner before the candy chaos begins, or just because you want dinner to feel a little more playful, I hope you love them as much as we do. Feel free to make them your own—swap in your favorite fillings, experiment with different dough patterns, or add your own spooky touches. That’s what cooking should be about, anyway.
I’d love to hear how yours turn out! Drop a comment below and let me know what variations you tried, or tag me in your photos if you share them online. Happy Halloween, and happy cooking!
Frequently Asked Questions
Can I make these peppers ahead of time for a party?
Absolutely! You can assemble the peppers completely (including the dough wrapping) up to 24 hours in advance. Keep them covered in the refrigerator, then bake them just before serving. Add about 5 minutes to the baking time since they’ll be starting from cold.
What if I can’t find candy eyes for the mummy faces?
No problem at all! You can use sliced black olives, capers, or even small dots of black sesame seeds for the eyes. I’ve also used tiny dollops of black food coloring gel on white cheese slices cut into circles. Get creative with whatever you have on hand.
Can I use different colors of bell peppers?
Yes, and I actually recommend using a mix of colors for visual variety. Red, orange, and yellow peppers are sweeter and more tender than green ones, but green peppers work perfectly fine if that’s what you have. Just note that green peppers take slightly longer to become tender.
How do I keep the crescent roll dough from getting soggy?
The key is not overstuffing the peppers and making sure the filling isn’t too wet. If your tomato sauce is particularly thin, let it simmer for an extra minute or two to reduce slightly. Also, make sure the peppers are well-drained after blanching—any excess water will make the dough soggy.
Can I make these in an air fryer instead of the oven?
Yes, you can! Preheat your air fryer to 350°F and cook the peppers for about 12 to 15 minutes. Check them at the 10-minute mark since air fryers cook faster than ovens. You may need to work in batches depending on the size of your air fryer basket.
Pin This Recipe!
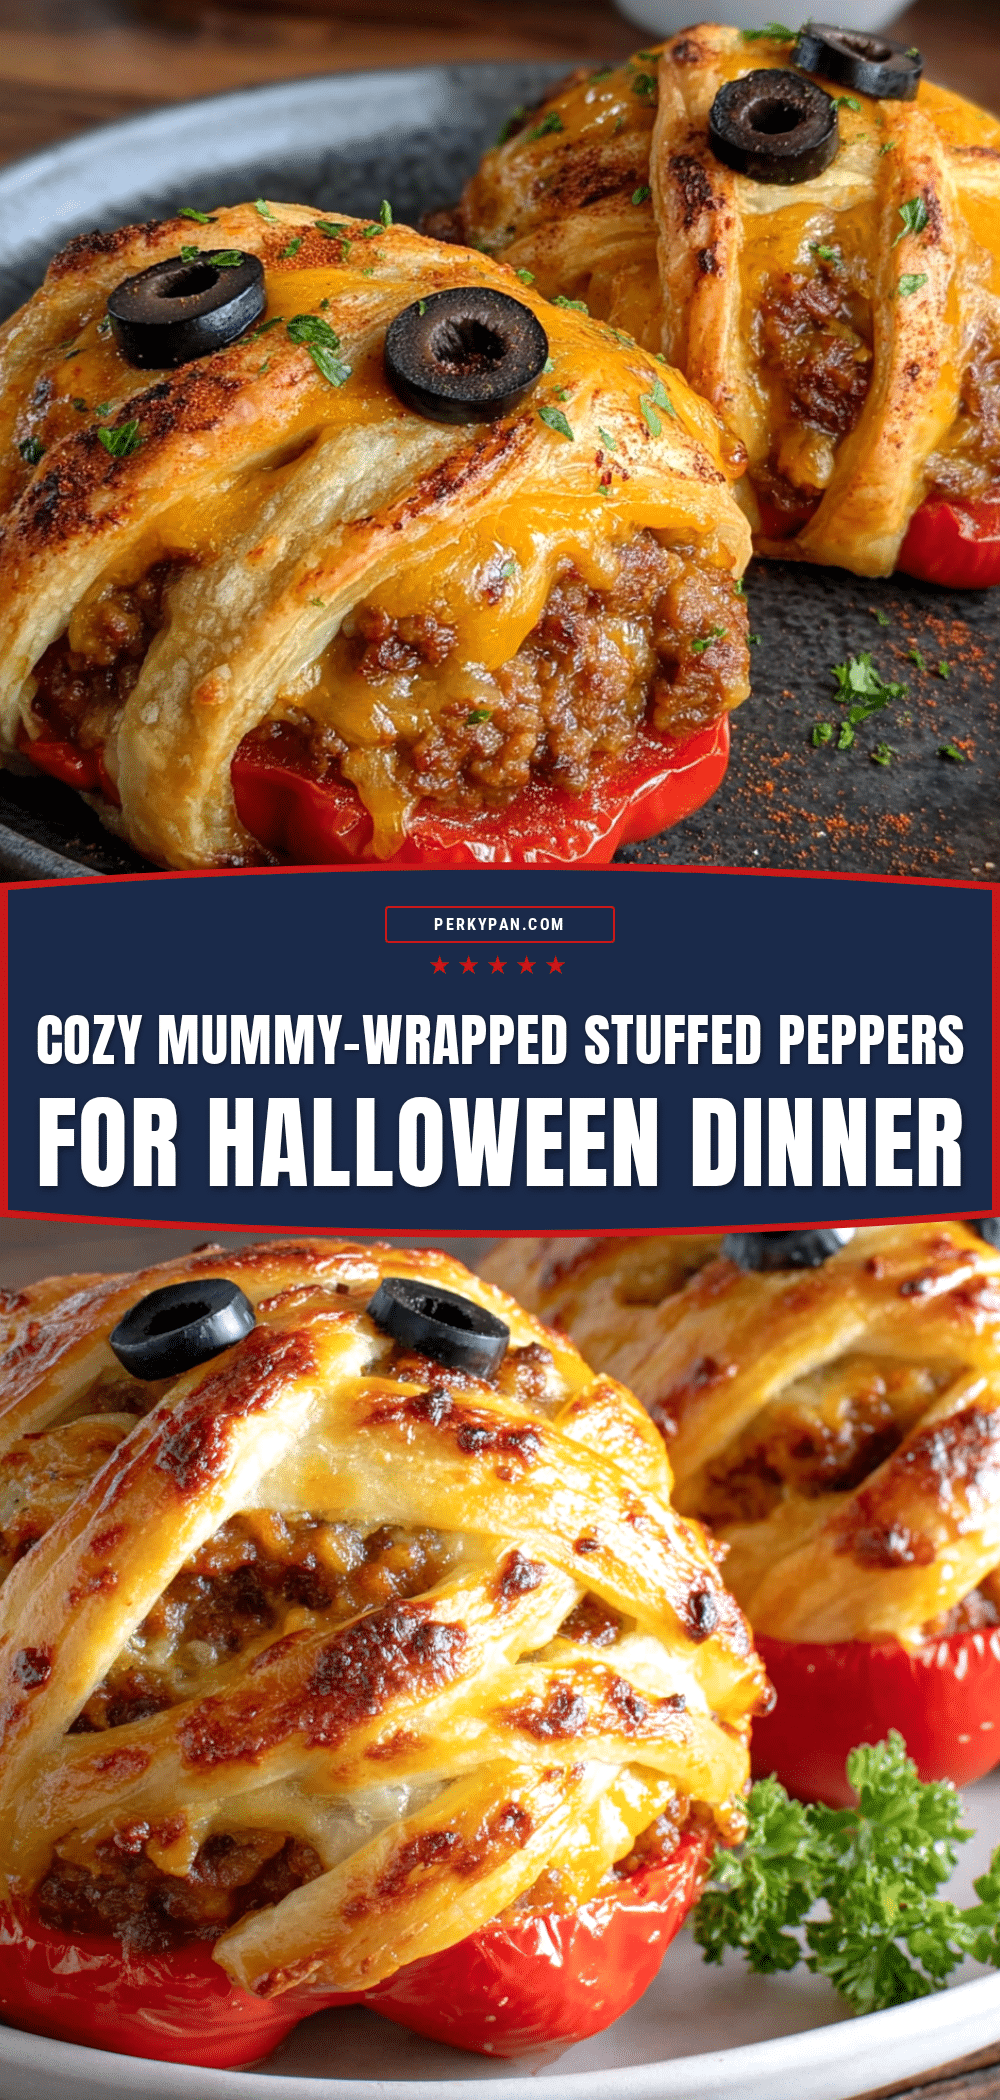
Cozy Mummy-Wrapped Stuffed Peppers: The Best Easy Halloween Dinner
These mummy-wrapped stuffed peppers are a fun and delicious Halloween dinner, featuring tender bell peppers filled with a savory meat and rice mixture, wrapped in golden, flaky crescent roll strips. A kid-friendly recipe that’s quick to assemble and perfect for a festive fall meal.
- Prep Time: 20 minutes
- Cook Time: 25 minutes
- Total Time: 45 minutes
- Yield: 4 servings 1x
- Category: Main Course
- Cuisine: American
Ingredients
- 4 large bell peppers (any color, red and orange recommended)
- 1 pound ground beef or turkey (85/15 recommended)
- 1 cup cooked rice (white, brown, or cauliflower rice)
- 1 small onion, finely diced (about 1/2 cup)
- 2 cloves garlic, minced (or 1 teaspoon garlic powder)
- 1 can (15 ounces) tomato sauce
- 1 teaspoon dried Italian seasoning
- 1/2 teaspoon salt (plus more to taste)
- 1/4 teaspoon black pepper
- 1 cup shredded mozzarella cheese (part-skim or whole milk)
- 1 can (8 ounces) refrigerated crescent roll dough
- 2 tablespoons melted butter
- Candy eyes or small olive slices (for mummy faces)
Instructions
- Preheat oven to 375°F. Bring a large pot of water to a boil.
- Cut tops off bell peppers (about 1/2 inch from top) and remove seeds and membranes. Trim a thin slice off the bottom if needed to create a flat surface.
- Blanch peppers in boiling water for 3 minutes. Drain upside down on paper towels.
- In a large skillet over medium-high heat, cook ground beef until browned (5-7 minutes). Drain excess fat.
- Add diced onion and cook 2 minutes until softened. Add garlic and cook 30 seconds until fragrant.
- Reduce heat to low. Stir in cooked rice, tomato sauce, Italian seasoning, salt, and pepper. Simmer 2 minutes.
- Remove from heat and stir in half of the shredded mozzarella cheese. Adjust seasoning to taste.
- Spoon filling into each blanched pepper, packing gently but leaving about 1/4 inch space at the top.
- Place stuffed peppers upright in a 9×13 inch baking dish.
- Sprinkle remaining mozzarella cheese over the tops of the peppers.
- Open crescent roll dough and separate into triangles. Cut each triangle lengthwise into 3-4 strips (about 1/2 inch wide).
- Wrap dough strips around each pepper in a crisscross pattern, leaving small gaps and the top partially exposed. Press ends gently to secure.
- Brush melted butter over all dough strips.
- Bake for 20-25 minutes until dough is golden brown and puffed, and peppers are tender. Tent with foil if dough browns too quickly.
- Let cool 5 minutes, then press candy eyes or olive slices into the exposed pepper tops to create mummy faces. Serve immediately.
Notes
Blanching the peppers is key for tender texture. For make-ahead, assemble peppers up to 24 hours in advance and refrigerate; add 5 minutes to baking time. Leftovers keep in the refrigerator for up to 4 days. To freeze, assemble unbaked peppers and freeze for up to 3 months; bake from frozen, adding about 10 minutes. For vegetarian version, use plant-based crumble or black beans and quinoa. For gluten-free, use gluten-free crescent dough or skip wrapping.
Nutrition
- Serving Size: 1 stuffed pepper
- Calories: 420
- Sugar: 8
- Sodium: 750
- Fat: 18
- Saturated Fat: 8
- Carbohydrates: 35
- Fiber: 4
- Protein: 22
Keywords: Halloween dinner, stuffed peppers, mummy peppers, crescent roll, kid-friendly, fall recipe, easy dinner


