Love this? Save it for later!
Share the inspiration with your friends
I was standing in the dairy aisle last Tuesday—just trying to grab milk and get out—when a kid walked past with a bag of those soft-baked cookies from the bakery section. That buttery, vanilla-heavy smell hit me, and suddenly I was eight years old in my Aunt Lou’s tiny kitchen, watching her slide a single sheet pan out of the oven. She’d let the cookies cool just long enough so we wouldn’t burn our tongues, then hand me one still warm and gooey in the center. She passed away a few years back, and I haven’t thought about those afternoons in forever. But right there, in the fluorescent glare of the grocery store, I wanted that exact feeling back. Not a whole batch. Not a freezer full. Just six perfect cookies. One pan. One bowl. No leftovers tempting me at midnight.
So I went home and started testing. I mean, honestly, most small-batch cookie recipes are just regular recipes divided down, and they never turn out right. The ratios get weird, the texture changes, and you end up with flat disks or hockey pucks. I wanted cookies that tasted like the ones from my memory—crispy edges, soft centers, that deep brown sugar flavor—but without committing to three dozen of them. Let’s face it, I don’t need that kind of temptation in my life on a Tuesday night.
This recipe took me four tries to get right. The first batch was too cakey. The second spread into one giant cookie. The third had the texture right but the flavor fell flat. But that fourth batch? I pulled them out of the oven, let them rest for exactly two minutes, and took a bite. And you know that feeling when something tastes exactly like it’s supposed to? That was it. These are the cookies I’ve been chasing since that moment in the dairy aisle.
Why You’ll Love This Recipe
Look, I’ve tested dozens of small-batch cookie recipes over the years, and most of them are a letdown. They either make too many, use weird ingredients, or just don’t taste right. This one is different. Here’s why you’ll actually want to make it on a regular weeknight:
- Quick & Easy: From start to finish, these are on your plate in under 25 minutes. No chilling required. No stand mixer needed. Just a bowl, a spoon, and your oven.
- Simple Ingredients: You probably have everything already. Butter, sugar, an egg (you’ll use just the yolk), flour, vanilla, baking soda, salt, and chocolate chips. No weird extracts or specialty flours.
- Perfect for Weeknight Cravings: This is the recipe for those evenings when you need something sweet but don’t want to spend an hour in the kitchen or have 24 cookies staring at you afterward.
- No Leftovers to Tempt You: Six cookies. That’s it. You eat them, you’re satisfied, and you move on with your life. No Tupperware of stale cookies on your counter for three days.
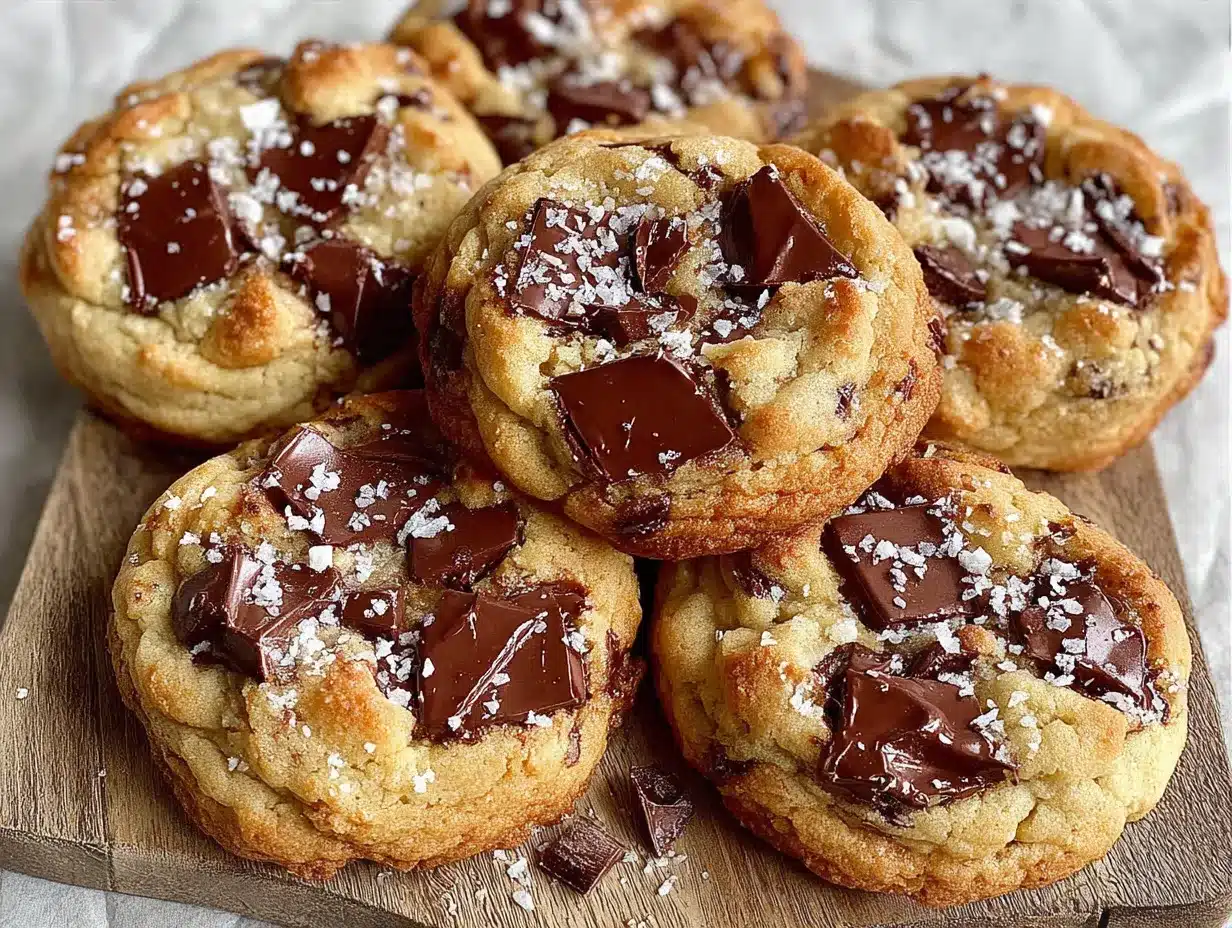
- Actually Delicious: These aren’t just “good for a small batch.” They’re genuinely great cookies. Crispy on the edges, soft and chewy in the middle, with that perfect balance of salty and sweet.
What makes this recipe different from the other small-batch recipes out there is the technique. Most recipes just scale down a full batch, which messes up the ratios. I developed this one from scratch specifically for six cookies. Using just an egg yolk instead of a whole egg gives you that chewy texture without making the dough too wet. And browning the butter? That’s the secret to getting deep, complex flavor in a small batch without needing extra ingredients or resting time.
These are the cookies you make when you’ve had a long day and just need something warm and familiar. They’re comfort food that doesn’t require a project. And honestly? They’re the kind of cookies that make you close your eyes after the first bite.
What Ingredients You Will Need
This recipe uses simple, everyday ingredients to create cookies that taste anything but ordinary. The key is in how you handle them, not what you buy. Here’s what you’ll need and why each one matters:
For the Cookie Dough
- Unsalted butter, 3 tablespoons (42g): We’re browning this, so unsalted is important—it lets you control the salt level. I use Kerrygold when I have it, but any good unsalted butter works. The browning step is what gives these cookies their nutty, caramel-like depth without needing extra ingredients.
- Light brown sugar, ¼ cup packed (50g): This is non-negotiable for chewy cookies. Brown sugar has molasses in it, which adds moisture and that deep, almost toffee-like flavor. Pack it firmly into your measuring cup—don’t be shy.
- Granulated sugar, 2 tablespoons (25g): Just enough to help with spreading and give the edges that slight crispness. The combination of both sugars is what gives you that perfect texture contrast.
- Egg yolk, 1 large: This is the secret to a small batch. Using just the yolk gives you richness and tenderness without making the dough too wet. Save the white for scrambled eggs tomorrow morning.
- Vanilla extract, ½ teaspoon: Use real vanilla if you can. The artificial stuff has a chemical aftertaste that really stands out in a small batch. I like Nielsen-Massey, but any pure vanilla works.
- All-purpose flour, ½ cup plus 1 tablespoon (72g): Spoon and level it—don’t scoop directly with your measuring cup or you’ll pack in too much flour and get dry cookies. This is the most common mistake people make.
- Baking soda, ¼ teaspoon: Helps the cookies spread just the right amount and gives them that slightly craggy top. Make sure it’s fresh—test it by dropping a bit in vinegar; if it fizzes, you’re good.
- Salt, ¼ teaspoon: I use fine sea salt here. It balances the sweetness and enhances the chocolate. Don’t skip it—salty cookies are better cookies.
- Semi-sweet chocolate chips, ⅓ cup (60g): I prefer Ghirardelli or Guittard for the best flavor and melt. You can also chop up a chocolate bar for bigger, more irregular puddles of chocolate. If you like darker cookies, use 60% cacao chips.
Ingredient Substitution Tips: If you’re out of brown sugar, you can mix ¼ cup white sugar with 1 tablespoon molasses. For a dairy-free version, use vegan butter sticks (not tub margarine) and dairy-free chocolate chips. If you only have salted butter, reduce the added salt to ⅛ teaspoon. And if you’re gluten-free, swap the all-purpose flour for a 1:1 gluten-free baking flour blend—I’ve had good results with Bob’s Red Mill.
Equipment Needed
You don’t need fancy equipment for these cookies, which is exactly how weeknight baking should be. Here’s what you’ll need:
- Small saucepan: For browning the butter. A light-colored pan is best so you can see the butter change color. I use my small All-Clad, but any small saucepan works.
- Mixing bowl: One medium bowl is all you need. I use a glass Pyrex bowl because it’s easy to see if everything’s mixed well.
- Whisk or wooden spoon: A whisk works best for combining the wet ingredients, but a wooden spoon or silicone spatula will do fine for the final mixing.
- Rubber spatula: For scraping every last bit of browned butter out of the pan—don’t waste that flavor.
- Baking sheet: A half-sheet pan is perfect. If you only have a dark nonstick pan, keep an eye on the cookies—they’ll brown faster.
- Parchment paper or silicone baking mat: Parchment is cheaper and works great. A silicone mat also works but may give slightly softer bottoms.
- Cookie scoop or tablespoon: A #40 cookie scoop (about 1.5 tablespoons) makes perfectly uniform cookies. If you don’t have one, just use a regular tablespoon and your hands.
- Cooling rack: Optional but helpful for getting those crispy edges. A plate works in a pinch.
Budget-Friendly Tip: Don’t run out and buy a cookie scoop for this. A regular spoon works fine—just make sure each portion is roughly the same size so they bake evenly. And if you don’t have parchment paper, you can grease the pan lightly with butter or cooking spray.
Preparation Method
Alright, let’s make some cookies. This whole process takes about 20 minutes from start to finish, so preheat your oven to 350°F (175°C) right now and line your baking sheet with parchment paper.
- Brown the butter (5 minutes): Put the 3 tablespoons of butter in your small saucepan over medium heat. Let it melt completely, then swirl the pan occasionally. After about 3-4 minutes, you’ll hear it start to crackle and pop—that’s the water evaporating. Keep watching. The butter will foam up, then the foam will subside, and you’ll see golden brown specks forming at the bottom. The moment it smells nutty and turns a warm amber color, take it off the heat. Don’t walk away during this step—burnt butter happens fast and there’s no coming back from it.
- Cool the butter slightly (2 minutes): Pour the browned butter into your mixing bowl, scraping every bit out with your spatula. Let it sit for 2 minutes to cool down. If you add the sugar while it’s too hot, it’ll melt the sugar and your cookies will spread too much. Trust me, I learned this the hard way on attempt number two.
- Mix the sugars and butter (1 minute): Add the brown sugar and granulated sugar to the warm butter. Whisk them together until they’re well combined and look like wet sand. It should be smooth, not grainy. This takes about 30 seconds of vigorous whisking.
- Add the egg yolk and vanilla (30 seconds): Drop in the egg yolk and vanilla extract. Whisk until everything is smooth and slightly thickened—it should look like caramel sauce. The mixture might look a little shiny, which is good.
- Add the dry ingredients (1 minute): Sprinkle the flour, baking soda, and salt over the wet mixture. Use a rubber spatula or wooden spoon to fold everything together. Stir just until you don’t see any more streaks of flour—overmixing will make the cookies tough. The dough should be soft and slightly sticky but hold together when pressed.
- Fold in the chocolate chips (30 seconds): Add the chocolate chips and fold them in gently. Make sure they’re evenly distributed throughout the dough. If you want a few chips on top for looks, reserve a handful to press into the dough balls later.
- Portion the dough (2 minutes): Use your cookie scoop or a tablespoon to scoop out 6 equal portions of dough. Each should be about 1.5 tablespoons. Roll them into balls with your hands—they don’t need to be perfect, just round. Place them on the prepared baking sheet, spacing them about 2 inches apart. These won’t spread too much, so 6 should fit fine on a standard sheet pan.
- Bake (9-11 minutes): Pop the sheet into your preheated oven. Bake for 9 minutes for soft, chewy cookies, or 11 minutes for slightly crisper edges. At 10 minutes, you’ll get the perfect middle ground. The cookies should look puffy, golden around the edges, and still slightly soft in the center when you pull them out. They’ll continue cooking on the hot pan.
- Cool on the pan (2 minutes): Leave the cookies on the baking sheet for exactly 2 minutes. This is crucial—if you try to move them too soon, they’ll fall apart. After 2 minutes, transfer them to a cooling rack or a plate. The bottoms will be perfectly golden.
- Enjoy warm (immediately): These are best eaten within 30 minutes of baking. Grab one while it’s still warm—the chocolate will be melty and the edges perfectly crisp. You deserve it.
Visual Cue: At the 8-minute mark, your kitchen should smell like a bakery. The cookies will look puffy and pale on top but golden brown around the very edges. If the edges are dark brown, you’ve gone too far.
Cooking Tips & Techniques
After four failed batches and countless tweaks, here’s what I’ve learned about making these cookies perfect every time:
Don’t skip browning the butter. I know it adds an extra step, but it’s the single most important technique in this recipe. Browning the butter evaporates the water and toasts the milk solids, giving you a nutty, caramel flavor that you can’t get any other way. Plus, since this is a small batch without any resting time, the browned butter adds complexity that would normally develop overnight in the fridge.
Use a light-colored pan for browning. Dark pans make it hard to see the color change, and you’ll end up with burnt butter more often than not. If you only have dark pans, watch closely and take the butter off the heat as soon as you see the first brown specks.
Weigh your flour if you can. I know, I know—measuring cups are easier. But flour is notoriously inconsistent when measured by volume. One person’s “cup” can be 20% more than another’s. If you have a kitchen scale, use 72 grams of flour. If not, spoon the flour into your measuring cup and level it off with a knife. Never scoop directly with the cup.
The egg yolk trick. Using just the yolk instead of a whole egg is what makes these cookies chewy instead of cakey. The white adds too much moisture for a small batch. Save the white for breakfast or freeze it for later use.
Chill if you have time, but don’t stress. These cookies work perfectly without chilling, which is the whole point. But if you have 30 minutes to spare, popping the dough balls in the fridge will give you slightly thicker, chewier cookies. Just add 1-2 minutes to the bake time.
My biggest failure: On my third attempt, I forgot to add the salt. The cookies tasted flat and one-dimensional. Salt isn’t just for saltiness—it enhances the chocolate and balances the sweetness. Don’t skip it.
Variations & Adaptations
Once you’ve mastered the basic recipe, here are some ways to switch it up based on what you have or what you’re craving:
- Double Chocolate: Replace 1 tablespoon of flour with 1 tablespoon of unsweetened cocoa powder. Use white chocolate chips or milk chocolate chips for contrast. You’ll get a rich, dark cookie that feels decadent.
- Add Nuts: Toast ¼ cup of chopped pecans or walnuts in a dry pan for 3-4 minutes, let them cool, then fold them in with the chocolate chips. The crunch adds a lovely texture contrast.
- Sea Salt Finish: Before baking, sprinkle a tiny pinch of flaky sea salt (like Maldon) on top of each dough ball. The salt crystals on top give you little bursts of saltiness that make the chocolate taste even richer.
- Gluten-Free Version: Swap the all-purpose flour for a 1:1 gluten-free baking flour blend that contains xanthan gum. I’ve used King Arthur’s Measure for Measure with great results. The texture will be slightly more tender, but still delicious.
- Vegan Option: Use vegan butter sticks (not tub margarine) and a flax egg (1 tablespoon ground flaxseed mixed with 2.5 tablespoons water, let sit for 5 minutes). Use dairy-free chocolate chips. The texture will be slightly less chewy, but still very good.
- Add-ins: Try swapping half the chocolate chips for butterscotch chips, peanut butter chips, or chopped dried cherries. Or add ¼ cup of shredded coconut for a tropical twist.
My personal favorite variation: I make these with dark chocolate chunks (chopped from a 70% cacao bar) and a sprinkle of smoked sea salt on top. The smoky salt with the dark chocolate and browned butter is absolutely killer.
Serving & Storage Suggestions
These cookies are best enjoyed warm, within 30 minutes of baking. That’s when the edges are crisp, the center is soft, and the chocolate is still melty. Here’s how to make the most of them:
Serving: Serve them on a small plate with a glass of cold milk or a hot cup of coffee. For an extra treat, sandwich two cookies with a scoop of vanilla ice cream for an instant ice cream sandwich. If you’re feeling fancy, drizzle a little melted chocolate or caramel sauce over the top.
Storage: If you somehow have leftovers (it happens, I guess), store them in an airtight container at room temperature for up to 3 days. They’ll lose their crisp edges and become soft all the way through, which some people actually prefer. To restore some crispness, pop them in a 300°F oven for 3-4 minutes.
Freezing: You can freeze the unbaked dough balls on a parchment-lined baking sheet until solid, then transfer them to a freezer bag. They’ll keep for up to 3 months. Bake from frozen, adding 2-3 minutes to the bake time. This is perfect for those nights when you want just one or two cookies without making a whole batch.
Reheating: Microwave a cookie for 8-10 seconds to get that just-baked softness back. Or use a toaster oven at 300°F for 3-4 minutes for crisper edges.
Flavor development: These cookies actually taste even better the next day—the flavors meld together and the texture evens out. They won’t be as crispy, but they’ll be deeply delicious. Store them with a slice of bread in the container to keep them soft.
Nutritional Information & Benefits
Let’s be real—these are cookies, not health food. But here’s the nutritional breakdown for one cookie (based on the recipe making 6):
| Nutrient | Amount per Cookie |
|---|---|
| Calories | 210 |
| Total Fat | 11g |
| Saturated Fat | 7g |
| Cholesterol | 45mg |
| Sodium | 180mg |
| Total Carbohydrates | 27g |
| Dietary Fiber | 1g |
| Sugars | 18g |
| Protein | 2g |
Health Considerations: Dark chocolate contains antioxidants and may have heart health benefits. The brown sugar provides a small amount of minerals like calcium and iron. Using butter instead of margarine means no artificial trans fats. And because this recipe makes only six cookies, portion control is built right in.
Dietary Notes: This recipe contains gluten (from the flour), dairy (from the butter), and eggs. See the variations section for gluten-free and vegan adaptations. The recipe is nut-free as written, but check your chocolate chips for cross-contamination if you have allergies.
My take: I believe in enjoying treats in moderation. These cookies are made with real ingredients, no preservatives, and no artificial anything. If you’re going to have a cookie, have a really good one—and these are really, really good.
Conclusion
These quick small batch chocolate chip cookies are exactly what weeknight baking should be—simple, fast, and deeply satisfying. They give you that warm, melty, just-baked experience without the commitment of a full batch or the hassle of complicated techniques. In less time than it takes to watch an episode of your favorite show, you can have six perfect cookies that taste like they came from a bakery.
I’ve made these cookies more times than I can count, and they never disappoint. They’ve gotten me through stressful deadlines, quiet Tuesday nights, and sudden cravings that just wouldn’t quit. And every time I pull that sheet pan out of the oven, I think about Aunt Lou and her tiny kitchen and how something so simple can feel so special.
Now it’s your turn. Try this recipe and let me know how it goes. Did you add your own twist? Did you eat all six in one sitting (no judgment here)? Drop a comment below and share your experience. And if you loved these, you might also enjoy my quick small batch brownies for another weeknight treat.
Happy baking, friends. You’ve got this.
Frequently Asked Questions
Can I use salted butter instead of unsalted?
Yes, you can. Just reduce the added salt in the recipe to ⅛ teaspoon. The cookies will still taste great, but you’ll have less control over the final salt level. If you’re using salted butter, skip the extra salt entirely.
Why did my cookies spread too much?
This usually happens for one of three reasons: your butter was too hot when you mixed it, you used too much sugar, or your baking soda is old. Make sure the browned butter cools for at least 2 minutes before adding the sugar, and always use fresh baking soda.
Can I double this recipe?
Absolutely. Just double all the ingredients and use one whole egg instead of two yolks. The bake time might increase by 1-2 minutes. This makes 12 cookies, which is still a manageable batch for most households.
How do I know when the cookies are done?
Look for golden brown edges and a puffy, slightly soft center. The cookies will look underdone in the middle when you pull them out—that’s perfect. They’ll continue cooking on the hot pan for the 2-minute rest period. If they look fully set, they’re overbaked.
Can I make the dough ahead of time?
Yes! You can make the dough, scoop it into balls, and refrigerate them for up to 48 hours. Just cover them with plastic wrap. When you’re ready to bake, add 1-2 minutes to the bake time. The cookies will actually be slightly chewier and more flavorful after resting.
Pin This Recipe!
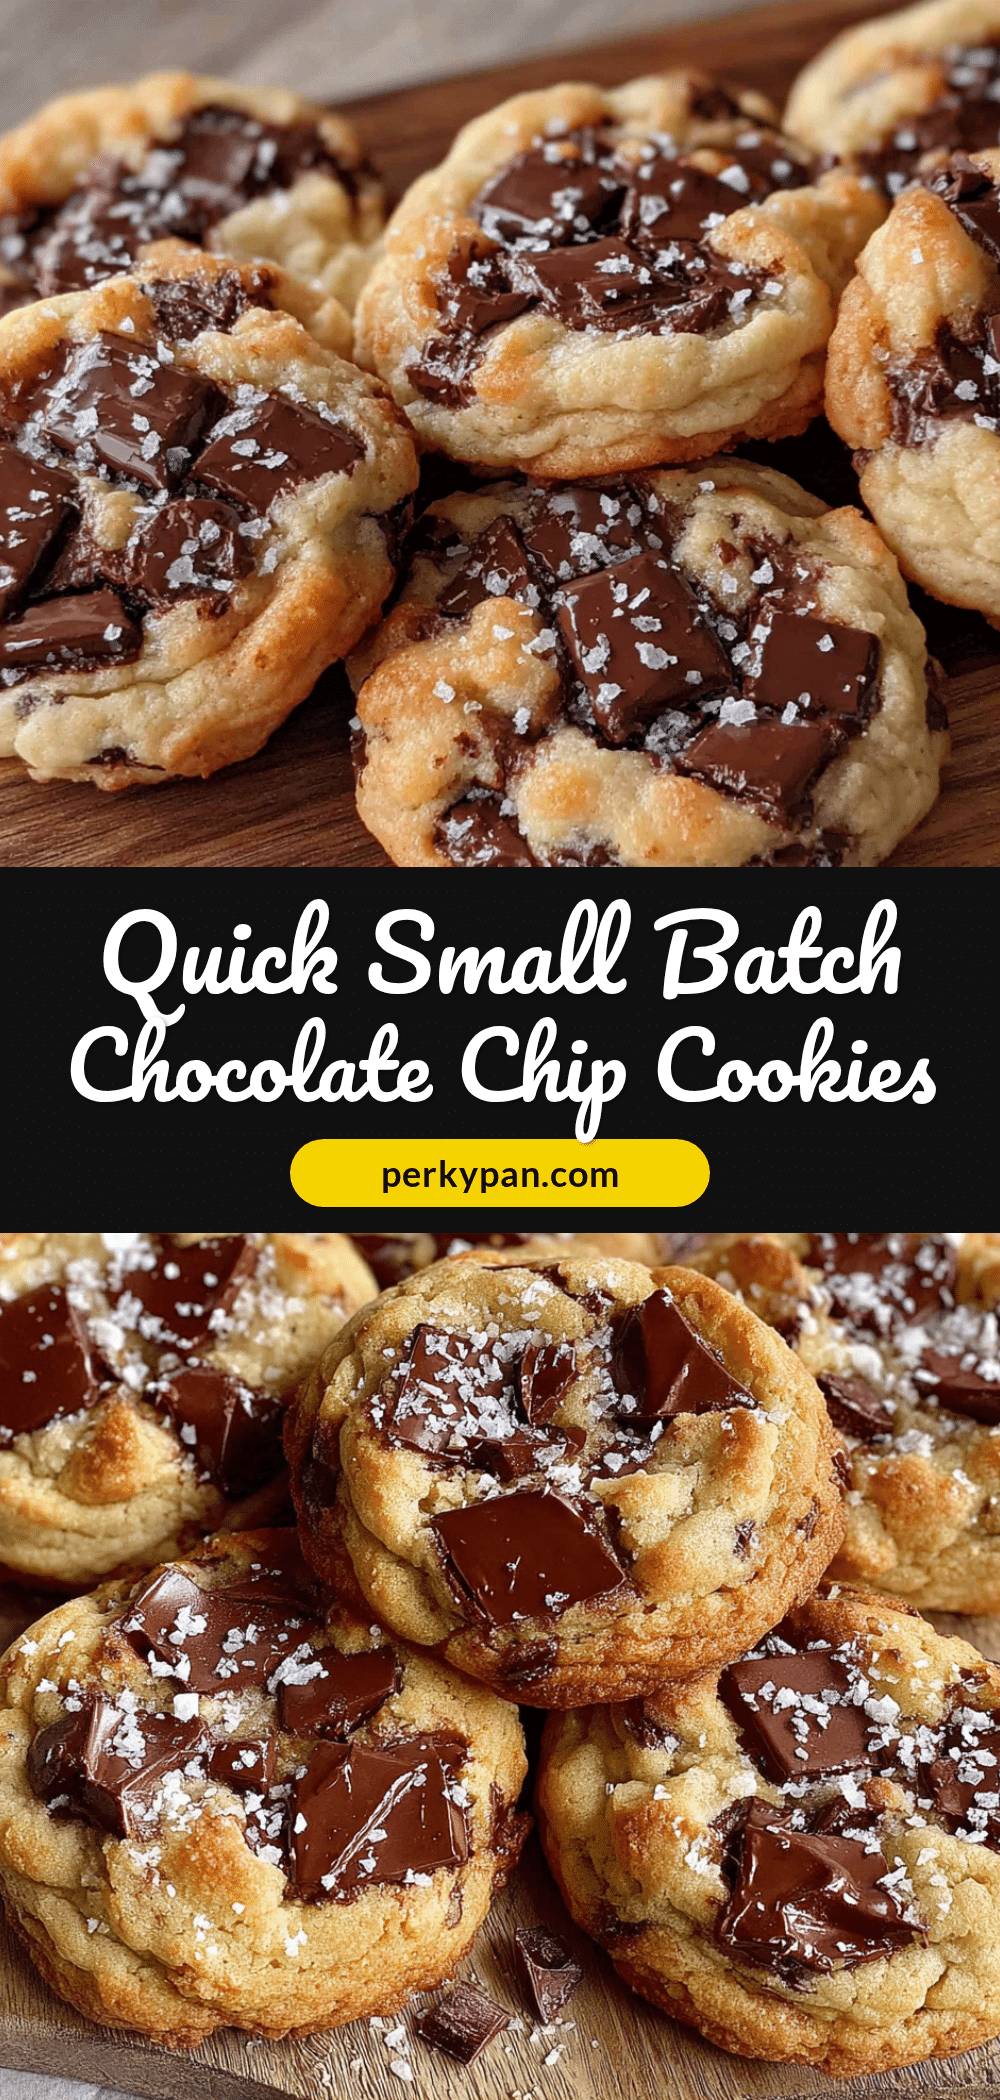
6 Quick Small Batch Chocolate Chip Cookies: Easy, Perfect, & Done

These quick small batch chocolate chip cookies are exactly what weeknight baking should be—simple, fast, and deeply satisfying. They give you that warm, melty, just-baked experience without the commitment of a full batch or the hassle of complicated techniques.
- Prep Time: 10 minutes
- Cook Time: 10 minutes
- Total Time: 20 minutes
- Yield: 6 cookies 1x
- Category: Dessert
- Cuisine: American
Ingredients
- 3 tablespoons unsalted butter (42g)
- ¼ cup packed light brown sugar (50g)
- 2 tablespoons granulated sugar (25g)
- 1 large egg yolk
- ½ teaspoon vanilla extract
- ½ cup plus 1 tablespoon all-purpose flour (72g)
- ¼ teaspoon baking soda
- ¼ teaspoon salt
- ⅓ cup semi-sweet chocolate chips (60g)
Instructions
- Preheat oven to 350°F (175°C) and line a baking sheet with parchment paper.
- Brown the butter: In a small saucepan over medium heat, melt 3 tablespoons butter. Swirl occasionally until it crackles, foams, then turns amber with brown specks and a nutty aroma (about 3-4 minutes). Remove from heat immediately.
- Cool the butter: Pour browned butter into a mixing bowl and let sit for 2 minutes to cool slightly.
- Mix sugars and butter: Add brown sugar and granulated sugar to the warm butter. Whisk vigorously until combined and looks like wet sand (about 30 seconds).
- Add egg yolk and vanilla: Add egg yolk and vanilla extract. Whisk until smooth and slightly thickened, like caramel sauce (about 30 seconds).
- Add dry ingredients: Sprinkle flour, baking soda, and salt over the wet mixture. Fold with a rubber spatula or wooden spoon just until no streaks of flour remain. Do not overmix.
- Fold in chocolate chips: Add chocolate chips and fold gently until evenly distributed. Reserve a few chips to press on top if desired.
- Portion dough: Scoop 6 equal portions (about 1.5 tablespoons each) and roll into balls. Place on prepared baking sheet, spacing 2 inches apart.
- Bake: Bake for 9-11 minutes. At 9 minutes for soft chewy, 11 for crisper edges, or 10 for perfect middle ground. Cookies should look puffy, golden around edges, and soft in center.
- Cool on pan: Leave cookies on baking sheet for exactly 2 minutes. Then transfer to a cooling rack or plate.
- Enjoy warm: Best eaten within 30 minutes of baking while chocolate is melty and edges are crisp.
Notes
Don’t skip browning the butter—it adds deep flavor. Use a light-colored pan for browning to see color change. Weigh flour if possible (72g). Using just egg yolk makes cookies chewy instead of cakey. Chilling dough for 30 minutes gives thicker cookies but is not required. For best results, eat within 30 minutes of baking.
Nutrition
- Serving Size: 1 cookie
- Calories: 210
- Sugar: 18
- Sodium: 180
- Fat: 11
- Saturated Fat: 7
- Carbohydrates: 27
- Fiber: 1
- Protein: 2
Keywords: small batch chocolate chip cookies, quick cookies, easy cookies, weeknight baking, no chill cookies