Love this? Save it for later!
Share the inspiration with your friends
There used to be a tiny British pub tucked away on a side street in Portland called The Queen’s Head that made a chicken pot pie that ruined me for all others. When they closed suddenly in 2018 — the landlord tripled the rent, the rumor went — I actually mourned it. That sounds dramatic, I know. But honestly, if you’d tasted that pie, you’d get it.
After seventeen tries — seventeen, let me tell you, with some truly sad, soggy disasters in between — I finally cracked the code. The secret wasn’t some fancy technique or imported butter. It was patience, which is not my strong suit, and trusting the process even when the filling looked a little loose going into the oven. I burned my hand on the third attempt, forgot the thyme on the fifth, and on the ninth try, I used frozen peas that turned into sad little gray marbles. But that seventeenth pie? My husband actually got quiet after the first bite. That’s his version of a standing ovation.
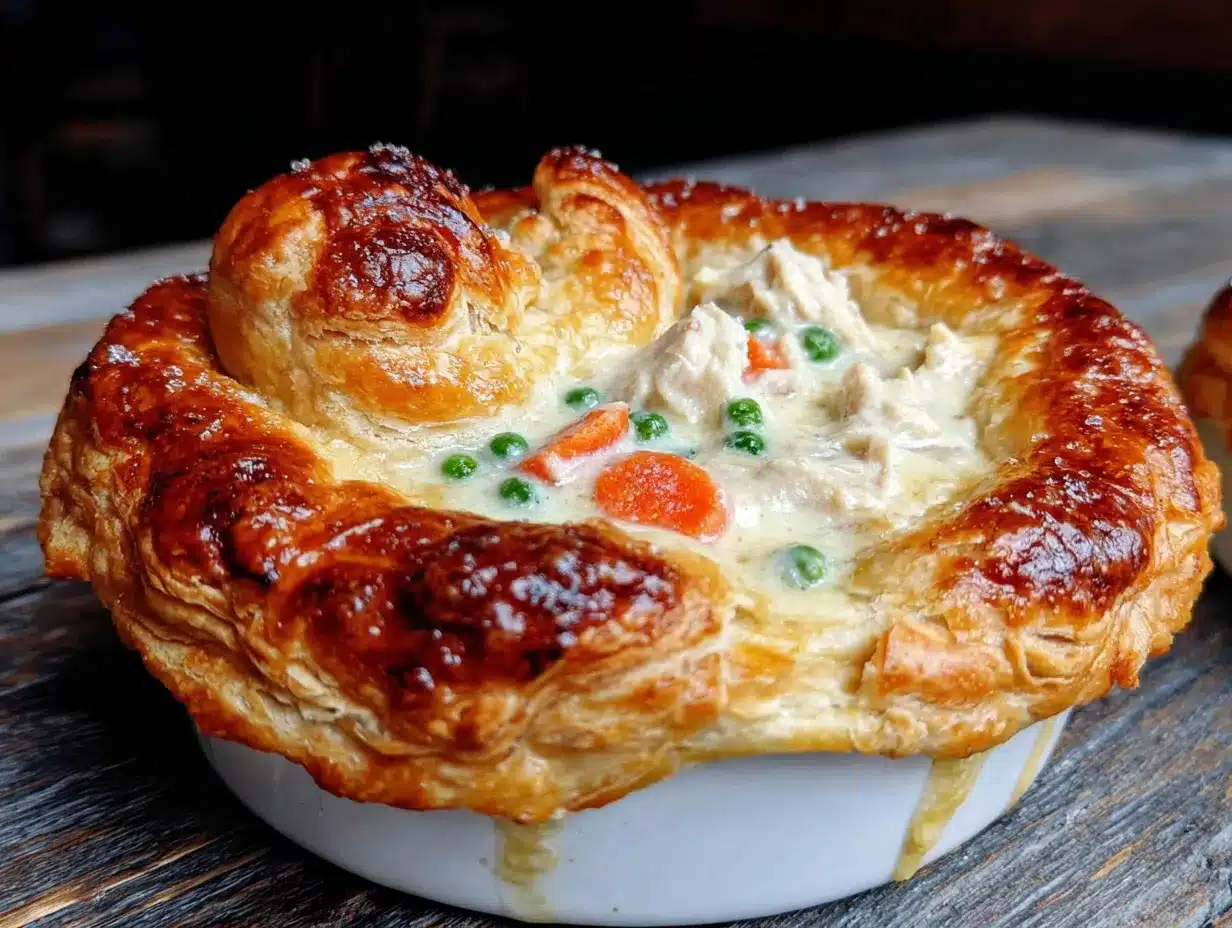
This classic chicken pot pie with flaky crust is the one I now bring to every potluck and holiday gathering I’m invited to. It’s the dish people ask me to make when they’re having a rough week or celebrating something big. And maybe you’ve been there — standing in the grocery aisle staring at frozen pot pies, knowing there has to be something better out there. There is. And it starts with a real, honest-to-goodness flaky crust and a filling so creamy and rich you’ll want to eat it with a spoon before it even hits the pastry.
Why You’ll Love This Recipe
This isn’t just another chicken pot pie recipe you’ll find floating around the internet. I’ve tested this version for dinner parties, casual Sunday suppers, and even a New Year’s Eve gathering where it disappeared in under fifteen minutes. Here’s why it works every single time:
- Crowd-Pleasing Comfort : This is the dish that makes people close their eyes on the first bite. The creamy filling, tender chicken, and that impossibly flaky crust — it’s pure comfort in a dish.
- Make-Ahead Friendly : You can assemble this pot pie a day before your guests arrive and just pop it in the oven. That’s a game-changer when you’re hosting and juggling a million other things.
- Simple Ingredients : Nothing fancy here. Butter, flour, chicken, vegetables, and a few pantry staples. No trips to specialty stores required.
- Perfect for Gatherings : Whether it’s a holiday dinner, a potluck, or just a cozy night with friends, this pie serves eight generously and looks stunning on the table.
- Unbelievably Flaky Crust : I’m not exaggerating when I say this crust shatters when you cut into it. The secret is ice-cold butter and not overworking the dough — I learned that the hard way after making hockey pucks for years.
What makes this recipe different from all the others? It’s the technique — you par-bake the bottom crust so it stays crispy, and you cook the filling just until it thickens before adding it to the pie. No more soggy bottoms or watery fillings. This is the version I’d serve to anyone I wanted to impress, and I have. Many times.
What Ingredients You Will Need
This recipe uses simple, honest ingredients that come together to create something truly special. Most of these are probably already in your kitchen, which makes this perfect for those “I need to bring something impressive” moments.
For the Flaky Pie Crust
- 2 ½ cups all-purpose flour (I prefer King Arthur for consistent results)
- 1 teaspoon salt
- 1 cup unsalted butter, very cold and cut into small cubes (European-style butter like Plugrà works beautifully here — higher butterfat means flakier crust)
- 6 to 8 tablespoons ice water (you might not need all of it)
For the Chicken Filling
- 2 tablespoons unsalted butter
- 1 medium yellow onion, diced
- 3 medium carrots, peeled and diced
- 2 celery stalks, diced
- 3 cloves garlic, minced
- ⅓ cup all-purpose flour
- 2 cups chicken broth (low-sodium is best so you can control the salt)
- 1 cup whole milk (half-and-half works too for an extra-rich filling)
- 3 cups cooked chicken, shredded or cubed (rotisserie chicken is my secret weapon here)
- 1 cup frozen peas (no need to thaw them first)
- 1 teaspoon dried thyme
- ½ teaspoon dried rosemary
- Salt and black pepper to taste
- 1 egg, beaten with 1 tablespoon water (for the egg wash)
I always use rotisserie chicken for this recipe — it’s already seasoned and tender, and it saves you about forty minutes of cooking and shredding time. If you have leftover roasted chicken from a Sunday dinner, that works beautifully too. Just make sure the chicken is at room temperature when you add it to the filling, or it will cool everything down too much.
For the vegetables, I recommend dicing them all about the same size — a quarter-inch dice is perfect. That way they cook evenly and every bite has a little bit of everything. And don’t skip the fresh garlic. I know it’s tempting to use the jarred stuff, but fresh garlic really makes a difference in the depth of flavor here.
Equipment Needed
You don’t need a fancy kitchen to make this pot pie, but a few key tools will make your life much easier:
- 9-inch pie dish (a deep-dish one is ideal — this filling is generous)
- Large skillet or Dutch oven (for cooking the filling)
- Mixing bowls (one large for the dough, one medium for the filling)
- Pastry cutter or food processor (for cutting butter into flour — I use my fingers most of the time, honestly, but a pastry cutter is faster)
- Rolling pin (a wine bottle works in a pinch, I’ve been there)
- Plastic wrap (for chilling the dough)
- Pastry brush (for the egg wash)
- Baking sheet (place the pie dish on this to catch any drips)
If you don’t have a food processor, don’t worry. I actually prefer making pie crust by hand — it gives you more control, and you’re less likely to overwork the dough. Just use a pastry cutter or two forks to cut the butter into the flour until it looks like coarse meal with some pea-sized butter pieces remaining. Those little butter chunks are what create the flaky layers.
Preparation Method
Let me walk you through this step by step. I’ve made this pot pie so many times I could do it in my sleep, but I still follow these steps every time because they work.
- Make the pie crust. In a large bowl, whisk together the flour and salt. Add the cold butter cubes and cut them into the flour using a pastry cutter or your fingertips until the mixture looks like coarse crumbs with some butter pieces the size of peas. Drizzle in the ice water, one tablespoon at a time, tossing with a fork after each addition, until the dough just comes together when squeezed. You should be able to pinch it and have it hold its shape without crumbling.
- Divide and chill. Turn the dough out onto a lightly floured surface and divide it in half. Flatten each half into a disk about an inch thick, wrap tightly in plastic wrap, and refrigerate for at least 1 hour. This is the hardest part — waiting. But trust me, cold dough is happy dough.
- Prep your filling ingredients. While the dough chills, dice your onion, carrots, and celery. Mince the garlic. Shred your chicken if you haven’t already. Measure out your broth and milk. Having everything ready before you start cooking makes the whole process so much smoother.
- Cook the vegetables. In a large skillet or Dutch oven over medium heat, melt the 2 tablespoons of butter. Add the diced onion, carrots, and celery. Cook for 6 to 8 minutes, stirring occasionally, until the vegetables have softened and the onion is translucent. Add the minced garlic and cook for another minute until fragrant.
- Make the roux. Sprinkle the ⅓ cup of flour over the cooked vegetables and stir constantly for 2 minutes. This cooks out the raw flour taste and starts the thickening process. The mixture will look dry and pasty — that’s exactly what you want.
- Add the liquids. Slowly pour in the chicken broth while whisking continuously to prevent lumps. Then add the milk, still whisking. Bring the mixture to a gentle simmer — you’ll see bubbles just breaking the surface — and cook for 3 to 4 minutes until it thickens enough to coat the back of a spoon.
- Finish the filling. Stir in the shredded chicken, frozen peas, dried thyme, dried rosemary, and salt and pepper to taste. Taste it here — this is your chance to adjust the seasoning. Remove from heat and let the filling cool slightly while you roll out the dough.
- Preheat and par-bake. Preheat your oven to 400°F (200°C). On a lightly floured surface, roll out one disk of dough to about 12 inches in diameter, about ⅛-inch thick. Gently transfer it to your 9-inch pie dish, pressing it into the bottom and up the sides. Trim the excess dough, leaving about a half-inch overhang. Prick the bottom of the crust all over with a fork, line it with parchment paper, and fill with pie weights or dried beans. Bake for 12 minutes, then remove the weights and parchment and bake for another 5 minutes until the bottom looks dry and just barely golden.
- Fill and top. Pour the chicken filling into the par-baked crust, spreading it evenly. Roll out the second disk of dough to the same size and place it over the filling. Pinch the edges of the top and bottom crusts together to seal, then crimp as desired. Cut 4 to 5 slits in the top crust to allow steam to escape. Brush the top crust with the egg wash — this gives it that gorgeous golden color.
- Bake to perfection. Place the pie dish on a baking sheet to catch any drips and bake for 30 to 35 minutes, until the crust is deep golden brown and the filling is bubbling up through the slits. Let the pie rest on a wire rack for at least 15 minutes before slicing. I know it’s hard to wait, but this step is crucial — the filling needs time to set so it doesn’t run all over your plate.
Cooking Tips & Techniques
I’ve made every mistake in the book with this recipe, so you don’t have to. Here’s what I’ve learned the hard way:
Keep everything cold for the crust. I cannot stress this enough. If your butter starts to soften while you’re working it into the flour, pop the bowl in the fridge for 10 minutes. Warm butter melts into the flour instead of creating those steam pockets that make the crust flaky. I once made a crust in a hot kitchen with the AC broken, and it turned out tough and greasy. Never again.
Don’t skip the par-bake. This is the step that separates a great pot pie from a soggy disaster. Par-baking the bottom crust ensures it stays crispy even under all that creamy filling. The first few times I made pot pie, I skipped this step because I was impatient, and the bottom crust was always a sad, doughy mess.
Let the filling cool before adding it to the crust. If you pour hot filling into your par-baked crust, it will steam the bottom and make it soggy. I usually let the filling sit for about 10 minutes while I’m rolling out the top crust. It’s the perfect timing.
Use a baking sheet. I learned this one the messy way. Pot pies bubble over sometimes, especially if you fill them generously. Putting the pie dish on a baking sheet saves you from scrubbing burnt filling off the bottom of your oven.
Let it rest. I know the smell filling your kitchen is intoxicating, and everyone is hovering with forks, but please let the pie rest for at least 15 minutes. The filling needs to set up so you get clean slices instead of a soupy mess. Use this time to set the table or toss a salad.
Variations & Adaptations
One of the best things about this chicken pot pie is how adaptable it is. Here are some variations I’ve tried and loved:
Vegetarian Version: Swap the chicken for 3 cups of mixed mushrooms — cremini, shiitake, and oyster mushrooms work beautifully. Sauté them until they release their liquid and start to brown before adding the vegetables. Use vegetable broth instead of chicken broth. I made this for a vegetarian friend’s birthday dinner, and she said it was the best pot pie she’d ever had.
Gluten-Free Adaptation: Use a gluten-free all-purpose flour blend for both the crust and the roux. King Arthur’s gluten-free measure-for-measure flour works really well here. Just note that gluten-free crusts are more fragile, so handle them gently. I’ve had good results adding a teaspoon of xanthan gum to help with structure.
Herb-Forward Twist: Add a tablespoon of fresh chopped parsley and a teaspoon of fresh chopped tarragon to the filling along with the other herbs. Tarragon and chicken are a match made in heaven, and it gives the pot pie a slightly fancy, restaurant-quality flavor.
Individual Pot Pies: This recipe also works beautifully as individual servings. Use 4 to 6 ramekins or small oven-safe bowls. Par-bake isn’t necessary for individual pies since they bake faster and the crust-to-filling ratio is different. Bake for about 20 to 25 minutes.
Make It Ahead: Assemble the entire pot pie (without the egg wash) and refrigerate it, covered, for up to 24 hours. When you’re ready to bake, brush with the egg wash and add about 10 minutes to the baking time since you’re starting from cold. This is my go-to strategy for dinner parties.
Serving & Storage Suggestions
This chicken pot pie is a showstopper on its own, but here’s how to make it a full meal:
Serving Temperature: Serve the pot pie warm, not piping hot. Letting it rest for 15 to 20 minutes after baking allows the filling to set and the flavors to meld. The crust should be golden and flaky, the filling creamy and steaming.
What to Serve Alongside: A simple green salad with a bright vinaigrette is the perfect contrast to the rich, creamy pot pie. I love a mix of arugula, spinach, and some shaved Parmesan with a lemon-Dijon dressing. Roasted green beans or steamed asparagus also work beautifully for a more substantial side.
Storage Instructions: Leftover pot pie keeps well in the refrigerator for up to 4 days. Cover the dish tightly with foil or plastic wrap. The crust will soften a bit in the fridge, but it’s still delicious.
Reheating Methods: For the best results, reheat individual slices in a 350°F (175°C) oven for about 15 minutes. This helps re-crisp the crust. You can also use the microwave in a pinch, but the crust will be soft. I actually love cold pot pie straight from the fridge the next day — don’t judge me.
Freezer Instructions: You can freeze the fully baked pot pie for up to 3 months. Let it cool completely, then wrap tightly in foil and place in a freezer bag. To reheat, thaw overnight in the refrigerator and reheat in a 350°F (175°C) oven for about 30 to 40 minutes, until heated through. You can also freeze the unbaked pot pie — just add about 20 minutes to the baking time.
Nutritional Information & Benefits
While this pot pie is definitely comfort food, it does have some nutritional bright spots. Here’s the estimated breakdown per serving (based on 8 servings):
| Nutrient | Amount Per Serving |
|---|---|
| Calories | 485 |
| Protein | 28g |
| Fat | 28g |
| Saturated Fat | 16g |
| Carbohydrates | 35g |
| Fiber | 3g |
| Sugar | 6g |
| Sodium | 680mg |
The chicken provides a solid dose of lean protein, while the carrots and peas contribute fiber, vitamin A, and antioxidants. The butter and milk add calcium and healthy fats that help keep you full and satisfied. If you’re watching your sodium, use low-sodium broth and go easy on the added salt — you can always adjust at the table.
This recipe contains dairy and gluten, so it’s not suitable for those with allergies to those ingredients. But as I mentioned in the variations section, there are ways to adapt it.
Conclusion
This classic chicken pot pie with flaky crust is more than just a recipe — it’s the dish I turn to when I want to feed people love in a tangible form. It’s the meal that says “I’m glad you’re here” without needing any words. And honestly, after seventeen tries and countless burned fingers and soggy bottoms, it feels so good to have finally nailed it.
I hope you make this for your next gathering, whether it’s a fancy dinner party or just a Tuesday night that needs a little something special. Don’t be afraid to make it your own — swap in your favorite vegetables, add more herbs, or go wild with the crust design. The best recipes are the ones that become yours.
When you make it — and I really hope you do — come back and tell me how it went. Did your family fight over the last slice? Did someone ask for the recipe? Did you finally get that flaky crust you’ve been chasing? I want to hear all about it. Drop a comment below or tag me in your photos. Happy cooking, friends!
Frequently Asked Questions
Can I use store-bought pie crust instead of making my own?
Absolutely! If you’re short on time, a good-quality store-bought crust will work fine. Just look for one that’s made with butter for the best flavor. You’ll still want to par-bake the bottom crust for the best texture.
Can I use leftover turkey instead of chicken?
Yes, this is a fantastic way to use up leftover Thanksgiving turkey. Just swap the chicken for an equal amount of cooked turkey. The recipe works exactly the same way.
Why is my filling too thin or runny?
This usually happens if the roux isn’t cooked long enough or if the filling isn’t simmered until thickened. Make sure you cook the flour-butter mixture for a full 2 minutes, and let the filling simmer until it coats the back of a spoon. Also, let the pie rest after baking — the filling thickens as it cools.
Can I add other vegetables to the filling?
Of course! Diced potatoes, mushrooms, corn, or green beans all work beautifully. Just make sure to cook harder vegetables like potatoes before adding them to the filling, or they’ll be crunchy in the final pie.
How do I prevent the crust from burning around the edges?
If the edges are browning too quickly, loosely cover them with strips of foil or a pie shield about halfway through baking. Every oven runs a little differently, so keep an eye on it after the 20-minute mark.
Pin This Recipe!

Classic Chicken Pot Pie with Flaky Crust – Easy Crowd-Pleasing Comfort

This classic chicken pot pie features a creamy, rich filling with tender chicken and vegetables, all encased in an impossibly flaky, buttery crust. It’s the ultimate comfort food that’s perfect for gatherings and sure to impress.
- Prep Time: 30 minutes
- Cook Time: 50 minutes
- Total Time: 1 hour 20 minutes
- Yield: 8 servings 1x
- Category: Main Course
- Cuisine: American
Ingredients
- 2 ½ cups all-purpose flour
- 1 teaspoon salt
- 1 cup unsalted butter, very cold and cut into small cubes
- 6 to 8 tablespoons ice water
- 2 tablespoons unsalted butter
- 1 medium yellow onion, diced
- 3 medium carrots, peeled and diced
- 2 celery stalks, diced
- 3 cloves garlic, minced
- ⅓ cup all-purpose flour
- 2 cups chicken broth, low-sodium
- 1 cup whole milk
- 3 cups cooked chicken, shredded or cubed
- 1 cup frozen peas
- 1 teaspoon dried thyme
- ½ teaspoon dried rosemary
- Salt and black pepper to taste
- 1 egg, beaten with 1 tablespoon water
Instructions
- Make the pie crust. In a large bowl, whisk together the flour and salt. Add the cold butter cubes and cut them into the flour using a pastry cutter or your fingertips until the mixture looks like coarse crumbs with some butter pieces the size of peas. Drizzle in the ice water, one tablespoon at a time, tossing with a fork after each addition, until the dough just comes together when squeezed.
- Divide and chill. Turn the dough out onto a lightly floured surface and divide it in half. Flatten each half into a disk about an inch thick, wrap tightly in plastic wrap, and refrigerate for at least 1 hour.
- Prep your filling ingredients. While the dough chills, dice your onion, carrots, and celery. Mince the garlic. Shred your chicken if you haven’t already. Measure out your broth and milk.
- Cook the vegetables. In a large skillet or Dutch oven over medium heat, melt the 2 tablespoons of butter. Add the diced onion, carrots, and celery. Cook for 6 to 8 minutes, stirring occasionally, until the vegetables have softened and the onion is translucent. Add the minced garlic and cook for another minute until fragrant.
- Make the roux. Sprinkle the ⅓ cup of flour over the cooked vegetables and stir constantly for 2 minutes. The mixture will look dry and pasty.
- Add the liquids. Slowly pour in the chicken broth while whisking continuously to prevent lumps. Then add the milk, still whisking. Bring the mixture to a gentle simmer and cook for 3 to 4 minutes until it thickens enough to coat the back of a spoon.
- Finish the filling. Stir in the shredded chicken, frozen peas, dried thyme, dried rosemary, and salt and pepper to taste. Remove from heat and let the filling cool slightly while you roll out the dough.
- Preheat and par-bake. Preheat your oven to 400°F (200°C). On a lightly floured surface, roll out one disk of dough to about 12 inches in diameter, about ⅛-inch thick. Gently transfer it to your 9-inch pie dish, pressing it into the bottom and up the sides. Trim the excess dough, leaving about a half-inch overhang. Prick the bottom of the crust all over with a fork, line it with parchment paper, and fill with pie weights or dried beans. Bake for 12 minutes, then remove the weights and parchment a…
- Fill and top. Pour the chicken filling into the par-baked crust, spreading it evenly. Roll out the second disk of dough to the same size and place it over the filling. Pinch the edges of the top and bottom crusts together to seal, then crimp as desired. Cut 4 to 5 slits in the top crust to allow steam to escape. Brush the top crust with the egg wash.
- Bake to perfection. Place the pie dish on a baking sheet to catch any drips and bake for 30 to 35 minutes, until the crust is deep golden brown and the filling is bubbling up through the slits. Let the pie rest on a wire rack for at least 15 minutes before slicing.
Notes
Keep all ingredients cold for the crust. Par-bake the bottom crust to prevent sogginess. Let the filling cool before adding to the crust. Use a baking sheet to catch drips. Let the pie rest for at least 15 minutes before slicing to allow the filling to set.
Nutrition
- Serving Size: 1 slice (1/8 of pie)
- Calories: 485
- Sugar: 6
- Sodium: 680
- Fat: 28
- Saturated Fat: 16
- Carbohydrates: 35
- Fiber: 3
- Protein: 28
Keywords: chicken pot pie, classic chicken pot pie, flaky crust, comfort food, chicken pie, pot pie recipe, homemade pot pie


