Love this? Save it for later!
Share the inspiration with your friends
Tuesday evening was in twelve hours and I had completely forgotten that I’d promised to host our neighborhood book club. Not just host—I’d sent a group text saying I’d make “something special.” Everyone else would be bringing wine and fancy cheese boards from that shop downtown. I had a package of chicken thighs thawing in the sink, a head of garlic that was starting to sprout, and honestly, a mild panic setting in. I remember staring into the fridge like it might suddenly produce a three-course meal. That’s when I spotted the sad bag of carrots, a half-used onion, and some baby potatoes rolling around in the crisper drawer. The power flickered—classic winter storm situation—and I thought, well, this is going to be interesting.
I threw everything into my biggest skillet, doused it in butter and garlic because that’s what my grandmother would have done, and crossed my fingers. The chicken thighs went in skin-side down, sizzling like a promise. The vegetables got tossed in the rendered fat, and I shoved the whole thing in the oven, hoping for the best. When the doorbell rang that evening, the kitchen smelled like someone had been cooking all day. One of the neighbors, a retired chef actually, asked for the recipe before she even took her coat off. I had to admit it took maybe ten minutes of actual work. The whole thing came together in one pan, which meant no mountain of dishes to hide before everyone showed up. And honestly? It was the only dish that got completely cleaned out that night. I’ve been making it ever since, especially on nights when I need something that feels like a hug but doesn’t require a culinary degree. Maybe you’ve been there—promised something impressive with nothing but pantry staples and a prayer. This one’s for you.
Why You’ll Love This Recipe
Let me tell you why this cozy one-pan garlic butter chicken thighs recipe has become my go-to for those evenings when comfort food is non-negotiable but time is tight. I’ve tested this method at least a dozen times, tweaking the temperature and timing until the chicken comes out perfectly juicy every single time. This isn’t just another sheet pan dinner—it’s a tried-and-true technique that delivers restaurant-quality results with minimal effort.
- One-Pan Wonder: Everything cooks together in a single skillet or baking dish. Less cleanup means more time curled up on the couch.
- Simple Ingredients: No fancy grocery store trips required. You probably have garlic, butter, and basic vegetables in your kitchen right now.
- Perfect for Busy Weeknights: With just 10 minutes of prep, this dish comes together faster than takeout delivery.
- Crowd-Pleaser: I’ve served this to picky kids, vegetarian friends (who ate the vegetables!), and my father-in-law who “doesn’t do chicken.” Everyone goes back for seconds.
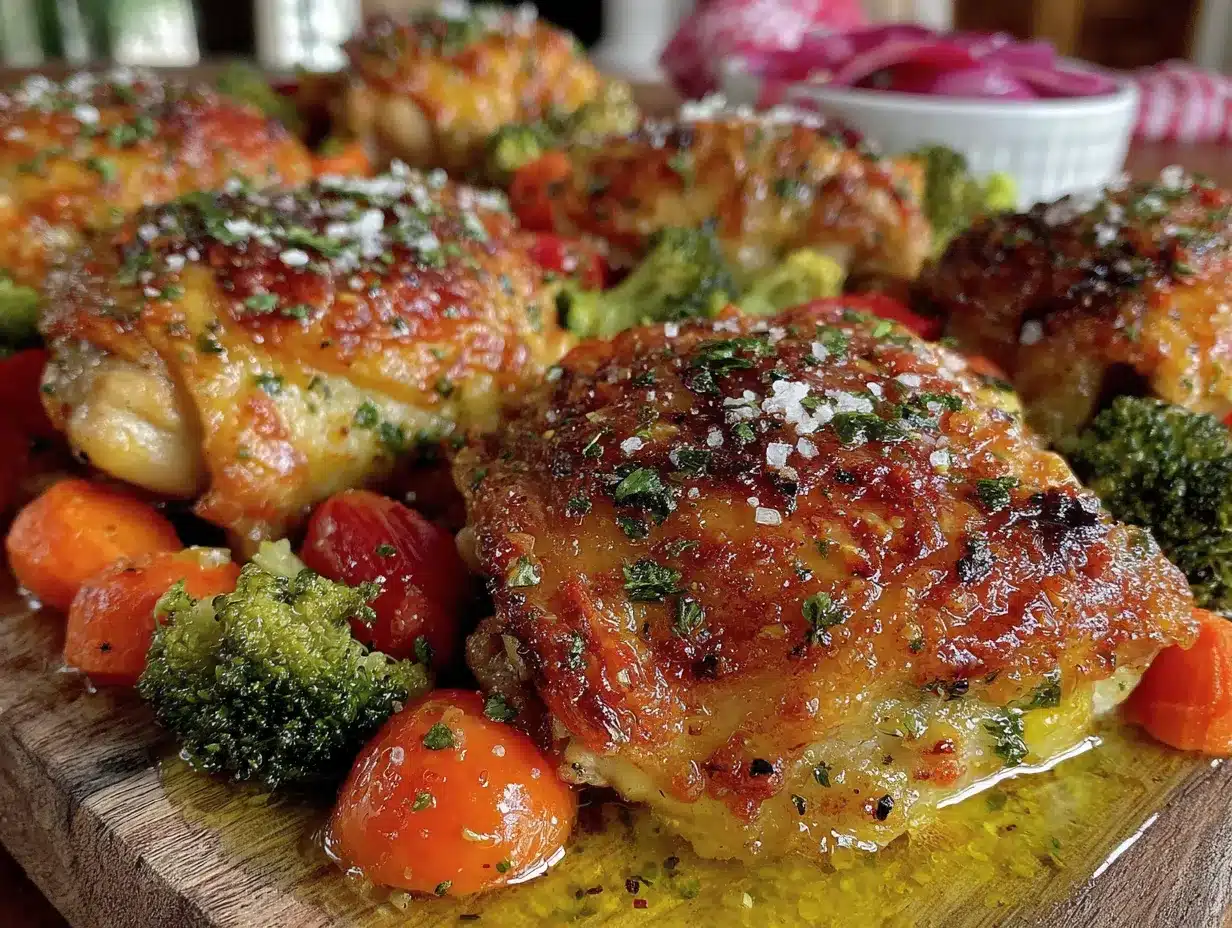
- Unbelievably Delicious: The garlic butter sauce coats every single bite, and the chicken thighs stay so tender they practically fall apart with a fork.
What makes this recipe different from all the other chicken thigh recipes out there? It’s the method. By searing the chicken first to get that golden, crispy skin, then roasting everything together in garlic butter, you get layers of flavor that taste like you spent hours in the kitchen. The vegetables soak up all those delicious pan juices, becoming caramelized and sweet. It’s comfort food reimagined—simpler, faster, but with the same soul-soothing satisfaction that makes you close your eyes after the first bite.
What Ingredients You Will Need
This recipe uses simple, wholesome ingredients to deliver bold flavor and satisfying texture without the fuss. Most of these are pantry staples you probably already have on hand, which makes this perfect for those nights when you need dinner on the table without a special trip to the store.
For the Chicken
- 4 bone-in, skin-on chicken thighs (about 1.5 pounds total) — the bone keeps the meat juicy, and the skin gets beautifully crispy. I prefer organic chicken from Bell & Evans for the best flavor.
- 1 teaspoon salt — use kosher salt for better seasoning control
- 1/2 teaspoon black pepper — freshly ground if you have it
- 1/2 teaspoon smoked paprika — adds a subtle smoky depth (regular paprika works too)
- 1/4 teaspoon garlic powder — just to double down on the garlic flavor
For the Garlic Butter Sauce
- 4 tablespoons unsalted butter (60 grams) — salted butter works, just reduce the added salt slightly
- 6 cloves garlic, minced — yes, six. Don’t skimp here, this is the star of the show
- 1 tablespoon olive oil — helps prevent the butter from burning
- 1 teaspoon dried thyme — or 1 tablespoon fresh thyme leaves
- 1/2 teaspoon red pepper flakes — optional, for a little warmth
For the Vegetables
- 1 pound baby potatoes (about 450 grams) — halved or quartered depending on size. Yukon Gold or red potatoes work great
- 3 medium carrots — peeled and cut into 2-inch chunks
- 1 medium yellow onion — cut into 1-inch wedges
- 2 cups broccoli florets (about 150 grams) — add these in the last 15 minutes so they don’t get mushy
- Fresh parsley — for garnish, totally optional but pretty
Ingredient Selection Tips: Look for chicken thighs that are roughly the same size so they cook evenly. For the potatoes, I recommend smaller ones because they cook faster and get those crispy edges. If you’re in a pinch, you can swap the broccoli for green beans or asparagus—just adjust the timing based on how thick they are. For a dairy-free version, use vegan butter or extra olive oil, though the flavor will be slightly different.
Equipment Needed
The beauty of this recipe is that you don’t need fancy equipment. Here’s what you’ll need:
- Large oven-safe skillet (12-inch) — cast iron is ideal for that perfect sear, but any oven-safe skillet works. I use my trusty Lodge cast iron that I’ve had for years
- Sharp chef’s knife — for cutting vegetables and mincing garlic
- Cutting board — preferably one with a groove to catch juices
- Measuring spoons — for the seasonings
- Tongs — for flipping the chicken without piercing the skin
- Instant-read thermometer — optional but highly recommended for perfect doneness
Alternative Options: If you don’t have an oven-safe skillet, you can sear the chicken in a regular skillet, then transfer everything to a baking dish. A 9×13-inch baking dish works perfectly. No tongs? Two forks will do the job, just be gentle with the skin. The thermometer isn’t strictly necessary—you’ll know the chicken is done when the juices run clear and the internal temperature reaches 165°F (74°C).
Budget-Friendly Tip: You don’t need to spend money on a fancy cast iron skillet. A sturdy baking sheet lined with foil works in a pinch—just arrange everything in a single layer and roast at 400°F for about 35 minutes. The skin won’t be quite as crispy, but it’ll still be delicious.
Preparation Method
Let me walk you through this step by step. I’ve made this recipe more times than I can count, and these are the exact steps that produce the best results every single time.
- Preheat your oven to 400°F (200°C). Position the rack in the middle of the oven. This temperature is the sweet spot—hot enough to crisp the chicken skin and caramelize the vegetables, but not so hot that the butter burns.
- Pat the chicken thighs dry with paper towels. This is crucial—wet skin won’t get crispy. I learned this the hard way after making soggy chicken for years. Take your time here, really get them dry.
- Season the chicken. In a small bowl, mix together 1 teaspoon salt, 1/2 teaspoon black pepper, 1/2 teaspoon smoked paprika, and 1/4 teaspoon garlic powder. Sprinkle this mixture evenly over both sides of the chicken thighs. Don’t forget the underside—it adds flavor to the pan juices.
- Prepare the vegetables. While the chicken rests with the seasoning, wash and cut your vegetables. Halve or quarter the baby potatoes so they’re about 1-inch pieces. Peel and cut the carrots into 2-inch chunks. Cut the onion into wedges. Set the broccoli aside—you’ll add it later.
- Start the garlic butter sauce. In a small saucepan over low heat (or in the microwave in 15-second bursts), melt the 4 tablespoons of butter with 1 tablespoon olive oil. Once melted, stir in the minced garlic, dried thyme, and red pepper flakes if using. Let it sit for a minute so the garlic infuses the butter. The smell at this point is absolutely incredible.
- Sear the chicken. Heat your oven-safe skillet over medium-high heat for about 2 minutes. Add 1 tablespoon of the garlic butter mixture to the pan. Place the chicken thighs skin-side down in the hot skillet. Let them cook undisturbed for 5-6 minutes—resist the urge to move them! You want that deep golden crust. The skin will release easily when it’s ready.
- Flip and arrange. Using tongs, flip the chicken thighs so the skin side is up. Turn off the heat. Arrange the potatoes, carrots, and onion wedges around the chicken in a single layer. Pour the remaining garlic butter mixture over everything, making sure to get some on the vegetables.
- Roast for 20 minutes. Place the skillet in the preheated oven. Set a timer. During this time, the chicken will continue cooking and the vegetables will start to soften and caramelize.
- Add the broccoli. After 20 minutes, carefully remove the skillet from the oven. Add the broccoli florets around the chicken, tucking them into the pan juices. Return to the oven for another 12-15 minutes.
- Check for doneness. The chicken is done when the internal temperature reaches 165°F (74°C) at the thickest part, or when the juices run clear when pierced with a knife. The vegetables should be tender and slightly caramelized at the edges.
- Rest and serve. Let the skillet rest for 5 minutes before serving. This allows the juices to redistribute throughout the chicken. Garnish with fresh parsley if you’re feeling fancy. Spoon some of those pan juices over everything—that’s where all the flavor lives.
Troubleshooting Tip: If your vegetables aren’t browning enough, you can switch the oven to broil for the last 2-3 minutes. Watch it carefully so nothing burns. If the chicken skin isn’t crispy enough, you can remove the vegetables and pop the chicken back under the broiler for a minute or two.
Cooking Tips & Techniques
Over the years, I’ve made every mistake you can imagine with this recipe. Let me save you the trouble with some hard-earned wisdom.
Don’t crowd the pan. When searing the chicken, make sure the pieces aren’t touching. If they’re too close together, they’ll steam instead of sear, and you’ll lose that beautiful golden crust. If your skillet is too small, sear the chicken in two batches.
Patience is your friend. The biggest mistake people make is moving the chicken too soon during the searing process. Let it sit in that hot pan for the full 5-6 minutes. It might look like it’s sticking at first, but it will release naturally once the crust forms. I once ruined a perfectly good dinner by flipping too early and tearing the skin off.
Keep an eye on the garlic. Garlic burns quickly, especially in butter. That’s why we add it to the melted butter off the heat, rather than cooking it in the pan. Burnt garlic turns bitter and can ruin the whole dish. If you notice the garlic in the pan starting to darken too much, add a splash of chicken broth to cool things down.
Timing is everything. I like to prep all my vegetables while the chicken is searing. That way, everything is ready to go into the oven as soon as the chicken is flipped. Multitasking in the kitchen isn’t always easy, but this is one of those recipes where a little planning goes a long way.
For consistent results, use an instant-read thermometer. Chicken thighs are forgiving, but they can still dry out if overcooked. I aim for 165°F (74°C) and pull them out immediately. The temperature will rise another 2-3 degrees while resting.
Variations & Adaptations
One of the things I love most about this cozy one-pan garlic butter chicken thighs recipe is how adaptable it is. Here are some variations I’ve tried and loved:
Seasonal Vegetable Swap: In the summer, I use zucchini, bell peppers, and cherry tomatoes instead of the root vegetables. Add them in the last 15 minutes since they cook faster. In the fall, butternut squash and Brussels sprouts are amazing. Just cut them into similar-sized pieces so they cook evenly.
Lemon Herb Version: Add the juice of one lemon and 2 tablespoons of fresh rosemary to the garlic butter mixture. The acidity cuts through the richness beautifully. I made this version for a dinner party and got three requests for the recipe.
Spicy Kick: Double the red pepper flakes and add a minced jalapeño to the garlic butter. Serve with a dollop of Greek yogurt or sour cream to cool things down. My husband loves this version when he needs something to wake up his taste buds.
Dairy-Free Adaptation: Replace the butter with 4 tablespoons of olive oil or vegan butter. The flavor will be slightly different, but still delicious. Add a splash of nutritional yeast to the vegetables for a cheesy note without the dairy.
One-Pan Meal Prep: Double the recipe and store the leftovers in individual containers. This reheats beautifully for lunch the next day. Just reheat in the oven or air fryer to restore the crispy skin—microwaving will make it soggy.
Serving & Storage Suggestions
This dish is best served hot, straight from the skillet. I like to bring the whole pan to the table and let everyone serve themselves—it feels cozy and communal. Spoon some of the pan juices over each serving; that garlic butter sauce is liquid gold.
What to Serve With It: This one-pan meal is pretty complete on its own, but if you want to stretch it, serve it with crusty bread to soak up the sauce, or a simple green salad with a lemon vinaigrette to cut through the richness. A glass of crisp white wine, like Sauvignon Blanc, pairs beautifully with the garlic butter.
Storage Instructions: Store leftovers in an airtight container in the refrigerator for up to 4 days. The flavors actually get better overnight as they meld together. For longer storage, freeze the chicken and vegetables in a freezer-safe container for up to 3 months. Thaw overnight in the refrigerator before reheating.
Reheating Tips: For best results, reheat in a 350°F (175°C) oven for about 10-15 minutes, or until heated through. The skin will crisp back up nicely. You can also use an air fryer at 375°F (190°C) for 5-7 minutes. Avoid the microwave if possible—it makes the skin rubbery and the vegetables mushy.
Nutritional Information & Benefits
Here’s the nutritional breakdown for one serving (one chicken thigh with vegetables), based on four servings:
| Nutrient | Amount Per Serving |
|---|---|
| Calories | 485 |
| Protein | 32g |
| Fat | 28g |
| Saturated Fat | 12g |
| Carbohydrates | 28g |
| Fiber | 5g |
| Sugar | 6g |
| Sodium | 680mg |
Health Benefits: Chicken thighs are rich in protein, iron, and B vitamins, which support energy metabolism. The garlic in this recipe is known for its immune-boosting properties—perfect for cold weather months. The colorful vegetables provide a variety of antioxidants and fiber. This meal is naturally gluten-free and can be made dairy-free with simple substitutions. It’s also relatively low in carbohydrates, making it suitable for those watching their carb intake.
Dietary Considerations: This recipe is naturally gluten-free and nut-free. For a lower-fat version, remove the skin before eating (though you’ll lose the crispy texture). The sodium can be reduced by using less salt or opting for low-sodium seasoning blends.
Conclusion
This cozy one-pan garlic butter chicken thighs recipe has honestly become a staple in my kitchen, and I think it deserves a spot in yours too. It’s the kind of meal that makes a regular Tuesday feel special, without requiring hours of effort or a sink full of dishes. The chicken comes out juicy and golden, the vegetables soak up all that garlicky goodness, and the whole thing comes together in about an hour with minimal hands-on time.
I love how forgiving this recipe is—you can swap in whatever vegetables are languishing in your fridge, adjust the seasonings to your taste, and it still turns out delicious. It’s become my go-to for those nights when I need something that feels like a warm hug but doesn’t demand too much from me. If you make it, I’d love to hear how it turns out. Leave a comment below and tell me what vegetables you used, or tag me in your photos on social media. And if you have a favorite variation, please share it—I’m always looking for new ideas to try!
Here’s to cozy dinners, happy bellies, and one less pan to wash. Happy cooking, friend.
Frequently Asked Questions
Can I use boneless, skinless chicken thighs instead?
Absolutely, but the cooking time will be shorter—about 20-25 minutes total in the oven. The meat won’t be quite as juicy since the bone adds moisture, and you’ll miss that crispy skin, but it’s still delicious. Just check for doneness at 165°F (74°C).
Can I make this recipe in a slow cooker?
You can, but you’ll lose the crispy skin and caramelized vegetables. If you want to try it, sear the chicken first, then transfer everything to the slow cooker with the garlic butter. Cook on low for 4-5 hours. The vegetables will be softer, and the chicken won’t be crispy, but the flavor will still be great.
How do I prevent the garlic from burning?
The key is to add the garlic to the melted butter off the heat, not while it’s still on the stove. Garlic burns quickly in hot butter. If you’re worried, you can also add the garlic halfway through the roasting time instead of at the beginning.
Can I use frozen chicken thighs?
I don’t recommend it for this recipe. Frozen chicken releases too much water as it cooks, which prevents the skin from getting crispy and makes the vegetables soggy. Thaw the chicken completely in the refrigerator overnight, then pat it dry before seasoning.
What if I don’t have an oven-safe skillet?
No problem! Sear the chicken in whatever skillet you have, then transfer everything to a 9×13-inch baking dish or a rimmed baking sheet. The cooking time will be about the same. Just make sure the vegetables are in a single layer for even roasting.
Pin This Recipe!

Cozy One-Pan Garlic Butter Chicken Thighs: Easy Weeknight Dinner

Juicy, golden chicken thighs and caramelized vegetables roasted in a rich garlic butter sauce—all in one pan. Perfect for busy weeknights when you need comfort food without the fuss.
- Prep Time: 10 minutes
- Cook Time: 35 minutes
- Total Time: 45 minutes
- Yield: 4 servings 1x
- Category: Main Course
- Cuisine: American
Ingredients
- 4 bone-in, skin-on chicken thighs (about 1.5 pounds total)
- 1 teaspoon kosher salt
- 1/2 teaspoon black pepper, freshly ground
- 1/2 teaspoon smoked paprika
- 1/4 teaspoon garlic powder
- 4 tablespoons unsalted butter (60 grams)
- 6 cloves garlic, minced
- 1 tablespoon olive oil
- 1 teaspoon dried thyme
- 1/2 teaspoon red pepper flakes (optional)
- 1 pound baby potatoes (about 450 grams), halved or quartered
- 3 medium carrots, peeled and cut into 2-inch chunks
- 1 medium yellow onion, cut into 1-inch wedges
- 2 cups broccoli florets (about 150 grams)
- Fresh parsley for garnish (optional)
Instructions
- Preheat your oven to 400°F (200°C). Position the rack in the middle of the oven.
- Pat the chicken thighs dry with paper towels.
- In a small bowl, mix together 1 teaspoon salt, 1/2 teaspoon black pepper, 1/2 teaspoon smoked paprika, and 1/4 teaspoon garlic powder. Sprinkle this mixture evenly over both sides of the chicken thighs.
- Wash and cut the vegetables: halve or quarter the baby potatoes into 1-inch pieces, peel and cut the carrots into 2-inch chunks, cut the onion into wedges. Set the broccoli aside.
- In a small saucepan over low heat (or in the microwave in 15-second bursts), melt the 4 tablespoons of butter with 1 tablespoon olive oil. Once melted, stir in the minced garlic, dried thyme, and red pepper flakes if using. Let it sit for a minute.
- Heat your oven-safe skillet over medium-high heat for about 2 minutes. Add 1 tablespoon of the garlic butter mixture to the pan. Place the chicken thighs skin-side down in the hot skillet. Cook undisturbed for 5-6 minutes until deep golden crust forms.
- Using tongs, flip the chicken thighs so the skin side is up. Turn off the heat. Arrange the potatoes, carrots, and onion wedges around the chicken in a single layer. Pour the remaining garlic butter mixture over everything.
- Roast for 20 minutes.
- After 20 minutes, carefully remove the skillet from the oven. Add the broccoli florets around the chicken, tucking them into the pan juices. Return to the oven for another 12-15 minutes.
- Check for doneness: the chicken is done when the internal temperature reaches 165°F (74°C) at the thickest part, or when the juices run clear. The vegetables should be tender and slightly caramelized.
- Let the skillet rest for 5 minutes before serving. Garnish with fresh parsley if desired. Spoon pan juices over everything before serving.
Notes
For extra crispy skin, switch the oven to broil for the last 2-3 minutes. If you don’t have an oven-safe skillet, sear the chicken in a regular skillet, then transfer everything to a 9×13-inch baking dish. For dairy-free, use vegan butter or extra olive oil. The broccoli should be added in the last 15 minutes to prevent mushiness.
Nutrition
- Serving Size: 1 chicken thigh with
- Calories: 485
- Sugar: 6
- Sodium: 680
- Fat: 28
- Saturated Fat: 12
- Carbohydrates: 28
- Fiber: 5
- Protein: 32
Keywords: one-pan chicken, garlic butter chicken, chicken thighs, easy weeknight dinner, comfort food, sheet pan dinner, gluten-free dinner