Love this? Save it for later!
Share the inspiration with your friends
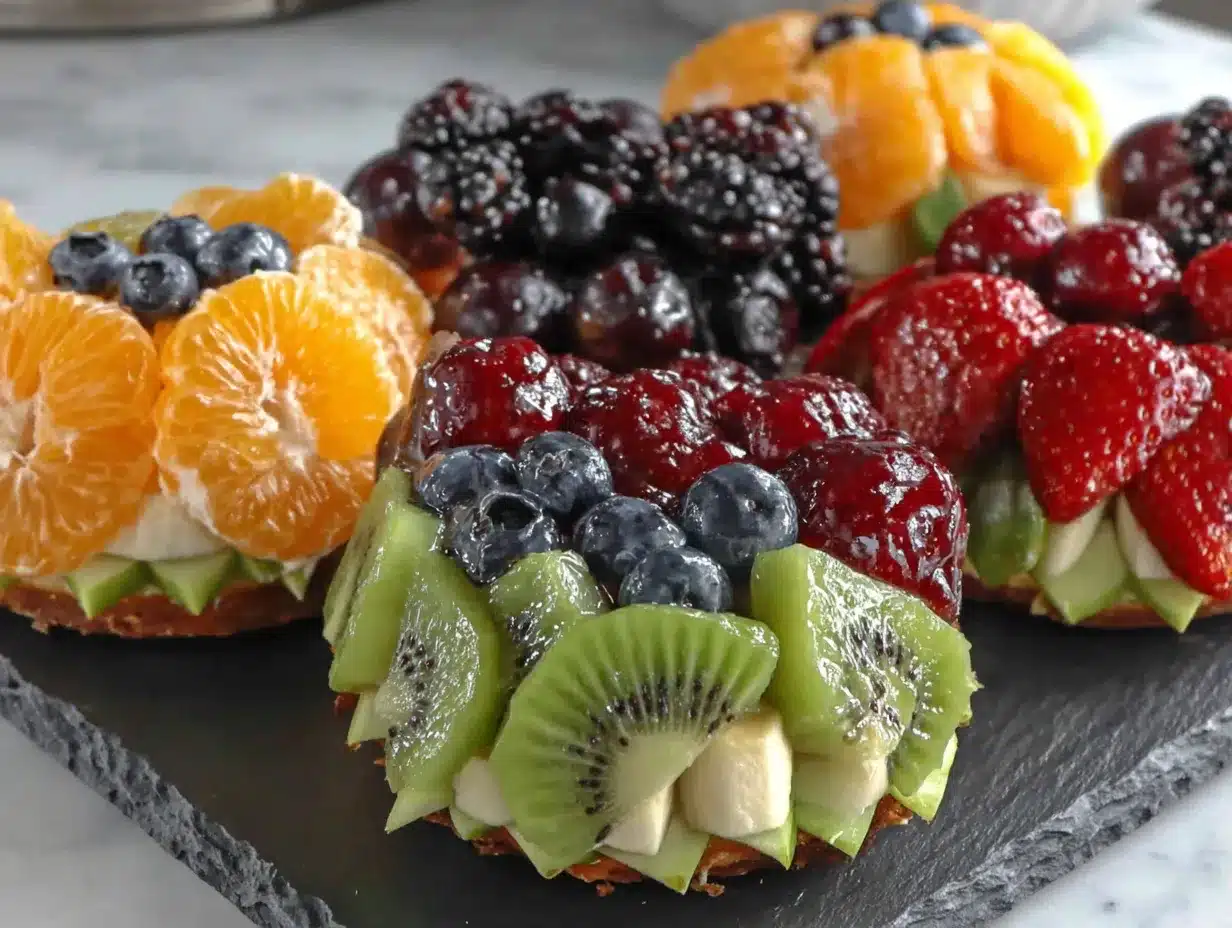
There used to be a tiny bakery in my neighborhood—Sweet Pea’s on Oak Street—that made the most incredible Halloween fruit tart. It wasn’t spooky or gory. Instead, it was charming: a giant sugar cookie base piled high with cream cheese frosting and topped with rows of fresh fruit arranged to look like a friendly monster’s face. When they closed last fall, I honestly felt a little lost. That tart had become our family’s Halloween tradition, and without it, the holiday felt hollow.
After six tries—some lopsided, one that slid right off the plate, and a couple that my kids called “scary for the wrong reasons”—I finally got it. But here’s the thing: I realized the tart was too fussy for a busy weeknight. So I simplified it. Instead of a baked base, I used a sturdy platter. Instead of frosting, I used thick Greek yogurt and a drizzle of honey. The result? A cozy Halloween monster fruit tray that’s easier, healthier, and honestly, even more fun to make.
I mean, let me tell you, the first time I set this tray down at our annual Halloween movie night, my neighbor Jen actually gasped. “You made that?” she asked, grabbing a handful of “monster fur” (aka blueberries). And that’s when I knew I had something special. Maybe you’ve been there—looking for a Halloween snack that’s festive but not loaded with sugar, something that feels like a treat but doesn’t leave everyone crashing. This is that recipe. It’s the one that brings the cozy without the chaos.
Why You’ll Love This Recipe
This cozy Halloween monster fruit tray isn’t just another fruit platter. It’s a conversation starter, a crowd-pleaser, and honestly, it’s almost too cute to eat. Almost. Here’s why it’s become my go-to for Halloween gatherings:
- Quick & Easy: You can assemble this entire tray in under 20 minutes. No baking, no complicated steps. Just chop, arrange, and serve.
- Simple Ingredients: You probably already have most of what you need in your fridge. A trip to the store is just for the fruit and maybe some yogurt.
- Perfect for Halloween: Whether it’s a classroom party, a cozy movie night, or a potluck, this tray fits right in. It’s festive without being over-the-top.
- Crowd-Pleaser: Kids love the monster theme, and adults appreciate the healthy twist. I’ve watched this tray disappear at parties more times than I can count.
- Unbelievably Delicious: The creamy yogurt dip paired with fresh, juicy fruit is a combination that just works. It’s light, refreshing, and satisfying all at once.
What makes this recipe different from the rest? It’s the attention to detail. Instead of just tossing fruit on a plate, you’re creating a character. The monster’s face comes to life with clever fruit placement—banana slices for eyes, a strawberry for the nose, and kiwi for wild, spiky hair. It’s the kind of thing that makes people stop and smile. And honestly, isn’t that what Halloween is all about?
This tray is comfort food reimagined. It’s healthier than a bowl of candy, faster than baking cookies, but with the same soul-soothing satisfaction. Perfect for impressing guests without stress, or turning a simple snack into something memorable. I’ve made it for Halloween parties, after-school snacks, and even as a centerpiece for a cozy fall brunch. It never fails to spark joy.
What Ingredients You Will Need
This recipe uses simple, wholesome ingredients to create a snack that’s as fun to look at as it is to eat. Most of these are pantry staples or easy to find at any grocery store. Let’s break down what you’ll need and why each ingredient matters.
For the Monster Base
- Large wooden or ceramic platter – A round or oval platter works best for a monster face. I use a 14-inch wooden board for a rustic look.
- 1 cup plain Greek yogurt (full-fat or 2%) – This serves as the “glue” for the fruit and adds a creamy, tangy element. I recommend Fage or Chobani for thickness.
- 2 tablespoons honey – A touch of sweetness to balance the yogurt’s tang. Local honey adds a lovely floral note.
- 1 teaspoon vanilla extract – Enhances the flavor of the yogurt dip without overpowering the fruit.
For the Monster’s Face
- 2 bananas – Sliced into rounds for the monster’s eyes. Use firm, slightly green bananas so they don’t brown too quickly.
- 1 large strawberry – Halved lengthwise for the nose. The red color pops beautifully against the yogurt.
- 1 cup blueberries – These become the monster’s “fur” or “scales.” They’re small, easy to arrange, and packed with antioxidants.
- 1 cup blackberries – Use these for the monster’s mouth or as additional fur. Their deep color adds contrast.
- 2 kiwis – Peeled and sliced into half-moons or thin rounds for the monster’s hair or ears. The bright green is perfect for a fun, spooky look.
- 1 cup red grapes – Cut in half for the monster’s cheeks or to fill gaps. Their sweetness balances the tart berries.
- 1/2 cup pomegranate seeds (optional) – These look like little jewels and work great for the monster’s teeth or as accents. I love the crunch.
For the Dip (Optional but Recommended)
- 1/4 cup creamy peanut butter – For a protein-packed dip on the side. Use almond or sunflower seed butter for a nut-free option.
- 1 tablespoon maple syrup – Stir into the peanut butter for a sweet, dippable consistency.
- 1/4 teaspoon cinnamon – A pinch of warmth that screams fall. It pairs beautifully with the fruit.
Ingredient Tips: For the best texture, use fruit that’s ripe but still firm. Overripe fruit will get mushy and release too much juice, making the tray soggy. I prefer organic berries when possible, but conventional works just fine. If you’re making this for a party, prep the fruit the night before and store it in airtight containers in the fridge. Assemble the tray right before serving for the freshest look.
Substitution Guidance: You can swap Greek yogurt for dairy-free coconut yogurt if needed. Use agave nectar instead of honey for a vegan version. For the fruit, feel free to get creative—mango slices make great “teeth,” and raspberries add a pop of red. The key is to choose fruits with different colors and shapes to make the monster’s face come alive.
Equipment Needed
You don’t need fancy tools to make this cozy Halloween monster fruit tray. Here’s what I use and a few alternatives if you’re improvising.
- Large platter or cutting board – A 12- to 16-inch wooden board is ideal, but a large ceramic plate or even a baking sheet works. I’ve used a clean pizza pan in a pinch.
- Sharp knife – For slicing fruit cleanly. A paring knife is great for precise cuts like strawberry halves or kiwi rounds.
- Cutting board – A medium-sized board for prepping fruit. I prefer a bamboo one because it’s gentle on knives.
- Small mixing bowl – For the yogurt dip. A cereal bowl works if you don’t have a small mixing bowl.
- Spatula or spoon – To spread the yogurt on the platter. An offset spatula gives a smooth finish, but a regular spoon does the job.
- Measuring spoons – For the honey, vanilla, and other small ingredients. Eyeballing works too, but measuring ensures consistent flavor.
- Paper towels – To pat fruit dry after washing. Wet fruit makes the yogurt runny, so this step is crucial.
- Small ramekin or bowl – For serving the peanut butter dip on the side. I use a tiny ceramic dish that looks cute on the tray.
If you don’t have a platter, arrange the fruit directly on parchment paper on a large baking sheet. It’s not as pretty, but it works. I’ve done this for classroom parties, and the kids didn’t care one bit. For a budget-friendly option, check thrift stores for wooden boards—I found my favorite one for three dollars.
Preparation Method
Let’s get to the fun part: building your monster! This process is simple, but I’ve learned a few tricks along the way that make it go smoothly. Follow these steps, and you’ll have a show-stopping tray in no time.
- Wash and dry all fruit. This is the most important step. Rinse the berries, grapes, kiwi, and pomegranate under cool water. Pat them dry with paper towels. Any excess moisture will make the yogurt slide around, and nobody wants a monster with a runny face. I learned this the hard way after my first tray turned into a fruit puddle.
- Make the yogurt dip. In a small bowl, combine 1 cup Greek yogurt, 2 tablespoons honey, and 1 teaspoon vanilla extract. Stir until smooth. Taste it—you want it sweet but not cloying. If it’s too tart, add another teaspoon of honey. Set aside in the fridge while you prep the fruit.
- Slice the bananas. Peel both bananas and cut them into 1/4-inch rounds. You’ll need about 10 slices for the monster’s eyes. Place the slices on a plate and lightly brush them with lemon juice (optional) to prevent browning. I skip this step if I’m serving immediately, but it’s a lifesaver for parties.
- Prep the remaining fruit. Cut the strawberry in half lengthwise. Peel the kiwis and slice them into thin rounds or half-moons. Cut the red grapes in half. Leave the blueberries and blackberries whole. If using pomegranate, scoop out the seeds and set them aside in a small bowl.
- Spread the yogurt base. Take your platter and use a spatula to spread the yogurt in a rough oval shape in the center. This is the monster’s face. Make it about 1/4-inch thick—thick enough to hold the fruit but not so thick that it’s overwhelming. Leave a border around the edges for the fruit “fur.”
- Create the monster’s eyes. Place two banana slices on the upper half of the yogurt oval, spaced about 2 inches apart. These are the eyes. On top of each banana slice, place a small blueberry or blackberry to make the pupil. It gives the monster a cute, slightly goofy expression.
- Add the nose. Place the strawberry half, cut-side down, in the center of the yogurt oval, just below the eyes. The pointed end should face downward for a classic monster look. If your strawberry is large, trim a small piece off the top to make it fit better.
- Form the mouth. Use blackberries to create a wide, friendly smile below the nose. Arrange them in a curved line, leaving a small gap in the middle if you want to add pomegranate seeds for “teeth.” I like to place a few seeds in a row for a goofy grin that makes everyone smile.
- Build the monster’s fur. Surround the yogurt face with blueberries, blackberries, and grape halves. Start from the outer edge and work inward, pressing the fruit gently into the yogurt to secure it. This is the most time-consuming part, but it’s also the most satisfying. I like to create a pattern—rows of blueberries, then a row of blackberries, then grapes—for a textured look.
- Add the hair. Arrange the kiwi slices along the top of the monster’s head, fanning them out like wild hair. You can overlap them for a fuller look or space them out for a spikier style. I’ve tried both, and the overlapping version looks more “cozy monster” to me.
- Fill in the gaps. Look at your tray and identify any empty spots. Use leftover berries, grape halves, or pomegranate seeds to fill them in. The goal is to cover the entire platter with fruit so no yogurt shows through except the face. This takes patience, but the result is worth it.
- Make the peanut butter dip (optional). In a small bowl, combine 1/4 cup peanut butter, 1 tablespoon maple syrup, and 1/4 teaspoon cinnamon. Stir until smooth. Place the bowl in the center of the tray or off to the side. I like to set it near the monster’s “chin” so it looks like the monster is drooling—gross but fun!
- Serve immediately. This tray is best enjoyed within an hour of assembly. If you need to make it ahead, prep all the fruit and the yogurt dip separately, then assemble just before serving. I’ve kept a prepped tray in the fridge for up to 2 hours, but the fruit starts to weep, so don’t push it.
Troubleshooting Tip: If the fruit slides around on the yogurt, you’ve spread it too thin. Add a little more yogurt to create a thicker base. If the monster’s face looks lopsided, use toothpicks to anchor the fruit in place—just remove them before serving!
Cooking Tips & Techniques
After making this cozy Halloween monster fruit tray more times than I can count, I’ve picked up a few tricks that make the process smoother and the result more impressive. Here’s what I wish I knew from the start.
Choose fruit wisely. Not all fruit is created equal for this tray. Bananas brown quickly, so slice them last and use them immediately. Berries should be firm—mushy blueberries will stain the yogurt. I once used overripe blackberries, and the tray turned into a purple mess. Learn from my mistake.
Create a blueprint first. Before you start placing fruit, visualize the monster’s face. I like to arrange the key features—eyes, nose, mouth—with the largest fruit first, then fill in the rest. It’s like painting by numbers, but with fruit. If you’re unsure, sketch a rough outline on a piece of paper. It sounds silly, but it helps.
Work in sections. Don’t try to do the whole tray at once. Start with the face, then move to the fur, then the hair. Taking breaks between sections keeps your hands from getting tired and your brain from getting overwhelmed. I usually do the face, take a sip of coffee, then tackle the fur.
Use toothpicks for stability. If you’re transporting the tray or making it ahead, toothpicks are your best friend. Insert them into larger fruit pieces to anchor them to the yogurt. Just remember to warn your guests—nobody wants to bite into a toothpick.
Keep it cold. Fruit lasts longer when it’s cold. Store the assembled tray in the fridge until you’re ready to serve. If you’re serving outdoors, place the tray on a bed of ice to keep everything fresh. I’ve done this for Halloween parties, and the fruit stays crisp for hours.
Embrace imperfection. Your monster doesn’t have to be perfect. In fact, a slightly lopsided face or uneven fur adds character. One time, my daughter arranged the kiwi hair to look like a mohawk, and it was the most popular tray at the party. Let the monster be itself.
Variations & Adaptations
One of the best things about this cozy Halloween monster fruit tray is how adaptable it is. Here are some variations I’ve tried and loved.
Dietary Variations
- Vegan Version: Swap the Greek yogurt for a thick coconut yogurt. Use agave nectar instead of honey. The peanut butter dip is already vegan if you use maple syrup.
- Nut-Free Version: Skip the peanut butter dip and serve with a side of dairy-free chocolate sauce or simply more yogurt. Sunflower seed butter works too if nut allergies aren’t severe.
- Low-Sugar Version: Use plain yogurt and skip the honey. The fruit provides enough natural sweetness. I’ve made this for a health-conscious crowd, and nobody missed the extra sugar.
Seasonal Adaptations
- Fall Harvest Monster: Add sliced apples and pears to the mix. Use cinnamon-spiced yogurt for extra warmth. The combination of apple slices and blackberries is stunning.
- Winter Wonderland Monster: Use white grapes, pears, and pomegranate seeds for a snowy look. Add a few edible glitter sprinkles for a magical touch.
- Summer Berry Monster: Swap the kiwi for mango slices and add raspberries. The bright colors scream summer fun.
Flavor Twists
- Chocolate Monster: Drizzle melted dark chocolate over the finished tray. The chocolate pairs beautifully with the fruit and makes it feel more indulgent.
- Spicy Monster: Add a pinch of cayenne pepper to the yogurt dip for a sweet-heat combo. It sounds weird, but it’s surprisingly addictive.
- Herb-Infused Monster: Stir fresh mint or basil into the yogurt dip. The herbs add a fresh note that elevates the fruit.
I once made a “zombie” version by using green grapes for the face and red grapes for the mouth. It was a hit at a Halloween party, and the kids loved the gross-out factor. Don’t be afraid to experiment—the worst that happens is you end up with a delicious snack.
Serving & Storage Suggestions
This cozy Halloween monster fruit tray is best served fresh, but with a few tricks, you can make it ahead or store leftovers.
Serving Temperature: Serve the tray chilled, straight from the fridge. The cold yogurt and crisp fruit are refreshing and satisfying. If you’re serving at room temperature, don’t leave it out for more than 2 hours, especially if you’re using dairy-based yogurt.
Presentation Tips: Place the tray on a decorative platter or a bed of fresh greens for a pop of color. I like to add a few mini pumpkins or fall leaves around the edges for a seasonal touch. If you’re serving at a party, label the dip with a cute sign—”Monster Drool” always gets a laugh.
Complementary Dishes: This tray pairs well with other Halloween snacks. Serve it alongside crispy garlic chicken for a savory contrast, or offer a bowl of popcorn for crunch. For a full Halloween spread, add a batch of spooky Halloween cupcakes and some creamy pumpkin soup for warmth.
Storage Instructions: If you have leftovers, store the fruit and yogurt separately. The fruit can be kept in an airtight container in the fridge for up to 2 days. The yogurt dip lasts about 3 days. Do not freeze the assembled tray—the fruit will turn to mush when thawed.
Reheating Methods: You don’t need to reheat this tray, but if you want to soften the yogurt slightly, let it sit at room temperature for 15 minutes before serving. The peanut butter dip can be microwaved for 10 seconds if it thickens in the fridge.
Flavor Development: The yogurt dip actually tastes better after a few hours in the fridge—the honey and vanilla meld together beautifully. I often make the dip the night before and assemble the tray the next day. The fruit, however, is best fresh, so don’t prep it too far in advance.
Nutritional Information & Benefits
This cozy Halloween monster fruit tray isn’t just cute—it’s packed with nutrients that make it a smart choice for any gathering. Here’s a breakdown of what you’re getting.
| Nutrient | Per Serving (approx. 1 cup fruit + 2 tbsp yogurt) |
|---|---|
| Calories | 180-220 |
| Protein | 8-10g |
| Carbohydrates | 30-35g |
| Fiber | 5-7g |
| Fat | 4-6g |
| Sugar | 20-25g (natural from fruit) |
Health Benefits: Berries are loaded with antioxidants that support immune health. Bananas provide potassium for muscle function and energy. Greek yogurt is rich in protein and probiotics, which aid digestion. Kiwi is packed with vitamin C—more than an orange, actually. This tray is a nutrient powerhouse disguised as a fun snack.
Dietary Considerations: This recipe is naturally gluten-free and can be made vegan or nut-free with simple swaps. It’s low in added sugars, relying on fruit for sweetness. If you’re watching your sugar intake, skip the honey and use plain yogurt. The fruit provides plenty of natural sweetness on its own.
Potential Allergens: Dairy (from yogurt) and peanuts (from peanut butter dip). For a dairy-free version, use coconut yogurt. For a nut-free version, skip the peanut butter or use sunflower seed butter. Always check labels if serving to guests with allergies.
I love that this tray lets me indulge in Halloween fun without the sugar crash. It’s a snack I feel good about serving to my family and friends, and the fact that it’s healthy is just a bonus. Honestly, the best part is watching kids devour a plate of fruit without a single complaint.
Conclusion
This cozy Halloween monster fruit tray has become a staple in my home, and I hope it becomes one in yours too. It’s the perfect blend of fun and wholesome—a snack that brings people together without the stress of complicated recipes or a pile of sugary treats. Whether you’re hosting a Halloween party, looking for a classroom snack, or just want to make a rainy October afternoon special, this tray delivers.
I love that this recipe is forgiving. You can swap fruits, adjust the face, or add your own creative touches. It’s not about perfection—it’s about the joy of creating something that makes people smile. My kids have started designing their own monsters, and some of their creations are hilariously lopsided, but they’re always proud of what they made.
So go ahead—grab a platter, some fruit, and a little imagination. Build a monster that’s uniquely yours. And when you do, I’d love to hear about it. Leave a comment below with your monster’s name or a photo of your creation. Share this recipe with a friend who needs a little Halloween cheer. And remember, the best monsters are the ones you can eat.
Happy Halloween, and happy snacking!
Frequently Asked Questions
Can I make this fruit tray the night before?
You can prep the fruit and yogurt dip the night before, but assemble the tray on the day you plan to serve it. The fruit will start to release moisture after a few hours, which can make the yogurt runny and the fruit less crisp. Store prepped fruit in separate airtight containers in the fridge.
What if I don’t have Greek yogurt?
You can use regular plain yogurt, but it will be thinner. To thicken it, strain it through a cheesecloth for an hour. Sour cream or cream cheese (softened) also work as substitutes, though they’ll change the flavor. For a dairy-free option, try coconut yogurt or cashew cream.
How do I keep the bananas from turning brown?
Brush the banana slices with a little lemon or lime juice. The acid slows down the browning process. You can also use slightly green bananas, which brown less quickly. If you’re serving immediately, browning isn’t an issue—the tray will be eaten before it becomes noticeable.
Can I use frozen fruit for this recipe?
I don’t recommend frozen fruit. When it thaws, it releases a lot of liquid, which will make the yogurt watery and the tray messy. Stick with fresh fruit for the best texture and presentation. If frozen fruit is all you have, thaw it completely and pat it very dry before using.
What other dips go well with this tray?
Besides the yogurt and peanut butter dips, try a chocolate ganache (melted dark chocolate with a splash of coconut milk), a caramel sauce, or a simple honey drizzle. For a savory option, a balsamic glaze adds a tangy contrast that pairs beautifully with berries.
Pin This Recipe!
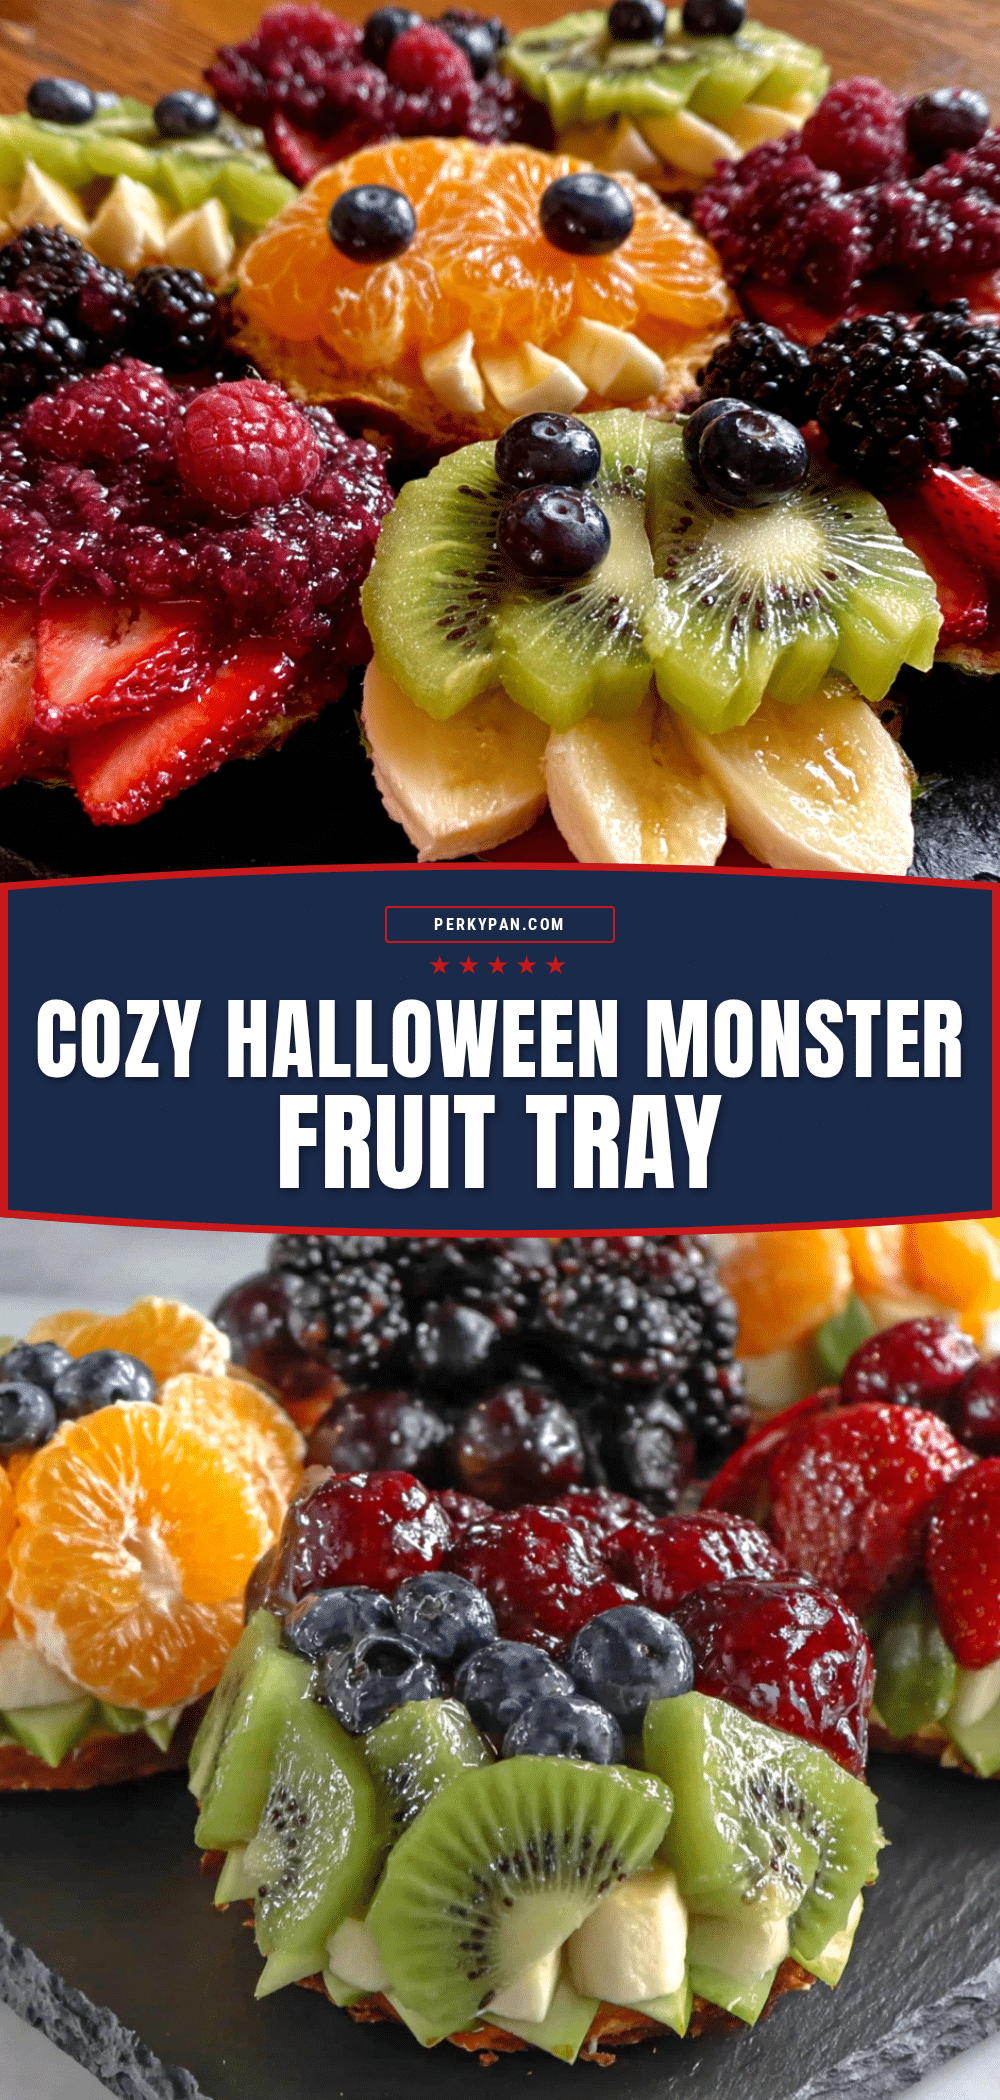
Cozy Halloween Monster Fruit Tray: Easy & Fun Party Snack
A fun and healthy Halloween snack featuring a monster face made from fresh fruit on a creamy Greek yogurt base. Quick to assemble and perfect for parties.
- Prep Time: 20 minutes
- Cook Time: 0 minutes
- Total Time: 20 minutes
- Yield: 8 servings 1x
- Category: Appetizer
- Cuisine: American
Ingredients
- 1 cup plain Greek yogurt (full-fat or 2%)
- 2 tablespoons honey
- 1 teaspoon vanilla extract
- 2 bananas
- 1 large strawberry
- 1 cup blueberries
- 1 cup blackberries
- 2 kiwis
- 1 cup red grapes
- 1/2 cup pomegranate seeds (optional)
- 1/4 cup creamy peanut butter
- 1 tablespoon maple syrup
- 1/4 teaspoon cinnamon
Instructions
- Wash and dry all fruit thoroughly.
- In a small bowl, combine Greek yogurt, honey, and vanilla extract. Stir until smooth. Set aside in the fridge.
- Peel bananas and slice into 1/4-inch rounds. Lightly brush with lemon juice to prevent browning (optional).
- Cut strawberry in half lengthwise. Peel kiwis and slice into thin rounds or half-moons. Cut red grapes in half. Leave blueberries and blackberries whole. If using pomegranate, scoop out seeds.
- Spread the yogurt mixture in a rough oval shape in the center of a large platter, about 1/4-inch thick.
- Place two banana slices on the upper half of the yogurt oval for eyes. Top each with a blueberry or blackberry for pupils.
- Place the strawberry half, cut-side down, in the center below the eyes for the nose.
- Use blackberries to form a curved smile below the nose. Add pomegranate seeds for teeth if desired.
- Surround the yogurt face with blueberries, blackberries, and grape halves to create the monster’s fur. Press gently into the yogurt.
- Arrange kiwi slices along the top of the monster’s head for hair, fanning them out.
- Fill any gaps with leftover fruit or pomegranate seeds.
- In a small bowl, combine peanut butter, maple syrup, and cinnamon. Stir until smooth. Place on the tray as a dip.
- Serve immediately or refrigerate until ready to serve.
Notes
For best results, use firm, ripe fruit. Assemble the tray just before serving to prevent fruit from releasing moisture. The yogurt dip can be made a day ahead.
Nutrition
- Serving Size: 1 cup fruit with 2 t
- Calories: 200
- Sugar: 22
- Sodium: 50
- Fat: 5
- Saturated Fat: 1
- Carbohydrates: 33
- Fiber: 6
- Protein: 9
Keywords: Halloween, fruit tray, monster, healthy snack, party food, no-bake