Love this? Save it for later!
Share the inspiration with your friends
My neighbor Marco asked me why I couldn’t just roast the pumpkin seeds with honey instead of going through the whole separate cinnamon-sugar toss after they came out of the oven. I started to explain why that wouldn’t work — then stopped. Honestly, I had no good reason. I just assumed honey would burn or make them sticky in a bad way. Three winters ago, during a particularly aggressive pumpkin carving session that left seeds scattered across my entire counter, I decided to try it his way. Marco is eight years old, by the way. He was helping his mom carve her first pumpkin ever, and he kept eyeing my complicated setup of bowls and spices with this skeptical look kids get when they think adults are making things harder than they need to be.
The power went out halfway through my first attempt, which forced me to rethink my timing entirely. I had to work by flashlight, using my phone to see the honey drizzle. That night, covered in pumpkin guts and feeling mildly ridiculous, I pulled a tray of the most perfectly caramelized seeds from the oven. The honey had done exactly what Marco predicted — it created this gorgeous, crackly coating that the cinnamon clung to like it finally found its home. I mean, I’ve been roasting seeds since I could reach the stove, and here was a kid who’d never done it once, telling me how. Maybe you’ve been there — that moment when someone with way less experience sees something you’ve been overcomplicating for years.
These honey roasted pumpkin seeds with cinnamon have become my fall ritual now. They’re the snack I make while the turkey brines, the thing I pack in little bags for neighbors, the reason I buy extra pumpkins just for the seeds. I keep making them because they remind me that sometimes the best cooking advice comes from people who haven’t learned why something “shouldn’t” work yet.
Why You’ll Love This Recipe
Let me tell you why these honey roasted pumpkin seeds with cinnamon are different from every other seed recipe you’ve tried. I’ve tested this about a dozen times across three different ovens, and I can confidently say this method produces the most addictive, perfectly crunchy, sweet-and-spicy snack you’ll pull from your kitchen all season.
- Quick & Easy : Comes together in under 30 minutes, most of which is hands-off roasting time. Perfect for those moments when pumpkin carving chaos has taken over your kitchen.
- Simple Ingredients : You need pumpkin seeds, honey, cinnamon, butter, and a pinch of salt. That’s it. No fancy extracts, no obscure spices, no trips to a specialty store.
- Perfect for Fall Gatherings : Great for Halloween parties, Thanksgiving snacking, or just having something cozy to munch while watching the leaves change. I always bring a jar to Friendsgiving and watch it disappear.
- Crowd-Pleaser : Kids love the sweetness, adults appreciate the warm cinnamon kick, and everyone fights over the clusters where the honey caramelized into little candy-like bits.
- Unbelievably Delicious : The texture is what gets me every time — crunchy on the outside with a slight chewiness where the honey coating clings. It’s next-level comfort snacking.
What makes this recipe different? It’s the honey method. Most recipes toss seeds in oil and spices, then add honey after roasting. But coating them before they go in creates this caramelized shell that transforms plain seeds into something that tastes dangerously close to candy. Every seed gets evenly coated, and the cinnamon blooms in the heat, releasing its full warm aroma. This isn’t just another version of roasted seeds — it’s your best version, the one you’ll come back to every pumpkin season.
This recipe is the kind that makes you close your eyes after the first bite. It’s comfort food reimagined — healthier than candy, faster than baking cookies, but with the same soul-soothing satisfaction. Perfect for impressing guests without stress, or turning a simple pumpkin carving afternoon into something memorable.
What Ingredients You Will Need
This recipe uses simple, wholesome ingredients to deliver bold flavor and satisfying crunch without the fuss. Most of these are pantry staples, especially during fall, and they come together in a way that feels both indulgent and completely sensible.
- Fresh pumpkin seeds — about 1 ½ cups, straight from your carving session. Rinse them well and pat them completely dry. Wet seeds won’t crisp up properly, and nobody wants soggy snacks. If you’re buying pre-packaged seeds, look for raw, unsalted ones for best results.
- Honey — 3 tablespoons of good quality honey. I prefer a mild wildflower honey for this, but any liquid honey works. The honey creates that signature caramelized coating and brings natural sweetness without refined sugar. (adds richness and helps the cinnamon stick)
- Unsalted butter — 2 tablespoons, melted. Butter gives the seeds a richer flavor than oil and helps the honey spread evenly. I recommend salted butter if that’s all you have, just reduce the added salt later. (use coconut oil if you need dairy-free)
- Ground cinnamon — 1 ½ teaspoons. This is where the warmth comes from. I’ve tried fancy Ceylon cinnamon and regular supermarket cinnamon, and honestly, both work beautifully. The cinnamon blooms in the heat and fills your kitchen with the most incredible fall aroma.
- Sea salt — ½ teaspoon, plus more for finishing. Salt balances the sweetness and makes the cinnamon pop. I use flaky sea salt for sprinkling at the end because those little crunch crystals are pure magic.
- Optional pinch of cayenne — just a tiny one, if you like a little heat with your sweet. It doesn’t make the seeds spicy, it just wakes up all the other flavors.
I recommend using fresh seeds from a sugar pumpkin or pie pumpkin if you can — they tend to be smaller and more tender than seeds from carving pumpkins, and they roast up with a better texture. But honestly, any pumpkin seeds work. I’ve made these with seeds from jack-o’-lantern pumpkins, and they turned out fantastic. Just make sure to remove as much of the stringy pumpkin flesh as possible during rinsing, because that stuff burns in the oven and tastes bitter.
For substitutions, you can swap the honey with maple syrup for a slightly different flavor profile — more woodsy, less floral. Use almond flour or oat flour if you need gluten-free, though this recipe is naturally gluten-free already. If you’re watching sugar intake, try using just 2 tablespoons of honey and adding an extra sprinkle of cinnamon for sweetness without the sugar load.
Equipment Needed
You don’t need much for this recipe, which is part of its charm. Here’s what you’ll want to have handy:
- Baking sheet — a standard half-sheet pan works perfectly. Line it with parchment paper for easiest cleanup. I’ve forgotten the parchment before, and let me tell you, scraping caramelized honey off a baking sheet is not fun.
- Large bowl — for tossing the seeds with the honey mixture. Any mixing bowl works, just make sure it’s big enough to toss without flinging seeds everywhere.
- Spatula or wooden spoon — for spreading the seeds into an even layer. A silicone spatula is nice because it scrapes every bit of the honey mixture out of the bowl.
- Measuring spoons — for honey, cinnamon, and salt. Honey is sticky, so spray your measuring spoon with a little cooking spray first, and it’ll slide right off.
- Small microwave-safe bowl — for melting the butter. You can also melt it in a small saucepan if you prefer.
- Cooling rack — optional but helpful. Letting the seeds cool on a rack allows air to circulate underneath, keeping them crunchy instead of steaming on the hot pan.
If you don’t have parchment paper, you can use a silicone baking mat. I’ve used both, and they work equally well. Just don’t skip the liner entirely unless you enjoy scrubbing. My first batch taught me that lesson the hard way — I spent a good ten minutes scraping at burnt honey residue while my kitchen smelled amazing but my pan looked sad.
Preparation Method
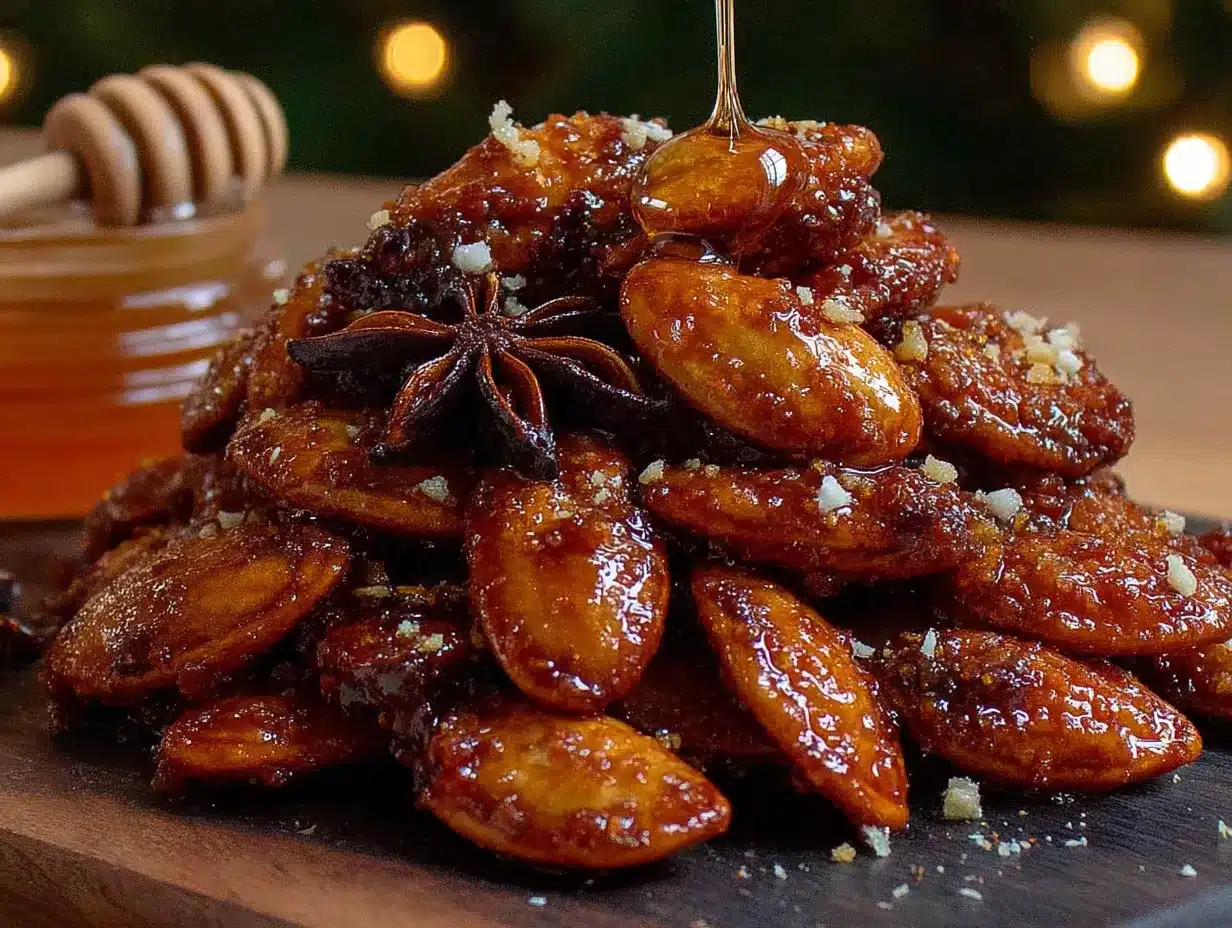
- Preheat your oven to 325°F (163°C). This moderate temperature is key — too hot and the honey burns before the seeds crisp up. I learned this after ruining a batch at 400°F. They went from golden to charcoal in what felt like seconds.
- Clean your pumpkin seeds thoroughly. Separate the seeds from the pumpkin guts and place them in a colander. Rinse under cool water, rubbing gently to remove any stringy bits. Don’t worry about getting every single piece off — a little pumpkin residue adds flavor. Pat the seeds completely dry with a clean kitchen towel or paper towels. This step matters more than you think. Wet seeds steam instead of roast, and you’ll end up with chewy seeds instead of crunchy ones.
- In a large bowl, whisk together the melted butter, honey, cinnamon, and salt. Stir until the cinnamon is fully incorporated — you don’t want any dry pockets of spice hiding in the mixture. The color should be a uniform golden brown, and the smell at this point is already incredible.
- Add the dried pumpkin seeds to the bowl and toss well. Use your spatula to make sure every seed gets coated. I like to fold the mixture over itself several times, scraping the bottom of the bowl. You’ll notice the honey mixture clumping a bit — that’s good. Those clumps will become the caramelized clusters everyone fights over.
- Spread the seeds in a single layer on your prepared baking sheet. Try to get them as even as possible. If some seeds are stacked on top of each other, they’ll steam instead of roast. Use your spatula to nudge them apart. Don’t worry about perfection — a little variation in spacing is fine.
- Roast for 20-25 minutes, stirring halfway through. Set a timer for 12 minutes, pull the pan out, and give the seeds a good stir with your spatula. This ensures even toasting and prevents the edges from burning while the center stays undercooked. The seeds will look darker and smell intensely of honey and cinnamon at this point.
- Watch for the golden moment. At around 20 minutes, start checking every 2 minutes. The seeds are done when they’re deep golden brown and the honey coating has darkened to a rich amber. They’ll still feel slightly soft when you pull them out — they continue crisping as they cool. Pull them when they look one shade lighter than you want.
- Cool completely on the baking sheet. Don’t touch them for at least 15 minutes. I know it’s tempting, but moving them too early will break the caramelized coating. Let them sit undisturbed, and you’ll hear a satisfying crackle as they cool and harden. Sprinkle with a pinch of flaky sea salt right when they come out of the oven, while the coating is still warm enough for the salt to stick.
- Break apart any large clusters with your hands. Some clumps are amazing — keep those. Break up any pieces that are too big to eat comfortably. The clusters are honestly the best part, so don’t break them down too much.
Cooking Tips & Techniques
Let me share what I’ve learned the hard way so you don’t have to. My first batch of honey roasted pumpkin seeds with cinnamon was a disaster — burnt on the edges, raw in the middle, and stuck to the pan like glue. Here’s what I figured out since then.
Dry your seeds like your crunch depends on it. Because it does. I spread my rinsed seeds on a towel and let them air dry for about 30 minutes before I even start mixing the coating. Any moisture on the seeds dilutes the honey mixture and creates steam in the oven. Steam is the enemy of crunch. I once rushed this step and ended up with seeds that had the texture of damp cardboard. Never again.
Stir at the right time. The 12-minute mark is non-negotiable. Set a timer, don’t rely on memory. I’ve walked away “just for a minute” and come back to seeds that looked like they’d been through a fire. The honey coating goes from perfect to burnt faster than you’d believe. When you stir, scrape the edges of the pan where the honey tends to pool and caramelize faster.
Trust the cooling process. Seeds straight from the oven will feel soft and almost bendy. Don’t panic. That’s normal. The honey coating is still molten at this point, and it hardens as it cools. If you try to eat them immediately, you’ll burn your mouth and think you failed. Give them the full 15 minutes, and they’ll transform into perfectly crunchy snacks. I tell everyone this, and someone still burns their tongue every single time.
Double up the batch if you’re smart. These disappear fast. I’ve watched a full tray vanish in under an hour at a small gathering. Make two trays simultaneously if your oven has room — just rotate them top to bottom at the halfway stir point. They store well, so leftovers aren’t a problem. Except there won’t be leftovers.
Watch your honey temperature. If your honey is cold and thick, it won’t coat the seeds evenly. Warm it slightly by placing the jar in a bowl of hot water for a few minutes, or microwave it for 10 seconds. Warm honey spreads like a dream and clings to every seed surface.
Variations & Adaptations
One of the best things about this honey roasted pumpkin seeds with cinnamon recipe is how flexible it is. I’ve experimented with quite a few variations, and some have become favorites in their own right.
Spicy Honey version : Add ¼ teaspoon of cayenne pepper and a pinch of smoked paprika to the honey mixture. The heat sneaks up on you after the sweetness hits, and it’s absolutely addictive. I made this for a football watching party, and people kept asking what “that spicy seed snack” was. It pairs surprisingly well with cold beer.
Maple Cinnamon variation : Swap the honey entirely for pure maple syrup. The flavor is more woodsy and less floral, with a deeper caramelization. This version feels almost like a breakfast cereal topping. I’ve crumbled it over oatmeal and yogurt, and it’s fantastic. Use Grade A dark amber maple syrup for the strongest flavor.
Savory-Sweet blend : Reduce the honey to 2 tablespoons and add 1 tablespoon of melted butter plus ½ teaspoon of garlic powder and ¼ teaspoon of black pepper. The cinnamon still provides warmth, but the garlic adds an unexpected savory note. This one is dangerous because you can’t stop eating it. I brought a jar to a potluck and came home with an empty container.
Dietary adaptations : For a vegan version, use coconut oil instead of butter and maple syrup instead of honey. The texture is slightly different — a bit more delicate — but still delicious. For a lower-sugar option, use just 1 ½ tablespoons of honey and add an extra ½ teaspoon of cinnamon. The cinnamon provides natural sweetness perception without the sugar load.
Seasonal twist : In the fall, add ¼ teaspoon of pumpkin pie spice along with the cinnamon. In winter, try adding a pinch of nutmeg and cloves. In spring, a tiny bit of orange zest brightens the whole thing up. I made a batch with orange zest and dark chocolate chips mixed in after cooling, and it tasted like a fancy holiday treat.
Serving & Storage Suggestions
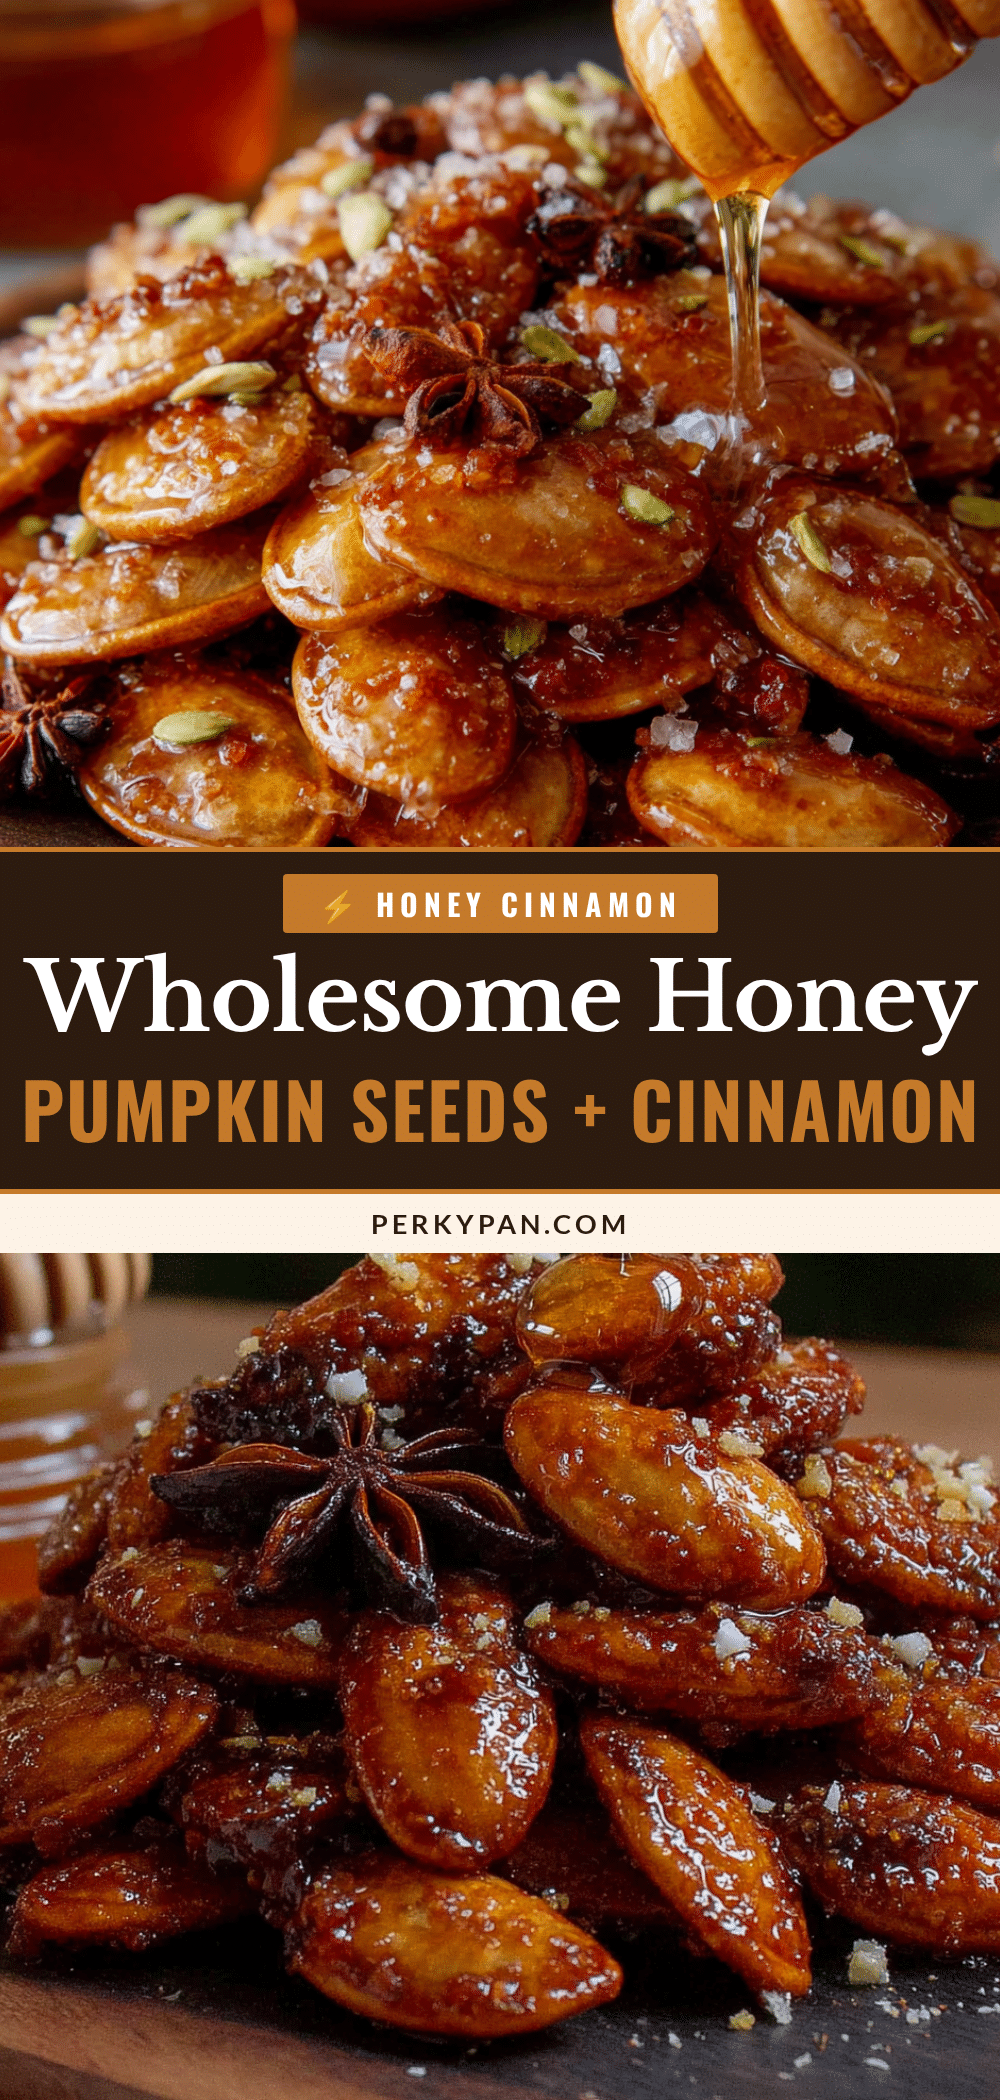
These honey roasted pumpkin seeds with cinnamon are best served at room temperature, straight from the cooling sheet if you can resist waiting. I like to pile them in a wooden bowl for a cozy, rustic presentation that screams fall. The golden color against the dark bowl is gorgeous, and the cinnamon aroma hits you as soon as someone reaches in.
They pair beautifully with a hot mug of apple cider or a pumpkin spice latte. For a fun snack board, arrange them alongside dried cranberries, dark chocolate chunks, and sharp cheddar cheese cubes. The sweet and salty combination with the cheese is unexpectedly perfect. I discovered this combo by accident when I was too lazy to put the cheese away, and now it’s my go-to party platter.
For storage, let the seeds cool completely before transferring to an airtight container. They’ll stay fresh at room temperature for up to two weeks — if they last that long. I keep mine in a glass jar with a tight-fitting lid, placed in a cool, dark pantry. Don’t refrigerate them; the humidity will soften their crunch. If you live in a humid climate, add a silica gel packet to the container to absorb excess moisture.
To re-crisp seeds that have softened slightly, spread them on a baking sheet and warm them in a 300°F oven for 5 minutes. Let them cool completely before storing again. This trick has saved many batches that sat out during a humid day. I’ve also reheated them in a dry skillet over medium-low heat for about 3 minutes, shaking the pan frequently. Both methods work, but the oven is more consistent.
The flavors actually deepen after a day or two. The honey and cinnamon meld together, and the seeds absorb more of the spice. I’ve found that day-two seeds are often even better than fresh ones, assuming they’ve been stored properly. Just don’t tell anyone that — they might hide a batch from you on purpose.
Nutritional Information & Benefits
These honey roasted pumpkin seeds with cinnamon offer a surprisingly balanced snack. A quarter-cup serving contains approximately 180 calories, 12 grams of healthy fats, 6 grams of protein, and 14 grams of carbohydrates, primarily from the honey. The protein and healthy fats make them more satisfying than typical sweet snacks, keeping you fuller longer.
Pumpkin seeds are nutritional powerhouses. They’re packed with magnesium, zinc, and iron — minerals that support immune function, sleep quality, and energy levels. The zinc in particular is great for skin health and wound healing. Cinnamon adds its own benefits, including anti-inflammatory properties and blood sugar regulation. The honey provides quick energy and contains trace antioxidants.
This recipe is naturally gluten-free, dairy-free if you use coconut oil instead of butter, and vegetarian. It contains tree nuts only if you add optional nut-based toppings. The main allergen concern is the potential for cross-contamination if you’re using shared kitchen equipment. If you’re serving guests with allergies, make a separate batch using dedicated tools.
From a wellness perspective, I love that this snack feels indulgent while actually providing real nutritional value. It satisfies that sweet-and-salty craving without the processed ingredients found in most packaged snacks. I feel good about eating a handful — or two — and I feel even better about serving them to my family.
Conclusion
These honey roasted pumpkin seeds with cinnamon are the kind of recipe that becomes part of your fall traditions. They’re simple enough for a weekday snack, special enough for holiday gatherings, and flexible enough to adapt to whatever you have in your pantry. Every time I make them, I think about Marco and his eight-year-old wisdom, and I smile.
I encourage you to make this recipe your own. Add more cinnamon if you love it, throw in some cayenne if you’re feeling bold, or swap the honey for maple syrup and see where that takes you. The base method is forgiving, and the results are consistently delicious. Don’t be afraid to experiment — some of my best variations came from happy accidents.
I’d love to hear how yours turn out. Drop a comment below and tell me about your favorite variation, or share a photo of your finished seeds. Tag me so I can see your golden, crunchy, cinnamon-coated creations. And if you have a Marco in your life — someone who challenges your cooking assumptions with simple logic — listen to them. They might just know something you don’t.
Happy roasting, friends. Your kitchen is about to smell incredible.
Frequently Asked Questions
Can I use store-bought pumpkin seeds instead of fresh ones?
Absolutely. Look for raw, unsalted pumpkin seeds in the bulk section or baking aisle. You’ll need about 1 ½ cups. The texture will be slightly different — store-bought seeds tend to be a bit smaller and more uniform — but they roast up beautifully. Just skip the cleaning step and go straight to mixing the coating.
Why did my seeds turn out chewy instead of crunchy?
This usually happens for one of three reasons: the seeds weren’t dried thoroughly before coating, the oven temperature was too low, or they were pulled from the oven too early. Make sure your seeds are completely dry before adding the honey mixture, and use an oven thermometer to verify your temperature. Let them cool fully on the baking sheet — they continue crisping as they cool.
Can I make these in an air fryer?
Yes! Preheat your air fryer to 300°F. Spread the coated seeds in a single layer in the basket and cook for 10-12 minutes, shaking the basket halfway through. Check them at 10 minutes and add time in 2-minute increments if needed. The air fryer version tends to be even crunchier than the oven version, and it’s faster too.
How do I prevent the honey from burning?
The key is moderate heat and attention. Keep your oven at 325°F or lower, and stir at the 12-minute mark. Watch the edges of the pan where honey tends to pool. If you see dark spots forming, stir immediately and reduce the temperature by 25 degrees for the remaining time. Parchment paper also helps prevent direct contact with the hot pan surface.
Can I double this recipe for a crowd?
Absolutely. Double all ingredients and use two baking sheets, placing them on separate oven racks. Rotate the pans top to bottom and front to back at the halfway stir point. You may need to add 2-3 minutes to the total cooking time since the oven has more to heat. Just keep a close eye on color and smell toward the end.
Pin This Recipe!
Wholesome Honey Roasted Pumpkin Seeds with Cinnamon
These honey roasted pumpkin seeds with cinnamon are a quick and easy fall snack, featuring a caramelized honey coating and warm cinnamon flavor. Perfect for Halloween parties, Thanksgiving snacking, or cozy autumn munching.
- Prep Time: 10 minutes
- Cook Time: 25 minutes
- Total Time: 35 minutes
- Yield: 4 servings 1x
- Category: Snack
- Cuisine: American
Ingredients
- 1 ½ cups fresh pumpkin seeds (raw, unsalted if store-bought)
- 3 tablespoons honey (mild wildflower preferred)
- 2 tablespoons unsalted butter, melted (or coconut oil for dairy-free)
- 1 ½ teaspoons ground cinnamon
- ½ teaspoon sea salt, plus more for finishing
- Optional pinch of cayenne pepper
Instructions
- Preheat your oven to 325°F (163°C).
- Clean the pumpkin seeds thoroughly: separate from pumpkin guts, rinse under cool water, and pat completely dry with a towel.
- In a large bowl, whisk together the melted butter, honey, cinnamon, and salt until fully incorporated.
- Add the dried pumpkin seeds to the bowl and toss well, ensuring every seed is coated.
- Spread the seeds in a single layer on a parchment-lined baking sheet.
- Roast for 20-25 minutes, stirring halfway through (at 12 minutes).
- Check for doneness: seeds are done when deep golden brown and the honey coating is rich amber. They will still feel slightly soft but will crisp as they cool.
- Cool completely on the baking sheet for at least 15 minutes. Sprinkle with flaky sea salt while still warm.
- Break apart any large clusters with your hands.
Notes
Dry seeds thoroughly for maximum crunch. Stir at the 12-minute mark to prevent burning. Seeds will feel soft when removed from oven but crisp as they cool. For best results, use fresh seeds from sugar or pie pumpkins. Store in an airtight container at room temperature for up to two weeks.
Nutrition
- Serving Size: 1/4 cup
- Calories: 180
- Sugar: 10
- Sodium: 150
- Fat: 12
- Saturated Fat: 4
- Carbohydrates: 14
- Fiber: 2
- Protein: 6
Keywords: honey roasted pumpkin seeds, cinnamon pumpkin seeds, fall snack, pumpkin seeds recipe, easy snack