Love this? Save it for later!
Share the inspiration with your friends
The company potluck was in six hours and I’d completely forgotten. I mean, I’d *known* about it for weeks, but somewhere between Tuesday’s deadline and Thursday’s chaos, it had evaporated from my brain. At 9 AM, my coworker Sarah pinged the group chat: “Can’t wait to see everyone’s desserts tomorrow!” My stomach dropped. Everyone else would be bringing elaborate, Pinterest-perfect creations. Karen from accounting was famous for her triple-layer chocolate ganache. Mark always brought those fancy French macarons that looked like they belonged in a bakery window. And me? I had a half-empty box of cake flour, a stick of butter that was *almost* at room temperature, and a vague memory of my grandmother’s birthday cake recipe that I’d never actually written down.
I’m not gonna lie—I panicked. I paced my kitchen, staring at the pantry like it owed me money. Then I saw the little jar of rainbow sprinkles hiding behind the oatmeal. And honestly? Something clicked. I grabbed my phone, called my mom (who bless her heart, answered on the first ring), and scribbled notes on a napkin while she walked me through the basics. The butter was still a little too cold. I may have overmixed the batter in my rush. And let’s just say the kitchen looked like a unicorn had sneezed everywhere. But I threw that cake in the oven, crossed my fingers, and hoped for the best.
When I walked into the office that next morning with my slightly lopsided, sprinkle-studded creation, I felt like a fraud. But then the first slice was cut. And the second. And suddenly, people were coming back for thirds. Karen asked for the recipe. Mark said it was “the happiest cake” he’d ever eaten. I won the potluck—not because I planned to, but because this cake has this weird, magical way of making everyone smile. That’s the thing about the Ultimate Funfetti Birthday Cake. It doesn’t need fancy techniques or rare ingredients. It just needs a little bit of chaos, a lot of sprinkles, and the willingness to have fun. Maybe you’ve been there—staring down a deadline with flour on your shirt. Trust me, this is the recipe that saves you every time.
Why You’ll Love This Recipe
This isn’t just another cake recipe. This is the one you’ll turn to when you need a guaranteed win. After testing this version over a dozen times (my neighbors have become very willing taste-testers, let me tell you), I can say with confidence that this is the Ultimate Funfetti Birthday Cake for a reason.
- Quick & Easy : From start to finish, this cake comes together in about 90 minutes. That includes baking and cooling time. The active prep? Maybe 20 minutes. Perfect for those “oh no, I need a dessert” moments.
- Simple Ingredients : You probably have 90% of these in your pantry right now. No specialty flours, no weird extracts. Just good old-fashioned baking staples plus a jar of sprinkles.
- Perfect for Parties : This cake was born for celebrations. Birthdays, potlucks, holidays, or just a Tuesday that needs brightening. It’s the dessert that makes people stop and smile.
- Crowd-Pleaser : Kids love the sprinkles. Adults love the soft, tender crumb. Everyone loves that it’s not too sweet. I’ve watched people who “don’t like cake” go back for seconds.
- Unbelievably Delicious : The secret is in the technique. Using buttermilk and a specific mixing method gives you a cake that’s moist, fluffy, and absolutely packed with vanilla flavor. Those little bursts of color are just the cherry on top.
What makes this different from every other funfetti cake out there? It’s the balance. So many versions are either too dry, too sweet, or the sprinkles all sink to the bottom. I’ve fixed all of that. The crumb is tender but sturdy enough to hold up to stacking. The frosting is creamy without being cloying. And the sprinkles? They stay suspended throughout the batter, giving you that perfect rainbow speckle in every single bite. This isn’t just good—it’s the kind of cake that makes you close your eyes after the first forkful.
What Ingredients You Will Need
This recipe uses simple, wholesome ingredients to deliver that signature birthday cake flavor and that impossibly tender texture. Most of these are pantry staples, which is exactly what you want when you’re baking for a crowd.
For the Cake:
- 2 ½ cups (312g) all-purpose flour – I recommend Gold Medal or King Arthur for consistent results. The protein content gives you the perfect structure.
- 2 ½ teaspoons baking powder – Make sure it’s fresh! Old baking powder is the #1 reason cakes don’t rise properly.
- ½ teaspoon baking soda – This helps with browning and tenderness.
- 1 teaspoon salt – Don’t skip it. Salt balances the sweetness and enhances the vanilla flavor.
- ¾ cup (1 ½ sticks or 170g) unsalted butter, softened – Room temperature is crucial here. Leave it out for about an hour before starting. If you’re in a rush, cut it into small cubes and let it sit for 15 minutes.
- 1 ½ cups (300g) granulated sugar – Regular white sugar is perfect. It creams beautifully with the butter.
- 3 large eggs, room temperature – Cold eggs can seize your batter. Place them in a bowl of warm water for 5 minutes if you forgot to take them out.
- 1 tablespoon pure vanilla extract – Splurge on the real stuff here. Imitation vanilla works, but the flavor won’t be as rich. I use Nielsen-Massey.
- 1 cup (240ml) buttermilk, room temperature – This is the magic ingredient. The acidity tenderizes the gluten and reacts with the baking soda for extra lift. No buttermilk? Add 1 tablespoon lemon juice to regular milk and let it sit for 5 minutes.
- ½ cup (80g) rainbow sprinkles (jimmies, not nonpareils) – This is important! Jimmies are the long, cylindrical sprinkles. Nonpareils (the tiny round ones) tend to bleed their color into the batter. Buy a good brand like Wilton or Sweetapolita.
For the Vanilla Buttercream Frosting:
- 1 cup (2 sticks or 226g) unsalted butter, softened – Again, room temperature is key. Cold butter won’t whip up fluffy.
- 4 cups (480g) powdered sugar, sifted – Sifting removes lumps and gives you a silky smooth frosting. Trust me on this one.
- ¼ cup (60ml) heavy cream – Or whole milk. Heavy cream makes it extra luxurious.
- 2 teaspoons pure vanilla extract – For that classic birthday cake flavor.
- ¼ teaspoon salt – Balances the sweetness.
- Additional sprinkles for decoration – Because more is more!
Equipment Needed
You don’t need a professional bakery setup for this cake, but having the right tools makes everything easier. Here’s what you’ll need:
- Two 9-inch round cake pans – I use Fat Daddio’s anodized aluminum pans. They conduct heat evenly and don’t warp. If you only have one pan, you can bake the layers one at a time—just let the pan cool completely between batches.
- Electric hand mixer or stand mixer – A stand mixer with the paddle attachment is ideal, but a hand mixer works perfectly too. You’ll be creaming butter and sugar for several minutes, so your arm will thank you.
- Mixing bowls – At least two medium bowls and one large bowl.
- Whisk – For combining dry ingredients.
- Rubber spatula – For scraping down the bowl and folding in sprinkles.
- Cooling rack – Essential for even cooling. If you don’t have one, you can use the inverted pan method, but a rack is better.
- Cake stand or serving plate – For that beautiful presentation.
- Offset spatula – Makes frosting so much easier. A butter knife works in a pinch, but an offset spatula is worth the $8 investment.
- Parchment paper – Cut circles for the bottom of your pans. This guarantees your cakes won’t stick.
Budget-friendly tip: Check your local dollar store for cake pans and mixing bowls. They won’t last forever, but they’ll get you through many birthday cakes.
Preparation Method
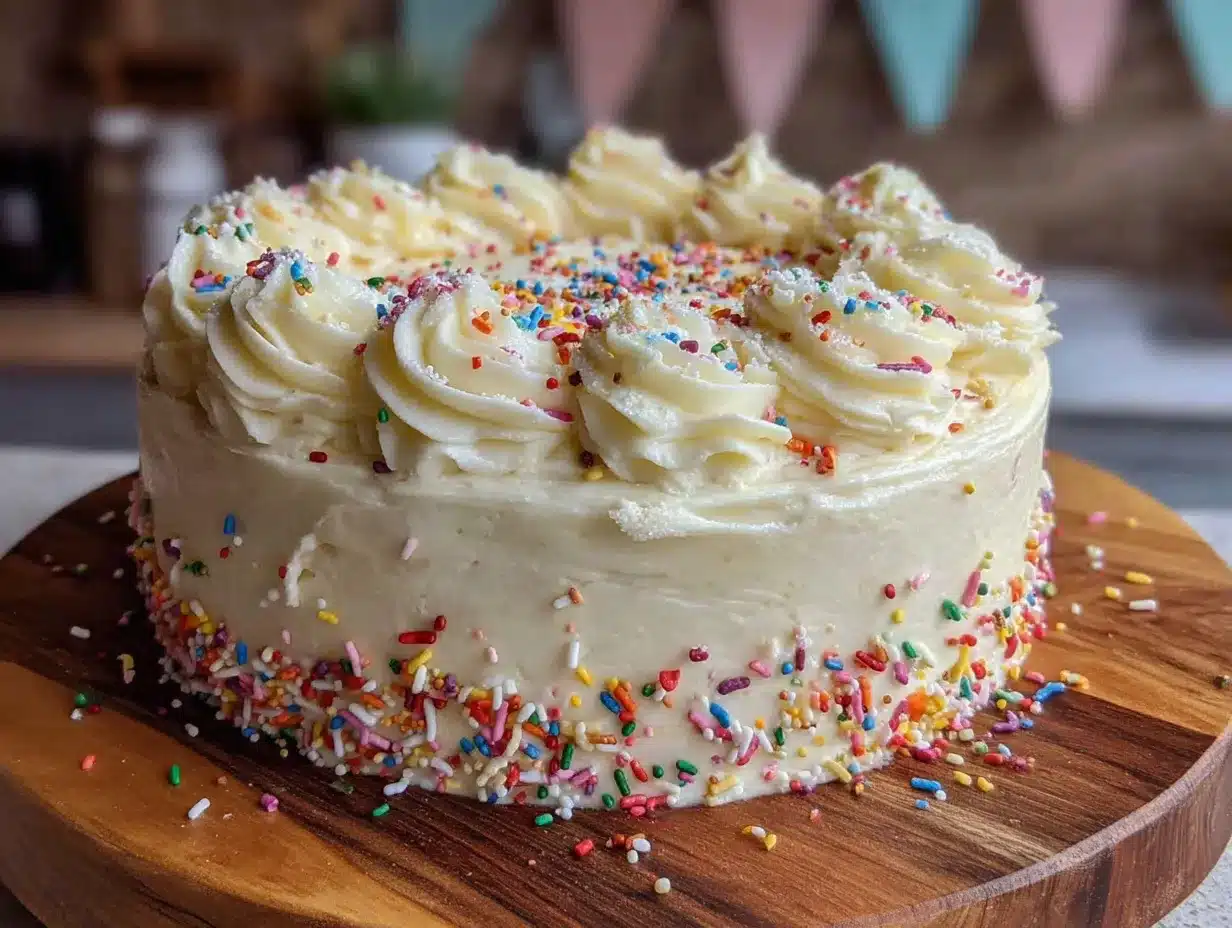
Alright, let’s make some magic. Follow these steps carefully, and you’ll have a cake that looks like you spent all day on it (even though you didn’t).
- Preheat and Prep – Preheat your oven to 350°F (175°C). Position the rack in the center of the oven. Grease two 9-inch round cake pans with butter or non-stick spray, then line the bottoms with parchment paper circles. Grease the parchment too. This double-layer protection is your insurance policy against stuck cakes.
- Whisk Dry Ingredients – In a medium bowl, whisk together the flour, baking powder, baking soda, and salt. Set this aside. Whisking aerates the flour and distributes the leavening agents evenly. No need to sift unless your flour is very lumpy.
- Cream Butter and Sugar – In a large mixing bowl (or the bowl of your stand mixer), beat the softened butter and granulated sugar together on medium-high speed for 3-4 minutes. You’re looking for a light, fluffy, pale yellow mixture. It should look like soft sand. Don’t rush this step—proper creaming is what gives the cake its tender crumb. Scrape down the sides and bottom of the bowl with your spatula halfway through.
- Add Eggs and Vanilla – Add the eggs one at a time, beating well after each addition (about 30 seconds each). The mixture should look smooth and glossy. Then add the vanilla extract and beat until combined. If the mixture looks curdled at this point, don’t panic—it means your eggs were a little too cold. Just keep mixing and it will come together.
- Alternate Dry and Wet Ingredients – With the mixer on low speed, add the dry ingredients in three additions, alternating with the buttermilk. Start and end with the dry ingredients. Here’s the rhythm: ⅓ of the flour mixture, mix until just combined, ½ of the buttermilk, mix, ⅓ of the flour, mix, remaining buttermilk, mix, final ⅓ of flour. Mix until just combined after each addition. Overmixing at this stage develops gluten and makes the cake tough. We want tender, not tough.
- Fold in Sprinkles – This is the fun part. Remove the bowl from the mixer and use your rubber spatula to gently fold in the rainbow jimmies. Fold just until they’re evenly distributed—about 10-12 folds. Don’t overmix or the colors might bleed. The batter will be thick and fluffy, studded with little pops of color.
- Divide and Bake – Divide the batter evenly between the two prepared pans. Use a kitchen scale for accuracy if you have one (about 600g per pan). Smooth the tops with your spatula. Bake for 25-30 minutes, or until a toothpick inserted in the center comes out clean or with just a few moist crumbs. The cakes should be golden brown and spring back when lightly touched. Rotate the pans halfway through baking if your oven has hot spots.
- Cool Completely – Let the cakes cool in their pans on a wire rack for 10-15 minutes. Then run a knife around the edges, invert onto the rack, and peel off the parchment paper. Let them cool completely—like, completely—before frosting. If you frost a warm cake, the frosting will melt into a sad puddle. Patience, my friend.
- Make the Frosting – While the cakes cool, make the buttercream. In a large bowl, beat the softened butter on medium speed until smooth and creamy (about 2 minutes). Gradually add the sifted powdered sugar, 1 cup at a time, beating on low speed until incorporated. Add the heavy cream, vanilla extract, and salt. Increase the speed to medium-high and beat for 3-4 minutes until light, fluffy, and spreadable. If it’s too thick, add a splash more cream. Too thin? Add a little more powdered sugar.
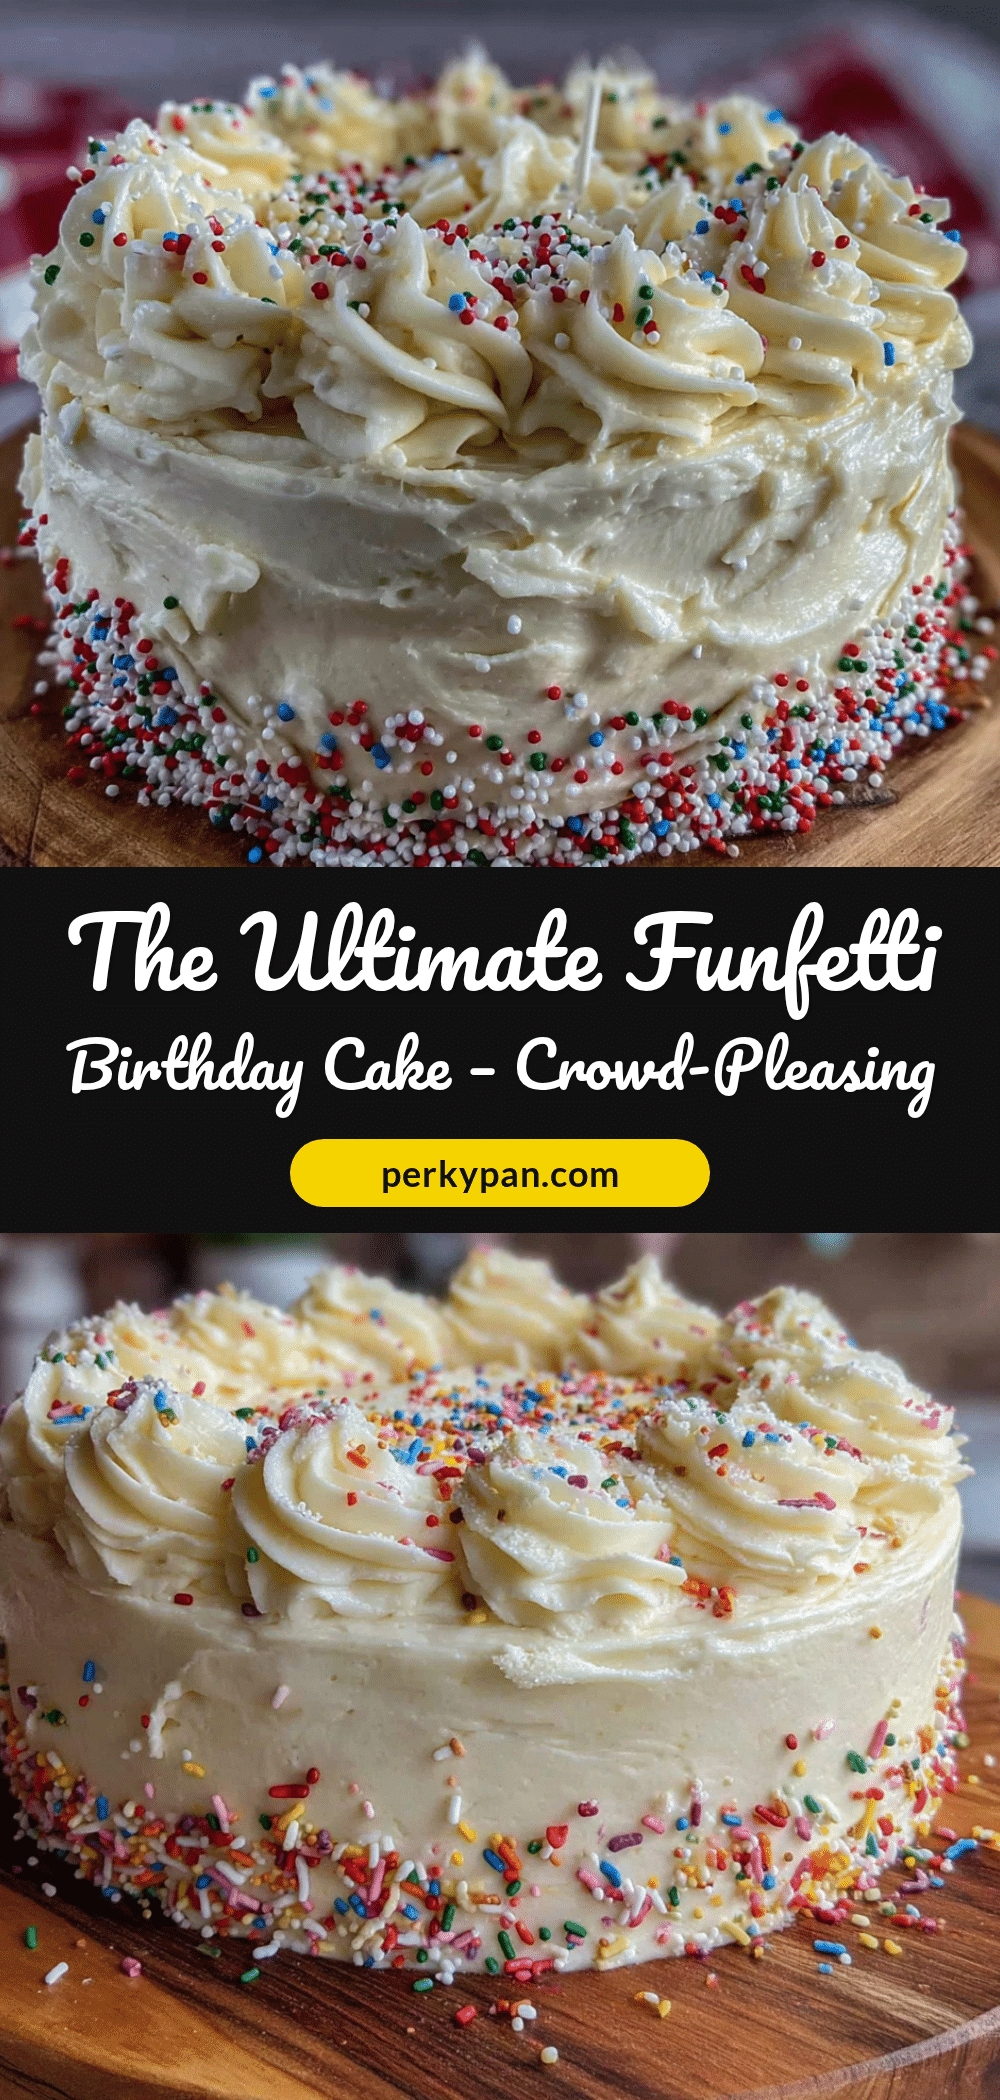
- Assemble and Frost – Place one cake layer on your serving plate, flat side down. Spread about 1 cup of frosting evenly on top. Place the second layer on top, flat side up. Apply a thin “crumb coat” of frosting all over the cake—just enough to seal in the crumbs. Refrigerate for 15-20 minutes to set. Then apply the final layer of frosting, using your offset spatula to create smooth sides or fun swirls on top. Decorate with additional sprinkles on the sides or top. I like to press them gently into the frosting for that fully-loaded look.
Cooking Tips & Techniques
I’ve made this cake enough times to have a few battle scars and a lot of hard-won wisdom. Here are the things I wish someone had told me when I first started making funfetti cake.
The Sprinkle Situation – I cannot stress this enough: use jimmies, not nonpareils. The first time I made this cake, I used those tiny round sprinkles and ended up with gray-green batter. It was tragic. Jimmies hold their color and shape through the baking process. Also, toss them in a tablespoon of flour before folding them into the batter. This little trick prevents them from all sinking to the bottom of the cake.
Room Temperature is Non-Negotiable – Your butter, eggs, and buttermilk all need to be at room temperature. Cold ingredients don’t emulsify properly, which means a dense, greasy cake. I learned this the hard way when I made a cake for my niece’s birthday and it came out looking like a hockey puck. Set everything out at least an hour before you start baking.
The Toothpick Test – Check your cakes at 25 minutes. Every oven runs differently. My old oven took exactly 28 minutes. My new one? 25 on the dot. Start checking early to avoid overbaking. Overbaked cake = dry cake, and nobody wants that.
Leveling Layers – If your cakes have domed tops (which happens), use a serrated knife to level them before stacking. Just slice off the dome so you have a flat surface. Save the scraps for snacking or making cake pops.
Multitasking Strategy – While the cakes are baking and cooling, make your frosting and clean up your workspace. This way, when the cakes are cool, you can focus entirely on assembly without a sink full of dishes staring at you.
Variations & Adaptations
This Ultimate Funfetti Birthday Cake is incredibly versatile. Here are some ways to make it your own:
Chocolate Funfetti Cake – Replace ¼ cup of the flour with ¼ cup of unsweetened cocoa powder. The chocolate base with rainbow sprinkles is a surprisingly gorgeous combination. My friend Jenna requested this for her 30th birthday and it was a huge hit.
Lemon Funfetti Cake – Add the zest of two lemons to the sugar and rub it in with your fingers before creaming with the butter. Replace 2 tablespoons of the buttermilk with fresh lemon juice. The bright citrus flavor pairs beautifully with the vanilla buttercream.
Cupcakes Instead of Cake – This batter makes about 24 standard cupcakes. Bake at 350°F (175°C) for 18-22 minutes. Perfect for birthday parties where you want individual servings.
Gluten-Free Version – Substitute the all-purpose flour with a good 1:1 gluten-free baking flour blend (I use Bob’s Red Mill). Add 1 teaspoon of xanthan gum if your blend doesn’t already contain it. The texture will be slightly more delicate, but still delicious.
Dairy-Free Adaptation – Use vegan butter sticks (like Miyoko’s) and replace the buttermilk with 1 cup of unsweetened almond milk mixed with 1 tablespoon of apple cider vinegar. For the frosting, use vegan butter and canned coconut cream instead of heavy cream. Let it chill before whipping.
Funfetti Cake Pops – Crumble any leftover cake (or intentionally bake a third layer) and mix with about ¼ cup of frosting. Roll into balls, insert lollipop sticks, and dip in melted white chocolate. Roll in sprinkles while the coating is still wet. These are always the first thing to disappear at parties.
Serving & Storage Suggestions
This cake is best served at room temperature. Take it out of the refrigerator about 30-45 minutes before you plan to serve it. The texture relaxes and the flavors become more pronounced. Slice with a sharp, serrated knife, wiping the blade clean between cuts for those picture-perfect slices.
What to Serve Alongside – A big glass of cold milk is the classic pairing. For an adult gathering, a glass of bubbly or a creamy vanilla milkshake works beautifully. If you’re serving this at a birthday party, a scoop of vanilla ice cream on the side never hurts.
Storage Instructions – Store the frosted cake in an airtight cake carrier at room temperature for up to 2 days. If your kitchen is warm, refrigerate it, but let it come to room temperature before serving. The cake itself stays moist for days thanks to the buttermilk.
Freezing Instructions – You can freeze the unfrosted cake layers for up to 3 months. Wrap each layer tightly in plastic wrap, then in aluminum foil. Thaw overnight in the refrigerator before frosting. You can also freeze the frosted cake (without decorations) for up to 2 months. Thaw in the refrigerator overnight, then add fresh sprinkles before serving.
Flavor Development – Honestly, this cake tastes even better the next day. The flavors meld together and the crumb becomes even more tender. So if you’re making it for a party, bake it a day ahead. Your future self will thank you.
Nutritional Information & Benefits
Let’s be real—this is a celebration cake, not a health food. But here’s the estimated nutritional breakdown per slice (based on 12 servings):
- Calories: Approximately 480-520 per slice
- Fat: 24g
- Carbohydrates: 68g
- Protein: 5g
- Sugar: 48g
That said, there are some bright spots. The buttermilk provides calcium and probiotics. The eggs offer high-quality protein and choline. And honestly? There’s a mental health benefit to eating something that makes you happy. I firmly believe that food should nourish your soul as much as your body. This cake is about joy, celebration, and connection. One slice won’t derail your wellness goals, but it might just make your day better.
Dietary Considerations: This recipe contains gluten, dairy, and eggs. See the variations section above for gluten-free and dairy-free adaptations. For a nut-free version, simply ensure your sprinkles are processed in a nut-free facility (most major brands are).
Conclusion
There’s a reason this Ultimate Funfetti Birthday Cake has become my go-to for every celebration, big or small. It’s forgiving enough for beginner bakers, impressive enough for seasoned ones, and universally loved by everyone who tries it. Those little bursts of color, that impossibly tender crumb, that creamy vanilla frosting—it all comes together to create something that feels like pure happiness on a plate.
I want you to make this your own. Add extra sprinkles. Try the lemon version. Make it into cupcakes for your kid’s class party. The beauty of this recipe is that it’s a starting point, not a rulebook. I’d love to hear how it turns out for you! Leave a comment below with your favorite variation, or tag me in your photos when you make it. Honestly, seeing your creations is my favorite part of this whole blogging thing.
Happy baking, my friend. Now go make some memories—and don’t forget to save a slice for yourself. You deserve it.
Frequently Asked Questions
Can I make this cake ahead of time?
Absolutely! You can bake the cake layers up to 2 days in advance. Wrap them tightly in plastic wrap and store at room temperature. You can also freeze them for up to 3 months. The frosting can be made a day ahead and refrigerated—just let it come to room temperature and re-whip before using.
Why did my sprinkles bleed into the batter?
This usually happens when you use nonpareils (the tiny round sprinkles) instead of jimmies (the long cylindrical ones). Nonpareils have a water-soluble dye that bleeds easily. Stick with jimmies, and toss them in a tablespoon of flour before folding them into the batter for extra insurance.
Can I use a different type of frosting?
Of course! While vanilla buttercream is classic, this cake works beautifully with cream cheese frosting, chocolate buttercream, or even a simple whipped cream frosting. If you’re feeling adventurous, try a strawberry or raspberry buttercream for a fruity twist.
How do I prevent my cake from sticking to the pan?
Grease your pans thoroughly with butter or non-stick spray, then line the bottoms with parchment paper circles. Grease the parchment too. Let the cakes cool in the pan for 10-15 minutes before turning them out. This combination has never failed me.
Can I make this into a sheet cake instead?
Yes! Pour the batter into a greased 9×13-inch baking pan and bake at 350°F (175°C) for 30-35 minutes. You’ll need about 1.5 times the frosting recipe to cover it properly. Sheet cakes are perfect for large gatherings—easier to transport and serve.
Pin This Recipe!
Ultimate Funfetti Birthday Cake – Easy Crowd-Pleasing Dessert
This Ultimate Funfetti Birthday Cake is a quick and easy dessert that comes together in about 90 minutes. With simple ingredients and a tender, moist crumb studded with rainbow sprinkles, it’s the perfect crowd-pleaser for any celebration.
- Prep Time: 20 minutes
- Cook Time: 30 minutes
- Total Time: 90 minutes
- Yield: 12 servings 1x
- Category: Dessert
- Cuisine: American
Ingredients
- 2 ½ cups (312g) all-purpose flour
- 2 ½ teaspoons baking powder
- ½ teaspoon baking soda
- 1 teaspoon salt
- ¾ cup (1 ½ sticks or 170g) unsalted butter, softened
- 1 ½ cups (300g) granulated sugar
- 3 large eggs, room temperature
- 1 tablespoon pure vanilla extract
- 1 cup (240ml) buttermilk, room temperature
- ½ cup (80g) rainbow sprinkles (jimmies, not nonpareils)
- 1 cup (2 sticks or 226g) unsalted butter, softened (for frosting)
- 4 cups (480g) powdered sugar, sifted (for frosting)
- ¼ cup (60ml) heavy cream (for frosting)
- 2 teaspoons pure vanilla extract (for frosting)
- ¼ teaspoon salt (for frosting)
- Additional sprinkles for decoration
Instructions
- Preheat oven to 350°F (175°C). Grease two 9-inch round cake pans and line bottoms with parchment paper. Grease parchment too.
- In a medium bowl, whisk together flour, baking powder, baking soda, and salt. Set aside.
- In a large bowl, beat softened butter and granulated sugar on medium-high speed for 3-4 minutes until light and fluffy. Scrape down bowl halfway through.
- Add eggs one at a time, beating well after each addition. Add vanilla extract and beat until combined.
- With mixer on low, add dry ingredients in three additions, alternating with buttermilk, starting and ending with dry ingredients. Mix until just combined after each addition.
- Remove bowl from mixer and gently fold in rainbow jimmies with a rubber spatula until evenly distributed (about 10-12 folds).
- Divide batter evenly between prepared pans. Smooth tops. Bake for 25-30 minutes, until a toothpick inserted in center comes out clean or with a few moist crumbs. Rotate pans halfway through if needed.
- Let cakes cool in pans on a wire rack for 10-15 minutes. Then invert onto rack, peel off parchment, and cool completely.
- For frosting: In a large bowl, beat softened butter on medium speed until smooth (about 2 minutes). Gradually add sifted powdered sugar, 1 cup at a time, beating on low. Add heavy cream, vanilla extract, and salt. Increase speed to medium-high and beat for 3-4 minutes until light and fluffy.
- Place one cake layer on serving plate, flat side down. Spread about 1 cup frosting evenly on top. Place second layer on top, flat side up. Apply a thin crumb coat of frosting all over. Refrigerate 15-20 minutes. Then apply final layer of frosting and decorate with additional sprinkles.
Notes
Use jimmies (long cylindrical sprinkles) not nonpareils to prevent color bleeding. Toss sprinkles in a tablespoon of flour before folding into batter to prevent sinking. Ensure all ingredients are at room temperature for best results. Check cakes at 25 minutes to avoid overbaking. Level domed tops with a serrated knife if needed. Cake tastes even better the next day.
Nutrition
- Serving Size: 1 slice
- Calories: 500
- Sugar: 48
- Sodium: 320
- Fat: 24
- Saturated Fat: 14
- Carbohydrates: 68
- Fiber: 1
- Protein: 5
Keywords: funfetti cake, birthday cake, sprinkle cake, easy cake, crowd-pleasing dessert, vanilla cake