Love this? Save it for later!
Share the inspiration with your friends
I was standing in line at the DMV, of all places, when the woman behind me started talking about dessert. Not just any dessert—she was describing these pumpkin cheesecake bars that her grandmother used to make, and she was getting emotional about it. Let me tell you, I wasn’t expecting cooking advice from a stranger in a government office on a rainy Tuesday afternoon, but there I was, clutching my number ticket, listening to her describe exactly how to make this no-bake pumpkin cheesecake bar that apparently had the power to fix bad days.
She told me she’d scribbled the recipe on a napkin years ago and kept it tucked in her wallet. The napkin was crumpled and stained, but she pulled it out anyway. I mean, I had to see it. And honestly, it was the most beautifully chaotic thing I’d ever seen—measurements crossed out, notes in the margins like “add more vanilla if you’re sad,” and a little heart drawn next to the word “pumpkin.” I knew right then I had to try making these cozy no-bake pumpkin cheesecake bars myself.
Maybe you’ve been there too, where a recipe finds you when you least expect it. That’s exactly what happened here. These bars have become my go-to for that moment when you need something sweet but don’t want to turn on the oven. They’re the kind of dessert that makes you slow down, take a breath, and actually enjoy the season. And let me tell you, they’ve never let me down since that day at the DMV.
Why You’ll Love This Recipe
Let me be real with you—I’ve tested this recipe more times than I can count. I’ve made it for Thanksgiving, for random weeknights, and even for a book club meeting where everyone asked for the recipe before they’d finished their first bite. Here’s why these cozy no-bake pumpkin cheesecake bars are worth every minute of effort:
- No Oven Required: These bars come together completely without heat. Perfect for those warm fall days when you want pumpkin flavor but don’t want to crank up the kitchen temperature.
- Simple Ingredients: You probably already have most of these in your pantry. No fancy extracts or hard-to-find items here—just good, honest ingredients that work together beautifully.
- Make-Ahead Friendly: These bars actually taste better after they’ve chilled overnight. You can prep them a day or two ahead of your gathering and just slice when ready.
- Crowd-Pleaser: I’ve served these at parties where half the guests claimed they “don’t like pumpkin desserts.” Every single one of them asked for seconds. Every. Single. One.
- Perfect for Cozy Nights: There’s something about the combination of creamy cheesecake filling and that spiced pumpkin layer that just feels like a hug in dessert form. It’s comfort food at its finest.
What makes these bars different from other pumpkin cheesecake recipes? It’s the texture, honestly. The filling is incredibly smooth—almost silky—because we’re using a technique that incorporates the cream cheese and pumpkin puree at just the right temperature. Plus, that buttery pecan crust adds a crunch that balances out the creamy layers perfectly. This isn’t just another pumpkin dessert; it’s the one that’ll have you closing your eyes after the first bite.
What Ingredients You Will Need
This recipe uses simple, wholesome ingredients to deliver that rich, comforting pumpkin flavor without any fuss. Most of these are pantry staples, especially if you do any fall baking. Here’s what you’ll need, broken down by component:
For the Pecan Crust
- 2 cups graham cracker crumbs (about 16 full sheets, crushed finely)
- 1/2 cup pecans, finely chopped (I recommend toasting them lightly first for extra flavor)
- 1/3 cup granulated sugar
- 1/2 cup unsalted butter, melted (use salted butter if that’s what you have, just reduce the added salt elsewhere)
- 1/4 teaspoon salt (skip this if using salted butter)
For the Pumpkin Cheesecake Filling
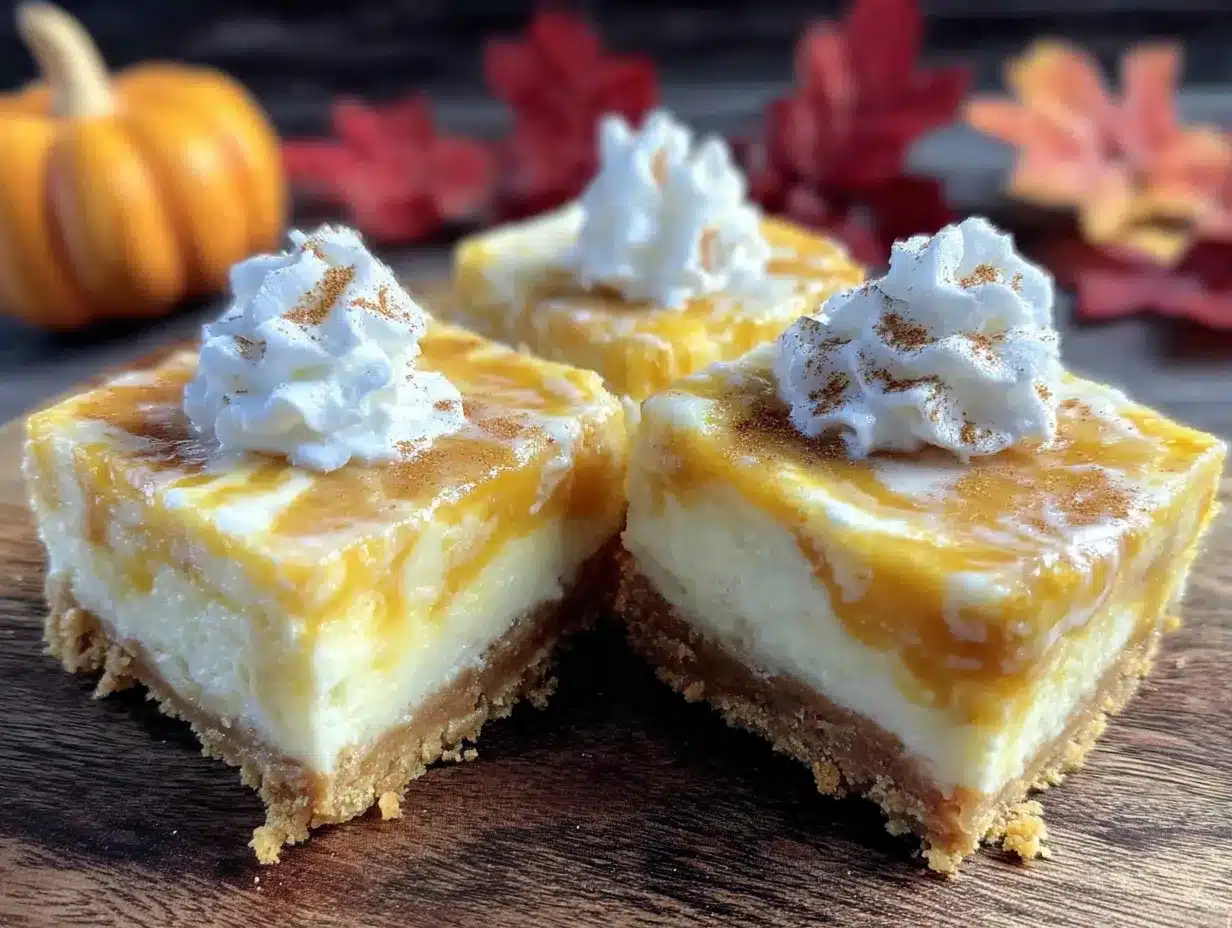
- 16 ounces cream cheese, softened to room temperature (full-fat works best for that creamy texture)
- 1 cup pumpkin puree (not pumpkin pie filling—make sure it’s 100% pure pumpkin)
- 3/4 cup packed light brown sugar
- 1/2 cup granulated sugar
- 1 teaspoon vanilla extract
- 1 1/2 teaspoons pumpkin pie spice (or make your own with cinnamon, nutmeg, ginger, and cloves)
- 1/2 teaspoon cinnamon
- 1/4 teaspoon salt
- 1 1/2 cups heavy cream, cold
- 1/4 cup powdered sugar
For the Topping (Optional but Recommended)
- 1/2 cup heavy cream, cold
- 2 tablespoons powdered sugar
- 1/4 teaspoon vanilla extract
- Crushed pecans or pumpkin seeds for garnish
- Caramel sauce for drizzling (store-bought is totally fine here)
A few notes on ingredients: I’ve tested this with both store-brand and name-brand cream cheese, and honestly, Philadelphia gives the smoothest result. For the pumpkin puree, Libby’s is my go-to because it’s consistently thick and not watery. If you’re using a different brand, you might need to drain off any excess liquid before measuring. And for the pecans, I’ve found that chopping them by hand gives a better texture than using a food processor—you want some small chunks for crunch, not a fine powder.
Equipment Needed
You don’t need anything fancy for these cozy no-bake pumpkin cheesecake bars, which is part of what makes them so great. Here’s what you’ll want to have on hand:
- 9×9-inch square baking pan (an 8×8 works too, your bars will just be a bit thicker)
- Parchment paper (for lining the pan—makes lifting out the bars so much easier)
- Large mixing bowls (at least two)
- Electric hand mixer or stand mixer (you can do this by hand, but your arm will thank you for using a mixer)
- Ziploc bag and rolling pin (for crushing graham crackers, or use a food processor if you prefer)
- Rubber spatula
- Measuring cups and spoons
- Plastic wrap or foil (for covering while chilling)
If you don’t have a 9×9 pan, you can use a 9×13 and just double the recipe—trust me, nobody will complain about extra bars. And if you’re short on time, you can buy pre-made graham cracker crumbs instead of crushing your own. I’ve done both, and while homemade gives a slightly better texture, the pre-made version works just fine for busy weeknights.
Preparation Method
Let me walk you through this step by step. I’ve made these bars more times than I can count, so I’ve figured out a few tricks along the way to make everything go smoothly.
Step 1: Prepare the Pan
Line your 9×9-inch baking pan with parchment paper, leaving some overhang on two opposite sides. This creates little “handles” that make lifting the finished bars out super easy. Lightly grease the parchment with a bit of butter or cooking spray—this prevents the crust from sticking.
Step 2: Make the Crust
In a medium bowl, combine the graham cracker crumbs, finely chopped pecans, granulated sugar, and salt. Pour in the melted butter and stir until everything is evenly moistened. The mixture should look like wet sand and hold together when you squeeze it in your fist. Press this mixture firmly into the bottom of your prepared pan. I use the bottom of a measuring cup to really pack it down—you want a solid, even layer. Pop this in the refrigerator while you make the filling.
Step 3: Whip the Cream
In a large mixing bowl, combine the cold heavy cream and powdered sugar. Using an electric hand mixer, whip on medium-high speed until stiff peaks form. This takes about 3-4 minutes. Be careful not to over-whip, or you’ll end up with butter. Set this aside in the refrigerator while you prepare the pumpkin mixture.
Step 4: Make the Pumpkin Cheesecake Base
In another large bowl, beat the softened cream cheese with an electric mixer until smooth and creamy, about 2 minutes. Add the brown sugar and granulated sugar and beat until well combined, scraping down the sides as needed. Mix in the pumpkin puree, vanilla extract, pumpkin pie spice, cinnamon, and salt. Beat until everything is smooth and uniform. The mixture should be thick and smell absolutely amazing at this point.
Step 5: Fold It All Together
Here’s where the magic happens. Take your whipped cream out of the refrigerator. Using a rubber spatula, gently fold about one-third of the whipped cream into the pumpkin mixture to lighten it. Then fold in the remaining whipped cream until just combined. Don’t overmix—you want to keep as much air in the mixture as possible for that light, creamy texture. The final mixture should be thick, smooth, and a beautiful pale orange color.
Step 6: Assemble and Chill
Pour the filling over the chilled crust and spread it into an even layer using your spatula. Give the pan a few gentle taps on the counter to release any air bubbles. Cover the pan with plastic wrap and refrigerate for at least 6 hours, but overnight is better. I know the wait is hard, but trust me—the longer it chills, the cleaner your slices will be.
Step 7: Add the Topping and Serve
When you’re ready to serve, make the whipped cream topping by whipping the cold heavy cream, powdered sugar, and vanilla extract together until soft peaks form. Spread or pipe this over the chilled bars. Sprinkle with crushed pecans or pumpkin seeds, and drizzle with caramel sauce if you’re feeling fancy. Use the parchment handles to lift the bars out of the pan, then slice with a sharp knife. For clean cuts, wipe the knife clean between each slice.
Cooking Tips & Techniques
After making these cozy no-bake pumpkin cheesecake bars more times than I can count, I’ve learned a few things the hard way. Let me save you some trouble:
Room temperature cream cheese is non-negotiable. I know, I know, we’re all impatient. But if you use cold cream cheese, you’ll end up with lumps in your filling that no amount of mixing will fix. Take it out of the fridge at least an hour before you start. If you forgot, here’s a trick: cut it into cubes and microwave it in 10-second bursts until just softened, not melted.
Don’t skip the chilling time. I made the mistake of trying to rush this once, and my bars were a sloppy mess. The filling needs time to set properly so you can cut clean slices. Six hours is the minimum, but overnight really is best. Think of it as making tomorrow-you very happy.
Watch your pumpkin puree. Some brands are more watery than others. If your pumpkin puree looks loose or has liquid pooling on top, spread it on a paper towel-lined plate for a few minutes to absorb some of that moisture. This prevents your filling from being too wet and not setting properly.
Fold gently. When you’re combining the whipped cream with the pumpkin mixture, use a light hand. Overmixing deflates all those lovely air bubbles and gives you a dense, heavy bar instead of that light, mousse-like texture we’re after.
Use a hot knife for clean slices. Run your knife under hot water, dry it off, then slice. The heat helps the knife glide through the bars without dragging the filling. Wipe and reheat between each cut for picture-perfect squares.
Variations & Adaptations
One of the best things about this recipe is how adaptable it is. Here are some variations I’ve tried and loved:
Gluten-Free Version: Swap the graham crackers for gluten-free graham crackers or crushed gluten-free cookies. The pecans in the crust already add great texture, so nobody will miss the gluten.
Dairy-Free Option: Use dairy-free cream cheese (I like the Kite Hill brand) and coconut cream instead of heavy cream. Just chill the can of coconut cream overnight and scoop off the solid part to whip. The texture will be slightly different, but still delicious.
Chocolate Pumpkin: Add 1/4 cup melted dark chocolate to the pumpkin filling before folding in the whipped cream. The chocolate and pumpkin combo is surprisingly amazing—like a pumpkin truffle in bar form.
Maple Pecan Twist: Replace the brown sugar with maple syrup (reduce the other liquid slightly) and add an extra 1/4 cup of chopped pecans to the filling. Drizzle maple syrup over the top before serving for extra indulgence.
Individual Servings: Instead of using a 9×9 pan, make these in small mason jars or dessert cups. Layer the crust, filling, and topping in each jar, then chill. Perfect for parties or gifting.
Serving & Storage Suggestions
These cozy no-bake pumpkin cheesecake bars are best served cold, straight from the refrigerator. I like to let them sit at room temperature for about 5 minutes before serving—just enough to take the chill off without losing the structure.
For presentation, I arrange the bars on a platter with a drizzle of caramel sauce and a sprinkle of crushed pecans. They look beautiful on a dessert table alongside other fall treats like apple cider donuts or pumpkin bread. A cup of hot coffee or spiced chai on the side is the perfect companion.
Storage: Keep these bars in an airtight container in the refrigerator for up to 5 days. The flavors actually develop and deepen over the first couple of days, so day-old bars are even better than fresh ones. I’ve found that the crust stays perfectly crunchy for about 3 days before it starts to soften slightly.
Freezing: These bars freeze beautifully! Freeze them uncovered on a baking sheet until solid, then wrap each bar individually in plastic wrap and store in a freezer bag for up to 2 months. Thaw in the refrigerator overnight before serving. I always keep a stash in my freezer for unexpected guests or late-night cravings.
Reheating: Honestly, I wouldn’t recommend reheating these—they’re meant to be enjoyed cold. But if you absolutely must, a few seconds in the microwave will soften them slightly. Just know that the texture won’t be the same.
Nutritional Information & Benefits
Here’s the approximate nutritional breakdown per bar (based on 16 servings):
- Calories: 385
- Total Fat: 26g
- Saturated Fat: 14g
- Cholesterol: 75mg
- Sodium: 280mg
- Total Carbohydrates: 35g
- Dietary Fiber: 2g
- Sugars: 24g
- Protein: 5g
While these bars are definitely a treat, they do offer some nutritional perks. Pumpkin is packed with vitamin A, fiber, and antioxidants that support eye health and immunity. The pecans provide healthy fats and magnesium, while the cream cheese offers calcium and protein. Plus, since there’s no baking involved, you’re not exposing the ingredients to high heat that can degrade some nutrients.
This recipe is naturally vegetarian and can easily be made gluten-free or dairy-free with the substitutions mentioned above. It contains dairy, nuts, and gluten in its standard form, so keep that in mind for guests with allergies.
Conclusion
These cozy no-bake pumpkin cheesecake bars have become my favorite fall dessert for so many reasons. They’re simple enough for a weekday treat but special enough for holiday gatherings. The creamy pumpkin filling, the crunchy pecan crust, and that cloud-like whipped cream topping come together to create something truly special—all without turning on the oven.
I love that this recipe came from such an unexpected place, scribbled on a napkin by a stranger at the DMV. It reminds me that good recipes can come from anywhere, and sometimes the best ones are the ones we least expect. I hope these bars bring you the same warmth and comfort they’ve brought me.
Now I’d love to hear from you! Have you made these bars? Did you try any fun variations? Drop a comment below and let me know how they turned out. And if you share them on social media, tag me so I can see your beautiful creations. Happy fall baking, friends!
Frequently Asked Questions
Can I use canned pumpkin pie filling instead of pumpkin puree?
No, I wouldn’t recommend it. Pumpkin pie filling already has sugar and spices added, which will throw off the sweetness and texture of these bars. Stick with 100% pure pumpkin puree for the best results.
How long do these bars need to chill?
At least 6 hours, but overnight is ideal. The longer they chill, the cleaner your slices will be. If you try to rush this step, the bars will be too soft to cut neatly.
Can I make these bars without nuts?
Absolutely! Simply omit the pecans from the crust and use an equal amount of additional graham cracker crumbs instead. The crust will still be delicious and crunchy.
Why did my filling turn out lumpy?
This usually happens when the cream cheese isn’t fully softened before mixing. Make sure your cream cheese is at room temperature—give it at least an hour on the counter. If you see lumps, keep beating until smooth before adding the other ingredients.
Can I double this recipe for a larger pan?
Yes! Double all the ingredients and use a 9×13-inch pan. The chilling time might need to increase by an hour or two since the bars will be thicker. Just make sure they’re fully set before slicing.
Pin This Recipe!
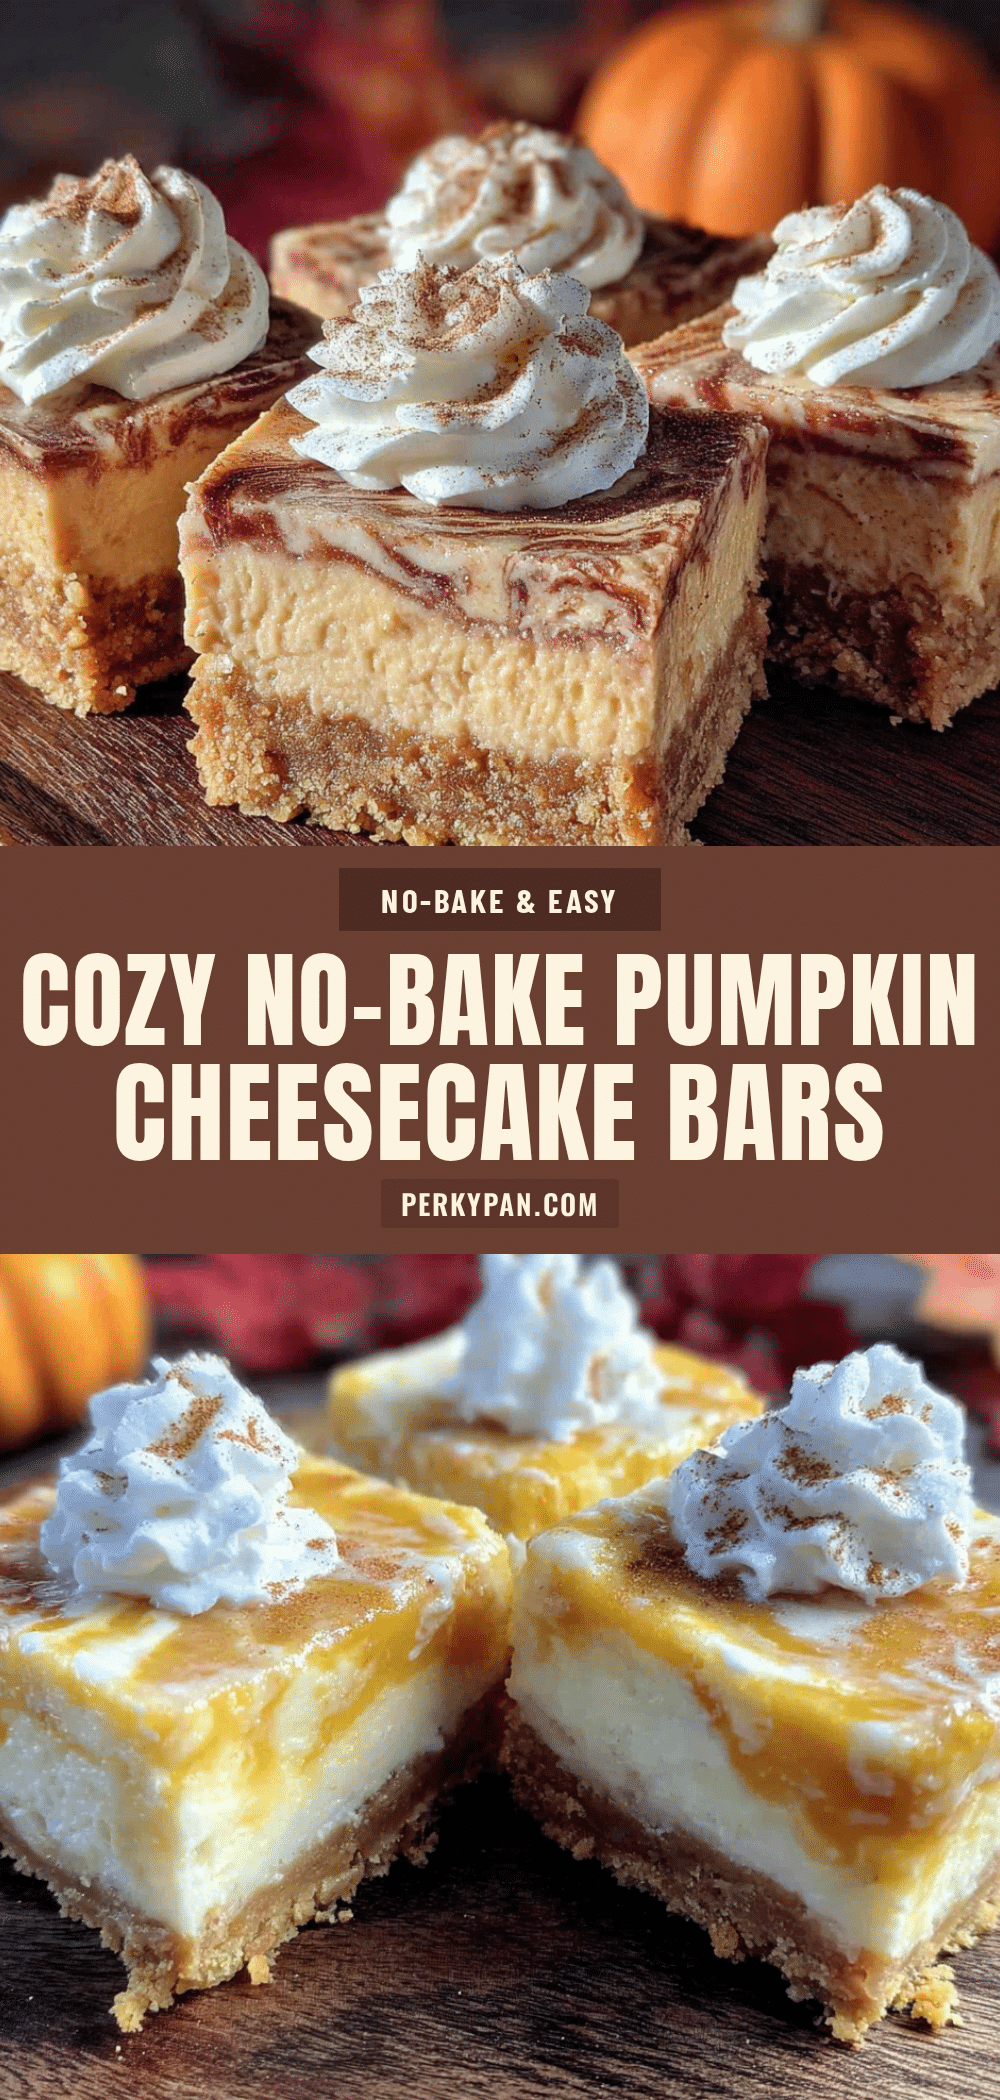
Cozy No-Bake Pumpkin Cheesecake Bars: Easy Fall Dessert
These no-bake pumpkin cheesecake bars feature a creamy pumpkin filling, a crunchy pecan crust, and a cloud-like whipped cream topping. They’re the perfect easy fall dessert that requires no oven and can be made ahead.
- Prep Time: 30 minutes
- Cook Time: 0 minutes
- Total Time: 6 hours 30 minutes (includes chilling)
- Yield: 16 servings 1x
- Category: Dessert
- Cuisine: American
Ingredients
- 2 cups graham cracker crumbs (about 16 full sheets, crushed finely)
- 1/2 cup pecans, finely chopped
- 1/3 cup granulated sugar
- 1/2 cup unsalted butter, melted
- 1/4 teaspoon salt
- 16 ounces cream cheese, softened to room temperature
- 1 cup pumpkin puree (not pumpkin pie filling)
- 3/4 cup packed light brown sugar
- 1/2 cup granulated sugar
- 1 teaspoon vanilla extract
- 1 1/2 teaspoons pumpkin pie spice
- 1/2 teaspoon cinnamon
- 1/4 teaspoon salt
- 1 1/2 cups heavy cream, cold
- 1/4 cup powdered sugar
- 1/2 cup heavy cream, cold (for topping)
- 2 tablespoons powdered sugar (for topping)
- 1/4 teaspoon vanilla extract (for topping)
- Crushed pecans or pumpkin seeds for garnish
- Caramel sauce for drizzling
Instructions
- Line a 9×9-inch baking pan with parchment paper, leaving overhang on two opposite sides. Lightly grease the parchment.
- In a medium bowl, combine graham cracker crumbs, finely chopped pecans, granulated sugar, and salt. Pour in melted butter and stir until evenly moistened. Press firmly into the bottom of the prepared pan. Refrigerate while making the filling.
- In a large mixing bowl, combine cold heavy cream and powdered sugar. Whip on medium-high speed until stiff peaks form, about 3-4 minutes. Set aside in the refrigerator.
- In another large bowl, beat softened cream cheese until smooth and creamy, about 2 minutes. Add brown sugar and granulated sugar and beat until well combined. Mix in pumpkin puree, vanilla extract, pumpkin pie spice, cinnamon, and salt until smooth.
- Gently fold about one-third of the whipped cream into the pumpkin mixture to lighten it. Then fold in the remaining whipped cream until just combined.
- Pour the filling over the chilled crust and spread into an even layer. Tap the pan gently on the counter to release air bubbles. Cover with plastic wrap and refrigerate for at least 6 hours, preferably overnight.
- When ready to serve, make the topping: whip cold heavy cream, powdered sugar, and vanilla extract until soft peaks form. Spread or pipe over the chilled bars. Sprinkle with crushed pecans or pumpkin seeds and drizzle with caramel sauce. Use parchment handles to lift bars out of the pan, then slice with a sharp knife.
Notes
Room temperature cream cheese is essential for a smooth filling. Chill for at least 6 hours, but overnight is best for clean slices. Use a hot knife for clean cuts. Store in an airtight container in the refrigerator for up to 5 days. Freeze for up to 2 months.
Nutrition
- Serving Size: 1 bar
- Calories: 385
- Sugar: 24
- Sodium: 280
- Fat: 26
- Saturated Fat: 14
- Carbohydrates: 35
- Fiber: 2
- Protein: 5
Keywords: no-bake pumpkin cheesecake bars, pumpkin dessert, fall dessert, no-bake dessert, cheesecake bars, pumpkin cheesecake


