Love this? Save it for later!
Share the inspiration with your friends
My seven-year-old nephew asked why I couldn’t just dump the pumpkin puree in with the cake mix and call it a day. I started to explain why that wouldn’t work — the moisture ratios, the density issues, the science of baking. Then I stopped. He was holding the can, looking at me with that mix of hope and boredom kids get when adults start talking too much. So I let him dump it in. I figured we’d learn a lesson together, even if that lesson was “sometimes you have to let people make mistakes.” But here’s the thing — it worked. Not just “good for a seven-year-old’s experiment” worked. Actually worked. The cakes came out tender and perfectly spiced, and that shortcut approach became the whole reason this recipe exists. I stood there with a spatula in my hand, humbled by a kid who just wanted to make cupcakes without all the fuss. Honestly, I’ve been cooking for over a decade, and I still think about that moment every time I make these.
These mini pumpkin bundt cakes with maple glaze are the kind of recipe you don’t overthink. They come together in one bowl, bake in under twenty minutes, and taste like fall in a tiny, adorable package. The maple glaze is optional but honestly not really — it’s what makes them feel special without any extra effort. My nephew still requests them every time he visits, and I still let him dump in the pumpkin. Maybe you’ve been there, staring at a recipe that asks for too many steps on a Tuesday night. This one’s for those days.
Why You’ll Love This Recipe
I’ve tested this recipe at least a dozen times across different ovens and altitudes, and it holds up every single time. Here’s why it earns a permanent spot in my fall rotation:
- Quick & Easy : From start to finish, you’re looking at about 30 minutes. That includes glazing. Perfect for after-school baking sessions or a last-minute dessert when company shows up.
- Simple Ingredients : You probably have most of this already — flour, sugar, eggs, butter. The pumpkin puree and maple syrup are the only things you might need to grab, and they’re both pantry-friendly.
- Perfect for Family Baking : Kids can help with nearly every step. Measuring, mixing, even glazing — it’s all forgiving and fun. No stand mixer required, so little hands can actually participate.
- Crowd-Pleaser : I’ve brought these to school bake sales, family dinners, and neighbor gatherings. Adults love the warm spice flavor, and kids just love that they’re mini and have glaze.
- Unbelievably Delicious : The texture is what gets me every time. Moist without being dense, tender without being crumbly. The maple glaze adds that sweet finish that makes you reach for a second one before you’ve finished the first.
This isn’t just another pumpkin cake recipe. The trick is using both pumpkin puree and a touch of sour cream in the batter, which keeps these mini cakes incredibly moist even after a day or two on the counter. I’ve tested versions with oil instead of butter, but the butter gives a richer flavor that stands up to the pumpkin without overpowering it. This is comfort food reimagined — faster, simpler, but with the same soul-soothing satisfaction that makes you close your eyes after the first bite.
What Ingredients You Will Need
This recipe uses simple, wholesome ingredients to deliver bold flavor and satisfying texture without the fuss. Most of these are pantry staples, which makes this an easy last-minute baking project.
- All-purpose flour — 1 ½ cups (180g). Spoon and level for accuracy. I prefer King Arthur Flour for consistent results.
- Granulated sugar — ¾ cup (150g). Adds sweetness and helps create that tender crumb.
- Light brown sugar — ¼ cup (50g), packed. Adds moisture and a hint of molasses flavor that pairs beautifully with pumpkin.
- Baking powder — 1 teaspoon. For lift. Make sure it’s fresh — test by dropping a bit in hot water; it should bubble vigorously.
- Baking soda — ½ teaspoon. Helps with browning and tenderness.
- Pumpkin pie spice — 2 teaspoons. You can use store-bought or make your own with cinnamon, nutmeg, ginger, and cloves. I use Simply Organic brand for their warm, balanced blend.
- Salt — ½ teaspoon. Balances sweetness and enhances flavor.
- Pumpkin puree — 1 cup (245g). Not pumpkin pie filling — make sure you grab 100% pure pumpkin. Libby’s is my go-to for consistent moisture content.
- Unsalted butter — ½ cup (113g), melted and slightly cooled. Use salted butter if that’s what you have, just reduce the added salt to ¼ teaspoon.
- Large eggs — 2, room temperature. Cold eggs can seize the melted butter, so let them sit out for 15-20 minutes.
- Sour cream — ¼ cup (60g). The secret ingredient for extra moisture. Full-fat works best, but Greek yogurt is a fine substitute.
- Vanilla extract — 1 teaspoon. Pure vanilla makes a difference here. Imitation will work, but the flavor won’t be as warm.
For the Maple Glaze:
- Powdered sugar — 1 cup (120g), sifted if lumpy.
- Pure maple syrup — 3 tablespoons. Not pancake syrup — use the real stuff. Grade A dark amber has a stronger maple flavor that stands up to the pumpkin.
- Milk — 1-2 tablespoons, as needed. Whole milk gives a creamier glaze, but any milk works.
- Vanilla extract — ½ teaspoon.
Equipment Needed
You don’t need a lot of fancy equipment for these mini pumpkin bundt cakes, which is part of why I love this recipe.
- Mini bundt pan — 12-cavity pan is ideal. If you don’t have one, a regular muffin tin works — just adjust the baking time to 15-18 minutes.
- Large mixing bowl — Any bowl you’d use for mixing cake batter. I use a glass Pyrex bowl because it’s easy to see when everything’s combined.
- Whisk — For combining dry ingredients.
- Spatula — A silicone spatula is best for folding the batter and scraping every last bit into the pan.
- Measuring cups and spoons — Dry measuring cups for flour and sugar, liquid measuring cup for pumpkin and sour cream.
- Cooling rack — Essential for even cooling. If you don’t have one, a cutting board works in a pinch.
- Small saucepan or microwave-safe bowl — For melting butter.
- Pastry brush or cooking spray — For greasing the bundt pan generously. I use Baker’s Joy spray — it has flour in it and works like magic.
Budget-friendly tip: If you don’t own a mini bundt pan, check thrift stores. I found mine for three dollars, and it’s one of my most-used pans during fall baking season.
Preparation Method
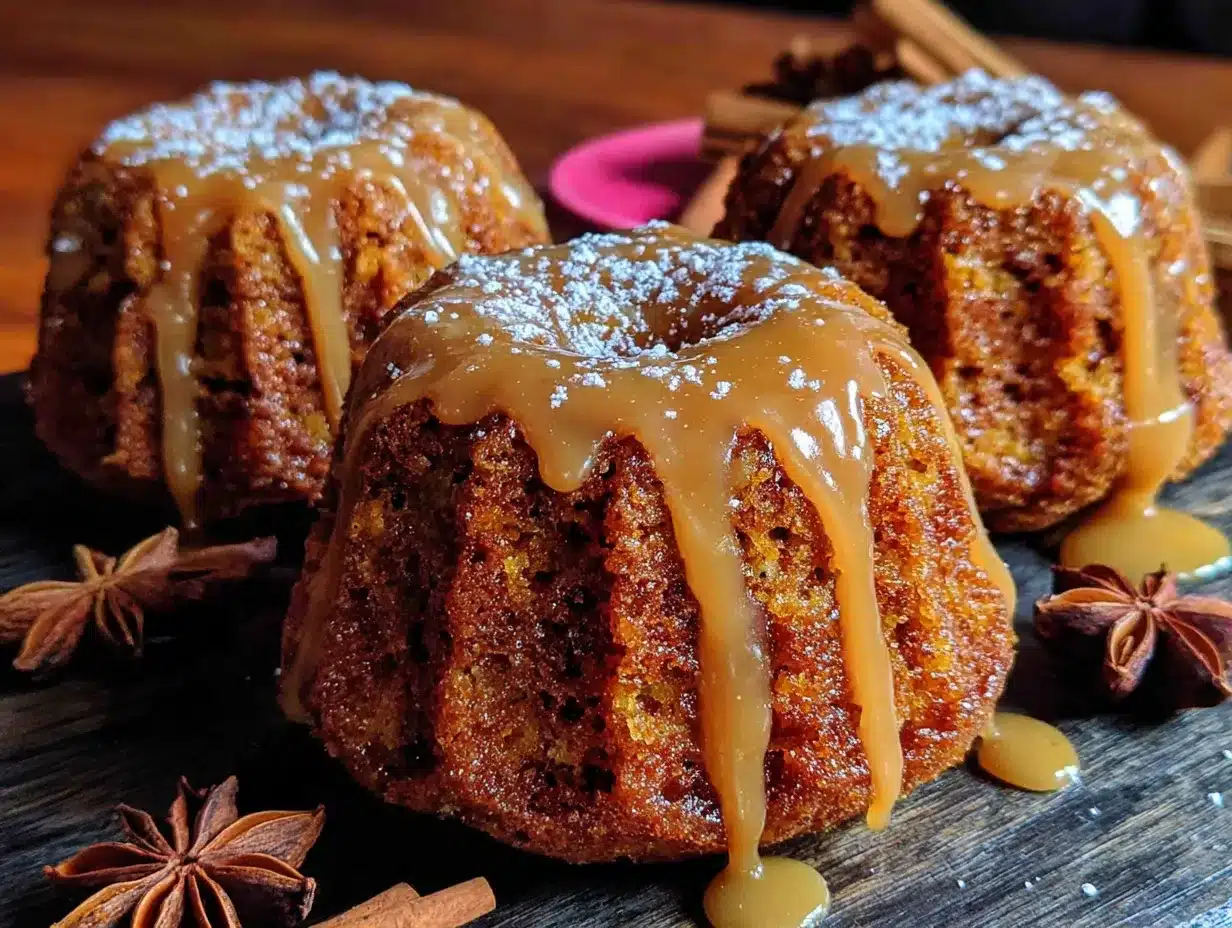
Preheat your oven to 350°F (175°C). Generously grease your mini bundt pan with baking spray or butter and flour. Don’t skip this step — mini bundt pans have lots of nooks and crannies, and nothing’s sadder than a stuck cake.
- Mix the dry ingredients. In a large bowl, whisk together the flour, granulated sugar, brown sugar, baking powder, baking soda, pumpkin pie spice, and salt. Make sure there are no lumps, especially from the brown sugar. This takes about 30 seconds.
- Add the wet ingredients. Make a well in the center of the dry ingredients. Pour in the pumpkin puree, melted butter, eggs, sour cream, and vanilla extract. Stir with a spatula until just combined — about 15-20 strokes. A few small lumps are fine. Overmixing will make the cakes tough, so stop as soon as you don’t see any more dry flour.
- Fill the bundt pan. Spoon the batter into the prepared pan, filling each cavity about ¾ full. I use a cookie scoop for even portions — it’s faster and less messy. You should get exactly 12 mini bundt cakes.
- Bake. Place the pan in the preheated oven and bake for 14-16 minutes. The cakes are done when a toothpick inserted into the center comes out clean or with a few moist crumbs. The tops should spring back when lightly touched. Start checking at 14 minutes — ovens vary, and you don’t want to overbake these.
- Cool in the pan. Let the cakes cool in the pan for 5 minutes. This is crucial — if you try to remove them too soon, they’ll fall apart. The pan needs that brief rest to let the structure set.
- Remove from pan. Place a cooling rack on top of the pan and carefully flip it over. Gently lift the pan off. If any cakes stick, give the pan a few gentle taps on the counter. Let the cakes cool completely on the rack before glazing — about 20 minutes.
Make the maple glaze: While the cakes cool, whisk together the powdered sugar, maple syrup, and vanilla extract in a small bowl. Add milk one tablespoon at a time until you reach a pourable consistency. The glaze should be thick enough to coat the back of a spoon but thin enough to drizzle. If it’s too thick, add another teaspoon of milk. Too thin, add a tablespoon of powdered sugar.
Glaze the cakes: Once the cakes are completely cool, drizzle the glaze over each one. I like to place the cooling rack over a sheet pan to catch drips. Let the glaze set for about 10 minutes before serving.
Cooking Tips & Techniques
I’ve made these mini pumpkin bundt cakes enough times to know exactly where things can go wrong. Here’s what I’ve learned, sometimes the hard way.
Don’t overmix the batter. I ruined my first batch by mixing until perfectly smooth. The cakes came out tough and dense. Mix until the flour disappears, then stop. A few lumps are your friend here.
Grease the pan like you mean it. Mini bundt pans have intricate designs that love to hold onto cake. I use a pastry brush to get butter into every crevice, then dust with flour. Baker’s Joy spray is even easier and works every time. Don’t use regular cooking spray — it’s not enough.
Check your pumpkin puree. Different brands have different moisture levels. Libby’s is consistent, but store brands can be more watery. If your puree looks loose, blot it with a paper towel before adding it to the batter. Too much moisture will make the cakes sink in the middle.
Room temperature matters. Cold eggs can make the melted butter seize up, creating lumps in your batter. Leave eggs on the counter for 15-20 minutes before starting. If you forgot, place them in a bowl of warm water for 5 minutes.
Let them cool properly. That 5-minute rest in the pan is non-negotiable. I tried to rush it once and ended up with a pile of pumpkin crumbs. Be patient — they’ll release cleanly after a short rest.
Variations & Adaptations
This recipe is forgiving, so feel free to play around. Here are some variations I’ve tried and loved.
Gluten-Free Version: Substitute the all-purpose flour with a 1:1 gluten-free baking flour blend. I’ve used Bob’s Red Mill with great results. Add ¼ teaspoon xanthan gum if your blend doesn’t include it. The texture will be slightly more tender but still delicious.
Dairy-Free Adaptation: Use melted coconut oil or vegan butter instead of regular butter. Swap the sour cream with dairy-free yogurt or coconut cream. The cakes will be a touch less rich but still moist and flavorful.
Spice It Up: If you’re not using pumpkin pie spice, make your own with 1 teaspoon cinnamon, ½ teaspoon nutmeg, ¼ teaspoon ginger, and ¼ teaspoon cloves. For a bolder flavor, add a pinch of cardamom or allspice.
Chocolate Lover’s Twist: Fold in ½ cup mini chocolate chips before baking. The chocolate melts into little pockets of richness that pair beautifully with the pumpkin and maple. My nephew insists on this version now.
No Maple Syrup? You can substitute the maple syrup in the glaze with honey or agave nectar. The flavor will be different but still lovely. For a simpler glaze, use 1 cup powdered sugar mixed with 2 tablespoons milk and ½ teaspoon vanilla.
Serving & Storage Suggestions
These mini pumpkin bundt cakes are best served slightly warm or at room temperature. The glaze will be set but still soft, and the cakes will be incredibly tender.
Serving Ideas: Arrange them on a cake stand for a pretty presentation. Dust with a little extra cinnamon or nutmeg on top for visual appeal. They’re perfect for brunch, dessert, or an afternoon snack with coffee or tea.
Storage: Store leftover cakes in an airtight container at room temperature for up to 3 days. Place a paper towel in the bottom of the container to absorb excess moisture, and another on top to keep the glaze from getting sticky. Change the paper towels if they get damp.
Freezing: These freeze beautifully. Place unglazed cakes in a single layer on a baking sheet and freeze until solid, about 1 hour. Transfer to a freezer-safe bag or container for up to 3 months. Thaw at room temperature for about 30 minutes, then glaze and serve. The glaze doesn’t freeze well, so always add it fresh.
Reheating: Pop a cake in the microwave for 10-15 seconds for that fresh-from-the-oven warmth. If you’re reheating multiple cakes, place them on a baking sheet in a 300°F oven for 5 minutes. The flavors actually deepen after a day — these are even better on day two.
Nutritional Information & Benefits
Here’s the approximate nutritional breakdown for one mini bundt cake with glaze, based on 12 servings:
| Nutrient | Amount Per Serving |
|---|---|
| Calories | 245 |
| Total Fat | 10g |
| Saturated Fat | 6g |
| Cholesterol | 55mg |
| Sodium | 210mg |
| Total Carbohydrates | 36g |
| Dietary Fiber | 1g |
| Sugars | 24g |
| Protein | 3g |
Pumpkin is packed with vitamin A, which supports eye health and immunity. It’s also a good source of fiber, which helps with digestion and keeps you feeling full. The maple syrup adds antioxidants, though I won’t pretend this is a health food. It’s a treat — a delicious, soul-warming treat that happens to have a few redeeming qualities. If you’re watching your sugar intake, you can reduce the granulated sugar to ½ cup and skip the glaze. The cakes will still be sweet and tender.
Conclusion
These mini pumpkin bundt cakes with maple glaze are proof that the best recipes often come from the most unexpected places. A seven-year-old’s impatient question led me to a simpler, better way of baking, and I’ve never looked back. They’re quick enough for a weekday project, special enough for a holiday table, and forgiving enough for beginner bakers.
I hope you give these a try and make them your own. Maybe add chocolate chips, swap the spice blend, or double the glaze — there’s no wrong way to enjoy them. If you do make them, I’d love to hear how they turned out. Drop a comment below or tag me in your photos. Happy baking, friends — and don’t forget to let the kids dump in the pumpkin.
Frequently Asked Questions
Can I use a regular muffin tin instead of a mini bundt pan?
Absolutely. Grease a standard 12-cup muffin tin and fill each cup about ¾ full. Bake at 350°F for 15-18 minutes, or until a toothpick comes out clean. The texture will be slightly different — more like a muffin than a bundt — but they’ll still be delicious.
Why did my mini bundt cakes stick to the pan?
This usually happens when the pan isn’t greased thoroughly enough. Make sure you get butter and flour into every crevice, or use a baking spray with flour like Baker’s Joy. Also, let the cakes cool in the pan for exactly 5 minutes — too long and they’ll steam and stick, too short and they’ll fall apart.
Can I make these ahead of time?
Yes. Bake the cakes a day ahead and store them unglazed in an airtight container at room temperature. Make the glaze and drizzle just before serving. The cakes actually get more moist and flavorful overnight.
How do I make the glaze thicker or thinner?
For a thicker glaze, add more powdered sugar one tablespoon at a time. For a thinner glaze, add more milk one teaspoon at a time. The ideal consistency is thick enough to coat the back of a spoon but thin enough to drizzle in a steady stream.
Can I use fresh pumpkin instead of canned?
Yes, but you’ll need to roast and puree it first. Fresh pumpkin puree has more water than canned, so you may need to blot it with paper towels or cook it down slightly on the stove to remove excess moisture. Canned pumpkin is more consistent and easier for this recipe.
Pin This Recipe!
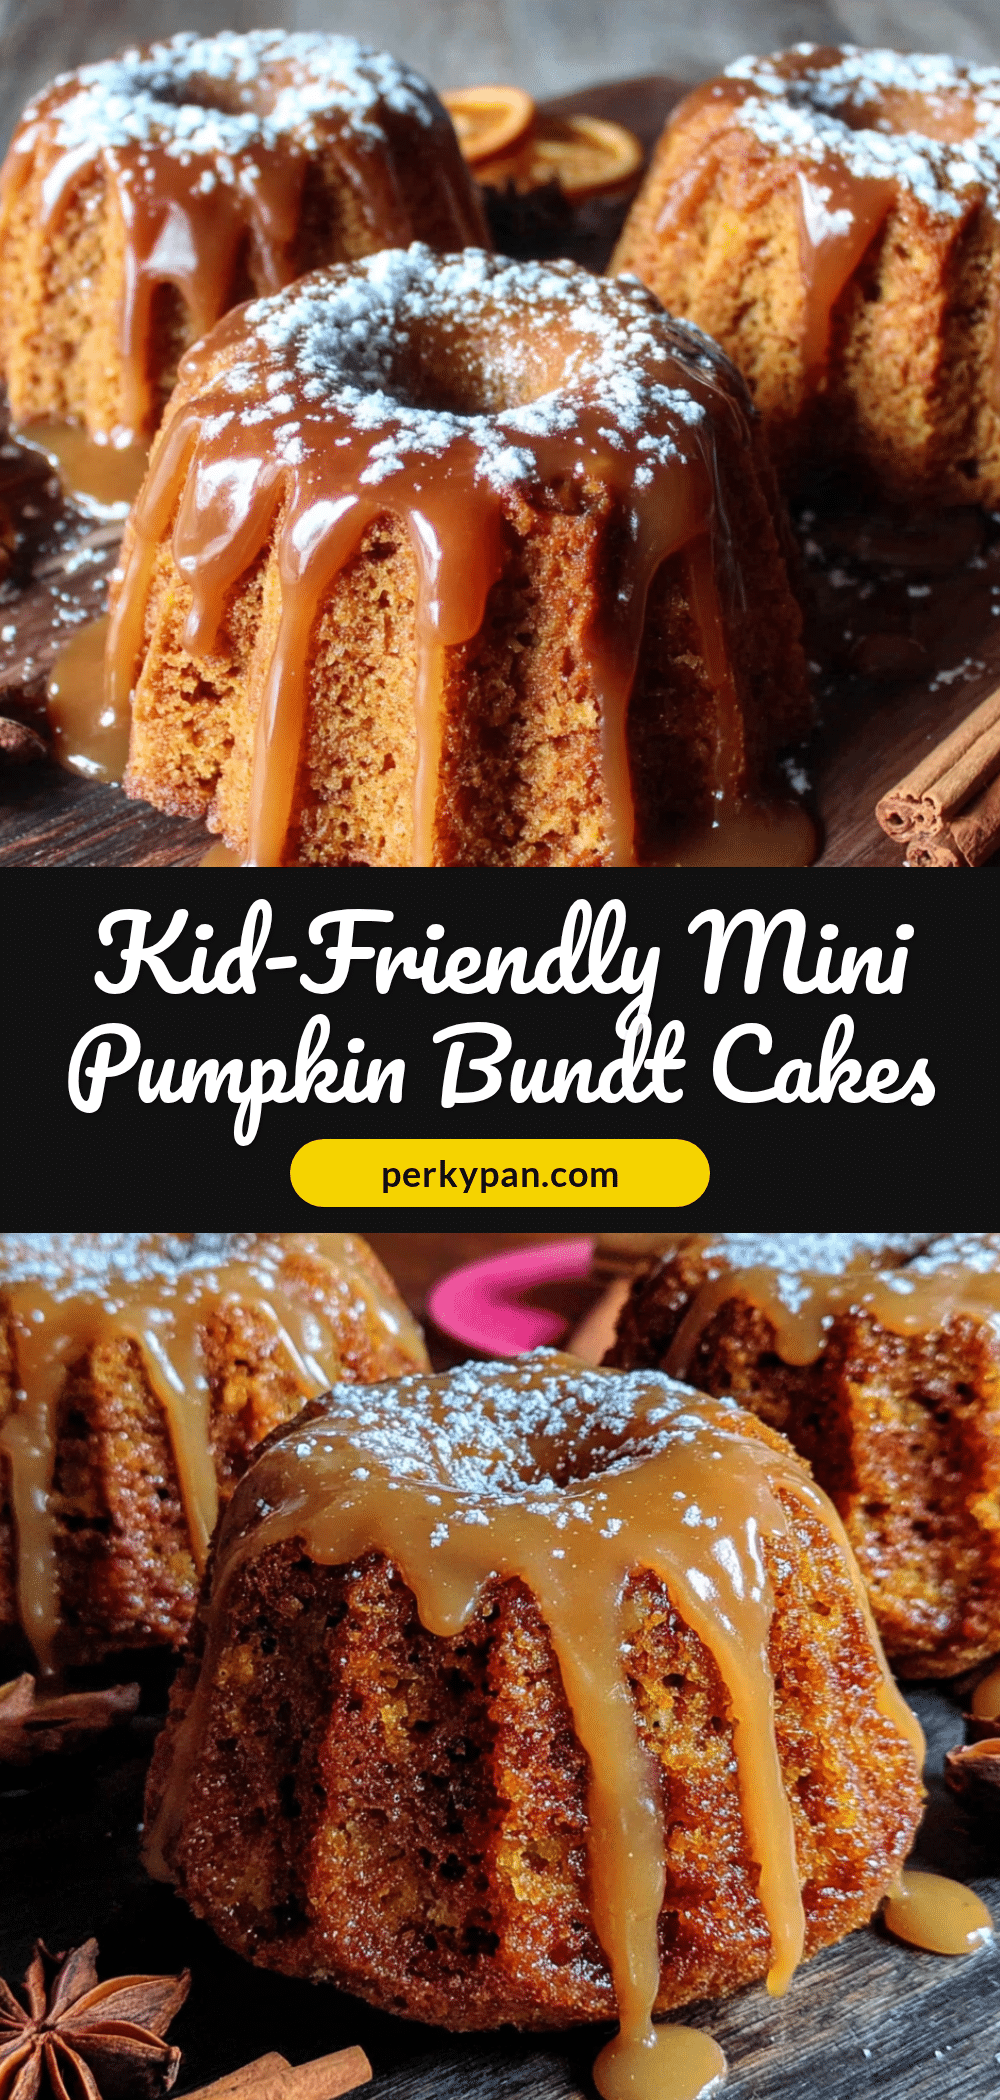
Easy Mini Pumpkin Bundt Cakes with Maple Glaze
These mini pumpkin bundt cakes with maple glaze are the kind of recipe you don’t overthink. They come together in one bowl, bake in under twenty minutes, and taste like fall in a tiny, adorable package.
- Prep Time: 10 minutes
- Cook Time: 16 minutes
- Total Time: 30 minutes
- Yield: 12 servings 1x
- Category: Dessert
- Cuisine: American
Ingredients
- 1 ½ cups (180g) all-purpose flour
- ¾ cup (150g) granulated sugar
- ¼ cup (50g) light brown sugar, packed
- 1 teaspoon baking powder
- ½ teaspoon baking soda
- 2 teaspoons pumpkin pie spice
- ½ teaspoon salt
- 1 cup (245g) pumpkin puree (not pumpkin pie filling)
- ½ cup (113g) unsalted butter, melted and slightly cooled
- 2 large eggs, room temperature
- ¼ cup (60g) sour cream
- 1 teaspoon vanilla extract
- 1 cup (120g) powdered sugar, sifted if lumpy
- 3 tablespoons pure maple syrup
- 1–2 tablespoons milk
- ½ teaspoon vanilla extract
Instructions
- Preheat your oven to 350°F (175°C). Generously grease your mini bundt pan with baking spray or butter and flour.
- Mix the dry ingredients: In a large bowl, whisk together the flour, granulated sugar, brown sugar, baking powder, baking soda, pumpkin pie spice, and salt until no lumps remain.
- Add the wet ingredients: Make a well in the center of the dry ingredients. Pour in the pumpkin puree, melted butter, eggs, sour cream, and vanilla extract. Stir with a spatula until just combined (15-20 strokes). A few small lumps are fine; do not overmix.
- Fill the bundt pan: Spoon the batter into the prepared pan, filling each cavity about ¾ full. You should get exactly 12 mini bundt cakes.
- Bake: Place the pan in the preheated oven and bake for 14-16 minutes, until a toothpick inserted into the center comes out clean or with a few moist crumbs. The tops should spring back when lightly touched.
- Cool in the pan: Let the cakes cool in the pan for 5 minutes. This is crucial for structure.
- Remove from pan: Place a cooling rack on top of the pan and carefully flip it over. Gently lift the pan off. Let the cakes cool completely on the rack before glazing (about 20 minutes).
- Make the maple glaze: While the cakes cool, whisk together the powdered sugar, maple syrup, and vanilla extract in a small bowl. Add milk one tablespoon at a time until you reach a pourable consistency. The glaze should be thick enough to coat the back of a spoon but thin enough to drizzle.
- Glaze the cakes: Once the cakes are completely cool, drizzle the glaze over each one. Let the glaze set for about 10 minutes before serving.
Notes
Don’t overmix the batter; a few lumps are fine. Grease the pan thoroughly to prevent sticking. Check pumpkin puree moisture level; blot if watery. Use room temperature eggs. Let cakes cool in pan for exactly 5 minutes before removing. For gluten-free, use a 1:1 gluten-free flour blend. For dairy-free, use melted coconut oil or vegan butter and dairy-free yogurt. Store in an airtight container at room temperature for up to 3 days. Freeze unglazed cakes for up to 3 months.
Nutrition
- Serving Size: 1 mini bundt cake
- Calories: 245
- Sugar: 24
- Sodium: 210
- Fat: 10
- Saturated Fat: 6
- Carbohydrates: 36
- Fiber: 1
- Protein: 3
Keywords: mini pumpkin bundt cakes, maple glaze, fall dessert, easy pumpkin recipe, mini bundt cakes, pumpkin spice


