Love this? Save it for later!
Share the inspiration with your friends
I was standing in the checkout line at the grocery store last October when a kid behind me, maybe six years old, started whispering to his mom about the candy display. “But Mom,” he said, his voice all serious, “what if the monsters want something healthy too?” And just like that, I was twenty-five years ago, sitting cross-legged on my Aunt Ruth’s linoleum kitchen floor, listening to her say the exact same thing. She’d pull out a cutting board and a bag of lychees—those weird, bumpy fruits from the Asian market—and turn them into the most ridiculous, wonderful Halloween snack I’d ever seen. She passed away a few years ago, and I haven’t thought about those lychee eyeballs in forever. But standing there in that checkout line, I could almost feel the cool fruit in my hand and hear her laugh. I knew I had to try making them again, but with something easier to find than lychees.
Honestly, I grabbed a bag of grapes and a jar of cream cheese before I even knew what I was doing. The cashier gave me a weird look—probably because it was October 28th and my cart had exactly three things in it—but I didn’t care. I was on a mission. The first batch I made at home? Total disaster. The cream cheese wouldn’t stick, the grapes kept rolling off the plate, and I may have thrown a grape at the wall out of sheer frustration. But I figured it out, and let me tell you, the version I’m sharing today is the one I wish I’d had back then. Maybe you’ve been there—wanting to make something fun for Halloween that doesn’t involve a bag of sugar the size of your head. This fruit tray is that thing.
It’s cozy, it’s a little ridiculous, and it’s exactly what you need for a slow evening at home or a Halloween party where you want to impress without stressing. The best part? It actually tastes good. Like, really good. The creamy, slightly tangy filling with the sweet pop of fruit? It’s the kind of snack that makes you close your eyes after the first bite. And the kids? They’ll lose their minds over the “eyeballs.” But honestly, I make this for myself just as often as I make it for anyone else.
Why You’ll Love This Recipe
This isn’t just another Halloween snack. I’ve tested this fruit tray about six times now—yes, six—and I’ve learned a thing or two about what works and what doesn’t. You know how some recipes look amazing on Pinterest but fall apart in real life? This one is the opposite. It’s forgiving, flexible, and genuinely delicious. Here’s why you’ll love it:
- Quick & Easy: Comes together in about 20 minutes, start to finish. Perfect for last-minute Halloween plans or a cozy night in when you want to do something fun but don’t have the energy for a full baking project.
- Simple Ingredients: You probably already have most of this stuff in your kitchen. No trips to specialty stores. No weird ingredients you’ll never use again.
- Perfect for Halloween: This is the kind of snack that makes people smile. It’s spooky without being scary, fun without being fussy. Great for parties, school events, or just a quiet evening watching Hocus Pocus.
- Crowd-Pleaser: I’ve served this to kids, adults, picky eaters, and people who “don’t do Halloween.” Everyone loves it. The creamy filling and fresh fruit combo is just that good.
- Unbelievably Delicious: The texture is what gets me—the smooth, tangy cream cheese mixture against the juicy pop of a grape or the soft sweetness of a strawberry. It’s comfort food in snack form.
What makes this recipe different from all the other eyeball snacks out there? It’s the filling. Instead of just sticking a candy eye on a grape, I use a seasoned cream cheese mixture that actually tastes like something. A little garlic powder, a pinch of salt, some fresh herbs—it turns a gimmick into a genuinely good appetizer. Plus, the way I assemble them keeps everything in place and looking perfect for hours. No sliding eyeballs, no messy platters. Just pure, cozy Halloween fun.
What Ingredients You Will Need
This recipe uses simple, everyday ingredients to create something that feels special. The magic is in the combination—creamy, tangy, sweet, and just a little savory. Here’s what you’ll need:
- For the “Eyeball” Base:
- 1 pound green or red seedless grapes (washed and dried completely) — the rounder and firmer, the better. Green grapes look more “eyeball-y” but red ones work too.
- 1 pint fresh strawberries (hulled) — these make great “big eyeballs” or “monster hearts” depending on how you arrange them.
- 1 cup fresh blueberries — for the “pupils” or just as a pop of color on the tray.
- 1 cup fresh blackberries — optional, but they add a nice dark “monster” vibe.
- For the Creamy Monster Filling:
- 8 ounces cream cheese, softened to room temperature (I use Philadelphia—it’s the creamiest and holds its shape best)
- 1/4 cup plain Greek yogurt (adds tang and makes the filling lighter; use full-fat for best texture)
- 2 tablespoons honey (or maple syrup for a vegan option)
- 1/2 teaspoon vanilla extract
- 1/4 teaspoon garlic powder (trust me on this—it sounds weird but it balances the sweetness perfectly)
- 1/8 teaspoon salt
- 1 tablespoon fresh chives, finely chopped (optional, but adds a nice savory note and a pop of green)
- For the “Monster” Decorations:
- 1/4 cup slivered almonds (for “monster teeth” or “horns”)
- 1/4 cup dried cranberries or goji berries (for “bloodshot veins” or “scary spots”)
- 2 tablespoons black sesame seeds (for “eyeball veins” or “monster freckles”)
- 1 small cucumber, sliced into thin rounds (for “monster skin” or “eyeball sockets”)
A few notes on ingredients: Look for grapes that are firm and not too soft—they’ll hold up better and look more like actual eyeballs. If you can’t find fresh chives, you can use a pinch of dried chives or just skip them. The garlic powder might seem out of place, but it’s the secret ingredient that makes the filling taste more complex and “grown-up.” My kids don’t even notice it, but my adult friends always ask what makes it so good.
For substitutions: Use dairy-free cream cheese and coconut yogurt for a vegan version. Swap honey for agave or maple syrup. If you don’t have black sesame seeds, you can use poppy seeds or just skip them. The almonds can be replaced with sunflower seeds or pumpkin seeds for a nut-free option.
Equipment Needed
You don’t need anything fancy for this recipe. I’ve made it in my tiny apartment kitchen with minimal tools and it turned out great. Here’s what you’ll need:
- One large cutting board (preferably with a groove to catch juices)
- A sharp paring knife (a small, serrated knife works well for grapes)
- A medium mixing bowl (for the cream cheese filling)
- A hand mixer or stand mixer (you can do it by hand with a fork, but a mixer makes it fluffier)
- A rubber spatula (for scraping every last bit of filling)
- A large serving platter or wooden board (a white platter makes the “eyeballs” pop)
- Small bowls for holding different toppings (keeps everything organized)
- A piping bag or a zip-top bag with the corner snipped off (for piping the filling into the grapes—trust me, this makes it SO much easier)
If you don’t have a piping bag, don’t worry. A zip-top bag works perfectly. Just fill it, snip a tiny corner, and squeeze. I’ve also used a small spoon to dollop the filling into the grapes, and while it’s a little messier, it still works. For the platter, I use a big white wooden board I got at a thrift store for $3. It’s got some scratches and stains, but that just adds to the “monster” vibe, right?
Preparation Method
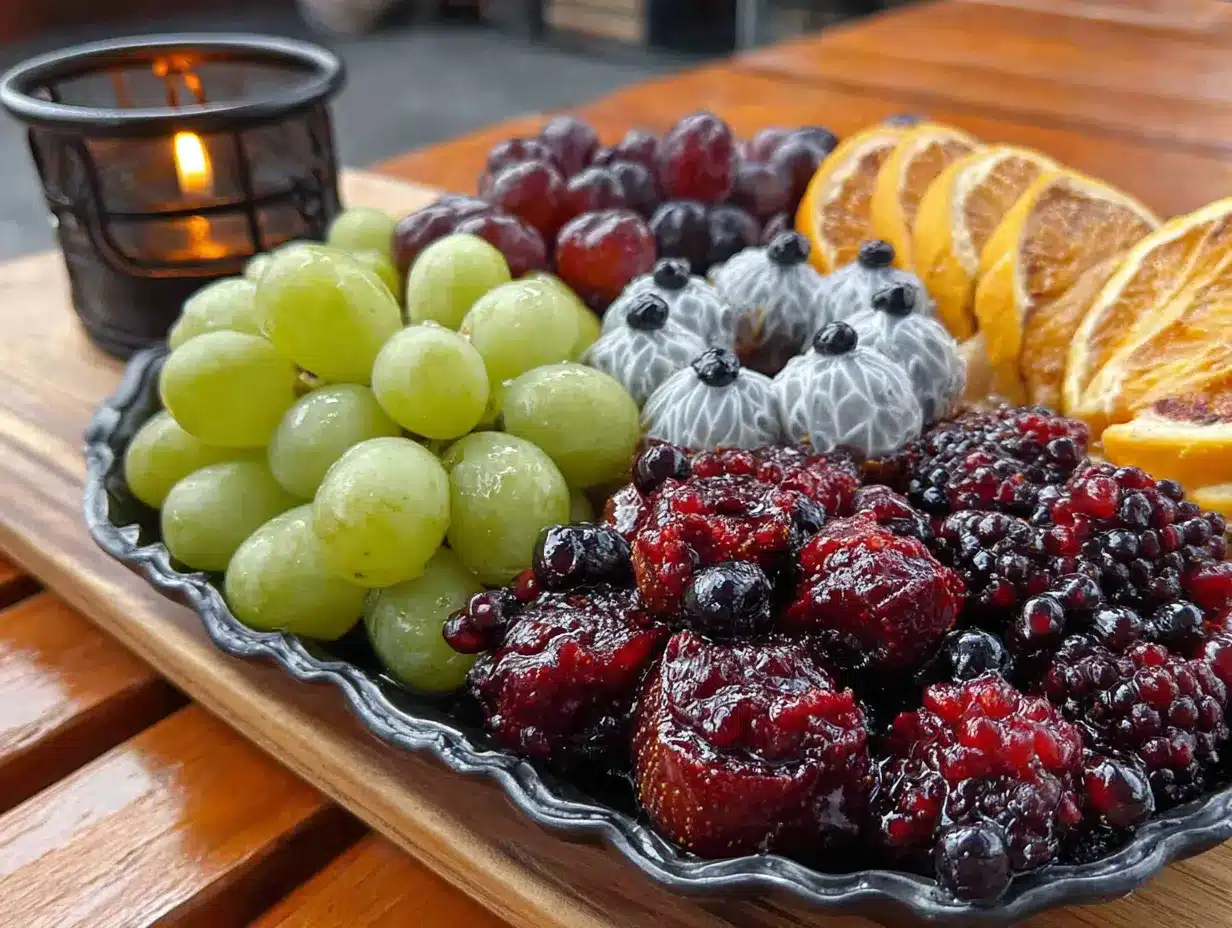
Okay, let’s get into the fun part. I’ve broken this down into steps so you don’t miss anything. Take your time—this is supposed to be fun, not stressful.
- Make the Creamy Monster Filling: In your mixing bowl, combine the softened cream cheese, Greek yogurt, honey, vanilla extract, garlic powder, and salt. Beat with your hand mixer on medium speed until smooth and fluffy—about 2 minutes. Scrape down the sides of the bowl with your spatula and give it one more quick mix. Fold in the chopped chives if you’re using them. Taste it and adjust the honey or salt if needed. The filling should be creamy, slightly tangy, and just a little sweet. Cover and pop it in the fridge while you prep the fruit.
- Prep the Grapes: Wash your grapes thoroughly and dry them completely. This is important—if they’re wet, the filling won’t stick. Pat them dry with a clean kitchen towel or paper towels. Using your paring knife, make a small slit in the side of each grape—just big enough to insert the filling. Don’t cut all the way through; you want a little pocket. For the “eyeball” look, aim for the slit to be on the side, not the top or bottom. Set the prepped grapes aside on a plate.
- Prep the Other Fruit: Hull the strawberries and cut them in half if they’re large. For the “monster” effect, you can leave some whole and cut others into different shapes—slices, wedges, whatever feels right. Wash and dry the blueberries and blackberries. Slice the cucumber into thin rounds. Set everything aside in separate bowls.
- Assemble the Eyeballs: Take your cream cheese filling out of the fridge. Spoon it into your piping bag or zip-top bag and snip off a tiny corner (about 1/4 inch). Working with one grape at a time, gently squeeze a small amount of filling into the slit you made earlier. You want just enough to make a little “eyeball” bulge—about the size of a small pea. Don’t overfill, or it’ll squish out. Place the filled grapes on your serving platter as you go, spacing them out a little.
- Add the Monster Details: This is where it gets creative. For “bloodshot veins,” press a small piece of dried cranberry or goji berry into the filling. For “pupils,” press a single black sesame seed or a tiny piece of blueberry into the center of the filling. For “monster freckles,” sprinkle a few black sesame seeds over the top. You can also use slivered almonds to make little “horns” or “teeth” sticking out of the filling. There’s no wrong way to do this—just have fun with it.
- Arrange the Platter: Start by placing the cucumber slices in a few spots around the platter—these are your “monster skin” patches. Arrange the filled eyeball grapes on top of and around the cucumber slices. Scatter the strawberries, blueberries, and blackberries around the edges. Use the remaining filling as a “dip” in a small bowl in the center of the platter. Sprinkle any extra sesame seeds or dried cranberries over the whole thing for a messy, monster-y look.
- Chill and Serve: Once everything is arranged, pop the platter in the fridge for at least 15 minutes. This helps the filling firm up and the flavors meld together. When you’re ready to serve, take it out and let it sit at room temperature for about 5 minutes—the filling will be a little softer and even more delicious.
A few things I’ve learned the hard way: Don’t skip drying the grapes. I did once and the filling slid right off. Also, if your cream cheese isn’t fully softened, you’ll end up with lumpy filling. Leave it out on the counter for at least 30 minutes before you start. And if you’re making this ahead of time (which you totally can), keep the filling and the fruit separate until right before serving. The grapes will release water over time and make everything soggy.
Cooking Tips & Techniques
I’ve made this fruit tray so many times now that I’ve got a few tricks up my sleeve. Let me share what I’ve learned—including the mistakes that taught me the most.
Tip #1: The grape size matters. Look for grapes that are all roughly the same size. This makes them look more uniform on the platter and they’re easier to fill. I once used a mix of giant and tiny grapes and the whole thing looked like a monster had a allergic reaction. Not the vibe I was going for.
Tip #2: Use a toothpick for the tiny details. Trying to place a single black sesame seed with your fingers is a recipe for frustration. Dip a toothpick in a little water, touch it to the seed, and then press it onto the filling. Works like a charm. I learned this after spending 20 minutes chasing sesame seeds around my kitchen counter.
Tip #3: Keep a damp paper towel handy. The cream cheese filling can get sticky on your fingers. A damp paper towel lets you wipe your hands quickly without having to wash them every two minutes. This is especially helpful if you’re making these with kids—trust me.
Tip #4: Don’t overthink the design. The beauty of this recipe is that it’s supposed to look a little messy and weird. That’s the whole monster vibe. If your eyeballs are lopsided or your bloodshot veins look more like random red spots, that’s perfect. Monsters aren’t supposed to be perfect.
Tip #5: Make extra filling. I always double the filling recipe because people love dipping the fruit in it. Plus, if you have extra, you can use it as a spread for crackers or toast the next morning. It’s honestly one of my favorite parts of this recipe.
Tip #6: Timing is everything. If you’re serving this at a party, assemble the platter no more than an hour before guests arrive. The fruit will stay fresh and the filling won’t get too soft. If you’re making it for a cozy night in, you can prep everything ahead of time and just assemble when you’re ready to eat.
Variations & Adaptations
One of the best things about this recipe is how easy it is to adapt. I’ve tried a bunch of different versions and they’ve all been delicious. Here are some of my favorites:
- Vegan Monster Eyeballs: Use dairy-free cream cheese and coconut yogurt for the filling. Swap the honey for maple syrup. Everything else stays the same. I made this for a friend who’s vegan and she said it was better than the original—though I’m not sure I agree!
- Spicy Monster Eyeballs: Add 1/4 teaspoon of cayenne pepper or chili flakes to the cream cheese filling. The heat pairs surprisingly well with the sweet fruit. I tried this on a whim and now it’s my secret party trick. Everyone asks what makes it so addictive.
- Fall Harvest Version: Swap the grapes for apple slices and pear wedges. Use a caramel-flavored filling (add 2 tablespoons of caramel sauce instead of honey). Top with chopped pecans and a sprinkle of cinnamon. This is perfect for Thanksgiving or a cozy autumn night.
- Savory Monster Platter: Skip the honey and vanilla, and add 1/4 cup of shredded cheddar cheese, 1 tablespoon of chopped fresh dill, and a pinch of black pepper to the filling. Use cucumber slices and cherry tomatoes instead of grapes. This is great for a Halloween party where you want something more substantial.
- Kid-Friendly “Friendly Monsters”: Use candy eyes (the ones you find at the baking supply store) instead of sesame seeds. Add a tiny dollop of strawberry jam on top of the filling for a “blood” effect that’s actually just sweet and fun. My niece and nephew go crazy for this version.
I’ve also tried making this with different fruits—kiwi slices, mango chunks, even watermelon balls. They all work, but grapes and strawberries are my favorite for the “eyeball” effect. The key is to use fruits that are firm enough to hold their shape and not too watery.
Serving & Storage Suggestions
This fruit tray is best served cold or at room temperature. I like to take it out of the fridge about 10 minutes before serving so the filling softens up just a little. Serve it on a large platter with extra filling in a small bowl for dipping. It’s perfect as an appetizer, a snack, or even a fun dessert.
For presentation, I like to arrange the “eyeballs” in clusters around the platter, with the other fruits scattered in between. A few cucumber slices placed strategically around the edges give it that “monster skin” look. You can also add some fresh mint leaves for a pop of green—it makes the whole thing look more intentional and less like a pile of fruit.
As for what to serve with it? This fruit tray pairs beautifully with a warm mug of apple cider or a cozy cup of hot chocolate. If you’re serving it at a party, put it next to a bowl of popcorn or some crispy garlic chicken sliders for a sweet-and-savory combo that everyone will love. For a Halloween movie night, I like to serve it alongside a plate of cheesy Halloween pizza dippers—the contrast is perfect.
Storage: If you have leftovers (which is rare in my house), store the filled grapes in an airtight container in the fridge for up to 2 days. The filling will soften and the grapes might release a little water, so they won’t look as pretty, but they’ll still taste great. You can also store the filling separately in a small container for up to 5 days and use it as a dip for fresh fruit or crackers.
Reheating: This is a cold dish, so no reheating needed! If the filling gets too soft after being out for a while, just pop the platter in the fridge for 15 minutes to firm it back up.
One thing I’ve noticed: the flavors actually get better after a few hours in the fridge. The garlic powder and honey meld together in a way that’s even more delicious the next day. So if you’re making this ahead of time, you’re in for a treat.
Nutritional Information & Benefits
I’m not a nutritionist, but I’ve done my research on the ingredients in this recipe. Here’s a rough estimate per serving (about 1/4 cup of fruit with filling):
- Calories: 120-150
- Fat: 7-9g
- Carbohydrates: 14-18g
- Fiber: 1-2g
- Sugar: 10-12g (mostly from fruit and honey)
- Protein: 3-4g
This recipe is naturally gluten-free and can be made vegan or dairy-free with simple substitutions. The grapes and berries are packed with antioxidants and vitamin C, while the Greek yogurt adds protein and probiotics. The cream cheese provides calcium and a little bit of healthy fat to keep you satisfied.
I love that this is a Halloween treat that doesn’t leave you feeling gross afterward. It’s sweet enough to feel like a treat, but it’s made with real, whole ingredients. Plus, the portion control is built in—each little eyeball is just a grape with a tiny bit of filling. You can eat a bunch of them and still feel good.
If you’re watching your sugar intake, you can reduce the honey to 1 tablespoon or use a sugar-free sweetener. The fruit itself is sweet enough that you might not even miss it. For a low-carb option, serve the filling with cucumber slices and skip the grapes altogether—it’s still delicious and totally satisfying.
Conclusion
This Cozy Halloween Monster Eyeball Fruit Tray is the kind of recipe that makes me love this time of year. It’s fun without being fussy, delicious without being unhealthy, and it always brings a smile to people’s faces. Whether you’re making it for a Halloween party, a cozy night in, or just because you want to do something a little different, I promise you won’t regret it.
I love that this recipe has become a tradition in my house. Every year, my friends text me asking if I’m bringing “the eyeballs” to the Halloween gathering. And every year, I tweak it just a little—different fruits, different fillings, different monster designs. That’s the beauty of this recipe: it’s a canvas for your creativity. You can make it your own.
So go ahead, give it a try. Grab some grapes, whip up that creamy filling, and let your inner monster loose. And when you do, I’d love to hear about it. Leave a comment below and tell me how your eyeballs turned out—or better yet, share a photo on Pinterest and tag me. Happy Halloween, friends. May your eyeballs be creepy, your filling be creamy, and your night be cozy.
Frequently Asked Questions
Can I make this fruit tray ahead of time?
Yes! You can prep the filling and wash the fruit up to 2 days ahead. Store them separately in the fridge. Assemble the platter no more than 1 hour before serving for the best texture and appearance.
What if I can’t find black sesame seeds?
No problem at all. You can use poppy seeds, chia seeds, or just skip them entirely. The “eyeballs” will still look great without them. You can also use tiny pieces of dried fruit or even sprinkles for a fun, colorful look.
How do I keep the grapes from rolling around on the platter?
I like to use a platter with a slight rim or a wooden board with a little texture. You can also place a few cucumber slices or lettuce leaves underneath the grapes to keep them in place. The filling also helps anchor them once it firms up in the fridge.
Can I use frozen fruit for this recipe?
I wouldn’t recommend it. Frozen fruit releases a lot of water as it thaws, which will make the filling slide off and turn everything into a soggy mess. Stick with fresh fruit for the best results. If you’re in a pinch, you can use frozen fruit that’s been fully thawed and patted very dry, but it won’t look as nice.
Is this recipe kid-friendly?
Absolutely! Kids love helping with this recipe. Let them wash the fruit, fill the piping bag, and arrange the “eyeballs” on the platter. Just be careful with the knife work—I recommend prepping the grapes yourself if little hands are involved. The end result is a snack that kids will actually eat, which is a win in my book.
Pin This Recipe!
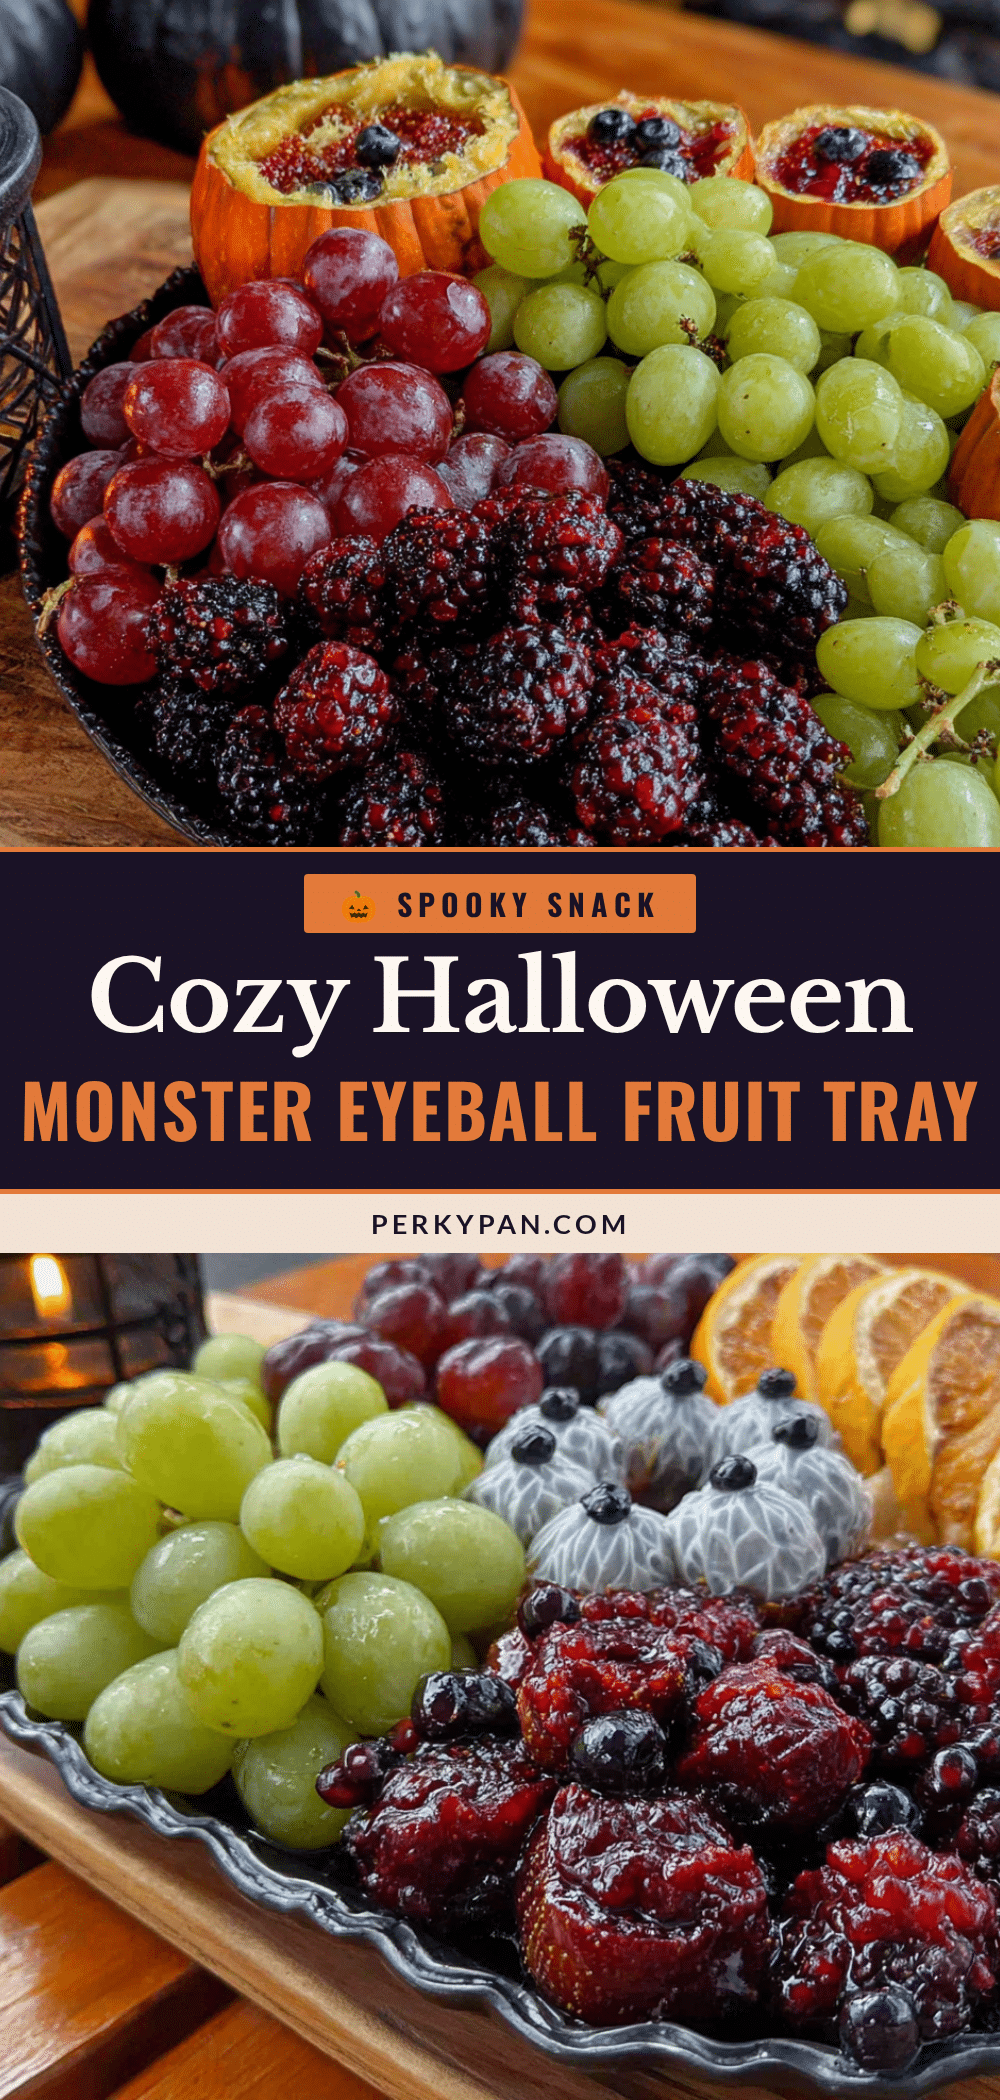
Cozy Halloween Monster Eyeball Fruit Tray
A fun and healthy Halloween snack featuring grapes and strawberries transformed into monster eyeballs with a creamy, tangy filling. Perfect for parties or a cozy night in.
- Prep Time: 20 minutes
- Cook Time: 0 minutes
- Total Time: 20 minutes
- Yield: 8 servings 1x
- Category: Appetizer
- Cuisine: American
Ingredients
- 1 pound green or red seedless grapes, washed and dried
- 1 pint fresh strawberries, hulled
- 1 cup fresh blueberries
- 1 cup fresh blackberries (optional)
- 8 ounces cream cheese, softened
- 1/4 cup plain Greek yogurt
- 2 tablespoons honey
- 1/2 teaspoon vanilla extract
- 1/4 teaspoon garlic powder
- 1/8 teaspoon salt
- 1 tablespoon fresh chives, finely chopped (optional)
- 1/4 cup slivered almonds
- 1/4 cup dried cranberries or goji berries
- 2 tablespoons black sesame seeds
- 1 small cucumber, sliced into thin rounds
Instructions
- Make the Creamy Monster Filling: In a mixing bowl, combine softened cream cheese, Greek yogurt, honey, vanilla extract, garlic powder, and salt. Beat with a hand mixer on medium speed until smooth and fluffy, about 2 minutes. Fold in chopped chives if using. Cover and refrigerate.
- Prep the Grapes: Wash and dry grapes thoroughly. Using a paring knife, make a small slit in the side of each grape to create a pocket for the filling. Set aside.
- Prep the Other Fruit: Hull strawberries and cut in half if large. Wash and dry blueberries and blackberries. Slice cucumber into thin rounds. Set aside in separate bowls.
- Assemble the Eyeballs: Spoon the cream cheese filling into a piping bag or zip-top bag with a tiny corner snipped off. Gently squeeze a small amount of filling into the slit of each grape, creating a small bulge. Place filled grapes on a serving platter.
- Add the Monster Details: Press dried cranberries or goji berries into the filling for ‘bloodshot veins.’ Add a black sesame seed or tiny blueberry piece for ‘pupils.’ Sprinkle with extra sesame seeds. Use slivered almonds for ‘horns’ or ‘teeth.’
- Arrange the Platter: Place cucumber slices around the platter for ‘monster skin.’ Arrange filled grapes on and around cucumber slices. Scatter strawberries, blueberries, and blackberries around the edges. Serve extra filling as a dip in a small bowl in the center.
- Chill and Serve: Refrigerate the platter for at least 15 minutes to firm up the filling. Let sit at room temperature for 5 minutes before serving.
Notes
Dry grapes thoroughly to help filling stick. Soften cream cheese for 30 minutes before mixing. Assemble platter no more than 1 hour before serving for best texture. Store leftovers in an airtight container in the fridge for up to 2 days.
Nutrition
- Serving Size: 1/4 cup of fruit wit
- Calories: 135
- Sugar: 11
- Sodium: 95
- Fat: 8
- Saturated Fat: 4
- Carbohydrates: 16
- Fiber: 1.5
- Protein: 3.5
Keywords: Halloween snack, fruit tray, monster eyeballs, healthy Halloween, grape eyeballs, cream cheese dip, spooky snack


