Love this? Save it for later!
Share the inspiration with your friends
The Friendsgiving potluck was in twelve hours and I’d completely forgotten. Everyone else would be bringing elaborate casseroles, slow-roasted turkeys, and those fancy charcuterie boards that look like they belong in a magazine. I had a can of pumpkin puree, a package of pre-made pie crusts, and about forty-five minutes of actual free time. Honestly, I almost just grabbed a store-bought pie on the way. But then I remembered—I wanted to be the one who showed up with something that actually tasted like effort, even if it took none. So I threw together these mini pumpkin pies, crossed my fingers, and prayed they’d hold up against the culinary competition.
Let me tell you, I was not expecting what happened next. My little hand-held pies, the ones I’d barely had time to crimp the edges on, were gone before the main course even hit the table. People were walking around with them in each hand, talking with their mouths full, asking for the recipe. I was honestly a little embarrassed—I mean, they were just mini pies. But there’s something about that perfect ratio of flaky crust to silky pumpkin filling, all in a personal-sized package, that just hits different. Maybe you’ve been there, showing up with a half-baked idea that somehow becomes the star of the show. That’s this recipe. It’s the underdog that wins every time.
The best part? I didn’t even have to stress about slicing a full pie or dealing with leftovers. Everyone grabbed their own little pie, and the mess was minimal—which, for a Friendsgiving, is basically a miracle. Now I make these every year, and they’ve become my signature contribution. Not bad for a last-minute panic bake, right?
Why You’ll Love This Recipe
I’ve tested this recipe more times than I care to admit—through burnt crusts, overly spiced fillings, and one particularly disastrous attempt at gluten-free pastry that I’m still not ready to talk about. But these mini pumpkin pies? They’re the result of all that trial and error. Here’s why they’re my go-to:
- Quick & Easy: From start to finish, these come together in under an hour. Perfect for those “oh no, I forgot about the potluck” moments we all have.
- Simple Ingredients: You probably have most of these in your pantry right now. No fancy grocery runs required.
- Perfect for Friendsgiving: Individual portions mean no slicing, no mess, and no fighting over the last piece. Everyone gets their own little pie.
- Crowd-Pleaser: I’ve brought these to everything from casual hangouts to office parties, and they always disappear first. Kids and adults alike go crazy for them.
- Unbelievably Delicious: That creamy, spiced pumpkin filling inside a buttery, flaky crust? It’s comfort food at its finest, just in a more portable package.
What makes these different from other mini pumpkin pie recipes is the texture. I use a trick of blending a bit of cream cheese into the filling, which gives it this ultra-smooth, almost cheesecake-like richness without being heavy. It’s not just another version—it’s the best version I’ve ever made. And honestly, after that first bite where the flavors just melt together, you’ll understand why I keep coming back to this recipe.
What Ingredients You Will Need
This recipe uses simple, wholesome ingredients to deliver that classic pumpkin pie flavor with a silky, luxurious texture. Most of these are pantry staples, especially if you’re a regular fall baker. Here’s what you’ll need:
For the Crust:
- 1 package (14.1 oz) refrigerated pie crusts (I prefer Pillsbury for consistency, but homemade works great too)
- 1 tablespoon unsalted butter, melted (for brushing the crust edges, optional—adds a beautiful golden finish)
- 1 tablespoon granulated sugar (for sprinkling on the crust, optional—adds a slight crunch)
For the Pumpkin Filling:
- 1 can (15 oz) pumpkin puree (not pumpkin pie filling—make sure it’s 100% pure pumpkin. I like Libby’s for its consistent texture)
- 3/4 cup granulated sugar
- 2 large eggs, room temperature (cold eggs can make the filling lumpy)
- 1 teaspoon vanilla extract
- 1 teaspoon ground cinnamon
- 1/2 teaspoon ground ginger
- 1/4 teaspoon ground nutmeg (freshly grated if you have it—it makes a difference)
- 1/4 teaspoon ground cloves
- 1/2 teaspoon salt
- 1 cup heavy cream (or half-and-half for a lighter version)
- 2 ounces cream cheese, softened (this is my secret ingredient for extra creaminess)
For the Topping (Optional but Recommended):
- 1 cup heavy whipping cream
- 2 tablespoons powdered sugar
- 1/2 teaspoon vanilla extract
- Ground cinnamon or nutmeg for dusting
When choosing your pumpkin puree, look for cans that are labeled “100% pure pumpkin” and avoid anything with added spices or sweeteners. The texture should be smooth and not too watery. If you’re feeling ambitious, you can roast and puree your own sugar pumpkins, but honestly, canned works beautifully here and saves so much time. For the cream cheese, I recommend using full-fat for the best texture, but a low-fat version will work in a pinch—just know the filling won’t be quite as luscious.
Equipment Needed
You don’t need a fully stocked professional kitchen for these mini pies, which is part of their charm. Here’s what you’ll need:
- Muffin tin: A standard 12-cup muffin tin works perfectly. If you only have a mini muffin tin, just adjust the baking time down by about 5-7 minutes.
- Rolling pin: For rolling out the pie crust if you’re using homemade. For store-bought, you might not need it at all.
- Round cookie cutter or glass: About 3.5 to 4 inches in diameter to cut out the crust rounds. A drinking glass works fine if you don’t have a cutter.
- Mixing bowls: One medium bowl for the filling, one small for the egg wash if using.
- Whisk: For smoothing out the filling. A fork works in a pinch, but a whisk gives you that silky texture.
- Hand mixer or stand mixer: For whipping the cream topping. You can also whisk by hand if you’re feeling strong.
- Pastry brush: For brushing the crust edges with butter or egg wash. Not essential, but it gives a nicer finish.
- Cooling rack: Helps the pies cool evenly without getting soggy bottoms.
I’ve made these with everything from a fancy muffin tin I got as a gift to a beat-up one I found at a thrift store. Honestly, they all work. The only thing I’d splurge on is a good quality muffin tin—the non-stick ones release the pies much easier. If you’re using an older tin, just grease it well with butter or non-stick spray.
Preparation Method
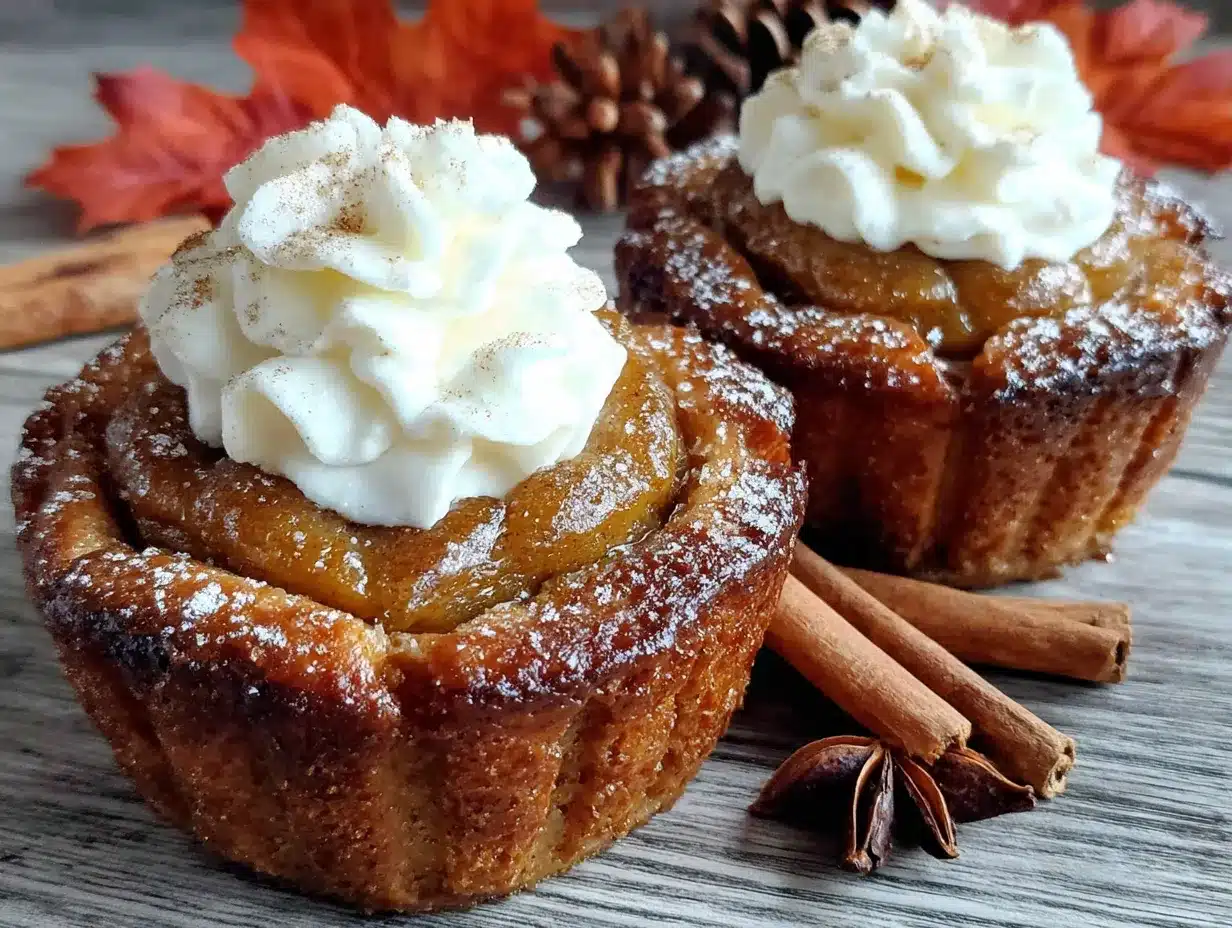
Alright, let’s get baking! Here’s how to make these mini pumpkin pies step by step. I’ve included all my little tricks and warnings so you don’t make the same mistakes I did.
- Preheat your oven to 375°F (190°C). This is important—don’t skip the preheating step. I once tried to save time and put the pies in a cold oven, and the crusts came out pale and sad.
- Prepare the muffin tin. Lightly grease a 12-cup muffin tin with butter or non-stick spray. This is crucial, even if your tin is non-stick. Trust me on this—I learned the hard way when my first batch stuck like glue.
- Roll out the pie crusts. If using refrigerated crusts, let them sit at room temperature for about 15 minutes to soften slightly. Unroll them on a lightly floured surface. Use a 3.5 to 4-inch round cookie cutter or a glass to cut out 12 rounds. You should get about 6 rounds per crust. Re-roll the scraps if needed to get all 12.
- Press the crusts into the muffin tin. Gently press each round into a muffin cup, making sure the edges come up slightly above the rim. Don’t stretch the dough—just ease it in. Prick the bottoms with a fork to prevent bubbling. Pop the tin in the fridge while you make the filling.
- Make the pumpkin filling. In a medium bowl, beat the cream cheese with a whisk or hand mixer until smooth. Add the pumpkin puree, sugar, eggs, vanilla, and all the spices. Mix until well combined. Slowly pour in the heavy cream while whisking gently. The mixture should be smooth and slightly thick, like a milkshake. If it looks lumpy, keep whisking—you want it silky.
- Fill the crusts. Remove the muffin tin from the fridge. Spoon or pour the filling into each crust, filling about 3/4 full. They will puff up a bit while baking, so don’t overfill. I use a small ladle or a measuring cup with a spout for this—less mess.
- Bake the pies. Place the muffin tin on the middle rack of your preheated oven. Bake for 18-22 minutes, or until the filling is set around the edges but still slightly jiggly in the center. The crust should be golden brown. If the edges of the crust are browning too fast, tent loosely with foil for the last 5 minutes.
- Cool completely. Let the pies cool in the tin for 10 minutes, then carefully transfer them to a wire rack to cool completely. This step is non-negotiable—the filling needs to set up properly. I’ve tried rushing this and ended up with runny pies.
- Make the whipped cream topping. While the pies cool, pour the heavy cream, powdered sugar, and vanilla into a chilled bowl. Whip with a hand mixer on medium-high speed until soft peaks form. Be careful not to overwhip—you want it fluffy, not buttery.
- Serve and enjoy. Once the pies are completely cool, top each with a dollop of whipped cream and a dusting of cinnamon or nutmeg. Serve immediately or refrigerate until ready to serve.
Cooking Tips & Techniques
Over the years, I’ve made every mistake in the book with these mini pies. Here’s what I’ve learned so you don’t have to suffer through burnt crusts and soupy fillings like I did.
Don’t overmix the filling. I know it’s tempting to keep whisking until it’s perfectly smooth, but overmixing incorporates too much air and can cause the filling to puff up and crack while baking. Mix just until everything is combined—a few tiny lumps are fine.
Blind bake if you like a crispier crust. If you’re someone who hates a soggy bottom (and who doesn’t?), you can pre-bake the crusts for 5-7 minutes before adding the filling. Just line them with parchment and fill with pie weights or dried beans. This extra step makes the crust extra flaky and prevents it from getting soggy from the wet filling.
Room temperature ingredients are your friend. Cold eggs and cold cream cheese can make the filling lumpy and uneven. Take them out of the fridge about 30 minutes before you start baking. I usually set everything out while I’m prepping the crusts.
Watch the edges. The crust edges can brown quickly because they’re so thin. If you notice them getting too dark before the filling is set, just cover the whole muffin tin loosely with foil. This trick has saved many a batch of mine from burnt edges.
Let them cool completely. I know it’s hard to wait, but these pies need time to set. If you try to remove them from the tin while they’re still warm, they’ll fall apart. Patience is a virtue, especially when pumpkin pie is involved.
Variations & Adaptations
One of the best things about these mini pumpkin pies is how versatile they are. I’ve played around with different variations over the years, and here are some of my favorites:
- Gluten-Free Version: Use a gluten-free pie crust mix or pre-made gluten-free crusts. I’ve had good luck with the Wholly Wholesome brand. Just follow the package directions for pre-baking if needed. The filling is naturally gluten-free, so you’re golden there.
- Vegan Option: Substitute the eggs with flax eggs (1 tablespoon ground flaxseed + 3 tablespoons water per egg), use coconut cream instead of heavy cream, and a vegan cream cheese. The texture will be slightly different—a bit denser—but still delicious. I tried this for a vegan friend’s birthday and was pleasantly surprised.
- Spice It Up: Add a pinch of cayenne pepper or a teaspoon of bourbon to the filling for a grown-up twist. The bourbon adds a warmth that pairs beautifully with the pumpkin. Just don’t tell the kids.
- Chocolate Pumpkin: Swirl 2 tablespoons of melted dark chocolate into the filling before baking. The combination of pumpkin and chocolate is surprisingly amazing—it’s like a pumpkin pie and a brownie had a baby.
- Crumb Topping: Instead of whipped cream, top the pies with a buttery pecan or oat crumble before baking. Mix 1/4 cup flour, 1/4 cup brown sugar, 3 tablespoons cold butter, and 1/4 cup chopped pecans. Sprinkle over the filling and bake as directed.
Serving & Storage Suggestions
These mini pumpkin pies are best served at room temperature or slightly chilled—both ways are delicious. I personally prefer them chilled because the filling firms up even more and the flavors seem to meld together overnight. If you’re serving them at a Friendsgiving, set them out on a platter with a pile of napkins and let everyone grab their own. They’re perfect for mingling.
For storage, place any leftover pies in an airtight container in the refrigerator. They’ll keep for up to 4 days, but honestly, they never last that long in my house. The flavors actually get better after a day or two, so don’t be afraid to make them ahead of time.
To freeze, place the cooled pies (without the whipped cream) on a baking sheet and freeze for about an hour, or until solid. Then transfer them to a freezer-safe bag or container. They’ll keep for up to 2 months. When you’re ready to serve, thaw them in the refrigerator overnight and add fresh whipped cream just before serving. I’ve done this for multiple Friendsgivings, and no one has ever guessed they were frozen.
For reheating, pop a pie in a 300°F oven for about 5-7 minutes to warm it through if you prefer a warm pie. Just don’t microwave it—the crust will turn soggy and sad. Trust me on this one.
Nutritional Information & Benefits
While these mini pumpkin pies are definitely a treat, they do offer some surprising nutritional benefits. Here’s a rough estimate per mini pie (without whipped cream):
- Calories: 245
- Fat: 14g
- Carbohydrates: 28g
- Protein: 4g
- Fiber: 2g
- Sugar: 16g
Pumpkin is packed with vitamin A (great for eye health), fiber (good for digestion), and antioxidants. The cream cheese and heavy cream add calcium and a bit of protein, though let’s be real—these are more about comfort than health food. But hey, at least you’re getting some veggies in, right? For a lighter version, you can use half-and-half instead of heavy cream and skip the whipped cream topping, but honestly, life’s too short for sad desserts.
Conclusion
These mini pumpkin pies have become my signature Friendsgiving dish, and I think they should become yours too. They’re easy enough for a last-minute panic bake but impressive enough to steal the show. Whether you’re hosting a cozy gathering with friends or just want a personal-sized pumpkin pie without the commitment of a full pie, this recipe delivers every time.
Don’t be afraid to make them your own—add your favorite spices, try a different crust, or experiment with toppings. That’s the beauty of cooking, right? It’s all about making something that tastes like you. I’d love to hear how yours turn out! Drop a comment below with your variations or tag me in your photos. Happy Friendsgiving, and may your pies always be perfectly spiced.
Frequently Asked Questions
Can I use pumpkin pie filling instead of pumpkin puree?
I wouldn’t recommend it. Pumpkin pie filling is already sweetened and spiced, so using it would throw off the balance of the recipe. Stick with 100% pure pumpkin puree for the best results.
Can I make these ahead of time?
Absolutely! These pies actually taste better the next day after the flavors have had time to meld. Just store them in the fridge and add the whipped cream right before serving.
How do I prevent the crust from getting soggy?
Blind baking the crusts for 5-7 minutes before adding the filling helps a lot. Also, make sure your filling isn’t too watery—drain any excess liquid from the pumpkin puree if it looks runny.
Can I freeze these mini pies?
Yes! Freeze them without the whipped cream for up to 2 months. Thaw in the refrigerator overnight and add fresh whipped cream before serving.
What if I don’t have a muffin tin?
You can use small ramekins or even a mini cheesecake pan with removable bottoms. Just adjust the baking time as needed—smaller portions will bake faster, larger ones will take longer.
Pin This Recipe!

Easy Mini Pumpkin Pies for a Cozy Friendsgiving
These mini pumpkin pies are the perfect last-minute Friendsgiving dessert, featuring a creamy, spiced pumpkin filling in a flaky, buttery crust. They’re easy to make, portable, and always a crowd-pleaser.
- Prep Time: 20 minutes
- Cook Time: 20 minutes
- Total Time: 40 minutes
- Yield: 12 mini pies 1x
- Category: Dessert
- Cuisine: American
Ingredients
- 1 package (14.1 oz) refrigerated pie crusts (e.g., Pillsbury)
- 1 tablespoon unsalted butter, melted (for brushing crust edges, optional)
- 1 tablespoon granulated sugar (for sprinkling on crust, optional)
- 1 can (15 oz) pumpkin puree (100% pure pumpkin, e.g., Libby’s)
- 3/4 cup granulated sugar
- 2 large eggs, room temperature
- 1 teaspoon vanilla extract
- 1 teaspoon ground cinnamon
- 1/2 teaspoon ground ginger
- 1/4 teaspoon ground nutmeg (freshly grated preferred)
- 1/4 teaspoon ground cloves
- 1/2 teaspoon salt
- 1 cup heavy cream (or half-and-half for lighter version)
- 2 ounces cream cheese, softened
- 1 cup heavy whipping cream (for topping)
- 2 tablespoons powdered sugar (for topping)
- 1/2 teaspoon vanilla extract (for topping)
- Ground cinnamon or nutmeg for dusting (for topping)
Instructions
- Preheat your oven to 375°F (190°C).
- Lightly grease a 12-cup muffin tin with butter or non-stick spray.
- If using refrigerated crusts, let them sit at room temperature for about 15 minutes to soften. Unroll on a lightly floured surface and use a 3.5 to 4-inch round cookie cutter or glass to cut out 12 rounds (about 6 per crust, re-rolling scraps if needed).
- Gently press each round into a muffin cup, ensuring edges come up slightly above the rim. Prick bottoms with a fork. Refrigerate the tin while making the filling.
- In a medium bowl, beat the cream cheese with a whisk or hand mixer until smooth. Add pumpkin puree, sugar, eggs, vanilla, cinnamon, ginger, nutmeg, cloves, and salt. Mix until well combined. Slowly pour in the heavy cream while whisking gently until smooth and slightly thick.
- Remove muffin tin from fridge. Spoon or pour filling into each crust, filling about 3/4 full.
- Bake on the middle rack for 18-22 minutes, until filling is set around edges but still slightly jiggly in center and crust is golden brown. If edges brown too fast, tent loosely with foil for the last 5 minutes.
- Let pies cool in the tin for 10 minutes, then transfer to a wire rack to cool completely.
- While pies cool, make whipped cream: In a chilled bowl, whip heavy cream, powdered sugar, and vanilla with a hand mixer on medium-high speed until soft peaks form.
- Once pies are completely cool, top each with a dollop of whipped cream and a dusting of cinnamon or nutmeg. Serve immediately or refrigerate.
Notes
For a crispier crust, blind bake the crusts for 5-7 minutes before adding filling. Use room temperature ingredients for a smooth filling. Cool completely before removing from tin to prevent breakage. Pies can be made ahead and stored in the fridge for up to 4 days; flavors improve after a day. Freeze without whipped cream for up to 2 months.
Nutrition
- Serving Size: 1 mini pie
- Calories: 245
- Sugar: 16
- Sodium: 210
- Fat: 14
- Saturated Fat: 8
- Carbohydrates: 28
- Fiber: 2
- Protein: 4
Keywords: mini pumpkin pies, Friendsgiving, easy pumpkin pie, individual pumpkin pie, fall dessert, potluck dessert


