Love this? Save it for later!
Share the inspiration with your friends
There used to be this little bakery tucked away on a side street in Portland, Oregon—the kind of place with mismatched chairs and a chalkboard menu that changed daily. They made these pumpkin bars that were absolute perfection. Not too dense, not too cakey, just this incredible balance of warm spices and that tangy cream cheese frosting that had me driving twenty minutes out of my way on rainy mornings. When they closed suddenly in 2019—a “For Lease” sign appeared overnight, just like that—I honestly felt a little lost. You know that feeling when a place becomes part of your routine, and then it’s just… gone?
After seventeen tries—seventeen, let me tell you, with some batches that went straight into the trash—I finally cracked the code. The first bite of this version? I actually teared up. It wasn’t just about recreating a recipe; it was about holding onto a memory. I mean, I’d spent two years trying to get that specific crumb, that particular sweetness level in the frosting, that texture that stays moist for days. My neighbor Dave, who’d never had the original, ate three bars in one sitting and said, “Whatever you did, don’t change a thing.” That’s when I knew.
These aren’t just pumpkin bars. They’re the ones that make you close your eyes after that first bite. The ones you’ll bring to every fall gathering and watch disappear from the platter. Maybe you’ve been there—chasing a flavor from a place that no longer exists. If so, you’re going to love what we’re making today.
Why You’ll Love This Recipe
Look, I’ve tested a lot of pumpkin bar recipes over the years. Some are too dense, like eating a brick of pumpkin paste. Others are so light they fall apart the second you try to frost them. These bars hit that sweet spot—literally and figuratively. Here’s why they’re different:
- Perfectly Moist, Never Soggy : The ratio of pumpkin puree to flour is carefully balanced so you get that tender crumb without any wetness in the middle. This was my biggest struggle during those seventeen trials, and I finally nailed it by adjusting the oil temperature.
- Simple Pantry Ingredients : No weird stuff here. Canned pumpkin, basic spices, eggs, butter, cream cheese—you probably have most of this in your kitchen right now. I tested this recipe at 11 PM on a Tuesday with what I had on hand, and it worked beautifully.
- Perfect for Fall Gatherings : Whether it’s a Friendsgiving potluck, a Halloween party, or just a cozy Sunday with the family, these bars are the star of the show. They travel well, they slice cleanly, and they feed a crowd without any fuss.
- That Cream Cheese Frosting Though : This isn’t some thin, runny glaze situation. It’s thick, tangy, and holds its shape beautifully. I use a higher cream cheese to butter ratio than most recipes because let’s be honest—that’s the best part.
- Make-Ahead Friendly : The bars actually taste better the next day after the flavors have had time to meld. You can bake them a day ahead, refrigerate unfrosted, then frost the morning of your event. Total stress-saver for hosts.
These bars aren’t just another pumpkin recipe—they’re the one I bring to every single fall event. My friend Sarah, who claims she “doesn’t like pumpkin desserts,” asked for the recipe after trying them. That’s the kind of reaction you can expect.
What Ingredients You Will Need
This recipe relies on simple, wholesome ingredients that work together to create something truly special. Most of these are pantry staples, especially during pumpkin season, but I’ll share a few tips I’ve learned along the way.
For the Pumpkin Bars
- 2 cups all-purpose flour (I use King Arthur Flour for consistent results—their protein content is reliable batch after batch)
- 2 cups granulated sugar (regular white sugar works perfectly here; I’ve tried coconut sugar and it changes the texture too much)
- 1 cup vegetable oil (canola or any neutral oil works; I’ve used avocado oil with great results too)
- 4 large eggs (room temperature is important—cold eggs can make the batter seize up)
- 1 can (15 oz) pumpkin puree (not pumpkin pie filling! I prefer Libby’s for its consistent moisture content)
- 2 teaspoons baking powder
- 1 teaspoon baking soda
- 1/2 teaspoon salt
- 2 teaspoons ground cinnamon
- 1/2 teaspoon ground nutmeg (freshly grated if you have it—the difference is noticeable)
- 1/2 teaspoon ground ginger
- 1/4 teaspoon ground cloves
For the Cream Cheese Frosting
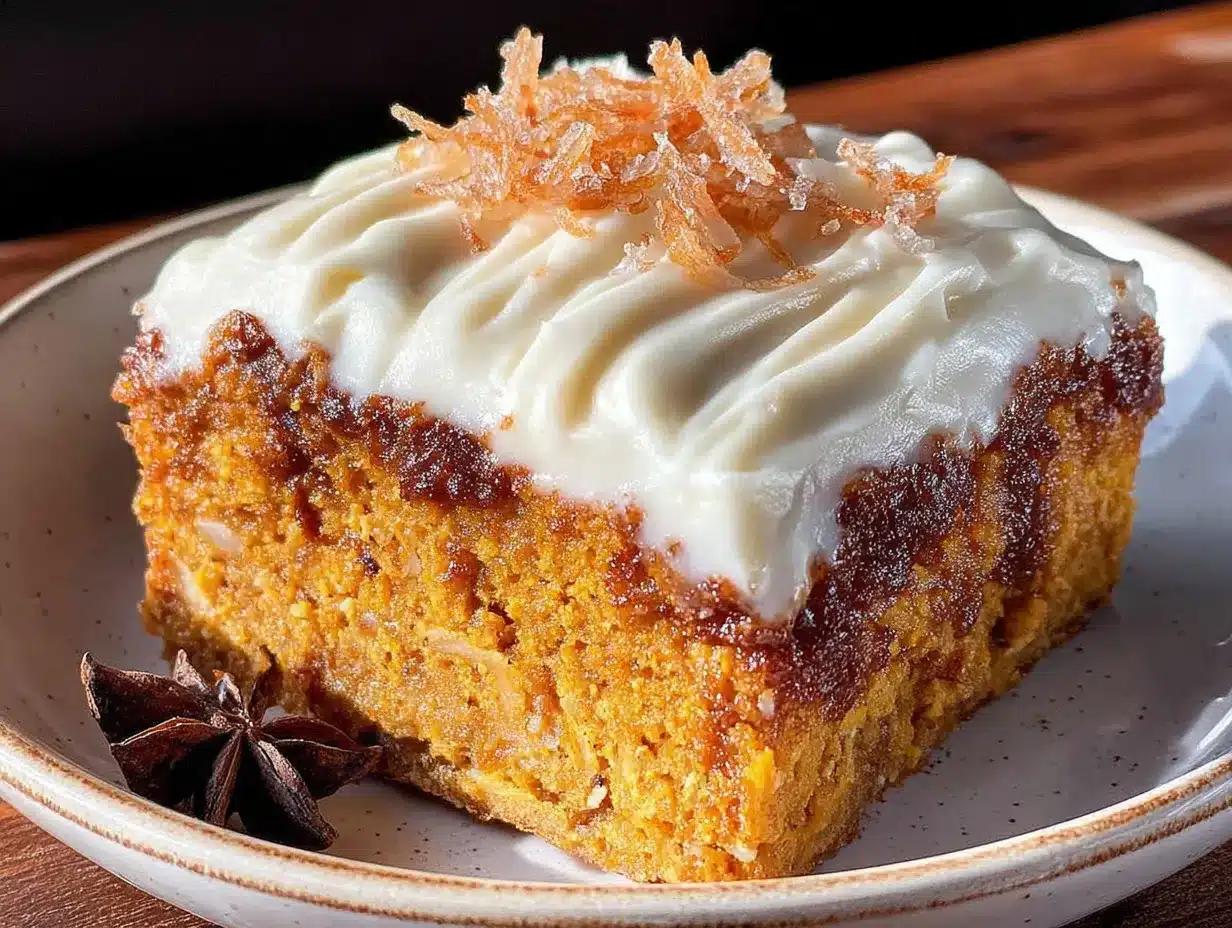
- 8 oz cream cheese (full-fat, softened—I’ve tried Neufchâtel and it works but isn’t as rich)
- 1/2 cup unsalted butter (softened, not melted)
- 4 cups powdered sugar (sifted if you want extra smooth frosting)
- 1 teaspoon vanilla extract
- Pinch of salt (trust me on this—it balances the sweetness)
Ingredient Selection Tips : For the best texture, make sure your pumpkin puree isn’t watery. If you open the can and see liquid sitting on top, give it a good stir before measuring. Some brands are runnier than others—I stick with Libby’s because their puree is consistently thick. For the cream cheese, Philadelphia is my go-to. The store brands often have more water content, which can make your frosting runny.
Substitution Guidance : Need a dairy-free option? Use plant-based cream cheese and butter—just make sure they’re both softened properly. For a gluten-free version, I’ve had success with Bob’s Red Mill 1-to-1 Gluten Free Baking Flour. The texture is slightly different but still delicious. If you’re out of pumpkin pie spice, just mix equal parts cinnamon, nutmeg, ginger, and a pinch of cloves—you’ll get the same warm flavor profile.
Equipment Needed
Nothing too fancy here—this is a straightforward recipe that doesn’t require a professional kitchen. Here’s what you’ll need:
- 9×13-inch baking pan (metal works best for even baking; glass pans can make the edges overbake before the center is done)
- Mixing bowls (one large for dry ingredients, one medium for wet)
- Electric hand mixer or stand mixer (for the frosting—you can do it by hand but your arm will thank you for the mixer)
- Whisk (for combining dry ingredients)
- Rubber spatula (for scraping the bowl and spreading the frosting)
- Parchment paper (this is non-negotiable—it makes lifting the bars out so much easier)
- Cooling rack (wire rack for even cooling)
- Measuring cups and spoons
Budget-Friendly Options : Don’t have a stand mixer? A hand mixer works perfectly for the frosting. No cooling rack? You can use the inverted baking pan—just make sure it’s clean and dry. I’ve made these bars in a disposable aluminum pan when traveling to a friend’s house, and they turned out just fine.
Maintenance Tip : If you’re using a metal pan, avoid using metal utensils on it to prevent scratching. I learned this the hard way—scratched pans can cause uneven browning over time.
Preparation Method
Let me walk you through this step by step. I’ve included all the little details that make the difference between good pumpkin bars and unforgettable ones.
- Preheat and Prep : Preheat your oven to 350°F (175°C). Line your 9×13-inch baking pan with parchment paper, leaving some overhang on the long sides—this creates handles for easy lifting later. Lightly grease the parchment with cooking spray or butter.
- Mix Dry Ingredients : In a large bowl, whisk together the flour, baking powder, baking soda, salt, cinnamon, nutmeg, ginger, and cloves. Make sure everything is evenly distributed—I usually whisk for about 30 seconds to aerate the flour a bit. Pro tip: if your spices have been sitting in the cabinet for more than a year, replace them. Old spices lose their potency and your bars will taste flat.
- Combine Wet Ingredients : In a separate medium bowl, beat the eggs lightly with a fork. Add the pumpkin puree, sugar, and vegetable oil. Stir until everything is well combined. The mixture should look smooth and glossy. If it looks separated, keep stirring—it’ll come together. I once forgot to stir the pumpkin can before measuring and ended up with watery batter. Don’t skip that step!
- Bring It Together : Pour the wet ingredients into the dry ingredients. Fold gently with a rubber spatula until just combined. A few small lumps are fine—overmixing will make the bars tough. You want to see the flour disappear, then stop. This takes about 20-25 folds. Seriously, count them if you have to.
- Bake : Pour the batter into the prepared pan and spread it evenly with your spatula. Bake for 25-30 minutes, or until a toothpick inserted in the center comes out clean or with just a few moist crumbs. The edges should be lightly golden and pulling away from the sides of the pan. My oven runs hot, so I check at 22 minutes. Know your oven—it’s the most important tool you’ll ever use.
- Cool Completely : This is the hardest part, I know. Let the bars cool in the pan on a wire rack for about 10 minutes, then lift them out using the parchment handles and transfer to the wire rack to cool completely. Do not frost while warm—the frosting will melt into a puddle. I learned this the hard way during attempt number six. Wait at least 1 hour, maybe 90 minutes to be safe.
- Make the Frosting : While the bars are cooling, make the cream cheese frosting. In a large bowl with an electric mixer, beat the softened cream cheese and butter together until smooth and creamy—about 2 minutes on medium speed. Scrape down the sides of the bowl. Add the vanilla and salt, then gradually add the powdered sugar, one cup at a time, beating on low speed until incorporated. Once all the sugar is in, increase to medium-high and beat for 2-3 minutes until light and fluffy. If the frosting seems too thick, add a teaspoon of milk. If it’s too thin, add more powdered sugar a tablespoon at a time.
- Frost and Slice : Spread the frosting evenly over the completely cooled bars. Use an offset spatula if you have one—it makes the smoothest finish. For clean slices, refrigerate the frosted bars for 30 minutes before cutting. Use a sharp knife and wipe it clean between cuts. You’ll get those beautiful, bakery-style edges.
Cooking Tips & Techniques
After seventeen attempts, I’ve collected some hard-won wisdom. Let me share what really matters:
The Room Temperature Rule : Your eggs, cream cheese, and butter all need to be at room temperature. Cold ingredients don’t emulsify properly, leading to a dense bar or lumpy frosting. Take them out of the fridge about 2 hours before you start baking. If you forgot (I do this all the time), place the eggs in a bowl of warm water for 5 minutes, and microwave the cream cheese in 10-second bursts—but seriously, just plan ahead. It makes such a difference.
Don’t Overmix the Batter : This is the number one mistake I see in pumpkin bar recipes. The gluten in the flour develops the more you mix, and too much gluten means tough, rubbery bars. Mix until the flour disappears into the batter, then stop. A few streaks of flour are better than overmixed dough. I speak from experience—batch number four was practically a hockey puck.
The Toothpick Test : Insert a toothpick into the center of the bars at the 22-minute mark. If it comes out with wet batter, give it 3 more minutes and check again. If it comes out clean, they’re done. If it comes out with a few moist crumbs, that’s actually perfect—the bars will continue to cook slightly from the residual heat after you pull them out.
Frosting Temperature Matters : If your frosting looks curdled or separated, your cream cheese was probably too cold, or your butter was too warm. Start over with properly softened ingredients. I’ve salvaged a curdled frosting by adding a tablespoon of cold cream and beating on high—it works about 60% of the time. But prevention is better than cure.
Timing Strategy for Hosts : Bake the bars the day before your event. Let them cool completely, cover with plastic wrap, and refrigerate. Make the frosting the morning of your event, let the bars come to room temperature for about 20 minutes, then frost and slice. This way, you’re not rushing around trying to do everything at once.
Variations & Adaptations
One of the best things about this recipe is how versatile it is. Here are some variations I’ve tried and loved:
Spiced Walnut Variation : Fold 1 cup of chopped toasted walnuts into the batter before baking. The crunch adds a lovely texture contrast to the soft bars. I made this version for a Thanksgiving potluck and it was the first thing to disappear. Toast the walnuts in a dry skillet over medium heat for 3-4 minutes until fragrant—it makes a huge difference in flavor.
Gluten-Free Option : Substitute the all-purpose flour with a good quality 1-to-1 gluten-free baking flour blend. I’ve tested this with Bob’s Red Mill and Cup4Cup, and both worked well. The texture is slightly more delicate, so handle the bars gently when lifting them out of the pan. Add an extra tablespoon of pumpkin puree to compensate for the drier gluten-free flour.
Dairy-Free Cream Cheese Frosting : Use plant-based cream cheese and butter. I’ve had the best results with Violife cream cheese and Miyoko’s butter. The frosting won’t be quite as firm, so refrigerate the frosted bars for at least an hour before slicing. The flavor is still fantastic—I served these to a dairy-free friend and she couldn’t tell the difference.
Pumpkin Chocolate Chip Bars : Fold 1 cup of semi-sweet chocolate chips into the batter. The chocolate complements the warm pumpkin spices beautifully. This is my go-to version for Halloween parties—kids and adults both love it. Use mini chocolate chips for more even distribution.
Maple Glaze Alternative : If you want to skip the cream cheese frosting for some reason (though I can’t imagine why), whisk together 1 cup powdered sugar, 2 tablespoons maple syrup, and 1 tablespoon milk for a simple maple glaze. Drizzle over the cooled bars. It’s less decadent but still delicious.
Serving & Storage Suggestions
These bars are incredibly versatile when it comes to serving. Here’s how I handle them:
Serving Temperature : I prefer these bars at room temperature—the frosting is soft and creamy, and the bars are perfectly moist. If you’ve refrigerated them, let them sit out for about 20-30 minutes before serving. For a fun twist, serve them slightly warm with a scoop of vanilla ice cream. The warm pumpkin and cold ice cream combination is absolutely divine.
Presentation Tips : For a beautiful presentation, cut the bars into clean squares using a sharp knife (wipe it clean between cuts). Arrange them on a white platter or cake stand. Dust with a light sprinkle of cinnamon or nutmeg on top for visual appeal. If you’re bringing them to a potluck, keep them in the pan and let people cut their own—just bring a good knife.
Storage Instructions : Store frosted bars in an airtight container in the refrigerator for up to 5 days. The flavors actually develop and deepen over the first 2 days. Unfrosted bars can be stored at room temperature for up to 3 days or frozen for up to 3 months. To freeze unfrosted bars, wrap them tightly in plastic wrap, then aluminum foil. Thaw overnight in the refrigerator before frosting.
Reheating Tips : If you prefer warm bars, microwave individual servings for 10-15 seconds. Be careful not to overheat or the frosting will melt. For a larger batch, warm them in a 300°F oven for about 5 minutes.
Flavor Development : Here’s a secret—these bars are actually better on day two. The spices have time to meld and deepen, and the texture becomes even more tender. So don’t stress about making them fresh the day of your event. Bake them a day ahead and thank me later.
Nutritional Information & Benefits
Let’s be real—these are a treat, not a health food. But they do have some redeeming qualities:
Estimated Nutritional Values (per bar, based on 24 servings) :
| Nutrient | Amount |
|---|---|
| Calories | 295 |
| Total Fat | 15g |
| Saturated Fat | 6g |
| Cholesterol | 45mg |
| Sodium | 210mg |
| Total Carbohydrates | 38g |
| Dietary Fiber | 1g |
| Sugars | 28g |
| Protein | 3g |
Health Benefits : Pumpkin is packed with vitamin A (beta-carotene), which supports eye health and immune function. It’s also a good source of fiber. The cream cheese provides some calcium and protein. The cinnamon in this recipe has anti-inflammatory properties and may help regulate blood sugar. So while these aren’t exactly health food, they’re not empty calories either.
Dietary Considerations : This recipe contains wheat (gluten), dairy, and eggs. For gluten-free and dairy-free options, see the variations section above. These bars are nut-free as written (unless you add the walnut variation), making them safe for school events.
Conclusion
These pumpkin bars with cream cheese frosting are more than just a recipe—they’re a little piece of fall that you can create in your own kitchen. After that Portland bakery closed, I thought I’d never taste those bars again. But you know what? This version might actually be better. The spices are more balanced, the frosting is richer, and the texture is exactly what I’d been chasing all those years.
What I love most about this recipe is how forgiving it is. You don’t need to be a professional baker to nail it. The batter comes together in one bowl, the frosting is practically foolproof, and the result is always impressive. Whether you’re bringing them to a Friendsgiving, serving them at a Halloween party, or just treating yourself on a cozy Sunday afternoon, these bars deliver.
I’d love to hear how yours turn out. Did you try any of the variations? Did you discover a new favorite spice combination? Drop a comment below and let me know—I read every single one. And if you share these on social media, tag me so I can see your beautiful creations. Happy baking, friends!
Frequently Asked Questions
Can I use fresh pumpkin instead of canned?
You absolutely can, but you’ll need to make sure the fresh pumpkin puree is well-drained. Fresh pumpkin contains more water than canned, which can make the bars soggy. After making your puree, let it sit in a fine-mesh strainer lined with cheesecloth for about 30 minutes to remove excess liquid. I’ve done this with sugar pumpkins (not carving pumpkins) and the flavor is lovely—just a bit more work.
Why did my cream cheese frosting turn out runny?
This usually happens for one of two reasons: either your cream cheese was too soft (almost melted) or you added the powdered sugar too quickly. Make sure your cream cheese is softened but still cool to the touch—about 65°F. If your frosting is already runny, try refrigerating it for 20 minutes, then beating it again with an additional 1/4 cup of powdered sugar. That usually fixes it.
Can I make these bars ahead of time for a party?
Yes, and I actually recommend it! Bake the bars up to 2 days ahead, cool completely, and store them unfrosted in an airtight container at room temperature. Make the frosting the day of your event, frost the bars, and refrigerate until serving. Let them sit at room temperature for 20 minutes before serving for the best texture. This is my go-to strategy for Thanksgiving—one less thing to do on the big day.
How do I get clean, neat slices?
The secret is chilling the frosted bars before cutting. Refrigerate them for at least 30 minutes after frosting. Use a sharp chef’s knife and wipe it clean with a damp paper towel between each cut. For the cleanest edges, dip the knife in hot water, wipe it dry, then make your cut. This is the same technique professional bakeries use for those perfect squares.
Can I freeze these pumpkin bars?
Absolutely! Unfrosted bars freeze beautifully for up to 3 months. Wrap them tightly in plastic wrap, then aluminum foil. Thaw overnight in the refrigerator before frosting. If you’ve already frosted them, you can freeze them too—just place them on a baking sheet in the freezer until the frosting is firm, then wrap individually in plastic wrap. Thaw in the refrigerator and bring to room temperature before serving. The texture stays surprisingly good.
Pin This Recipe!
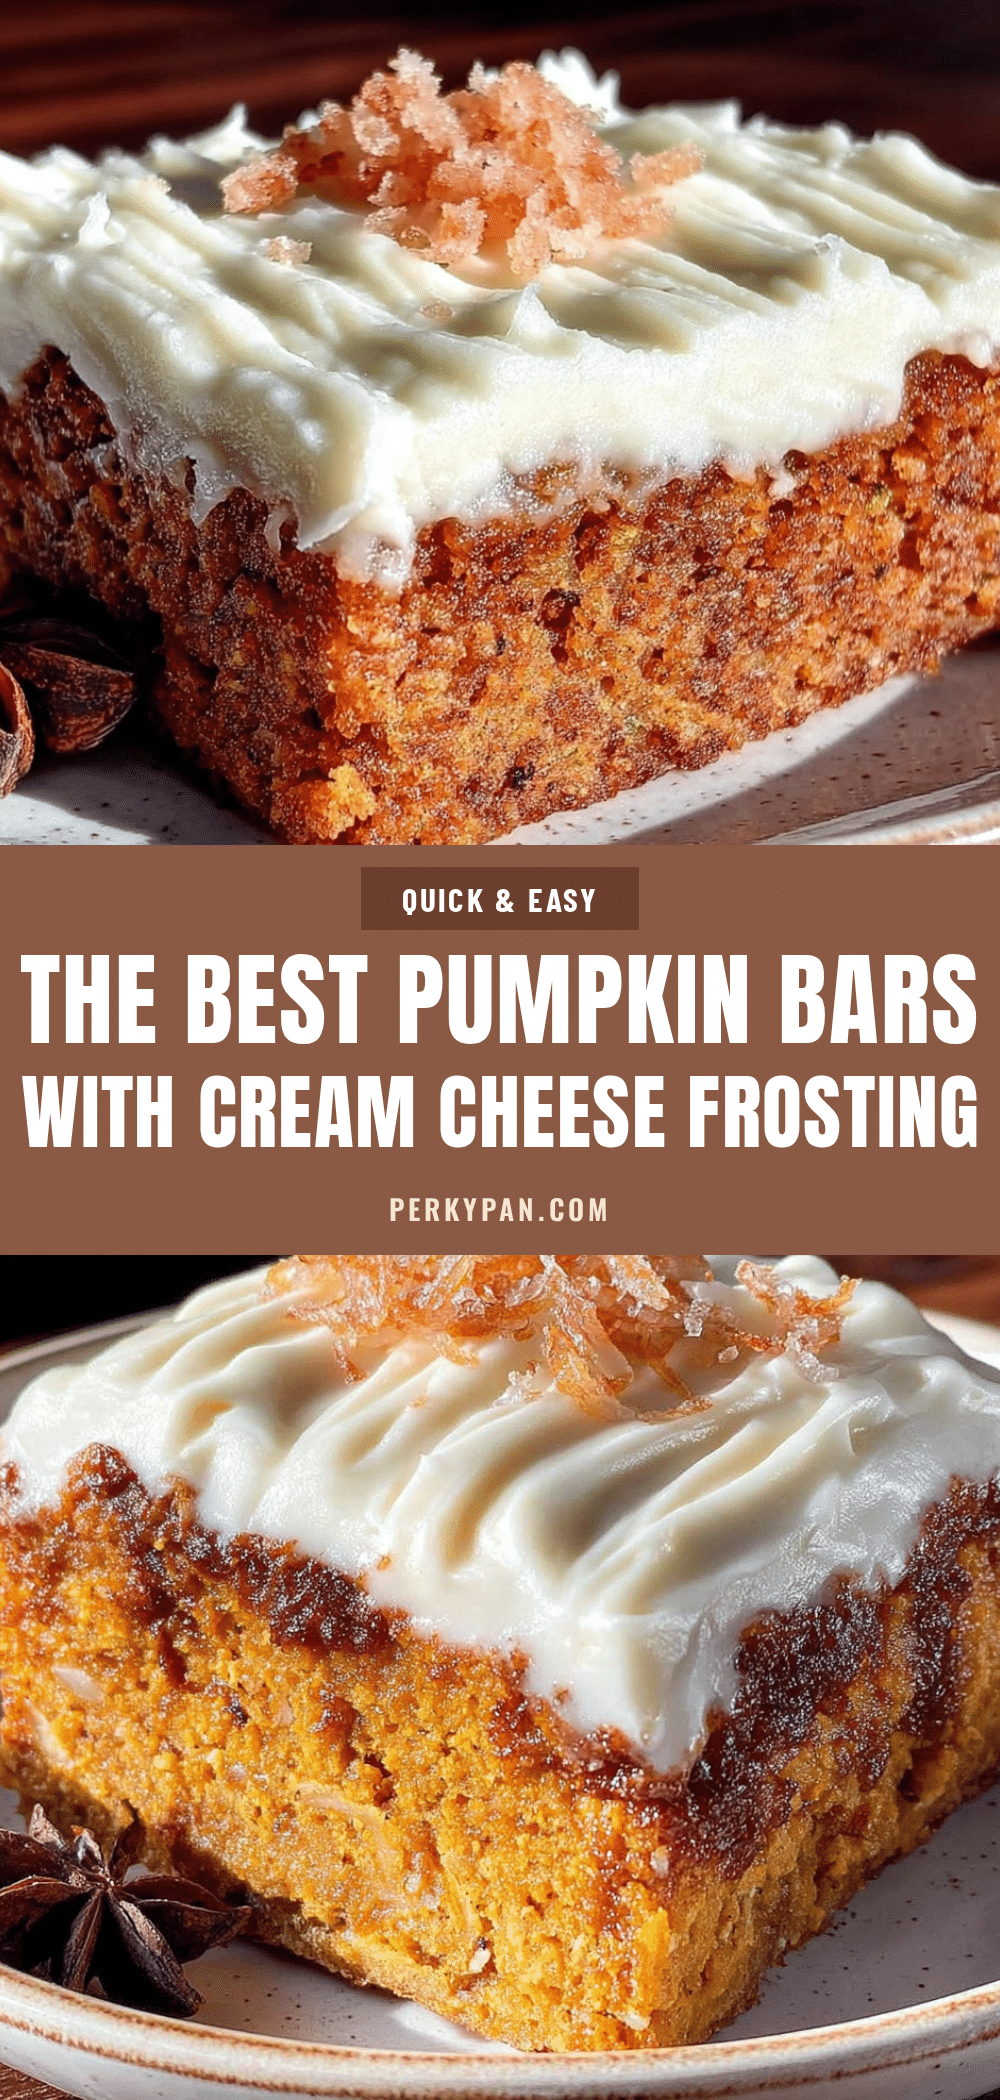
The Best Pumpkin Bars with Cream Cheese Frosting
These pumpkin bars are perfectly moist with a balanced blend of warm spices and topped with a thick, tangy cream cheese frosting. They’re the ultimate fall dessert that will disappear from any gathering.
- Prep Time: 20 minutes
- Cook Time: 30 minutes
- Total Time: 1 hour 50 minutes (includes cooling)
- Yield: 24 servings 1x
- Category: Dessert
- Cuisine: American
Ingredients
- 2 cups all-purpose flour
- 2 cups granulated sugar
- 1 cup vegetable oil
- 4 large eggs, room temperature
- 1 can (15 oz) pumpkin puree (not pumpkin pie filling)
- 2 teaspoons baking powder
- 1 teaspoon baking soda
- 1/2 teaspoon salt
- 2 teaspoons ground cinnamon
- 1/2 teaspoon ground nutmeg
- 1/2 teaspoon ground ginger
- 1/4 teaspoon ground cloves
- 8 oz cream cheese, softened
- 1/2 cup unsalted butter, softened
- 4 cups powdered sugar, sifted if desired
- 1 teaspoon vanilla extract
- Pinch of salt
Instructions
- Preheat oven to 350°F (175°C). Line a 9×13-inch baking pan with parchment paper, leaving overhang on the long sides. Lightly grease the parchment.
- In a large bowl, whisk together flour, baking powder, baking soda, salt, cinnamon, nutmeg, ginger, and cloves until evenly distributed.
- In a separate medium bowl, beat eggs lightly. Add pumpkin puree, sugar, and vegetable oil. Stir until smooth and glossy.
- Pour wet ingredients into dry ingredients. Fold gently with a rubber spatula until just combined (about 20-25 folds). Do not overmix.
- Pour batter into prepared pan and spread evenly. Bake for 25-30 minutes, or until a toothpick inserted in the center comes out clean or with a few moist crumbs.
- Cool bars in pan on a wire rack for 10 minutes, then lift out using parchment handles and transfer to wire rack to cool completely (at least 1 hour).
- For frosting: In a large bowl, beat softened cream cheese and butter with an electric mixer until smooth and creamy (about 2 minutes). Add vanilla and salt. Gradually add powdered sugar, one cup at a time, beating on low until incorporated. Increase speed to medium-high and beat for 2-3 minutes until light and fluffy.
- Spread frosting evenly over completely cooled bars. Refrigerate for 30 minutes before slicing for clean edges. Use a sharp knife, wiping clean between cuts.
Notes
For best results, ensure all ingredients (eggs, cream cheese, butter) are at room temperature. Do not overmix the batter. Bars taste even better the next day. Unfrosted bars can be frozen for up to 3 months.
Nutrition
- Serving Size: 1 bar
- Calories: 295
- Sugar: 28
- Sodium: 210
- Fat: 15
- Saturated Fat: 6
- Carbohydrates: 38
- Fiber: 1
- Protein: 3
Keywords: pumpkin bars, cream cheese frosting, fall dessert, pumpkin dessert, easy pumpkin bars


