Love this? Save it for later!
Share the inspiration with your friends
I was standing in the middle of the grocery store last October — the one on Elm Street with the squeaky cart wheels — when a kid ran past me holding a bag of Honeycrisp apples. The smell hit me next, that dusty-sweet scent of autumn produce mixed with cinnamon from the bakery section, and suddenly I was seven years old at my Aunt Lena’s kitchen table. She had this big wooden board in front of her, not for dinner, but for what she called “picking food.” Little piles of apple slices, cheese cubes, crackers, and those orange fruit snacks shaped like pumpkins. I remember thinking it was the fanciest thing I’d ever seen, and I was allowed to eat it with my hands. I hadn’t thought about that afternoon in maybe twenty years.
That memory stuck with me all the way through checkout. I mean, honestly, I almost cried over a bag of apples in aisle four. Aunt Lena passed away when I was fifteen, and I never got to make that board with her or ask her why she called it that. But standing there, I realized what she’d done — she’d made something that felt like a grown-up party but was totally for kids. No one told her what to put on it. She just knew. So I bought the apples. And the cheese. And the fruit snacks, obviously. I figured I’d try to recreate that feeling, not just the food, but the permission to make a mess and call it dinner.
This kid-friendly Friendsgiving charcuterie board with fall fruits is my attempt at capturing that exact moment. It’s for the parents who want their kids to feel included in the holiday fun without stressing over fancy plating or expensive ingredients. Maybe you’ve been there — trying to get everyone to the table, knowing half of them won’t touch the green bean casserole. This board solves that. It’s simple, it’s affordable, and honestly, it makes everyone happy. Let me show you how to build one that your kids will actually eat and your wallet won’t hate.
Why You’ll Love This Recipe
I’ve tested this board about six times now — twice for my own kids, once for a neighbor’s birthday party, and three times just because I wanted to eat it. Each time, something clicked. The kids went straight for the fruit and cheese, the adults snuck the dark chocolate, and nobody complained. That’s rare, let me tell you.
- Quick & Easy: You can put this together in under twenty minutes. No cooking required, just slicing and arranging. Perfect for those days when you’re already juggling a million things.
- Simple Ingredients: Everything comes from a regular grocery store. No fancy cheese shops or specialty markets needed. You probably already have half of these in your fridge.
- Perfect for Friendsgiving: Whether it’s a classroom party, a playdate, or your actual Friendsgiving dinner, this board fits right in. It’s festive without being fussy.
- Crowd-Pleaser: I’ve watched picky eaters go back for thirds. The combination of sweet fall fruits, mild cheese, and crunchy crackers is basically kid kryptonite.
- Unbelievably Delicious: The flavor combo here is next-level comfort food. That first bite — a crisp apple slice with a bit of sharp cheddar and a drizzle of honey — honestly, it’s perfect.
What makes this recipe different from the rest? It’s designed for small hands and big appetites. The portions are kid-sized, the colors are fun, and there’s no pressure to eat anything you don’t like. Plus, I’ve included tricks to make it look impressive without spending hours arranging things. You don’t need to be a chef to pull this off — just a parent who wants to make something special.
This board isn’t just good. It’s the kind of thing that makes you close your eyes after the first bite. It’s comfort food reimagined — healthier, faster, but with the same soul-soothing satisfaction. Perfect for impressing guests without stress, or turning a simple meal into something memorable.
What Ingredients You Will Need
This recipe uses simple, wholesome ingredients to deliver bold flavor and satisfying texture without the fuss. Most of these are pantry staples or easy to find in any grocery store. I’ve grouped them by category to make shopping easier.
For the Fruit Selection
- Honeycrisp apples, 2 medium — sliced thin (they hold up well and don’t brown as fast)
- Bartlett pears, 2 medium — also sliced (look for ones that are slightly firm so they don’t get mushy)
- Seedless red grapes, 1 cup — left whole or halved for younger kids
- Pomegranate seeds, ½ cup — adds a pop of color and sweetness (I recommend buying pre-seeded to save time)
- Dried apricots, ½ cup — these are like candy for kids
- Fresh figs, 4-5 — halved if you can find them; totally optional but fancy
For the Cheese Selection
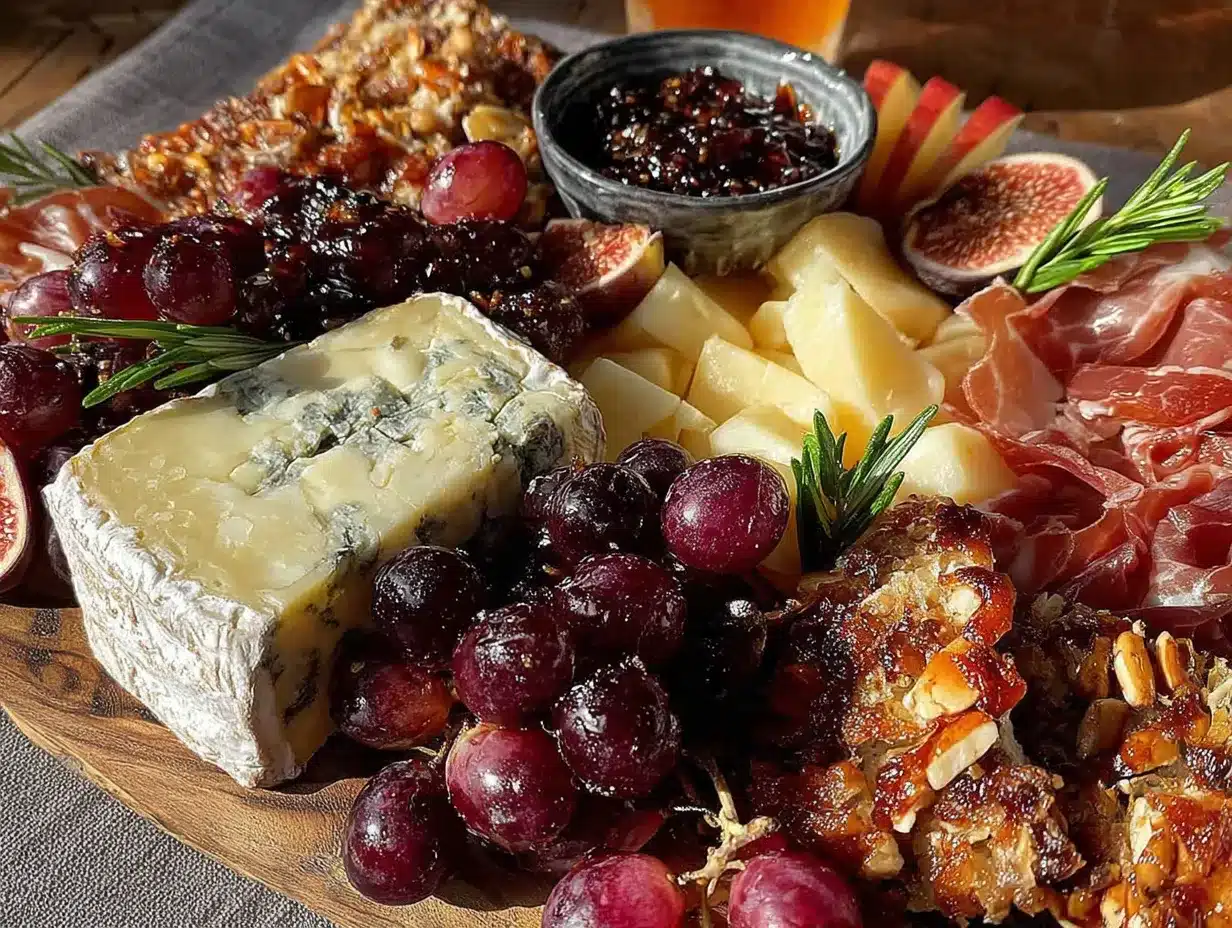
- Sharp cheddar block, 8 ounces — cut into small cubes (I use Cabot or Tillamook, they’re affordable and taste great)
- Colby Jack block, 8 ounces — also cubed (mild and creamy, kids love it)
- String cheese, 4 sticks — pulled apart into strips (fun to eat and no knife needed)
- Cream cheese, 4 ounces — softened, for spreading on crackers (optional but nice)
For the Crunchy Bits
- Butter crackers, 1 cup — like Ritz or generic brand (kids go crazy for these)
- Pretzel sticks, 1 cup — adds saltiness and crunch
- Whole wheat crackers, 1 cup — for the adults who want to feel healthy
For the Sweet and Salty Add-Ons
- Dark chocolate chips, ½ cup — or milk chocolate if your kids prefer (I use Ghirardelli)
- Honey, 2 tablespoons — for drizzling (buy local if you can, it’s worth it)
- Roasted and salted almonds, ½ cup — optional, skip if serving very young children
- Pumpkin seeds, ¼ cup — adds a fall touch and extra crunch
For the Fun Extras
- Mini pumpkin-shaped fruit snacks, 1 small bag — trust me on this one, the kids will lose their minds
- Apple cider or juice, for serving — not on the board, but perfect alongside it
Substitution guidance: Use almond flour crackers for a gluten-free option. Swap the cheddar with vegan cheese if needed. For a nut-free version, just leave out the almonds and pumpkin seeds. The fruit snacks are non-negotiable though — that’s the secret weapon.
Equipment Needed
You don’t need anything fancy for this board. Here’s what I use:
- Large wooden cutting board or serving platter — at least 12 by 18 inches. I got mine at a thrift store for five bucks. Any flat surface works.
- Chef’s knife — for slicing apples, pears, and cheese. A sharp one makes all the difference.
- Small bowls or ramekins — for things like honey, chocolate chips, and pomegranate seeds. I use little ceramic ones from a set my mom gave me.
- Cutting board — for prep work. Don’t use your nice wooden one for cutting apples, they’ll stain it.
- Cheese slicer or vegetable peeler — for making cheese curls if you want to get fancy. Not required though.
- Paper towels — for blotting fruit dry after washing. Wet fruit makes crackers soggy.
No wooden board? A baking sheet lined with parchment paper works great. I’ve done it. No one cares what the board looks like when the food is good.
Preparation Method
Let’s build this board. I’ll walk you through it step by step. Total time: about 20 minutes, plus a few extra for arranging.
- Wash and dry all your fruit (2 minutes). Rinse the apples, pears, grapes, and figs under cool water. Pat them completely dry with paper towels. This step matters — wet fruit will make your crackers and pretzels soggy within minutes. I learned this the hard way at my first Friendsgiving.
- Slice the apples and pears (4 minutes). Cut each apple in half, remove the core, then slice into thin wedges — about ¼ inch thick. Do the same with the pears. If you’re not serving right away, toss them with a little lemon juice to prevent browning. For kids under three, cut the slices into smaller pieces to avoid choking hazards.
- Cut the cheese (3 minutes). Slice the cheddar and Colby Jack blocks into small cubes, about ½ inch each. Pull the string cheese apart into thin strips. If you want to get fancy, use a vegetable peeler to make cheese curls from the cheddar block — kids think these are hilarious.
- Prepare the small bowls (2 minutes). Fill your ramekins with honey, chocolate chips, pomegranate seeds, and pumpkin seeds. Set them aside. The honey drizzle will happen at the end.
- Arrange the board (5 minutes). Start with the small bowls — place them around the board like little islands. Then add the cheese cubes and string cheese strips in small piles. Next, arrange the apple and pear slices in a fan pattern or just scatter them around. Add the grapes in clusters. Fill in the gaps with crackers, pretzel sticks, and dried apricots. Sprinkle the fruit snacks and almonds over everything. Finally, place the fig halves wherever they fit.
- Add the finishing touches (2 minutes). Drizzle the honey over the cheese and apple slices. I like to do it in a zigzag pattern — it looks pretty and kids think it’s magic. Add a few extra pomegranate seeds on top for color. Step back and look at your board. If it seems sparse, add more crackers. You can always eat the extras later.
- Serve immediately or cover with plastic wrap and refrigerate for up to two hours. If refrigerating, leave the honey off until serving, otherwise it gets sticky and weird.
One note: don’t stress about making it perfect. The first time I did this, I spent thirty minutes arranging everything and my kids immediately grabbed handfuls and mixed it all together. It looked like a disaster. But they were happy, and that’s what counts.
Cooking Tips & Techniques
Here are some things I’ve learned from making this board more times than I can count.
Keep it low and spread out. Don’t pile ingredients on top of each other. Kids get overwhelmed when they can’t see what’s available. Spread everything out so each item has its own space. Think of it like a buffet for tiny people.
Cut everything bite-sized. I once left apple slices too big and my four-year-old tried to shove a whole wedge in her mouth. Cut things small enough that kids can eat them in one or two bites. It also makes the board look fuller.
Use the “three color” rule. Try to have at least three different colors on the board. Red apples, green grapes, orange cheddar — it looks more appetizing and kids are more likely to try things that look fun.
Don’t forget the dipping options. Honey is great, but you can also use yogurt dip, apple butter, or even a little caramel sauce for special occasions. I’ve found that having something to dip makes kids way more adventurous.
Watch out for the honey. It’s not safe for babies under one year old. If you’re serving infants, skip the honey or put it in a separate bowl that only adults can reach.
One mistake I made early on: putting the chocolate chips next to the fruit. They got sticky and gross. Now I keep them in a small bowl away from anything wet. Little things like that make a big difference.
Variations & Adaptations
This board is super flexible. Here are some ways to change it up.
For gluten-free diets: Swap the butter crackers and pretzels for gluten-free versions. Most stores carry them now. The rest of the board is naturally gluten-free.
For dairy-free needs: Use vegan cheese shreds or skip the cheese entirely and add more fruit and nuts. I’ve made a version with just apples, pears, grapes, and chocolate and the kids didn’t even notice the cheese was missing.
Seasonal swap: In the summer, use peaches, plums, and berries instead of apples and pears. In the winter, add clementine segments and dried cranberries. The base formula stays the same.
Savory version for adults: Add some salami slices, olives, and a sprinkle of red pepper flakes on the honey. This turns it into a board that works for a grown-up party too.
My personal favorite variation: I once made this for a Halloween playdate and added candy corn and mini marshmallows instead of the fruit snacks. It was a sugar bomb, but the kids talked about it for weeks. Balance it with extra fruit and nobody complains.
Customize based on what your kids actually eat. My friend’s daughter hates apples but loves pears, so she swaps them. It’s your board — make it work for your family.
Serving & Storage Suggestions
Serve this board at room temperature. If you’ve refrigerated it, let it sit out for about fifteen minutes before serving. The cheese tastes better at room temp, and the fruit isn’t shockingly cold.
For presentation, I like to put the board in the center of the table and let everyone grab what they want. Kids love the freedom of picking their own food. Pair it with small cups of apple cider or juice for the full Friendsgiving experience.
Leftover storage: Separate the components into airtight containers. Fruit and cheese go in the fridge, crackers and pretzels stay in the pantry. The honey can sit on the counter. Everything keeps for about three days, though the apple slices will brown a bit. That’s fine — they still taste good.
Reheating: You don’t need to reheat anything, but if the cheese feels too cold, let it sit out for ten minutes. The crackers might get stale if stored with fruit, so keep them in a separate bag.
Flavor development: Honestly, this board is best fresh. The fruit starts to release moisture after a few hours, and the crackers lose their crunch. But if you have leftovers, chop everything up and toss it into a salad or eat it as a snack plate. Nothing goes to waste.
Nutritional Information & Benefits
Here’s an approximate breakdown per serving (about one-sixth of the board):
- Calories: 320
- Protein: 12 grams
- Fat: 18 grams
- Carbohydrates: 35 grams
- Fiber: 5 grams
- Sugar: 22 grams (mostly from fruit)
The apples and pears provide fiber and vitamin C, which is great for growing kids. The cheese offers calcium and protein to keep them full. Pomegranate seeds are packed with antioxidants — they’re like little nutrition bombs. The dark chocolate has less sugar than milk chocolate and contains iron.
Dietary considerations: This board is vegetarian. It can be made gluten-free and dairy-free with substitutions. It contains nuts if you include the almonds. The honey means it’s not suitable for vegans, but you can swap with maple syrup.
I like that this board feels indulgent but isn’t actually terrible for you. The fruit does the heavy lifting, and the cheese adds staying power. It’s the kind of food that makes you feel good after eating it, not sluggish.
Conclusion
This kid-friendly Friendsgiving charcuterie board with fall fruits is more than just a snack — it’s a way to include everyone at the table, especially the little ones. It’s affordable, it’s quick, and it’s built around ingredients that kids actually want to eat. You don’t have to be a fancy host or spend hours in the kitchen. Just grab a board, some fruit, some cheese, and let the kids help you arrange it. They’ll love being part of the process.
I make this board every Friendsgiving now, and every time I do, I think of Aunt Lena and her wooden board full of “picking food.” She knew what she was doing. She made something that felt special without being complicated. That’s what I want for you and your family too.
So go ahead — try it this year. Swap in your kids’ favorite fruits, add their preferred crackers, and make it your own. When you do, come back and tell me how it went. Drop a comment below or tag me in your photos. I’d love to see your version of this board. Happy Friendsgiving, and happy eating!
Frequently Asked Questions
Can I make this board ahead of time?
Yes, you can prep everything up to two hours ahead. Just keep the fruit and cheese separate from the crackers, and don’t add the honey until right before serving. Cover everything with plastic wrap and refrigerate.
What if my kids are picky eaters?
Start with just three or four items they already like — apples, cheese, crackers, and fruit snacks. Gradually add new things like pears or pomegranate seeds. The familiar items will make them more willing to try the new ones.
How many people does this board serve?
This board serves about 6 to 8 kids as a snack or light meal. If you’re serving adults too, double the cheese and crackers. For a party, make two boards — one for kids and one for adults.
Can I use other fruits?
Absolutely. Try sliced bananas, strawberries, or clementine segments. Just be aware that bananas brown quickly, so add them right before serving. In the fall, persimmons and Asian pears are also great options.
Is this board safe for toddlers?
Yes, with modifications. Cut everything into very small pieces — no whole grapes or large apple slices. Skip the honey for babies under one year. Remove the almonds and pumpkin seeds to avoid choking hazards. Always supervise toddlers while they’re eating.
Pin This Recipe!
Easy Kid-Friendly Friendsgiving Charcuterie Board with Fall Fruits
A quick and easy charcuterie board designed for kids, featuring fall fruits, mild cheeses, crunchy crackers, and fun extras. Perfect for Friendsgiving, playdates, or any gathering where you want to include little ones in the holiday fun.
- Prep Time: 20 minutes
- Cook Time: 0 minutes
- Total Time: 20 minutes
- Yield: 6-8 servings 1x
- Category: Appetizer
- Cuisine: American
Ingredients
- 2 medium Honeycrisp apples, sliced thin
- 2 medium Bartlett pears, sliced thin
- 1 cup seedless red grapes, whole or halved
- ½ cup pomegranate seeds
- ½ cup dried apricots
- 4–5 fresh figs, halved (optional)
- 8 ounces sharp cheddar block, cut into small cubes
- 8 ounces Colby Jack block, cut into small cubes
- 4 string cheese sticks, pulled apart into strips
- 4 ounces cream cheese, softened (optional)
- 1 cup butter crackers (e.g., Ritz)
- 1 cup pretzel sticks
- 1 cup whole wheat crackers
- ½ cup dark chocolate chips (or milk chocolate)
- 2 tablespoons honey
- ½ cup roasted and salted almonds (optional)
- ¼ cup pumpkin seeds
- 1 small bag mini pumpkin-shaped fruit snacks
- Apple cider or juice, for serving
Instructions
- Wash and dry all fruit (apples, pears, grapes, figs) under cool water and pat completely dry with paper towels.
- Slice apples and pears into thin wedges (about ¼ inch thick). If not serving immediately, toss with a little lemon juice to prevent browning. For toddlers, cut into smaller pieces.
- Cut cheddar and Colby Jack blocks into small cubes (about ½ inch). Pull string cheese apart into thin strips. Optionally, use a vegetable peeler to make cheese curls from the cheddar.
- Fill small bowls or ramekins with honey, chocolate chips, pomegranate seeds, and pumpkin seeds.
- Arrange the board: place small bowls around the board like islands. Add cheese cubes and string cheese strips in small piles. Arrange apple and pear slices in a fan pattern or scatter them. Add grapes in clusters. Fill gaps with crackers, pretzel sticks, and dried apricots. Sprinkle fruit snacks and almonds over everything. Place fig halves wherever they fit.
- Drizzle honey over cheese and apple slices in a zigzag pattern. Add extra pomegranate seeds on top for color. If board seems sparse, add more crackers.
- Serve immediately, or cover with plastic wrap and refrigerate for up to 2 hours. If refrigerating, add honey just before serving.
Notes
For gluten-free: use gluten-free crackers and pretzels. For dairy-free: use vegan cheese or omit cheese and add more fruit and nuts. For nut-free: omit almonds and pumpkin seeds. Honey is not safe for babies under 1 year. For toddlers, cut everything into very small pieces and remove whole grapes and nuts to avoid choking hazards. The board is best served fresh; leftovers can be stored separately for up to 3 days.
Nutrition
- Serving Size: 1/6 of board
- Calories: 320
- Sugar: 22
- Sodium: 450
- Fat: 18
- Saturated Fat: 8
- Carbohydrates: 35
- Fiber: 5
- Protein: 12
Keywords: charcuterie board, Friendsgiving, kid-friendly, fall fruits, easy appetizer, no-cook, party food


