Love this? Save it for later!
Share the inspiration with your friends
Laura wasn’t trying to impress anyone. I’d stopped by her place on a random Tuesday evening to grab a book I’d lent her months ago, and the smell hit me before I even got past the front door. It was buttery and sweet, almost nutty, with this warmth that made you want to curl up right there on the doormat. She was in the kitchen, barefoot, stirring something in a cast iron skillet while half-watching the news on a tiny tablet propped against the salt shaker.
“What is that?” I asked, maybe a little too eagerly. She shrugged, not even looking up. “Oh, just some squash. Got it at the farmers market last weekend.” Just some squash. Let me tell you, it was anything but just squash. The honeynut squash in that pan had turned a deep, caramelized gold, and the butter was bubbling with these little brown specks that smelled like toasted hazelnuts. She tossed in a drizzle of maple syrup, gave the pan a shake, and that was it. No fuss, no fancy plating. She served it straight from the skillet with a couple of spoons.
I stood there, fork in hand, and took a bite. Honestly, I think I forgot to talk for a solid minute. The squash was tender and sweet, but that brown butter brought this rich, savory depth that made it feel like something you’d pay too much for at a nice restaurant. Laura was already back to watching the news, completely nonchalant. That’s the thing about the best recipes, right? They come from people who don’t even realize they’re making magic. Maybe you’ve been there—standing in someone else’s kitchen, eating something unforgettable while the cook acts like it’s no big deal. That night, I asked her exactly what she did, and I’ve been making this quick maple brown butter honeynut squash ever since. It’s the side dish that steals the show without trying.
Why You’ll Love This Recipe
Let’s be real for a second. Weeknights are chaos. You’re tired, you’re hungry, and the last thing you want is a recipe with a mile-long ingredient list and a sink full of dishes. This quick maple brown butter honeynut squash is the answer to that problem. It comes together in under 30 minutes, uses just a handful of pantry staples, and somehow tastes like you spent hours in the kitchen.
- Quick & Easy: From start to finish, you’re looking at about 25 minutes. That’s less time than it takes to decide what to order for takeout.
- Simple Ingredients: Honeynut squash, butter, maple syrup, salt, and maybe a pinch of cinnamon if you’re feeling fancy. That’s it. No weird specialty items.
- Perfect for Busy Weeknights: This isn’t a holiday-only side dish. It’s for Tuesday nights when you need something green (well, orange) on the plate fast.
- Crowd-Pleaser: I’ve served this to my picky-eating nephew and my food-snob neighbor. Both asked for seconds. It’s magic, I swear.
- Unbelievably Delicious: The brown butter is the game-changer here. It adds a nutty, almost caramel-like flavor that makes the sweet maple syrup and tender squash sing together.
What makes this version different from all the other roasted squash recipes out there? It’s the technique. Instead of roasting the squash whole or in big chunks, you slice it into thin half-moons. This cuts the cooking time in half and gives you way more surface area for that gorgeous brown butter glaze to cling to. Every single bite is coated in flavor. No dry, bland pieces hiding at the bottom of the pan. This isn’t just another squash recipe—it’s your new weeknight secret weapon.
What Ingredients You Will Need
This recipe keeps things refreshingly simple. You don’t need a grocery list the length of your arm. Here’s what you’ll grab:
- Honeynut squash (2 medium, about 1 lb each): Honeynut squash is smaller and sweeter than butternut, with a thinner skin that doesn’t need peeling. Look for ones that feel heavy for their size. If you can’t find honeynut, you can swap in butternut squash—just peel it first and cut it into similar-sized pieces.
- Unsalted butter (3 tablespoons): I use unsalted so I can control the salt level. Kerrygold is my go-to for its rich flavor, but any good-quality butter works. The browning process is where the magic happens, so don’t skip it.
- Pure maple syrup (2 tablespoons): Please use the real stuff, not pancake syrup. Grade A dark amber is perfect for this—it has a stronger maple flavor that stands up to the brown butter. I like the brand Runamok for their slightly smoky notes.
- Kosher salt (½ teaspoon): Morton’s or Diamond Crystal both work fine. The salt balances the sweetness and makes the brown butter flavor pop.
- Fresh thyme (4-5 sprigs, optional but recommended): The earthy, slightly floral notes cut through the richness. Strip the leaves off the stems before adding them to the pan.
- Cinnamon (¼ teaspoon, optional): Just a pinch adds warmth without overpowering the squash. I add it about half the time, depending on my mood.
- Black pepper (a few cracks, to finish): Freshly ground is best. It adds a tiny bit of heat that plays nicely with the sweet maple.
Substitution Guidance: If you’re dairy-free, you can use a high-quality vegan butter like Miyoko’s for browning. It won’t brown exactly the same, but it gets close. For a lower-sugar option, reduce the maple syrup to 1 tablespoon and let the natural sweetness of the squash shine. If you don’t have fresh thyme, dried thyme works in a pinch—use about ½ teaspoon, and add it with the maple syrup to let it rehydrate.
Equipment Needed
You don’t need a fancy kitchen to pull this off. Here’s what you’ll want to have handy:
- Large cast iron skillet (10 or 12-inch): This is my favorite tool for this recipe. Cast iron holds heat evenly and helps the squash get those beautiful caramelized edges. If you don’t have one, a heavy-bottomed stainless steel skillet works too. Avoid non-stick for browning—you won’t get the same color.
- Sharp chef’s knife: Honeynut squash has thin skin, but it’s still dense. A sharp knife makes slicing through it safe and easy. I use my 8-inch Wüsthof.
- Cutting board: A sturdy wooden or plastic board. Put a damp paper towel under it to keep it from sliding.
- Measuring spoons: For the maple syrup and salt. Eyeballing works for some things, but for browning butter, precision matters.
- Wooden spoon or silicone spatula: For stirring the squash in the pan. Silicone won’t scratch your cast iron.
- Paper towels: For drying the squash slices. Wet squash won’t brown properly.
Budget-friendly tip: You don’t need a fancy cast iron skillet. A $20 Lodge skillet from Target works just as well as a $200 vintage one. I started with a Lodge and still use it almost every day.
Preparation Method
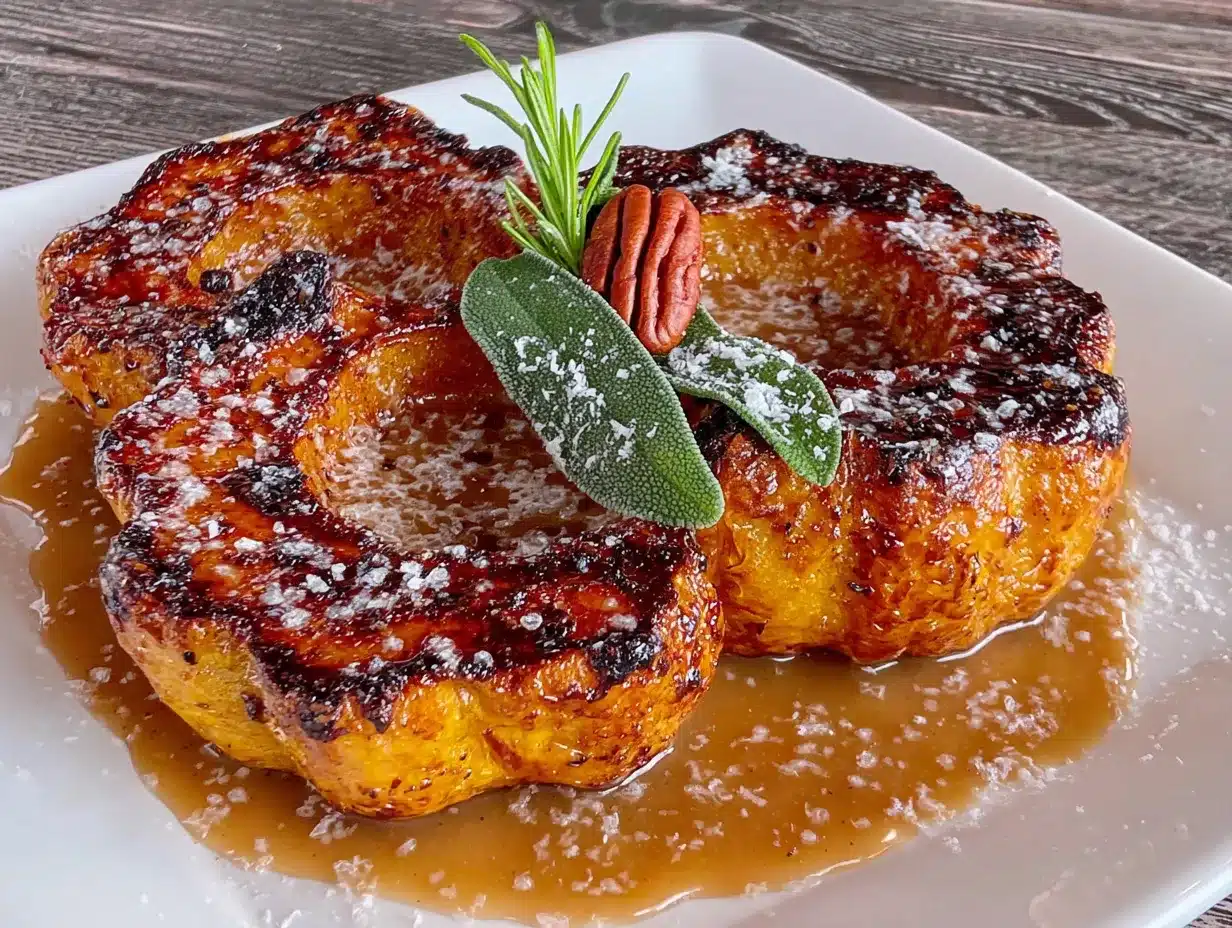
Alright, let’s get cooking. This whole thing takes about 25 minutes, so clear your counter and let’s go.
- Prep the squash (5 minutes): Rinse the honeynut squash well and pat them dry. Using a sharp chef’s knife, trim off the stem end and the very bottom. Slice each squash in half lengthwise. Scoop out the seeds and stringy bits with a spoon—you can toss them or save them for roasting later. Place each half cut-side down and slice crosswise into ¼-inch thick half-moons. Try to keep them even so they cook at the same rate. I usually get about 20-24 slices from two medium squash.
- Heat the pan (2 minutes): Place your cast iron skillet over medium heat. Let it warm up for a full 2 minutes. You want it hot but not smoking. While the pan heats, pat the squash slices dry with paper towels. This step is non-negotiable—wet squash steams instead of browning.
- Brown the butter (3 minutes): Add the 3 tablespoons of unsalted butter to the hot skillet. Let it melt completely, swirling the pan occasionally. The butter will start to foam and then the foam will subside. Watch closely—small brown specks will appear at the bottom of the pan, and the butter will smell nutty and toasty. This takes about 2-3 minutes. Don’t walk away! Burnt butter happens fast and tastes bitter.
- Add the squash (1 minute): Once the butter is golden brown and smells amazing, carefully add the squash slices in a single layer. They’ll sizzle loudly—that’s a good sign. If your pan is crowded, cook in two batches. Crowding the pan steams the squash instead of browning it.
- Sear the first side (4 minutes): Let the squash cook undisturbed for 4 minutes. Yes, leave them alone. I know it’s tempting to stir, but patience gives you those gorgeous caramelized edges. After 4 minutes, use tongs to flip a piece. It should be deep golden brown on the bottom. If not, give it another minute.
- Flip and add maple (3 minutes): Flip all the squash slices over. Drizzle the 2 tablespoons of maple syrup evenly over the top. Sprinkle with ½ teaspoon kosher salt and the optional cinnamon. Add the fresh thyme leaves if using. Cook for another 3 minutes, shaking the pan occasionally to coat the squash in the glaze.
- Finish and serve (2 minutes): The squash should be tender when pierced with a fork but still holding its shape. The glaze will be thick and syrupy. Remove the pan from the heat. Finish with a few cracks of black pepper and a tiny pinch of flaky sea salt if you have it. Serve immediately, straight from the skillet or transfer to a warm serving platter.
Troubleshooting tip: If your squash isn’t browning, your pan might not be hot enough. Turn the heat up to medium-high for the searing step. If the butter starts to burn, lower the heat and add the squash right away to cool the pan down.
Cooking Tips & Techniques
I’ve made this recipe more times than I can count, and I’ve definitely messed it up along the way. Here’s what I’ve learned so you don’t have to make the same mistakes.
Don’t skip drying the squash. This is the number one mistake I made early on. Wet squash releases steam, which prevents browning. You end up with pale, soggy slices instead of caramelized golden ones. Pat each slice dry with a paper towel before it hits the pan. It takes an extra 30 seconds and makes all the difference.
Watch the butter like a hawk. Brown butter goes from perfect to burnt in about 15 seconds. The moment you see those brown specks form and smell that nutty aroma, add the squash immediately. If you’re nervous, take the pan off the heat while you add the squash—the residual heat will keep the butter warm without burning it.
Use medium heat, not high. I know you want that caramelization fast, but high heat will burn the butter before the squash has a chance to cook through. Medium heat gives you the perfect balance of browning and tenderness. Trust the process.
Don’t overcrowd the pan. If you’re doubling the recipe, cook the squash in two batches. When the pan is too full, the temperature drops and the squash releases moisture, turning your beautiful brown butter glaze into a watery mess. I learned this the hard way when I tried to cook three squash at once for a dinner party. It was a sad, soggy situation.
Let the squash rest after cooking. If you can resist eating it right away, let it sit in the warm pan for 2-3 minutes before serving. The glaze thickens slightly and coats every slice even better. The flavors also meld together during this short rest.
Variations & Adaptations
This recipe is a fantastic base that you can tweak based on what you have in your pantry or your mood that night. Here are some of my favorite variations:
Spicy Maple Brown Butter Squash: Add ¼ teaspoon of red pepper flakes or a tiny pinch of cayenne pepper along with the maple syrup. The heat cuts through the sweetness beautifully. I made this version for a potluck once, and it was the first dish to disappear.
Herbaceous Version: Swap the thyme for fresh rosemary or sage. Rosemary adds a piney, aromatic note that pairs wonderfully with brown butter. Sage gets crispy and adds a savory, almost peppery flavor. Chop them finely and add them with the maple syrup.
Balsamic Glaze Twist: After cooking, drizzle the finished squash with a teaspoon of good balsamic glaze (the thick, syrupy kind). The acidity balances the sweetness and adds a gorgeous tangy finish. This is my go-to when I’m serving it alongside roasted chicken.
Dietary Adaptation (Vegan): Use 3 tablespoons of vegan butter for browning. Miyoko’s European Style Cultured Butter browns surprisingly well. The flavor is slightly different but still delicious. Make sure your maple syrup is pure and you’re good to go.
Seasonal Swap: In the summer, try this with yellow squash or zucchini. Slice them a bit thicker (about ½-inch) since they have higher water content. You’ll need to cook them a few minutes longer to evaporate the extra moisture. It’s a completely different dish but equally good.
I once tried adding a tablespoon of bourbon to the pan right after the maple syrup. The alcohol cooked off, leaving behind a warm, smoky sweetness. It was fantastic but maybe not for a Tuesday night with the kids. Save that one for a date night in.
Serving & Storage Suggestions
This quick maple brown butter honeynut squash is best served hot, straight from the skillet. The glaze is at its most luscious and the edges are perfectly crisp. Here’s how to make the most of it:
Serving Temperature: Serve it hot or warm. If it cools down too much, the glaze can get a bit sticky. A quick 30-second zap in the microwave or a minute in a warm oven brings it right back.
Presentation: I like to serve it family-style in the cast iron skillet. It keeps everything warm and looks rustic and inviting. Sprinkle a few fresh thyme leaves and a pinch of flaky sea salt over the top right before serving for a pop of color and texture.
What to Serve With It: This squash is incredibly versatile. It’s perfect alongside a simple roast chicken, pan-seared pork chops, or even a hearty grain bowl with quinoa and roasted chickpeas. For a vegetarian dinner, serve it with a big green salad and some crusty bread to soak up the leftover brown butter glaze. It also works beautifully as a topping for creamy polenta or stirred into warm farro.
Storage: Leftovers keep well in an airtight container in the refrigerator for up to 4 days. The squash will soften a bit as it sits, but the flavor actually deepens and becomes even more complex. I’ve been known to eat the leftovers cold, straight from the container, as a snack.
Reheating: The best way to reheat is in a skillet over medium heat with a tiny splash of water or extra maple syrup to refresh the glaze. Stir gently until warmed through, about 3-4 minutes. You can also microwave it in 30-second bursts, but the texture won’t be as good. Avoid reheating at high power for too long, or the squash can turn mushy.
Freezer Note: I don’t recommend freezing this dish. The texture of the squash changes significantly after thawing and becomes watery. It’s so quick to make that you’re better off preparing it fresh when you need it.
Nutritional Information & Benefits
Let’s be honest—this isn’t a health food, but it’s made with real, whole ingredients that bring some serious nutritional benefits to the table. Here’s a rough estimate per serving (based on 4 servings):
| Nutrient | Amount per Serving |
|---|---|
| Calories | 185 |
| Total Fat | 9g |
| Saturated Fat | 5.5g |
| Carbohydrates | 28g |
| Fiber | 4g |
| Sugar | 16g |
| Protein | 2g |
| Vitamin A | 290% DV |
| Vitamin C | 25% DV |
| Potassium | 12% DV |
Honeynut squash is a nutritional powerhouse. It’s packed with beta-carotene, which your body converts into vitamin A for healthy vision and immune function. It’s also a great source of fiber, which keeps you full and supports digestive health. The maple syrup adds natural sweetness with some antioxidants, and the butter provides fat-soluble vitamins A, D, and E. This dish is naturally gluten-free and can be made vegan with a simple swap. It’s also relatively low in calories for how satisfying it is. I love that I can serve something this delicious and feel good about what’s on the plate.
Conclusion
This quick maple brown butter honeynut squash is the kind of recipe that proves you don’t need a million ingredients or hours of time to make something truly memorable. It came from a random Tuesday night in a friend’s kitchen, and it’s become a staple in mine ever since. The brown butter brings a nutty richness that feels fancy, the maple syrup adds just the right amount of sweetness, and the whole thing comes together in under 30 minutes with minimal cleanup. It’s weeknight cooking at its best—efficient, forgiving, and absolutely delicious.
I’d love to hear how it turns out for you. Did you add a twist? Serve it with something unexpected? Drop a comment below and let me know. And if you loved it as much as I do, share this recipe with a friend who needs a quick weeknight win. Honestly, just make it. Your Tuesday night dinner is about to get a whole lot better.
Frequently Asked Questions
Can I use butternut squash instead of honeynut?
Yes, absolutely. Butternut squash is larger and has thicker skin, so you’ll need to peel it first. Cut it into similar ¼-inch half-moons. The cooking time might increase by 2-3 minutes since butternut is denser. The flavor will be slightly less sweet, so you might want to add an extra teaspoon of maple syrup.
How do I know when the butter is properly browned?
Watch for the butter to melt, foam, and then the foam to subside. Small brown specks will appear at the bottom of the pan, and the butter will smell nutty and toasty—like toasted hazelnuts. This usually takes 2-3 minutes over medium heat. Don’t walk away; the line between brown and burnt is very thin.
Can I make this recipe ahead of time?
You can prep the squash up to a day in advance. Slice it, pat it dry, and store it in an airtight container in the refrigerator. When you’re ready to cook, let it sit at room temperature for 10 minutes to take off the chill. The actual cooking is best done fresh, but leftovers reheat well.
Is this recipe suitable for meal prep?
It works okay for meal prep if you’re eating it within 2-3 days. The texture softens over time, but the flavor deepens. For best results, reheat in a skillet to refresh the glaze. I wouldn’t recommend it for a full week of meal prep—the squash gets too soft by day four or five.
Can I double this recipe for a crowd?
You can, but you’ll need to cook the squash in batches. Don’t overcrowd the pan, or the squash will steam instead of brown. Use a large 12-inch skillet and cook two batches, keeping the first batch warm in a 200°F oven while you finish the second. The total time will be about 40 minutes for a double batch.
Pin This Recipe!
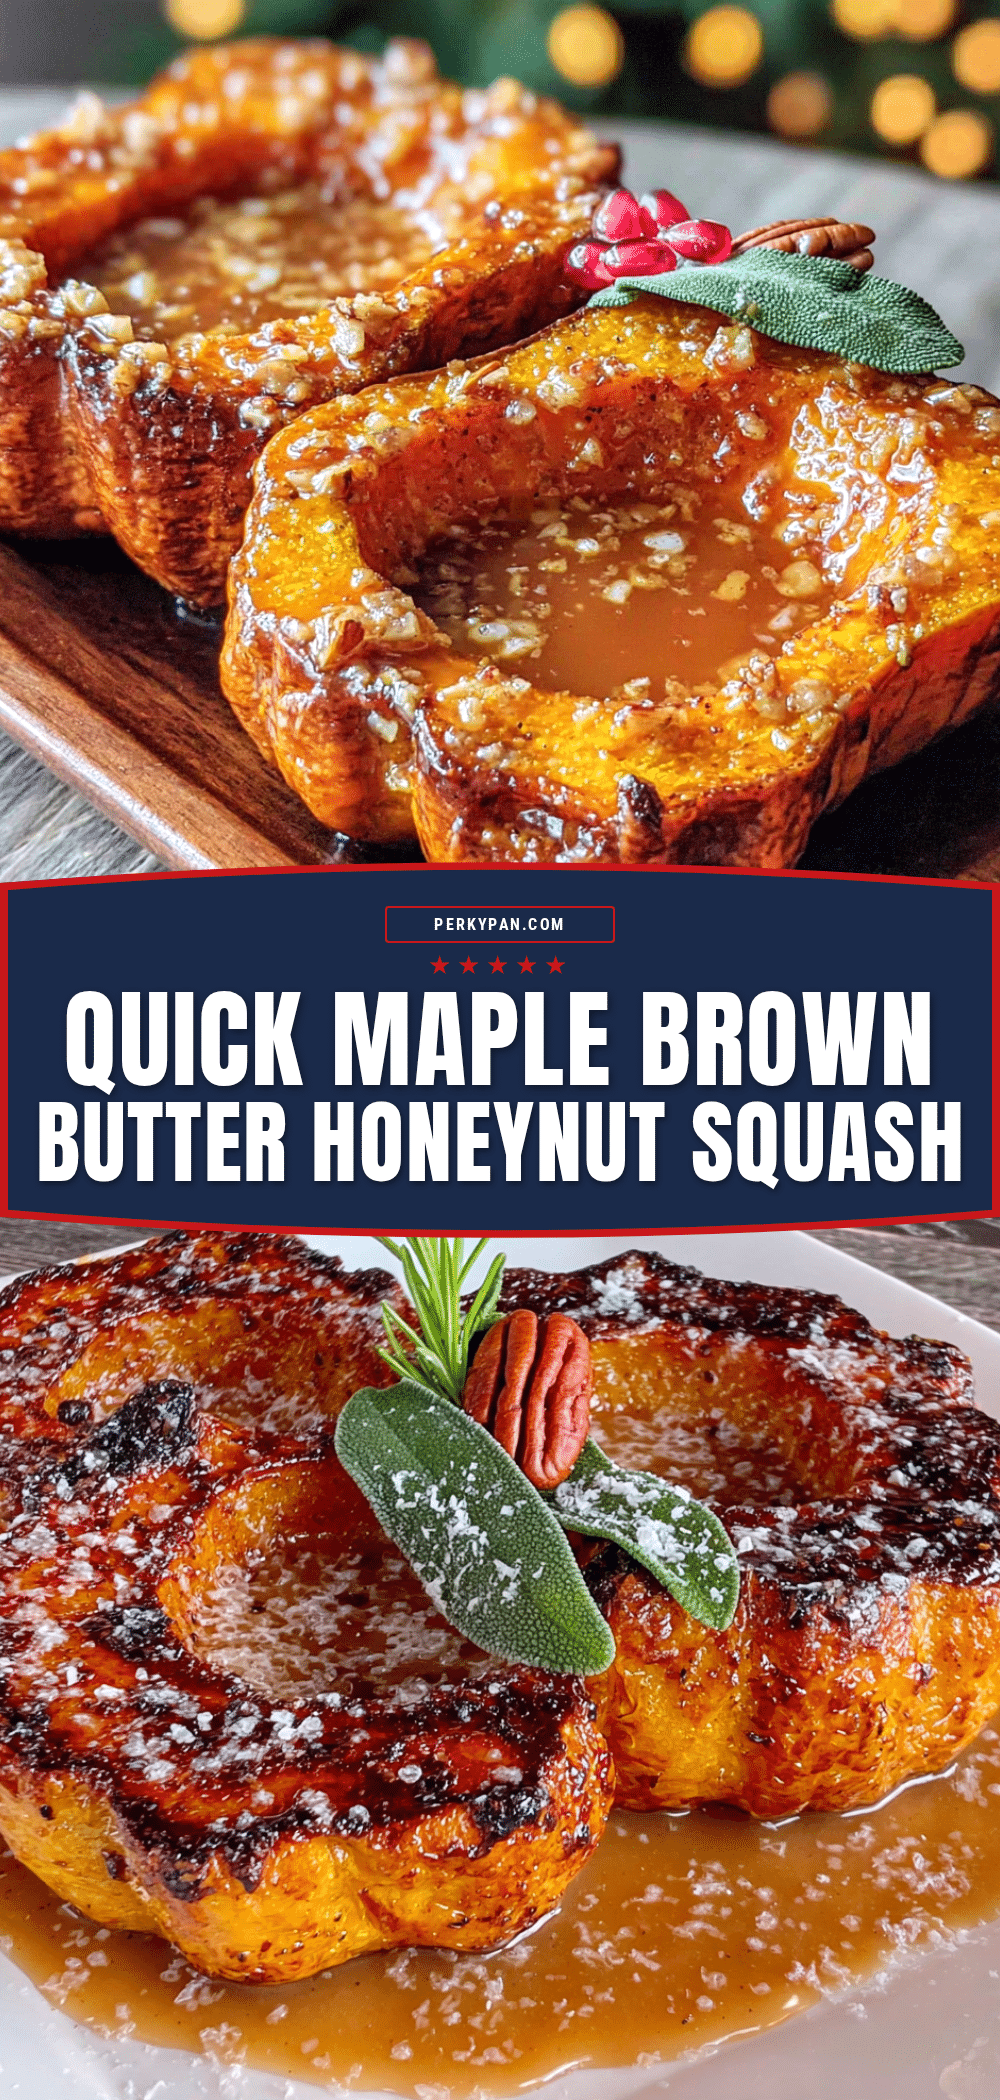
Best Quick Maple Brown Butter Honeynut Squash Ever
This quick maple brown butter honeynut squash comes together in under 30 minutes with just a handful of simple ingredients. The brown butter adds a nutty richness, while the maple syrup brings the perfect sweetness, making it a weeknight side dish that steals the show.
- Prep Time: 5 minutes
- Cook Time: 20 minutes
- Total Time: 25 minutes
- Yield: 4 servings 1x
- Category: Side Dish
- Cuisine: American
Ingredients
- 2 medium honeynut squash (about 1 lb each)
- 3 tablespoons unsalted butter
- 2 tablespoons pure maple syrup
- ½ teaspoon kosher salt
- 4–5 sprigs fresh thyme (optional but recommended)
- ¼ teaspoon cinnamon (optional)
- Black pepper, to finish
Instructions
- Prep the squash: Rinse and pat dry the honeynut squash. Trim off the stem end and bottom. Slice each squash in half lengthwise, scoop out seeds and stringy bits. Place each half cut-side down and slice crosswise into ¼-inch thick half-moons.
- Heat the pan: Place a large cast iron skillet over medium heat and let it warm for 2 minutes. Pat the squash slices dry with paper towels.
- Brown the butter: Add 3 tablespoons unsalted butter to the hot skillet. Let it melt, swirling occasionally, until it foams, then the foam subsides and small brown specks appear (about 2-3 minutes).
- Add the squash: Carefully add the squash slices in a single layer. They should sizzle. If the pan is crowded, cook in two batches.
- Sear the first side: Cook undisturbed for 4 minutes until deep golden brown on the bottom.
- Flip and add maple: Flip all slices. Drizzle with 2 tablespoons maple syrup, sprinkle with ½ teaspoon kosher salt and optional cinnamon. Add fresh thyme leaves if using. Cook for another 3 minutes, shaking the pan occasionally.
- Finish and serve: The squash should be tender. Remove from heat, finish with black pepper and optional flaky sea salt. Serve immediately.
Notes
Don’t skip drying the squash—wet squash steams instead of browning. Watch the butter closely; it goes from brown to burnt in seconds. Use medium heat, not high. Don’t overcrowd the pan. Let the squash rest for 2-3 minutes after cooking for the glaze to thicken.
Nutrition
- Serving Size: 1 serving
- Calories: 185
- Sugar: 16
- Sodium: 290
- Fat: 9
- Saturated Fat: 5.5
- Carbohydrates: 28
- Fiber: 4
- Protein: 2
Keywords: honeynut squash, maple brown butter, quick side dish, fall recipe, weeknight dinner


