Love this? Save it for later!
Share the inspiration with your friends
There used to be a tiny French patisserie tucked between a laundromat and a dusty thrift store on Magazine Street in New Orleans that made the most ethereal meringue cookies I have ever tasted. When they shuttered during the pandemic—just vanished overnight, with a handwritten sign taped to the door that said “Merci, c’est fini”—I honestly felt a little gutted. Those little clouds of sugar and air were my secret weapon for Halloween parties, baby showers, and every random Tuesday that needed a touch of whimsy.
After seventeen tries—seventeen, let me tell you, with some truly tragic results involving weeping puddles of egg white and sugar that looked more like sad pancakes than ghost-shaped cookies—I finally got it. The exact crisp-tender texture, the way they dissolve on your tongue like a whispered secret, that perfect glossy finish that catches the light just so. I mean, the first successful batch came out of the oven at 11 PM on a Wednesday, and I may have actually teared up a little. You know that feeling when something just clicks after you’ve been chasing it forever?
These ghost-shaped meringue cookies are now my go-to for every gathering I host. They’re the kind of thing that makes people stop mid-conversation and say, “Wait, you made these?” The best part? They only need three ingredients, and the whole process is strangely meditative. Maybe you’ve been looking for that one showstopper that doesn’t actually require culinary school to pull off. These little ghosts are it.
Why You’ll Love This Recipe
Let me be straight with you—these ghost-shaped meringue cookies are the ultimate host hack. I’ve tested this recipe at six different dinner parties, two Halloween bashes, and one very confused Thanksgiving where I insisted on ghosts alongside the turkey. They work every single time.
- Ridiculously Simple Ingredients: You probably have egg whites and sugar in your kitchen right now. The only “special” ingredient is cream of tartar, and honestly, you can sub in a splash of lemon juice or white vinegar if you’re in a pinch. No fancy grocery runs needed.
- Make-Ahead Magic: These cookies can be baked up to two weeks in advance and stored in an airtight container. That means you can check “dessert” off your list while binge-watching your favorite show, days before anyone shows up. Your future stressed-out host self will thank you.
- Total Crowd-Pleaser: I’ve watched grown adults—people who claim they “don’t do cute food”—sneak three of these off the platter. There’s something about the ghost shape that brings out the kid in everyone. Plus, they’re naturally gluten-free, so your guests with dietary restrictions can join the fun without a second thought.
- Zero Stress Presentation: These cookies look impressive without requiring any artistic talent. The piping is forgiving, the shapes don’t need to be perfect (ghosts are supposed to look a little wonky), and you can make them as spooky or as adorable as you want. I’ve done batches with tiny chocolate chip eyes and batches that were just plain white ghosts—both vanished equally fast.
- Conversation Starter: Every single time I set these out, someone asks for the recipe. They’re unexpected, they’re charming, and they give you that little glow of satisfaction when someone takes a bite and their eyebrows go up. That’s the moment, right there.
What Ingredients You Will Need
This recipe uses just three core ingredients, plus a tiny stabilizer that makes all the difference between a crisp ghost that holds its shape and a sad, weeping puddle of sugar. Let’s break down what each one does and how to pick the best versions.
- 3 large egg whites (room temperature, about 90g or 3.2 ounces): The foundation of your ghosts. Cold eggs separate more easily, but room temperature whites whip up to a much greater volume. I always separate my eggs straight from the fridge, then let the whites sit on the counter for about 20 minutes before I start whipping. Pro tip: Keep a tiny bowl nearby for rogue yolk bits—if even a speck of yolk gets into your whites, they won’t whip properly. I learned this the hard way, staring at a bowl of stubbornly liquid egg whites on a Tuesday night, muttering things I won’t repeat here.
- 3/4 cup granulated sugar (150g or about 5.3 ounces): Regular white sugar, nothing fancy. The sugar needs to dissolve completely into the egg whites, which is why we add it gradually. Some recipes call for superfine sugar, but I’ve had great results with standard granulated sugar as long as I’m patient with the addition. The sugar provides structure and that signature crispness.
- 1/2 teaspoon cream of tartar (about 2g): This is the unsung hero of stable meringue. It’s an acid that helps the egg whites hold their structure and prevents them from deflating. If you don’t have cream of tartar, use 1/2 teaspoon of lemon juice or white vinegar instead. I’ve done both, and honestly, I can’t taste any difference in the finished cookies.
- 1/2 teaspoon vanilla extract (optional but recommended, about 2.5ml): Pure vanilla extract adds a lovely warmth that balances the sweetness. I use the real stuff here, not imitation, because the flavor is noticeably more complex. That said, you can absolutely skip it for plain ghosts, or swap in peppermint extract for a holiday twist.
- Black gel food coloring (for faces, optional): If you want to give your ghosts little eyes and mouths, a tiny bit of black gel food coloring and a toothpick is all you need. I’ve also used melted dark chocolate piped on with a toothpick, which adds a nice flavor contrast.
For the best texture, I recommend using fresh eggs—older eggs have thinner whites that don’t whip as well. I like buying organic, pasture-raised eggs from the farmers’ market when I can, but honestly, any decent grocery store eggs will work. The key is freshness and careful separation.
Equipment Needed
You don’t need a fully stocked professional kitchen for these ghost-shaped meringue cookies, but a few key tools make the process much smoother. Here’s what I use every single time.
- Electric stand mixer or hand mixer: You can whip meringue by hand with a whisk, but I’m not going to pretend that’s a fun experience. A stand mixer with the whisk attachment is my preference because I can walk away for a minute, but a hand mixer works perfectly too. I’ve made these with both, and the results are identical.
- Large mixing bowl: Make sure it’s absolutely clean and dry—any trace of grease will prevent your egg whites from whipping. I wipe mine down with a little lemon juice on a paper towel before I start, just to be safe.
- Piping bag with a round tip: A piping bag gives you control over the ghost shapes. I use a Wilton 1A round tip, which creates nice, plump ghosts. If you don’t have a piping bag, a sturdy zip-top bag with a corner snipped off works in a pinch. I’ve done it, and the ghosts come out a little more rustic, but still adorable.
- Baking sheets lined with parchment paper: Parchment is non-negotiable here. The meringue will stick to everything else. I’ve tried silicone baking mats, and while they work, I find parchment gives me cleaner release.
- Cooling rack: Meringues need to cool completely on the baking sheet before you move them, but a cooling rack is essential for the final storage step.
If you’re on a budget, skip the fancy piping tips and use the zip-top bag method. I’ve made dozens of batches that way, and nobody has ever complained about the shape of the ghosts.
Preparation Method
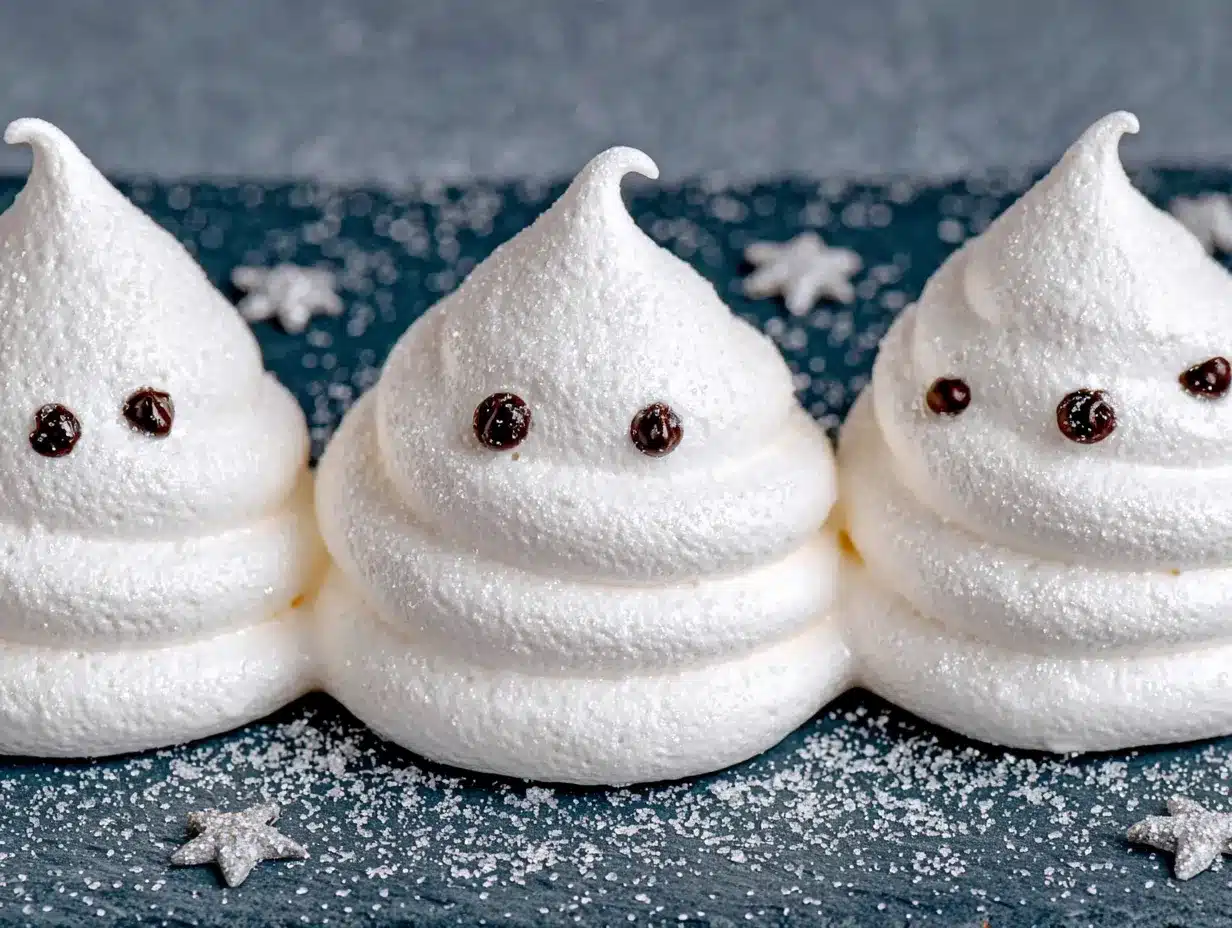
Making these ghost-shaped meringue cookies takes patience, but the actual hands-on time is surprisingly short. Here’s exactly how I do it, including all the little tricks I’ve picked up along the way.
- Preheat your oven to 200°F (93°C). Yes, that’s very low. We’re essentially dehydrating the meringue, not baking it. Line two large baking sheets with parchment paper and set them aside. The low temperature is crucial—I once got distracted and cranked the oven to 250°F, and my ghosts came out with brown spots that made them look less “spooky” and more “questionable.”
- Prepare your egg whites. Separate three large eggs while they’re cold, dropping the whites into your perfectly clean mixing bowl. Reserve the yolks for another use—I usually make a quick custard or add them to scrambled eggs the next morning. Let the whites sit at room temperature for 20 minutes. This step matters more than you might think; cold egg whites take forever to whip and never reach the same volume.
- Start whipping. Attach the whisk to your stand mixer and begin beating the egg whites on medium speed. After about 30 seconds, when they start looking frothy and bubbly, add the cream of tartar. Continue beating until soft peaks form—this means when you lift the whisk, the meringue forms a peak that flops over immediately. This usually takes 2-3 minutes.
- Add the sugar gradually. With the mixer running on medium-high speed, add the sugar one tablespoon at a time. I know it’s tedious, but rushing this step leads to gritty meringue that weeps later. Each addition should be fully incorporated before you add the next. This whole process takes about 5-7 minutes. Add the vanilla extract during the last tablespoon of sugar.
- Whip to stiff peaks. Once all the sugar is incorporated, increase the speed to high and beat until the meringue is glossy and forms stiff peaks. You’ll know it’s ready when you lift the whisk and the peak stands straight up without drooping. Rub a tiny bit between your fingers—if it feels smooth and not grainy, the sugar has dissolved completely. This takes another 2-4 minutes. Don’t over-whip, or the meringue will start to separate and look curdled. Trust me, I’ve ruined a batch this way, and it’s heartbreaking.
- Pipe the ghosts. Transfer the meringue to your piping bag fitted with a round tip. Hold the bag perpendicular to the baking sheet, about half an inch above the surface. Pipe a round blob for the body, then lift the bag straight up slightly and pipe a smaller blob for the head. Release pressure and pull the bag away quickly to create a little peak on top. Leave about 2 inches between each ghost—they don’t spread much, but you want airflow. If you’re adding faces, gently dot on black gel food coloring with a toothpick before baking.
- Bake low and slow. Place the baking sheets in the preheated oven and bake for 2 hours. Rotate the pans halfway through for even drying. The meringues are done when they’re firm to the touch and easily lift off the parchment paper. If they still feel sticky or soft, give them another 15-20 minutes. Every oven is a little different—my friend’s oven takes 2 hours 15 minutes, while mine is done right at 2 hours.
- Cool completely. Turn off the oven and leave the meringues inside with the door slightly ajar for another hour. This gradual cooling prevents cracking. After that, let them cool completely on the baking sheets on a wire rack. Don’t try to rush this—warm meringue is fragile and will crumble.
Cooking Tips & Techniques
After making these ghost-shaped meringue cookies more times than I care to count, I’ve collected a few hard-won lessons that will save you from my early mistakes.
Humidity is the enemy. Meringue is basically sugar and air, and sugar loves to absorb moisture from the air. If you live in a humid climate like I do (hello, Gulf Coast summers), pick a dry day to make these. I’ve tried making them during a thunderstorm, and the ghosts came out sticky and never fully crisped. If you absolutely must bake on a humid day, add an extra 15-20 minutes to the baking time and store them with a silica gel packet in the container.
The bowl must be spotless. Any trace of oil, grease, or yolk will sabotage your meringue. I wipe my bowl and whisk attachment with a paper towel dipped in lemon juice before I start. It sounds fussy, but it takes ten seconds and guarantees success. One time I used a bowl that had a tiny smear of butter from earlier cooking, and the egg whites simply refused to whip past a sad, watery state.
Don’t rush the sugar. I cannot stress this enough. Adding sugar too quickly is the most common mistake. The sugar crystals need time to dissolve into the egg white structure. If you dump it all in at once, you’ll end up with a grainy meringue that weeps sugar syrup during baking. Set a timer and add it slowly—it’s meditative, I promise.
Test for doneness properly. When you think the meringues are done, lift one off the parchment. It should release easily without sticking. If it resists, back in the oven it goes. Also, tap one gently—it should sound hollow. This is the same test you’d use for perfectly baked bread, and it’s never failed me.
Variations & Adaptations
One of the best things about this recipe is how endlessly adaptable it is. I’ve played around with different flavors and shapes, and here are my favorite variations.
- Pumpkin Spice Ghosts: Add 1 teaspoon of pumpkin pie spice and a pinch of cinnamon to the sugar before whipping. The spices blend beautifully with the vanilla, and the aroma while baking is absolutely intoxicating. I made these for a fall harvest party, and they disappeared faster than the actual pumpkin pie.
- Chocolate-Dipped Ghosts: After the meringues have cooled completely, dip the bottoms in melted dark chocolate and let them set on parchment paper. The contrast between the airy meringue and the rich chocolate is incredible. I did this for a friend’s birthday, and she texted me the next day asking for the recipe.
- Peppermint Holiday Ghosts: Swap the vanilla extract for 1/2 teaspoon of peppermint extract and add a drop of red food coloring to create a subtle pink swirl. These are perfect for Christmas gatherings, and the peppermint flavor cuts through the sweetness beautifully.
- Vegan Version: Use aquafaba (the liquid from a can of chickpeas) instead of egg whites. Three tablespoons of aquafaba replaces one egg white. The process is the same, though the baking time might be slightly shorter. I’ve tested this for a vegan friend, and honestly, even I couldn’t tell the difference.
- Lemon Lavender Ghosts: Add 1 teaspoon of dried culinary lavender and the zest of one lemon to the sugar before whipping. This creates a delicate, floral version that’s perfect for spring gatherings or baby showers. The lavender adds a subtle purple tint that’s lovely.
Serving & Storage Suggestions
These ghost-shaped meringue cookies are designed to be the star of your dessert table, and a little thought about serving and storage goes a long way.
Serving: Arrange the ghosts on a large platter or cake stand for maximum visual impact. I like to scatter a few around the base of the stand to create a “floating” effect. If you’re serving them at a Halloween party, consider placing them on a bed of black sesame seeds or crushed chocolate cookies to look like dirt. For a more elegant presentation, serve them alongside fresh berries and a dollop of whipped cream.
What to serve alongside: These cookies pair beautifully with hot coffee, tea, or a glass of cold milk. For a dessert spread, I love serving them with a rich chocolate mousse or a tangy lemon tart—the contrast in textures and flavors is delightful. If you’re hosting a cocktail party, try pairing them with a dry sparkling wine or a crisp apple cider.
Storage: Store the cooled meringues in an airtight container at room temperature for up to two weeks. Do not refrigerate—the moisture will make them sticky. If you live in a humid area, add a food-safe silica gel packet to the container to absorb excess moisture. I’ve also successfully frozen these cookies for up to three months. Place them in a single layer in a freezer-safe container with parchment between layers. Thaw at room temperature for about 15 minutes before serving.
Flavor development: Interestingly, these meringues actually improve after a day or two. The flavors meld and deepen, and the texture becomes even more perfectly crisp. I often make them two days before a party for this reason.
Nutritional Information & Benefits
Each ghost-shaped meringue cookie (without chocolate or add-ins) contains approximately:
- Calories: 25-30
- Carbohydrates: 6-7g
- Protein: 0.5g
- Fat: 0g
- Sugar: 6-7g
These cookies are naturally fat-free and gluten-free, making them a great option for guests with dietary restrictions. The egg whites provide a small amount of protein, and the sugar gives a quick energy boost. While they’re certainly a treat rather than a health food, they’re a lighter option compared to traditional butter cookies or chocolate chip cookies.
The cream of tartar adds a tiny amount of potassium, and if you use vanilla extract, you get a hint of antioxidants from the vanilla bean. Allergen-wise, these contain eggs, so they’re not suitable for those with egg allergies. The vegan aquafaba version eliminates this concern.
From a wellness perspective, I love that these cookies satisfy a sweet craving without leaving me feeling heavy. They’re light, airy, and somehow feel like a special indulgence without the guilt.
Conclusion
These ghost-shaped meringue cookies have become my signature party trick, and I honestly don’t see that changing anytime soon. They’re the perfect combination of impressive and approachable—the kind of recipe that makes you look like a culinary genius while actually being almost embarrassingly simple. Every time I set a platter of these out, I watch people’s faces light up, and that never gets old.
I encourage you to make these your own. Play with the flavors, experiment with different shapes, and don’t stress about perfection. The slightly imperfect ghosts are always the most charming anyway. Whether you’re hosting a Halloween bash, a fall gathering, or just want to surprise your family with something special, these cookies deliver every single time.
I’d love to hear how your ghost-shaped meringue cookies turn out! Drop a comment below with your favorite variation, or tag me in your photos if you share them online. Happy baking, friends—and may your ghosts always be perfectly crisp.
Frequently Asked Questions
Can I use liquid egg whites from a carton?
I don’t recommend it. Carton egg whites often contain stabilizers that prevent them from whipping to stiff peaks. Fresh egg whites give you the best volume and texture. If you’re in a pinch, you can try it, but expect less stable results.
Why are my meringues weeping or sticky?
This usually happens for one of three reasons: humidity in the air, under-baking, or sugar that wasn’t fully dissolved. Make sure your meringue passes the “smooth between fingers” test before piping, and bake on a dry day if possible. If they’re sticky after baking, pop them back in the oven for another 15-20 minutes.
Can I make these ahead of time for a party?
Absolutely! In fact, I prefer to make them 1-2 days in advance. The flavor improves, and they stay perfectly crisp in an airtight container. You can even make them up to two weeks ahead if stored properly.
How do I get perfectly white ghosts?
To achieve bright white meringues, make sure your baking sheets are clean and free of any grease. Some bakers add a tiny drop of white gel food coloring to enhance the whiteness, but I find that using fresh, high-quality egg whites and clean equipment does the trick.
Can I pipe different shapes besides ghosts?
Of course! This meringue recipe is incredibly versatile. You can pipe kisses, stars, or even small nests for a different look. Just adjust the piping technique and baking time slightly for different shapes. Smaller shapes will bake faster, so keep an eye on them after 90 minutes.
Pin This Recipe!
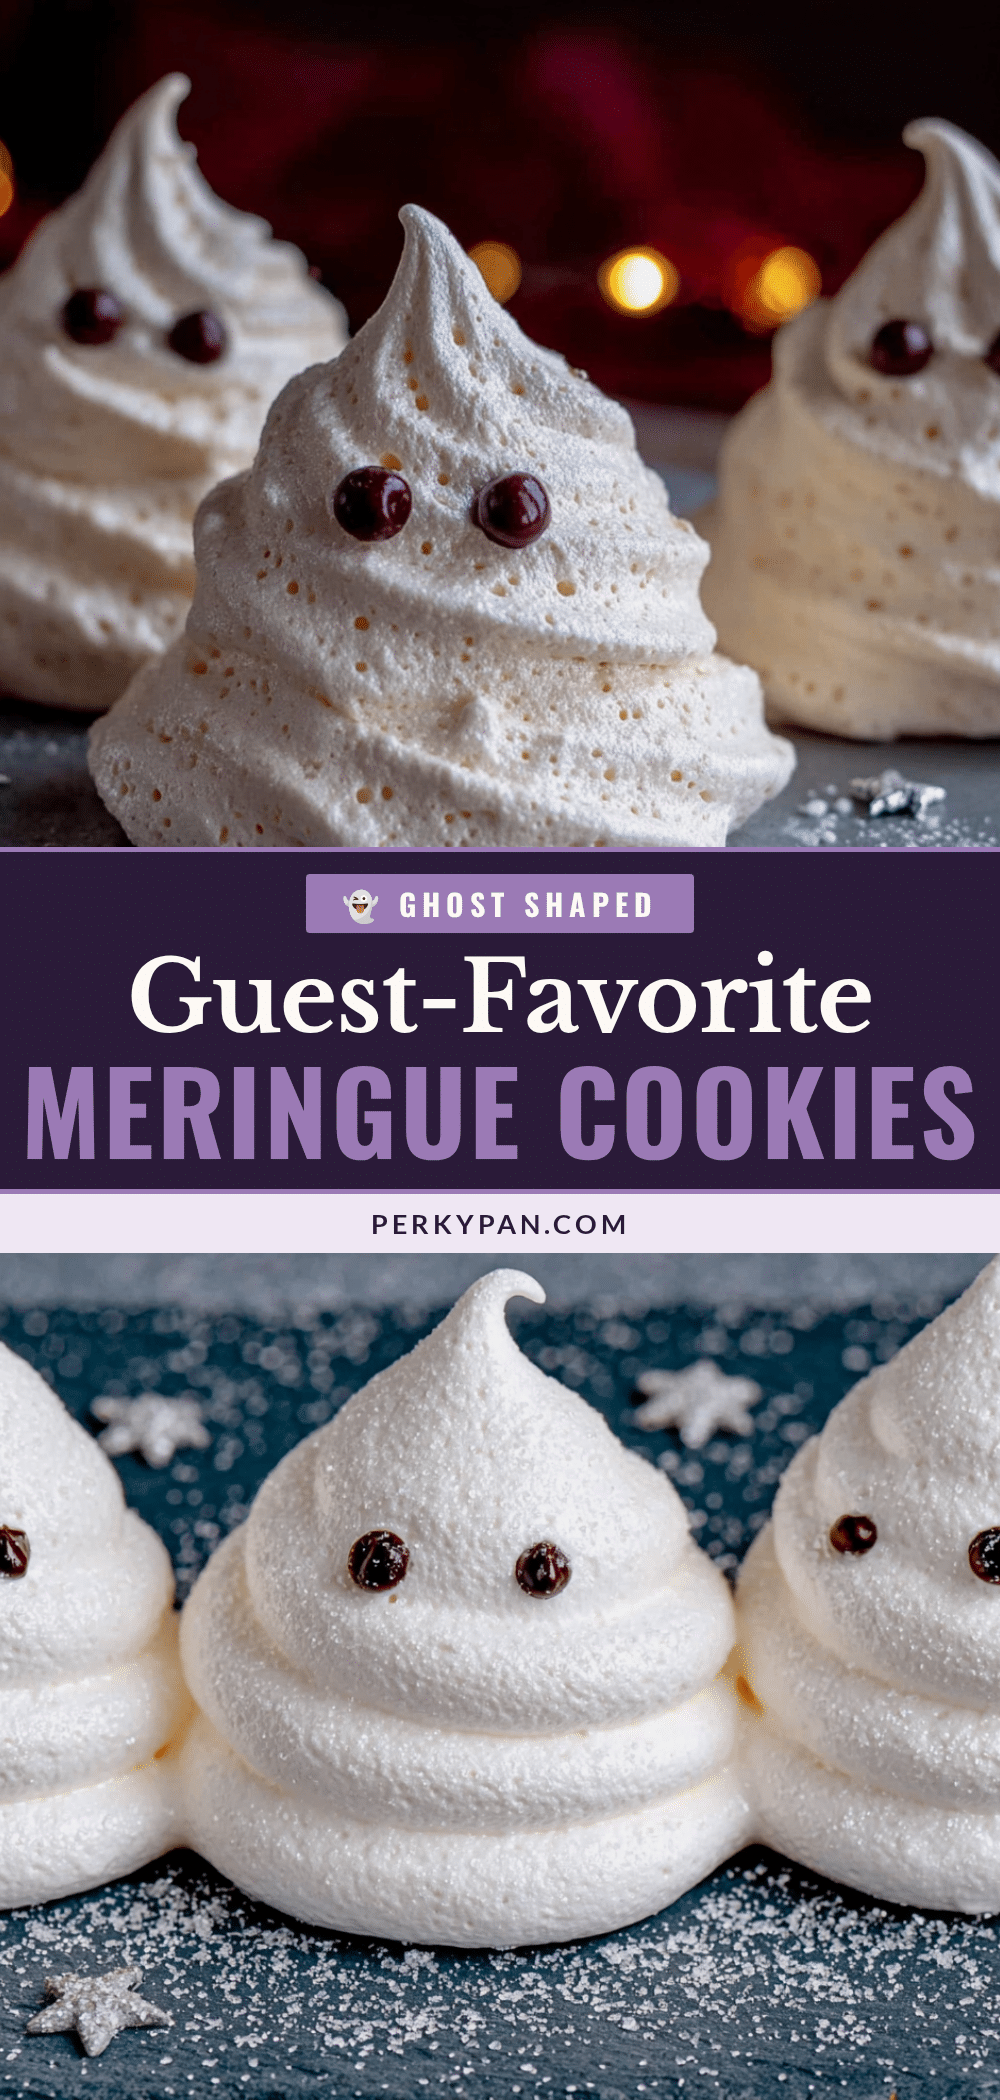
Guest-Favorite Ghost-Shaped Meringue Cookies: Easy 3-Ingredient Recipe
These ethereal ghost-shaped meringue cookies are a showstopper for Halloween parties and gatherings. Made with just three ingredients, they are light, crisp, and dissolve on your tongue like a whispered secret.
- Prep Time: 20 minutes
- Cook Time: 2 hours
- Total Time: 3 hours 20 minutes
- Yield: 24 servings 1x
- Category: Dessert
- Cuisine: French
Ingredients
- 3 large egg whites (room temperature, about 90g or 3.2 ounces)
- 3/4 cup granulated sugar (150g or about 5.3 ounces)
- 1/2 teaspoon cream of tartar (about 2g)
- 1/2 teaspoon vanilla extract (optional but recommended, about 2.5ml)
- Black gel food coloring (for faces, optional)
Instructions
- Preheat your oven to 200°F (93°C). Line two large baking sheets with parchment paper.
- Separate three large eggs while cold, dropping the whites into a clean mixing bowl. Let the whites sit at room temperature for 20 minutes.
- Attach the whisk to your stand mixer and begin beating the egg whites on medium speed. After about 30 seconds, when frothy, add the cream of tartar. Continue beating until soft peaks form (2-3 minutes).
- With the mixer running on medium-high speed, add the sugar one tablespoon at a time, fully incorporating each addition before adding the next (5-7 minutes). Add the vanilla extract during the last tablespoon of sugar.
- Increase speed to high and beat until the meringue is glossy and forms stiff peaks (2-4 minutes). The meringue should feel smooth between your fingers.
- Transfer the meringue to a piping bag fitted with a round tip. Pipe ghosts onto the prepared baking sheets: pipe a round blob for the body, then lift and pipe a smaller blob for the head. Leave about 2 inches between each ghost. If adding faces, dot on black gel food coloring with a toothpick before baking.
- Bake for 2 hours, rotating the pans halfway through. The meringues are done when firm to the touch and easily lift off the parchment.
- Turn off the oven and leave the meringues inside with the door slightly ajar for 1 hour. Then cool completely on the baking sheets on a wire rack.
Notes
Humidity is the enemy of meringue; bake on a dry day if possible. Ensure the bowl and whisk are completely clean and grease-free. Add sugar gradually to avoid grainy meringue. For vegan version, use aquafaba (3 tablespoons per egg white).
Nutrition
- Serving Size: 1 cookie
- Calories: 2530
- Sugar: 67
- Sodium: 10
- Carbohydrates: 67
- Protein: 0.5
Keywords: meringue cookies, ghost cookies, Halloween cookies, 3-ingredient recipe, gluten-free dessert, egg white cookies


