Love this? Save it for later!
Share the inspiration with your friends
I was at the community garden’s fall harvest party last October, completely out of my depth. I had offered to bring dessert—confident, maybe a little cocky—and now I was staring at a table groaning with pies, cobblers, and elaborate cakes that looked like they belonged in a bakery window. My contribution, a simple chocolate cheesecake, suddenly felt like a sad, plain brick. I was mentally kicking myself when my neighbor, a retired baker named Mrs. Kowalski who had been watching me from her folding chair, finally spoke up. “You know,” she said, not unkindly, “that cheesecake just needs a little personality. Hand me a toothpick.” I watched, baffled, as she took a small bowl of white chocolate ganache she had spotted in my bag and, with a few confident swirls of a toothpick, turned my plain chocolate cheesecake into a stunning spiderweb. The crowd went wild, and I have never made a plain cheesecake since.
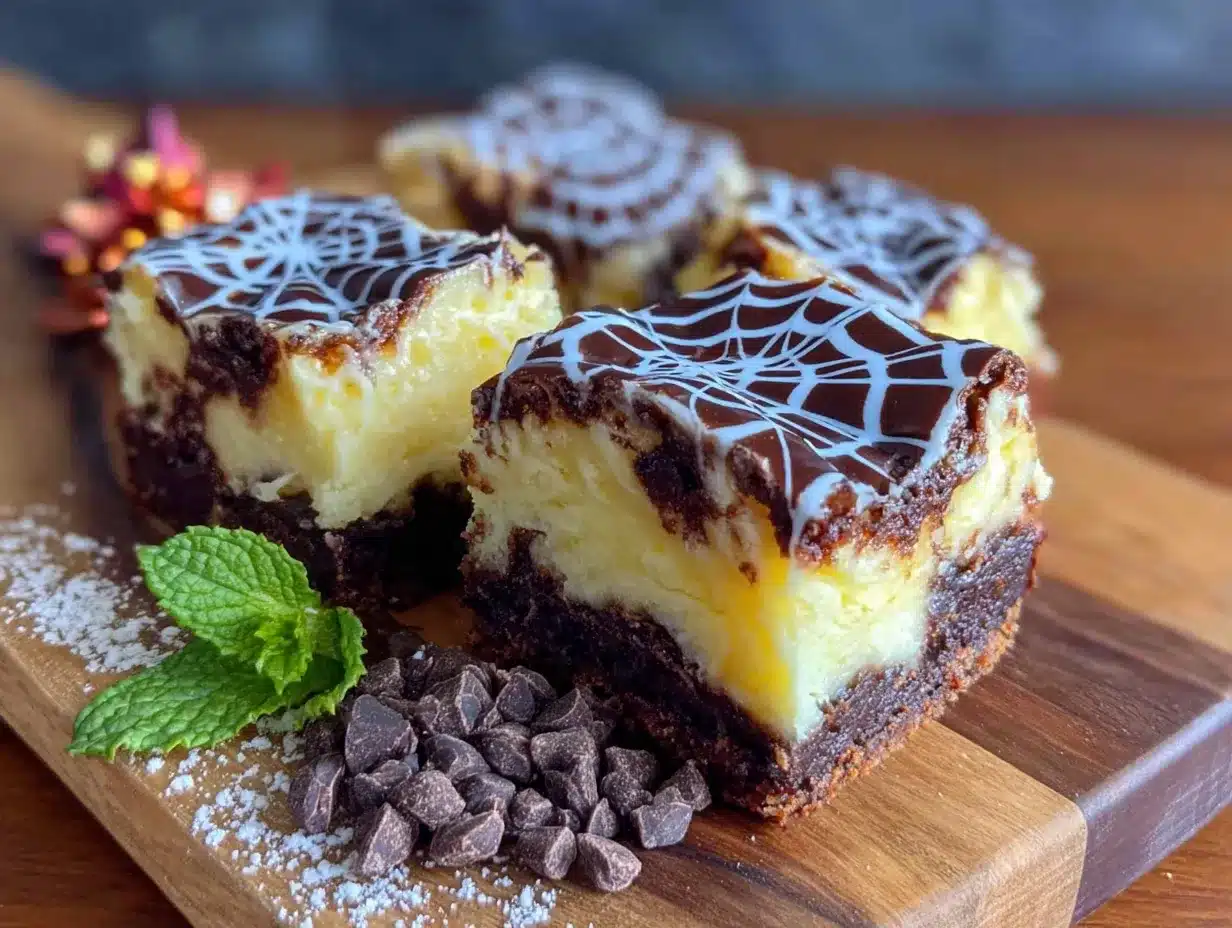
That moment taught me something important about hosting: sometimes the best party tricks are the simplest ones. And honestly, that is the whole magic behind these Perfect Spiderweb Chocolate Cheesecake Bars. They are the dessert that makes you look like a kitchen wizard when, let me tell you, the hard part is just making a regular cheesecake. The spiderweb design? That is the fun, five-minute party trick. I have made these for every Halloween gathering since, and they never fail to get that gasp of delight. Maybe you have been there—standing in your kitchen, wondering how to impress a crowd without spending all week in the kitchen. These bars are the answer. They are rich, they are chocolatey, and they have that little bit of showmanship that makes a dinner party feel special. Let me walk you through how to make them, starting with why you will absolutely love this recipe.
Why You’ll Love This Recipe
Hosting a Halloween party is stressful enough without trying to pull off a complicated, multi-tiered dessert. These Spiderweb Chocolate Cheesecake Bars are designed to make you look like a pro with minimal effort. They are the kind of recipe that lets you spend more time with your guests and less time sweating in the kitchen.
- Looks Incredibly Impressive: The spiderweb design is a guaranteed conversation starter. It looks like you spent hours piping intricate details, but the secret is just a toothpick and a steady hand.
- Simple Ingredients: You probably have most of these in your pantry already. No need for weird, specialty baking items that you will never use again.
- Perfect for Halloween Parties: These bars are the ultimate crowd-pleaser for a spooky gathering. They are easy to serve, easy to eat standing up, and they fit the theme perfectly without being too gimmicky.
- Crowd-Pleaser: I have yet to meet someone who does not love a good chocolate cheesecake. The creamy filling against the crisp, buttery crust is a classic combination that appeals to both kids and adults.
- Make-Ahead Friendly: This is the real MVP for hosting. You can make these a day or two in advance, which means one less thing to worry about on party day. The flavors actually get even better after a night in the fridge.
What really sets this recipe apart is the texture. I have tested dozens of cheesecake bar recipes, and the trick here is using a combination of cream cheese and sour cream. The sour cream adds a slight tang that cuts through the richness of the chocolate, and it gives the filling an incredibly smooth, almost velvety texture. It is not just another chocolate cheesecake—it is the one that makes people close their eyes after the first bite and ask for the recipe.
What Ingredients You Will Need
This recipe uses simple, wholesome ingredients to deliver a dessert that tastes like it came from a high-end bakery. The beauty is in the balance—a buttery crust, a luscious chocolate filling, and a dramatic spiderweb topping.
For the Crust
- 1 ½ cups (150g) chocolate cookie crumbs (about 15 Oreo cookies, finely crushed, cream filling included). I recommend using Oreos for the best flavor and texture. The dark crumb provides a perfect contrast to the creamy filling.
- ¼ cup (50g) granulated sugar
- 6 tablespoons (85g) unsalted butter, melted (adds richness and helps the crust hold together)
- Pinch of salt (to balance the sweetness)
For the Chocolate Cheesecake Filling
- 16 ounces (452g) cream cheese, softened to room temperature (this is crucial—cold cream cheese will give you a lumpy filling)
- ¾ cup (150g) granulated sugar
- 2 large eggs, at room temperature
- 1 teaspoon vanilla extract
- ½ cup (120g) sour cream, at room temperature (adds tang and creaminess)
- 8 ounces (226g) semi-sweet chocolate, melted and slightly cooled (I use Ghirardelli baking bars for a rich, smooth flavor)
For the Spiderweb Topping
- ½ cup (120ml) white chocolate chips or white candy melts
- 2 tablespoons (30ml) heavy cream
- Optional: 1-2 drops black or orange food coloring (to tint the white chocolate for a more festive look)
Ingredient Tips: For the best texture, make sure your cream cheese, eggs, and sour cream are all at room temperature. I usually take them out of the fridge about an hour before I start baking. If you are in a hurry, you can soften the cream cheese in the microwave in short bursts, but be careful not to melt it. For the chocolate, I prefer using a good quality semi-sweet bar over chocolate chips because it melts more smoothly and has a better flavor profile.
Equipment Needed
You do not need a lot of fancy equipment for this recipe, which is part of its charm. Here is what you will need:
- 9×9-inch square baking pan (an 8×8-inch pan will also work, but your bars will be slightly thicker and may need a few extra minutes of baking time)
- Parchment paper (for easy removal of the bars)
- Food processor or zip-top bag and rolling pin (for crushing the cookies)
- Medium mixing bowls (2-3)
- Electric hand mixer or stand mixer (a whisk and some elbow grease will also work, but a mixer makes the filling much smoother)
- Rubber spatula
- Small microwave-safe bowl (for melting the white chocolate)
- Toothpick or skewer (for creating the spiderweb design)
- Piping bag or small zip-top bag (for the white chocolate drizzle)
I have made these bars with just a hand whisk before, and while it is doable, I will warn you—your arm will be tired. A hand mixer is a worthwhile investment if you bake often. For the piping bag, a simple zip-top bag with a tiny corner snipped off works perfectly.
Preparation Method
Step 1: Prepare the Crust
Preheat your oven to 325°F (165°C). Line your 9×9-inch baking pan with parchment paper, leaving some overhang on two opposite sides—this will be your “handles” to lift the bars out later. In a food processor, pulse the chocolate cookies until they are fine crumbs. If you do not have a food processor, place the cookies in a zip-top bag and crush them with a rolling pin. It is a great way to get out some pre-party stress!
In a medium bowl, combine the cookie crumbs, granulated sugar, and a pinch of salt. Pour the melted butter over the mixture and stir with a fork until all the crumbs are evenly moistened. They should look like wet sand. Press the mixture firmly into the bottom of your prepared pan. I use the bottom of a flat measuring cup to get an even, compact layer. Bake for 10 minutes, then set aside to cool slightly while you make the filling.
Step 2: Make the Cheesecake Filling
In a large mixing bowl, beat the softened cream cheese with an electric mixer on medium speed until it is completely smooth and there are no lumps. This should take about 2 minutes. Add the granulated sugar and beat until well combined, scraping down the sides of the bowl with a rubber spatula as needed.
Add the eggs one at a time, beating on low speed after each addition until just combined. Do not overmix at this stage—you do not want to incorporate too much air into the batter, which can cause cracks. Add the vanilla extract and sour cream, and mix on low until just combined.
Now, pour in the melted and slightly cooled semi-sweet chocolate. Fold it into the batter with your rubber spatula until it is fully incorporated and the mixture is a uniform, dark chocolate color. The batter will be thick and luscious.
Step 3: Assemble and Bake
Pour the chocolate cheesecake filling over the pre-baked crust and spread it into an even layer with your spatula. Gently tap the pan on the counter a few times to release any air bubbles.
Bake at 325°F (165°C) for 35-40 minutes. The edges should be set and slightly puffed, but the center should still have a slight jiggle when you gently shake the pan. This is the sign of a perfectly baked cheesecake—it will continue to set as it cools. Overbaking will result in a dry, cracked cheesecake.
Remove the pan from the oven and place it on a wire rack to cool completely to room temperature. Once cool, refrigerate for at least 4 hours, or preferably overnight. This step is non-negotiable for clean, neat slices.
Step 4: Create the Spiderweb
Once the cheesecake is fully chilled and firm, it is time for the fun part. In a small microwave-safe bowl, combine the white chocolate chips and heavy cream. Microwave in 20-second intervals, stirring after each, until the mixture is completely smooth and melted. If you are using food coloring, stir it in now.
Transfer the melted white chocolate to a small piping bag or a zip-top bag with a tiny corner snipped off. Pipe a small circle of white chocolate in the very center of the cheesecake. Then, pipe concentric circles around it, spacing them about 1 inch apart, until you reach the edges.
Here is the magic trick: Take a toothpick or a skewer and, starting from the center, drag it gently through the white chocolate circles out towards the edge of the pan. Wipe the toothpick clean, then repeat from the edge back towards the center. Continue this pattern around the entire cheesecake, and you will see a beautiful spiderweb design emerge. Work quickly, as the white chocolate will start to set. If it becomes too thick, you can reheat it for a few seconds.
Cooking Tips & Techniques
I have made my fair share of mistakes with cheesecake, so let me save you some trouble. The biggest issue people run into is cracks. To avoid this, do not overmix the batter once you add the eggs, and do not overbake. That slight jiggle in the center is your best friend. Another trick is to place a pan of hot water on the lower rack of your oven while the cheesecake bakes. The steam helps keep the oven moist and prevents the top from drying out and cracking.
For the spiderweb design, the key is to work quickly. Have your toothpicks ready before you start piping. If the white chocolate starts to thicken as you work, just pop it back in the microwave for 10 seconds. I once tried to rush this step and ended up with a messy blob instead of a web—patience is a virtue here.
For perfect, clean slices, use a sharp knife and wipe it clean with a damp paper towel between each cut. Running the knife under hot water and drying it off before slicing also helps. This is especially important for a party where presentation matters.
Variations & Adaptations
One of the best things about this recipe is how easy it is to adapt. Here are a few ideas I have tried and loved:
- Peanut Butter Spiderweb: Swirl ½ cup of creamy peanut butter into the cheesecake batter before baking. The chocolate and peanut butter combination is a crowd favorite. Use the same white chocolate spiderweb on top.
- Pumpkin Spice Version: For a fall twist, replace ½ cup of the cream cheese with pumpkin puree and add 1 teaspoon of pumpkin pie spice to the filling. The spiderweb looks stunning against the orange-hued cheesecake.
- Gluten-Free Option: Use gluten-free chocolate sandwich cookies for the crust. The rest of the ingredients are naturally gluten-free. I have made this for friends with celiac disease, and they could not tell the difference.
- Spooky Color Swirl: Instead of a white chocolate spiderweb, use a mixture of melted orange and black candy melts to create a more colorful, festive design. It is especially fun for kids’ parties.
Serving & Storage Suggestions
These bars are best served cold, straight from the refrigerator. The firm texture makes them easy to slice and serve, and the chilled cheesecake is incredibly refreshing. For a Halloween party, I like to arrange them on a black platter or a wooden board and sprinkle a few edible glitter stars or candy spiders around them for extra drama.
They pair beautifully with a hot cup of coffee or a glass of cold milk. If you are serving them as part of a larger spread, they go well with other no-fuss desserts like pumpkin bars or a simple apple crisp.
For storage, keep the bars in an airtight container in the refrigerator for up to 5 days. They also freeze beautifully. Wrap individual slices tightly in plastic wrap, then place them in a freezer-safe bag or container. They will keep for up to 3 months. To thaw, simply transfer a slice to the refrigerator overnight. The flavors actually deepen and meld together after a day or two, so do not be afraid to make them ahead.
Nutritional Information & Benefits
Let’s be honest—this is a decadent dessert, not a health food. But that does not mean it cannot be part of a balanced lifestyle. One bar (based on 16 servings) contains approximately 320 calories, 22g of fat, 28g of carbohydrates, and 5g of protein. The cream cheese provides a good amount of calcium and protein, while the dark chocolate is rich in antioxidants. If you are looking to lighten it up, you can use reduced-fat cream cheese and sour cream, though the texture will be slightly less rich.
For those with dietary restrictions, please note that this recipe contains dairy, eggs, and gluten (from the cookies). It is not suitable for vegans or those with severe allergies to these ingredients. However, the gluten-free variation mentioned above works wonderfully.
I personally believe that food is about joy and connection, especially when you are hosting. One slice of this cheesecake is a moment of pure indulgence, and that is something worth celebrating.
Conclusion
These Perfect Spiderweb Chocolate Cheesecake Bars are more than just a dessert—they are a showstopper that will make your Halloween party unforgettable. They are the recipe that proves you do not need to be a professional baker to create something stunning. The combination of a rich, creamy chocolate cheesecake and a dramatic spiderweb topping is pure magic, and it is so much easier than it looks.
I love this recipe because it reminds me of that moment in the garden with Mrs. Kowalski—a simple, generous gesture that turned a plain dessert into something special. It is a reminder that the best recipes are often the ones shared between friends and neighbors.
Now it is your turn. I would love to see your spiderweb creations! Tag me in your photos or leave a comment below telling me how yours turned out. Did you try a fun variation? Did your guests love them? Let me know, and happy baking!
Frequently Asked Questions
Can I use a different type of chocolate for the filling?
Absolutely! You can use milk chocolate for a sweeter, milder flavor, or dark chocolate (60-70% cacao) for a more intense, rich taste. Just make sure to use a good quality chocolate that melts smoothly.
My cheesecake cracked on top. What went wrong?
Cracks usually happen from overbaking or from a sudden change in temperature. To prevent this, make sure you do not overbake (the center should still jiggle), and let the cheesecake cool gradually in the oven with the door slightly ajar for about an hour before you take it out. The spiderweb topping will also help hide any small cracks!
Can I make this recipe in a different size pan?
Yes, you can use an 8×8-inch pan, but your bars will be thicker. You will need to increase the baking time by about 5-10 minutes. For a 9×13-inch pan, double the entire recipe and bake for about 45-50 minutes.
How far in advance can I make these bars?
You can make them up to 3 days in advance and store them in the refrigerator. I actually think they taste better on the second or third day! You can also freeze them for up to 3 months.
My white chocolate seized up when I melted it. How do I fix it?
If your white chocolate becomes grainy and thick, it has seized. This usually happens if a tiny bit of water gets into the chocolate. To fix it, try adding a teaspoon of vegetable oil or more heavy cream and stirring vigorously. If it does not smooth out, it is best to start over with fresh chocolate.
Pin This Recipe!
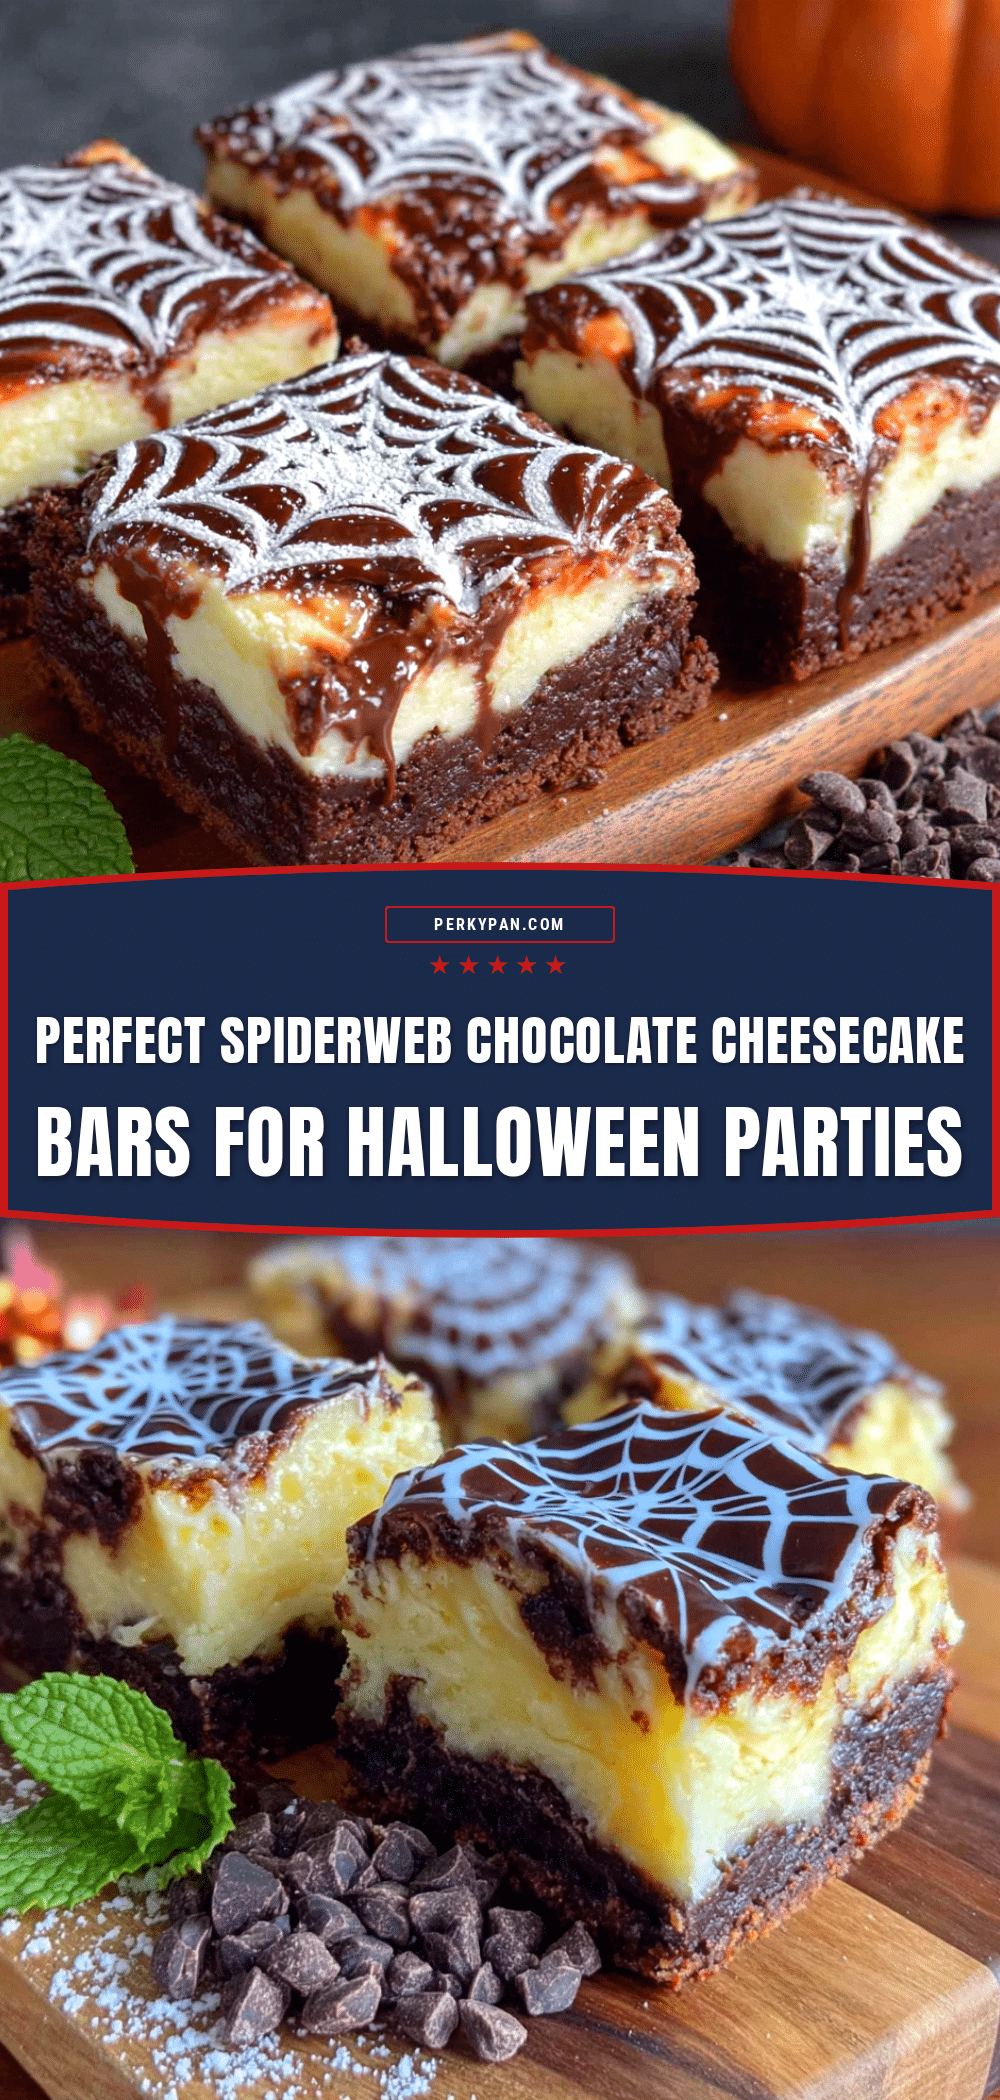
Perfect Spiderweb Chocolate Cheesecake Bars: Easy Halloween Dessert
These Perfect Spiderweb Chocolate Cheesecake Bars are a showstopper for Halloween parties. With a rich, creamy chocolate cheesecake filling and a dramatic spiderweb topping, they look impressive but are surprisingly easy to make.
- Prep Time: 20 minutes
- Cook Time: 40 minutes
- Total Time: 5 hours (includes chilling time)
- Yield: 16 servings 1x
- Category: Dessert
- Cuisine: American
Ingredients
- 1 ½ cups (150g) chocolate cookie crumbs (about 15 Oreo cookies, finely crushed)
- ¼ cup (50g) granulated sugar
- 6 tablespoons (85g) unsalted butter, melted
- Pinch of salt
- 16 ounces (452g) cream cheese, softened to room temperature
- ¾ cup (150g) granulated sugar
- 2 large eggs, at room temperature
- 1 teaspoon vanilla extract
- ½ cup (120g) sour cream, at room temperature
- 8 ounces (226g) semi-sweet chocolate, melted and slightly cooled
- ½ cup (120ml) white chocolate chips or white candy melts
- 2 tablespoons (30ml) heavy cream
- Optional: 1-2 drops black or orange food coloring
Instructions
- Preheat oven to 325°F (165°C). Line a 9×9-inch baking pan with parchment paper, leaving overhang on two sides.
- In a food processor, pulse chocolate cookies into fine crumbs. In a medium bowl, combine crumbs, ¼ cup sugar, and a pinch of salt. Pour in melted butter and stir until moistened. Press firmly into the bottom of the prepared pan. Bake for 10 minutes, then set aside to cool slightly.
- In a large bowl, beat softened cream cheese with an electric mixer on medium speed until smooth, about 2 minutes. Add ¾ cup sugar and beat until combined, scraping down sides.
- Add eggs one at a time, beating on low after each until just combined. Add vanilla and sour cream, mix on low until combined.
- Fold in melted semi-sweet chocolate with a rubber spatula until fully incorporated and uniform in color.
- Pour filling over crust and spread evenly. Tap pan on counter to release air bubbles. Bake for 35-40 minutes until edges are set but center still jiggles slightly.
- Cool completely on a wire rack, then refrigerate for at least 4 hours or overnight.
- For spiderweb: In a small microwave-safe bowl, combine white chocolate chips and heavy cream. Microwave in 20-second intervals, stirring after each, until smooth. Add food coloring if desired.
- Transfer melted white chocolate to a piping bag or zip-top bag with a tiny corner snipped off. Pipe a small circle in the center, then concentric circles around it, spaced about 1 inch apart.
- Using a toothpick, drag from the center outward through the circles, then from the edge back toward the center. Repeat around the entire cheesecake to create a spiderweb pattern. Work quickly.
- Slice with a sharp knife, wiping clean between cuts. Serve cold.
Notes
For best texture, ensure cream cheese, eggs, and sour cream are at room temperature. Do not overmix after adding eggs to prevent cracks. The center should still jiggle when done. For clean slices, use a sharp knife wiped clean between cuts. Can be made up to 3 days in advance and stored in the refrigerator. Freezes well for up to 3 months.
Nutrition
- Serving Size: 1 bar
- Calories: 320
- Sugar: 20
- Sodium: 180
- Fat: 22
- Saturated Fat: 13
- Carbohydrates: 28
- Fiber: 2
- Protein: 5
Keywords: Halloween dessert, spiderweb cheesecake, chocolate cheesecake bars, easy cheesecake, spooky dessert, party dessert


