Love this? Save it for later!
Share the inspiration with your friends
There used to be a tiny Portuguese rotisserie place tucked behind a dry cleaner on 28th street that made the most ridiculous chicken thighs. I’m talking about skin so shatteringly crisp it sounded like walking on autumn leaves, with meat so juicy it practically begged to be sopped up with crusty bread. When they closed—literally overnight, with a handwritten “Obrigado” taped to the window—I felt a genuine pang of loss. After twelve attempts—some burnt, some soggy, one that set off the smoke detector for twenty minutes—I finally cracked the code. And honestly, the answer was sitting in my kitchen the whole time: the air fryer.
I know what you’re thinking. Air fryer chicken thighs? Isn’t that just a fancy way to describe baked chicken? Let me tell you, no. No, it is not. The air fryer does something almost magical to chicken thighs. It creates this incredibly crispy exterior while locking in all that fatty, juicy goodness that makes thighs so much better than breasts in the first place. I mean, the first time I pulled a perfectly bronzed thigh out of my air fryer, I actually texted my friend Maria a photo with the caption “We’re back.” She knew exactly what I meant.
What I love most about this method is how it delivers that rotisserie-level crunch without the deep fryer and without the mess. You know that feeling when you bite into a piece of chicken and the skin cracks audibly? That’s what we’re chasing here. After all those failed attempts—the soggy-skinned disappointment, the dry-meat tragedy—I finally landed on a technique that works every single time. Maybe you’ve been there too, chasing a memory of perfect chicken from a place that no longer exists. If so, this recipe is for you.
Why You’ll Love This Recipe
Let’s be real for a second. There are a million chicken thigh recipes out there. But this one? This one is different. After testing this recipe on my family, my neighbors, and even my picky brother-in-law (who claims he “doesn’t like chicken”), I can confidently say this is the version you’ll come back to again and again.
- Quick & Easy: From fridge to plate in under 30 minutes. Seriously. No marinating overnight, no complicated steps—just crispy, juicy chicken that fits into a busy weeknight.
- Simple Ingredients: You probably have everything in your pantry right now. No trips to specialty stores, no obscure spices. Just good, honest ingredients that let the chicken shine.
- Perfect for Meal Prep: These thighs reheat beautifully—the skin stays crisp even the next day. Make a batch on Sunday and enjoy them all week in salads, grain bowls, or straight from the fridge (no judgment here).
- Crowd-Pleaser: Kids love the crunch, adults love the flavor, and everyone loves that it feels indulgent without being heavy. I’ve served these at casual dinners and holiday gatherings—they disappear every time.
- Healthier Than Fried: You get that deep-fried texture with a fraction of the oil. It’s the kind of recipe that makes eating well feel like a treat, not a chore.
What really sets this recipe apart is the technique. Instead of just seasoning the skin and hoping for the best, I use a simple trick—a light dusting of baking powder—that transforms ordinary chicken skin into something extraordinary. It’s not gimmicky; it’s science. The baking powder helps the skin dry out and bubble up, creating those tiny, crispy pockets that make every bite satisfying. Plus, I’ve tested this with every air fryer model my friends own—from the fancy Ninja to the budget-friendly Cosori—and it works across the board.
This isn’t just another chicken recipe. It’s the one that makes you close your eyes after the first bite. It’s comfort food reimagined—lighter, faster, but with the same soul-soothing satisfaction that makes chicken thighs a weeknight hero.
What Ingredients You Will Need
This recipe uses simple, wholesome ingredients to deliver bold flavor and satisfying texture without the fuss. Most of these are pantry staples, which means you can whip up this dish whenever the craving strikes—no special planning required.
For the Chicken:
- 4 bone-in, skin-on chicken thighs (about 1.5 pounds total) – Bone-in keeps the meat juicier; skin-on is non-negotiable for crispiness
- 1 tablespoon olive oil – Helps the seasoning stick and promotes browning
- 1 teaspoon kosher salt – I prefer Diamond Crystal for its clean taste and easy pinchability
- 1/2 teaspoon black pepper – Freshly ground, please—it makes a difference
- 1 teaspoon garlic powder – Not garlic salt; we want pure flavor without extra sodium
- 1 teaspoon onion powder – Adds depth without overpowering
- 1/2 teaspoon smoked paprika – This is my secret weapon; it adds a subtle smokiness that mimics that rotisserie flavor
- 1/2 teaspoon baking powder – The key to ultra-crispy skin (make sure it’s aluminum-free to avoid a metallic taste)
Optional but Recommended:
- Fresh thyme or rosemary sprigs – For aromatics during cooking (adds a lovely herbal note)
- Lemon wedges – For squeezing over the finished chicken; the acidity cuts through the richness beautifully
- Flaky sea salt – A pinch right before serving adds texture and a pop of salinity
Ingredient Selection Tips:
When buying chicken thighs, look for pieces that are roughly the same size—this ensures even cooking. I prefer organic or pasture-raised chicken when possible; the flavor is noticeably richer, and the fat renders more cleanly. If you can only find skinless thighs, this recipe won’t work the same way—the skin is essential for that crispy texture we’re after. For a truly spectacular result, pat the chicken thighs dry with paper towels before seasoning. Moisture is the enemy of crispiness, so removing as much surface moisture as possible is a game-changer.
Substitution Guidance:
If you don’t have smoked paprika, regular sweet paprika works fine—you’ll just miss that subtle smoky note. No garlic powder? Use two finely minced fresh garlic cloves mixed with the oil. For a spicy kick, add 1/4 teaspoon cayenne pepper to the seasoning mix. And if you’re watching your sodium, reduce the salt to 3/4 teaspoon—the baking powder also contributes a slight saltiness.
Equipment Needed
You don’t need a professional kitchen to make these crispy air fryer chicken thighs. Here’s what you’ll need:
- Air Fryer: Any model works—basket-style or oven-style. I use a 5.8-quart Cosori, which fits four thighs comfortably without overcrowding. If yours is smaller, cook in batches.
- Tongs: For flipping the chicken halfway through. Silicone-tipped tongs are gentle on non-stick baskets.
- Paper Towels: Essential for drying the chicken skin thoroughly. Don’t skip this step!
- Mixing Bowl: For combining the seasoning mix and coating the chicken.
- Instant-Read Thermometer: Optional but highly recommended—it takes the guesswork out of doneness. Chicken thighs are safe at 165°F, but I prefer pulling them at 175-180°F for more tender, fall-apart meat.
- Cutting Board and Knife: For any prep work, though honestly, this recipe is mostly hands-off.
If you don’t own an air fryer yet, I get it—they’re a commitment. But honestly, for recipes like this one, it pays for itself in saved takeout money. Budget-friendly options like the Gourmia or Dash models work perfectly for this recipe. Just make sure whatever you buy has a temperature range up to 400°F.
Preparation Method
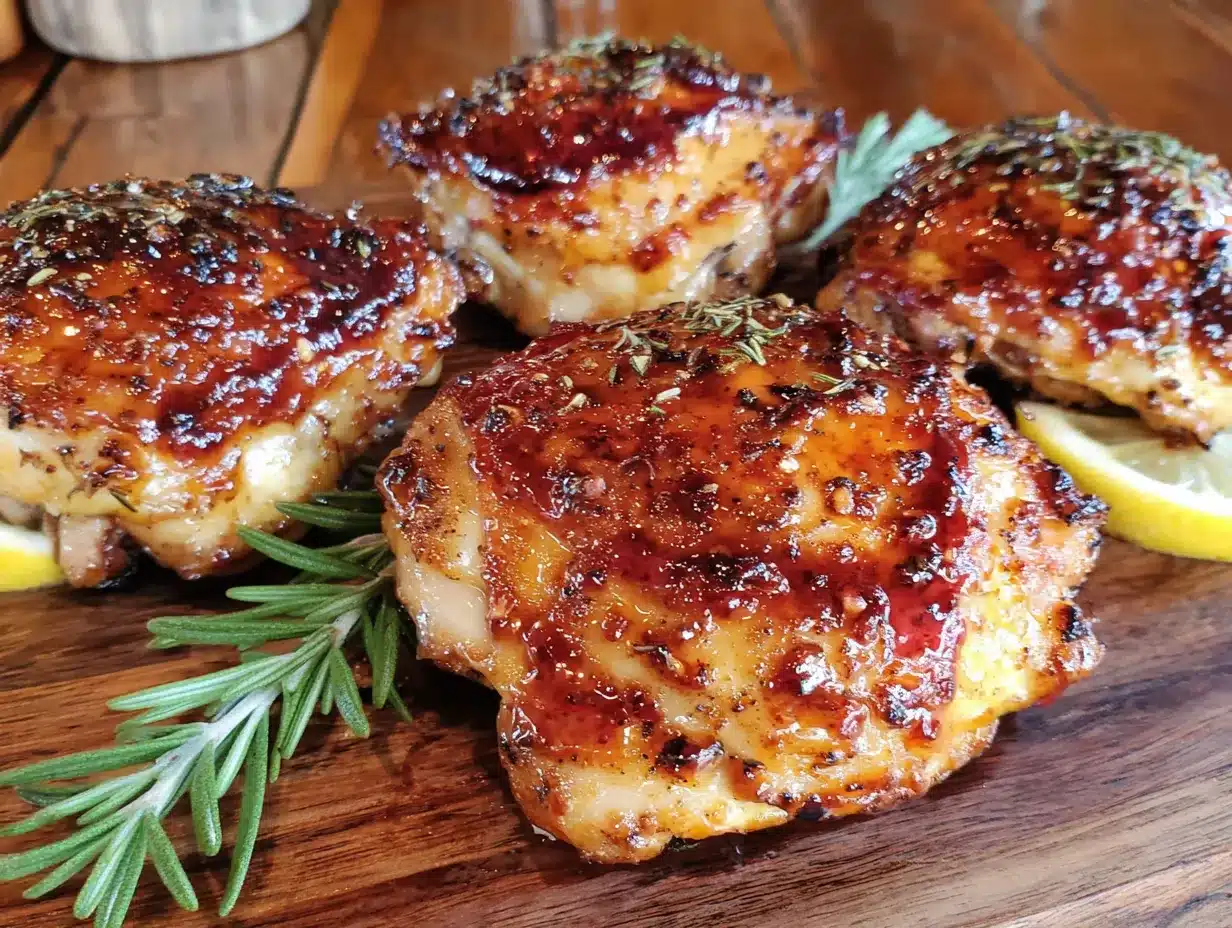
Alright, let’s get cooking. The key to perfect air fryer chicken thighs is all in the prep. Follow these steps, and you’ll have restaurant-quality chicken at home.
- Pat the chicken dry. This is the most important step. Take your chicken thighs out of the package and pat them thoroughly with paper towels. I mean really dry—you want no visible moisture on the skin. This step alone is the difference between crispy and soggy. Let them sit on a plate while you prepare the seasoning mix.
- Preheat your air fryer. Set it to 380°F (193°C) and let it run for 3-5 minutes. Preheating ensures the chicken starts cooking immediately, which helps the skin crisp up faster. If your air fryer doesn’t have a preheat setting, just run it empty for a few minutes.
- Mix the dry seasonings. In a small bowl, combine the kosher salt, black pepper, garlic powder, onion powder, smoked paprika, and baking powder. Stir with a fork to break up any clumps. The baking powder is our secret weapon—it raises the skin’s pH, allowing it to brown and crisp more efficiently.
- Season the chicken. Place the dried chicken thighs in a mixing bowl. Drizzle with olive oil and toss to coat evenly—use your hands, it’s easier. Then sprinkle the seasoning mixture over the chicken, turning to coat all sides. Make sure you get seasoning under the skin too if possible; just gently lift the skin and rub a little in. Don’t oversaturate—we want a light, even coating.
- Arrange in the air fryer basket. Place the seasoned chicken thighs skin-side down in a single layer. This is crucial—crowding the basket traps steam and prevents crisping. If your thighs are touching, cook in batches. Leave at least 1/2 inch of space between each piece.
- Cook for 12 minutes. Set the timer and let the air fryer do its thing. You’ll hear a satisfying sizzle as the fat renders. Don’t open the basket during this time—every time you open it, you let out heat and slow down the cooking.
- Flip and continue cooking. After 12 minutes, use tongs to flip the chicken thighs skin-side up. Cook for another 10-12 minutes, or until the internal temperature reaches 175-180°F (79-82°C) in the thickest part of the thigh. The skin should be deep golden brown and incredibly crispy. If it’s not quite there, add 2-minute increments until it’s perfect.
- Rest before serving. This is a step people often skip, but it matters. Let the chicken rest on a wire rack or cutting board for 5 minutes. This allows the juices to redistribute, so every bite is moist and tender. If you cut into it immediately, all those delicious juices will run out onto the plate.
- Finish with flair. Sprinkle with flaky sea salt and a squeeze of fresh lemon juice right before serving. The brightness of the lemon cuts through the richness and makes the flavors pop.
Sensory cues: At the 12-minute mark, the kitchen should smell deeply savory—like roasted chicken from a rotisserie. When you flip the thighs, the skin should be lightly browned but not yet dark. The final product should have a glossy, bronzed exterior that crackles when you press it with a fork. Inside, the meat should be opaque all the way through and pull away from the bone easily.
Cooking Tips & Techniques
After making this recipe dozens of times (and yes, failing a few times along the way), I’ve gathered some insider knowledge that will help you nail it on the first try.
Don’t skip the baking powder. I know it sounds weird, but trust me on this. Baking powder is alkaline, which raises the skin’s pH and accelerates browning. It also creates tiny bubbles in the skin as it cooks, resulting in that shatteringly crisp texture. Just make sure it’s aluminum-free—regular baking powder can leave a metallic aftertaste.
Patience with the skin. The biggest mistake I made in my early attempts was flipping the chicken too early. Let the skin-side-down phase do its work. That direct contact with the hot basket surface is what renders the fat and creates the crust. If you flip too soon, you’re essentially steaming the skin instead of crisping it.
Batch cooking is your friend. If you’re cooking for a crowd, don’t be tempted to cram all the thighs in at once. Overcrowding drops the temperature inside the air fryer and creates steam, which is the enemy of crispiness. Cook in batches and keep the finished thighs warm in a 200°F oven while you finish the rest.
Use a thermometer. I once pulled my chicken at 165°F because that’s what the USDA says is safe. The meat was fine, but it wasn’t as tender as it could be. Chicken thighs have more connective tissue than breasts, and they benefit from cooking to a higher internal temperature—175-180°F—which breaks down collagen and makes the meat incredibly juicy. Don’t be afraid of the higher temp; it’s the sweet spot for thighs.
One more thing— I learned this the hard way after a particularly smoky incident: clean your air fryer basket between batches if you’re cooking a lot. Built-up grease can burn and create smoke. A quick wipe with a paper towel is all it takes.
Variations & Adaptations
This recipe is incredibly versatile. Once you master the basic technique, you can riff on it endlessly. Here are some of my favorite variations:
Spicy Honey Garlic: After cooking, brush the thighs with a mixture of 2 tablespoons honey, 1 tablespoon soy sauce, 1 minced garlic clove, and 1/2 teaspoon red pepper flakes. Return to the air fryer for 2 minutes to caramelize. The sweet-spicy glaze is absolutely addictive.
Lemon Herb: Add 1 teaspoon dried oregano and 1 teaspoon dried thyme to the seasoning mix. Place a few lemon slices in the basket around the chicken while it cooks. The lemon infuses the meat with bright, citrusy flavor.
BBQ Style: Skip the baking powder and instead coat the chicken in your favorite sugar-free BBQ sauce after the first 12 minutes. Flip, brush with more sauce, and cook for the remaining time. You get sticky, caramelized chicken without the deep fryer.
Dietary Adaptations: This recipe is naturally low-carb and keto-friendly—just skip any sugary glazes. For a dairy-free version, it already is dairy-free. If you need to avoid nightshades, omit the paprika and add a pinch of turmeric for color. For a milder flavor, reduce or omit the black pepper.
Different Cooking Methods: No air fryer? No problem. You can achieve similar results in a convection oven set to 400°F. Place the chicken on a wire rack over a baking sheet and cook for 25-30 minutes, flipping halfway. The skin won’t be quite as crispy, but it’ll still be delicious. In a pinch, pan-sear the thighs skin-side down in an oven-safe skillet, then finish in a 400°F oven for 15 minutes.
My personal favorite variation? I once added a teaspoon of za’atar to the seasoning mix and served the chicken with a side of labneh and warm pita. It was a complete accident—I grabbed the wrong jar—but it turned into one of my most requested dishes. Sometimes the best recipes come from happy mistakes.
Serving & Storage Suggestions
These crispy air fryer chicken thighs are incredibly versatile. Here’s how to serve and store them for maximum enjoyment.
Serving Temperature: Serve the chicken hot, straight from the air fryer. The skin is at its crispiest within the first 15 minutes. If you need to hold them, keep them on a wire rack in a 200°F oven—not on a plate, where the bottom will steam and soften.
What to Serve With: These thighs pair beautifully with almost anything. For a light meal, serve with a simple arugula salad dressed with lemon vinaigrette. For comfort food, go with mashed cauliflower or roasted vegetables. I love them alongside roasted broccoli and a side of garlic yogurt sauce. They’re also fantastic sliced over a grain bowl with quinoa, roasted sweet potatoes, and tahini dressing.
Storage: Leftover chicken thighs keep well in the refrigerator for up to 4 days. Store them in an airtight container—but here’s the trick: place a paper towel at the bottom of the container to absorb excess moisture. Change the paper towel if it becomes wet.
Reheating: The air fryer is your best friend for reheating. Preheat to 350°F and cook the thighs for 4-5 minutes, flipping once. The skin will crisp right back up. The microwave works in a pinch, but the skin will be soft—still tasty, just not crispy. For meal prep, I often reheat the chicken directly from frozen: add 2-3 minutes to the cooking time.
Flavor Development: Here’s a secret: these chicken thighs actually taste even better the next day. The flavors have time to meld, and the meat becomes even more tender. I often make a double batch specifically for leftovers—they’re amazing cold, sliced over a salad.
Nutritional Information & Benefits
Per serving (1 chicken thigh):
- Calories: 285
- Protein: 24g
- Fat: 20g (mostly healthy monounsaturated and saturated fats from the skin)
- Carbohydrates: 1g
- Fiber: 0g
- Sugar: 0g
- Sodium: 520mg (varies with salt amount)
Chicken thighs often get a bad reputation compared to breasts, but they’re actually a nutritional powerhouse. They’re rich in selenium, which supports thyroid function and acts as an antioxidant, and they contain significant amounts of B vitamins, particularly B6 and B12, which are essential for energy metabolism. The fat in chicken thighs—especially when you eat the skin—contains oleic acid, the same heart-healthy fat found in olive oil.
This recipe fits perfectly into a balanced diet. It’s low in carbohydrates, high in protein, and uses minimal added oil. For those watching their sodium, simply reduce the salt in the seasoning mix. The baking powder does contribute some sodium, so if you’re strictly limiting salt, consider using a salt-free seasoning blend instead.
From my perspective, this recipe is a great example of how eating well doesn’t mean sacrificing flavor. You get the satisfaction of crispy, indulgent-tasting chicken without the heavy oils and refined flours of traditional fried chicken. It’s a win-win for your taste buds and your body.
Conclusion
If you’ve been searching for that perfect crispy chicken thigh recipe—the one that delivers on texture, flavor, and ease—this is it. After chasing that memory of the Portuguese rotisserie place for months, I can honestly say this version surpasses the original. It’s faster, healthier, and honestly, just as satisfying.
What I love most about this recipe is how adaptable it is. Once you’ve mastered the basic technique, you can play with different seasonings, glazes, and serving ideas. Make it your own. That’s the beauty of cooking—you take a technique and make it reflect your tastes.
I’d love to hear how these turn out for you. Did you try a variation? Serve them with something unexpected? Leave a comment below and let me know—I read every single one. And if you loved this recipe, please share it with a friend who needs a little crispy chicken magic in their life.
Until next time, happy cooking—and may your chicken always be crispy.
Frequently Asked Questions
Can I use boneless, skinless chicken thighs?
You can, but the result won’t be the same. Boneless thighs cook faster (about 10-12 minutes total) and won’t develop that shatteringly crispy skin. If you use boneless, reduce the cooking time and check for doneness at 165°F. They’ll still be tasty, just not as crispy.
Why is my air fryer chicken not crispy?
The most common culprit is moisture. Make sure you pat the chicken extremely dry before seasoning. Another issue could be overcrowding the basket—steam gets trapped and softens the skin. Finally, check that your air fryer is preheated and that you’re using enough heat (380°F is the sweet spot).
Can I marinate the chicken overnight?
You can, but it’s not necessary for this recipe. If you do marinate, keep it simple—oil, acid (like lemon juice), and herbs. Avoid sugary marinades, which can burn in the air fryer. Just be sure to pat the chicken dry again before seasoning, as the marinade will add moisture.
How do I prevent the chicken from sticking to the basket?
A light spray of avocado oil or olive oil on the basket before adding the chicken helps. Also, don’t move the chicken during the first 12 minutes—it will naturally release as it cooks. If you try to flip it too early, it might stick.
Can I cook frozen chicken thighs in the air fryer?
Yes, but you’ll need to adjust the cooking time. Add about 5-8 minutes to the total cook time, and flip halfway through. The skin won’t be as crispy since frozen chicken releases more moisture as it thaws. For best results, thaw the chicken in the refrigerator overnight before cooking.
PrintCrispy Air Fryer Chicken Thighs – Easy Juicy Recipe

These air fryer chicken thighs deliver shatteringly crispy skin and juicy meat in under 30 minutes. A simple baking powder trick transforms ordinary chicken into a restaurant-quality meal that’s perfect for weeknights.
- Prep Time: 10 minutes
- Cook Time: 22-24 minutes
- Total Time: 32-34 minutes
- Yield: 4 servings 1x
- Category: Main Course
- Cuisine: American
Ingredients
- 4 bone-in, skin-on chicken thighs (about 1.5 pounds total)
- 1 tablespoon olive oil
- 1 teaspoon kosher salt
- 1/2 teaspoon black pepper, freshly ground
- 1 teaspoon garlic powder
- 1 teaspoon onion powder
- 1/2 teaspoon smoked paprika
- 1/2 teaspoon baking powder (aluminum-free)
- Fresh thyme or rosemary sprigs (optional)
- Lemon wedges (optional)
- Flaky sea salt (optional)
Instructions
- Pat the chicken thighs dry thoroughly with paper towels. Let them sit on a plate while you prepare the seasoning mix.
- Preheat your air fryer to 380°F (193°C) for 3-5 minutes.
- In a small bowl, combine kosher salt, black pepper, garlic powder, onion powder, smoked paprika, and baking powder. Stir with a fork to break up any clumps.
- Place the dried chicken thighs in a mixing bowl. Drizzle with olive oil and toss to coat evenly. Sprinkle the seasoning mixture over the chicken, turning to coat all sides. Get seasoning under the skin if possible.
- Arrange the seasoned chicken thighs skin-side down in a single layer in the air fryer basket, leaving at least 1/2 inch of space between each piece.
- Cook for 12 minutes. Do not open the basket during this time.
- After 12 minutes, use tongs to flip the chicken thighs skin-side up. Cook for another 10-12 minutes, or until the internal temperature reaches 175-180°F (79-82°C) in the thickest part of the thigh. The skin should be deep golden brown and crispy.
- Let the chicken rest on a wire rack or cutting board for 5 minutes before serving.
- Sprinkle with flaky sea salt and a squeeze of fresh lemon juice right before serving.
Notes
Pat the chicken extremely dry for maximum crispiness. Use aluminum-free baking powder to avoid a metallic taste. For best results, cook to an internal temperature of 175-180°F for tender, fall-apart meat. Do not overcrowd the basket; cook in batches if necessary. Leftovers can be stored in the refrigerator for up to 4 days and reheated in the air fryer at 350°F for 4-5 minutes.
Nutrition
- Serving Size: 1 chicken thigh
- Calories: 285
- Sodium: 520
- Fat: 20
- Saturated Fat: 6
- Carbohydrates: 1
- Protein: 24
Keywords: air fryer chicken thighs, crispy chicken thighs, easy chicken recipe, juicy chicken thighs, air fryer recipe, weeknight dinner, keto chicken, low carb chicken


